Together Counts
Rouviere Media did extensive WordPress template development for this website, an on-line center for healthy living, which was built under the direction of Howard Development.
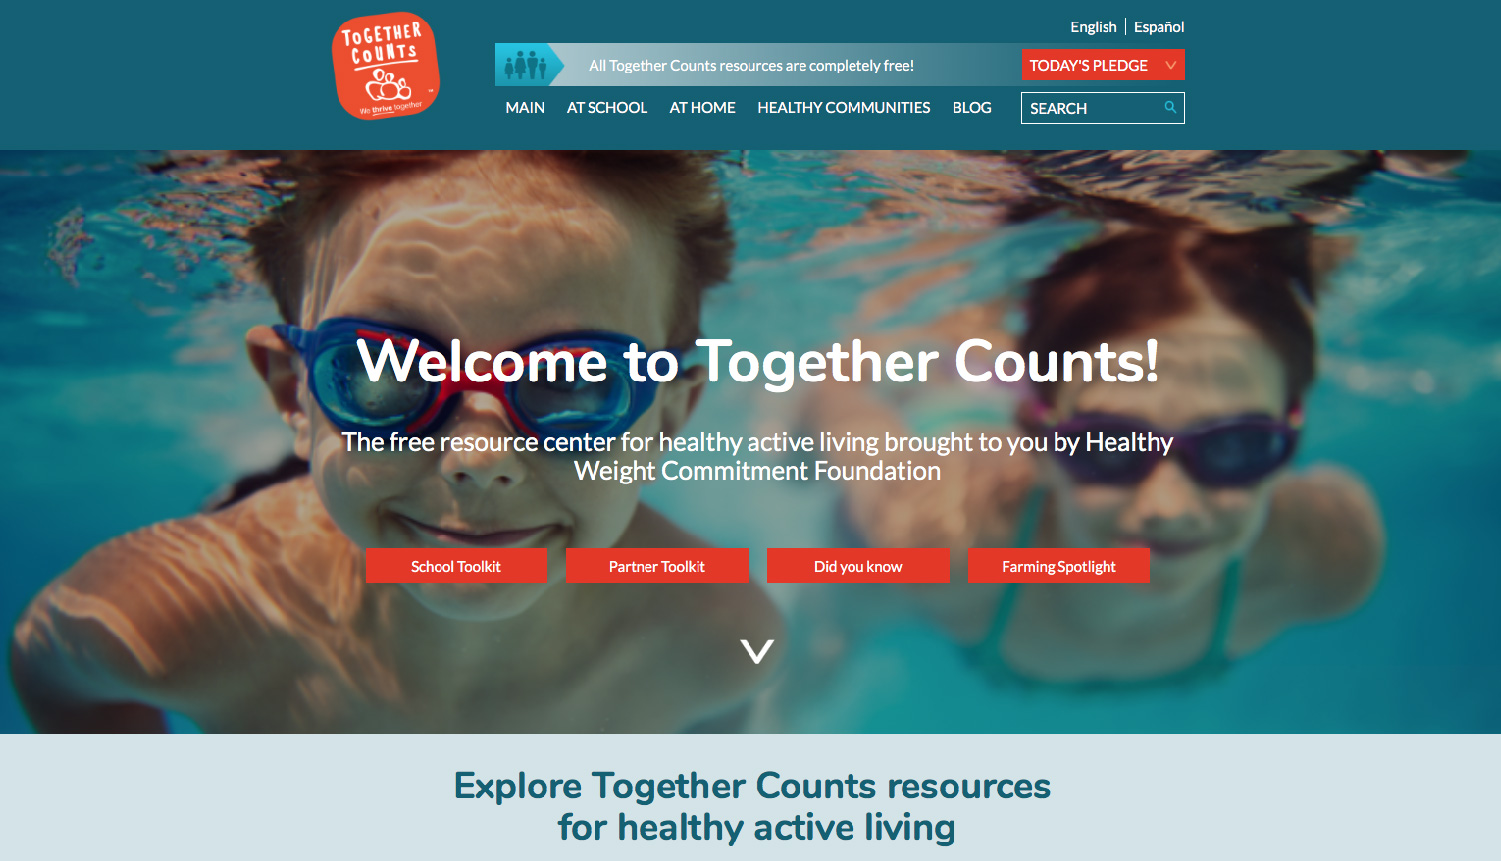
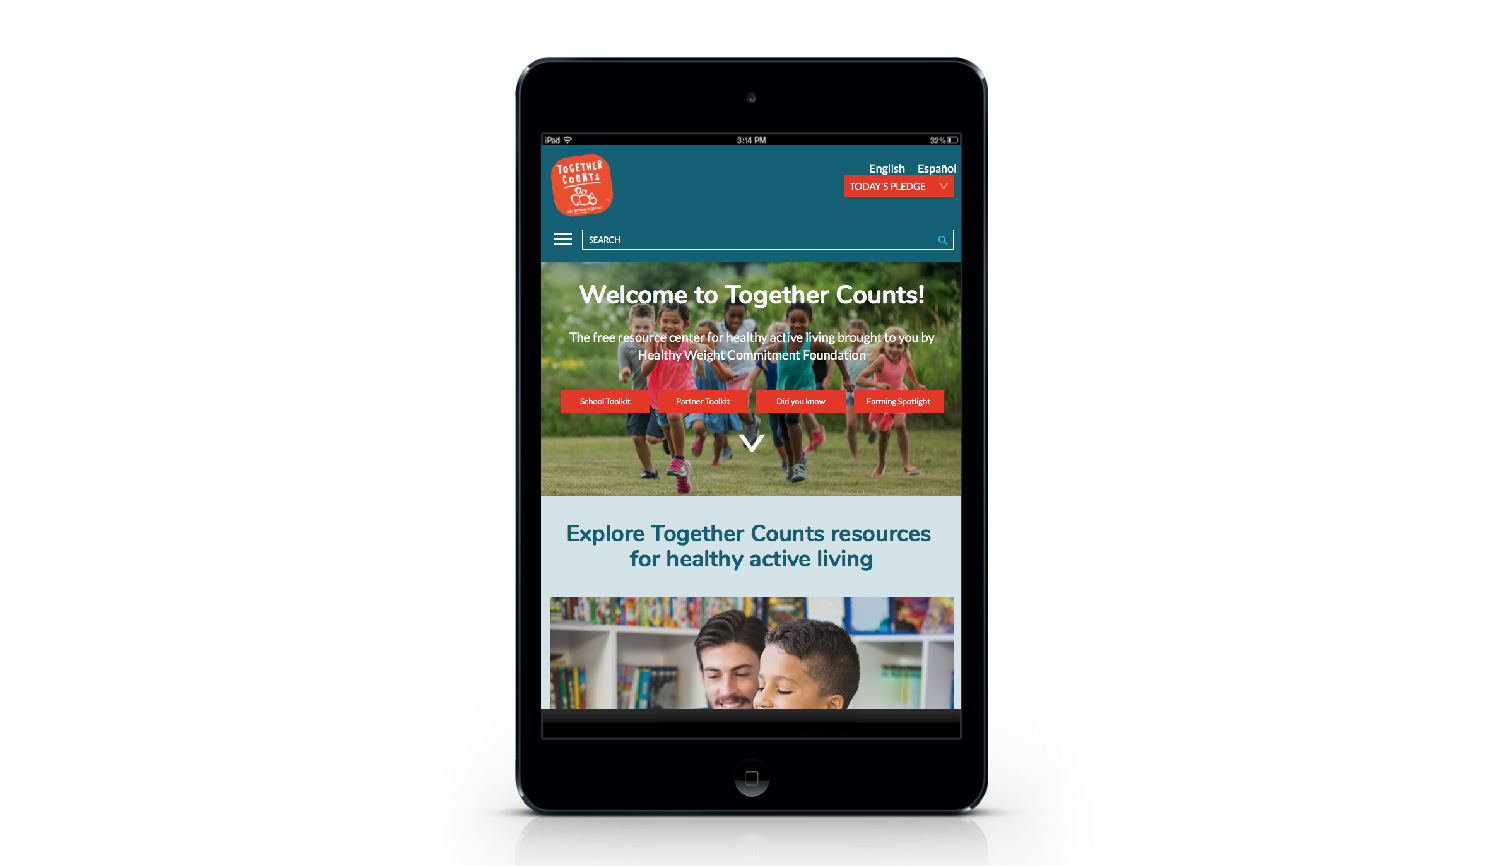
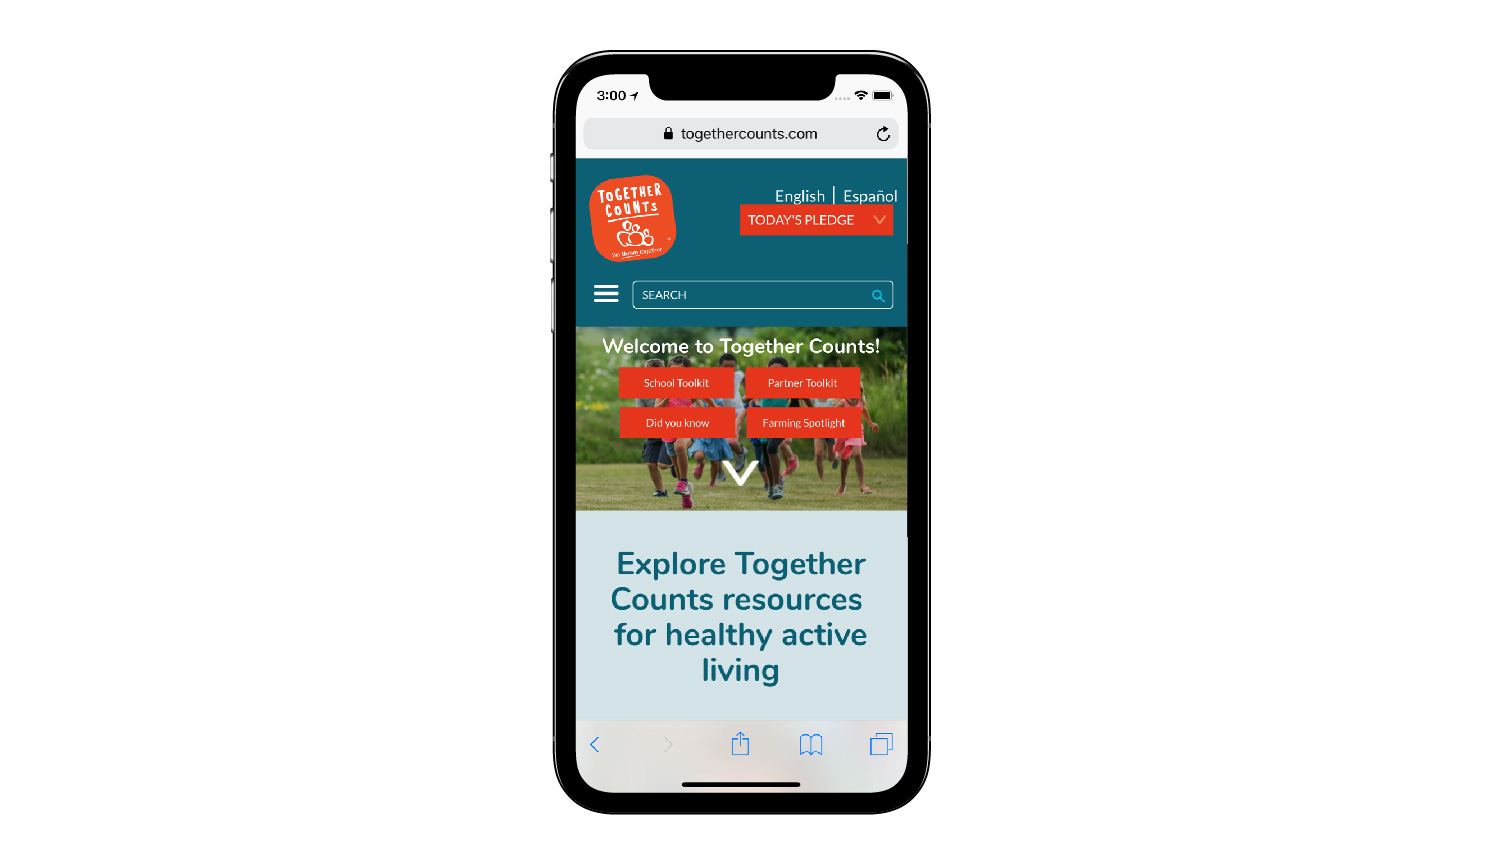
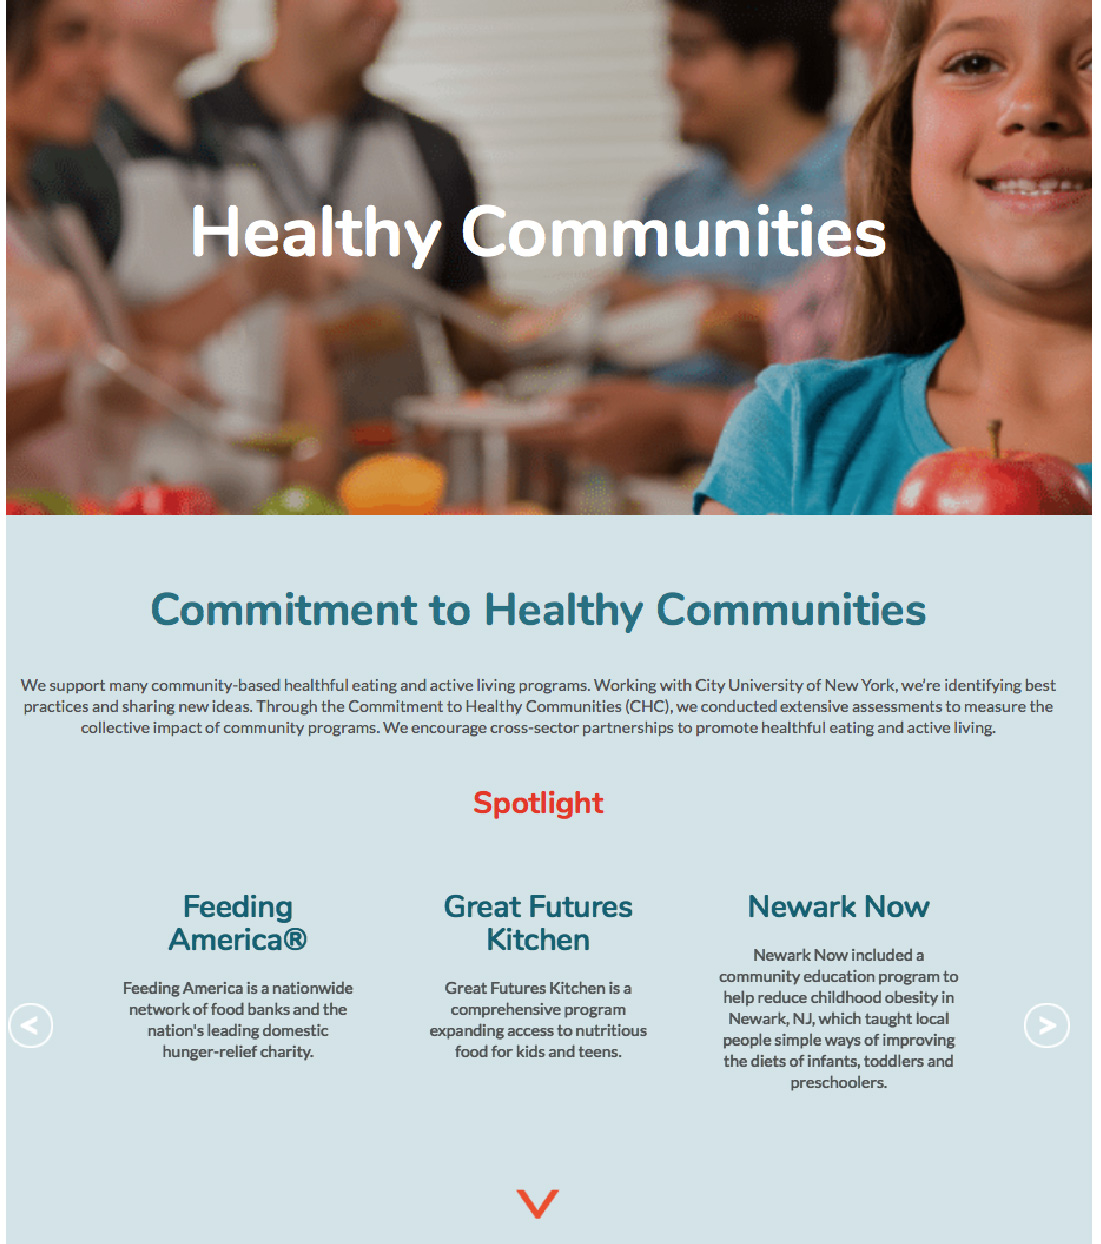
The website is a free on-line resource center for healthy active living by Healthy Weight Commitment Foundation.
Among its many features are information on healthy eating...

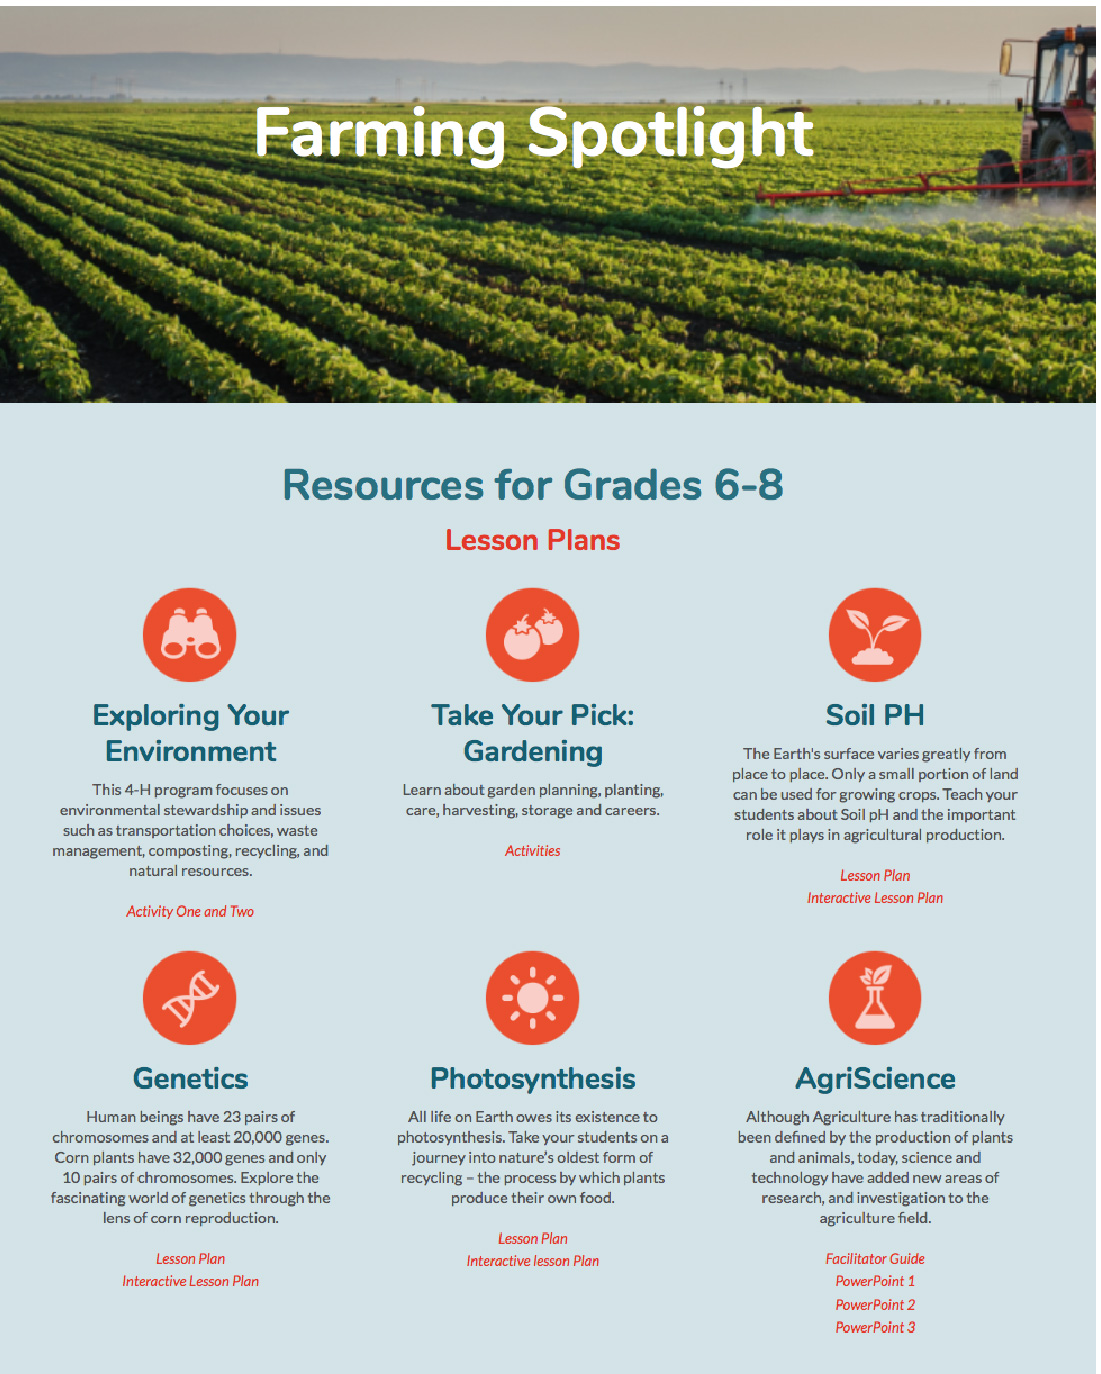
...lesson plans for schools,
... information about community-based healthful living programs,
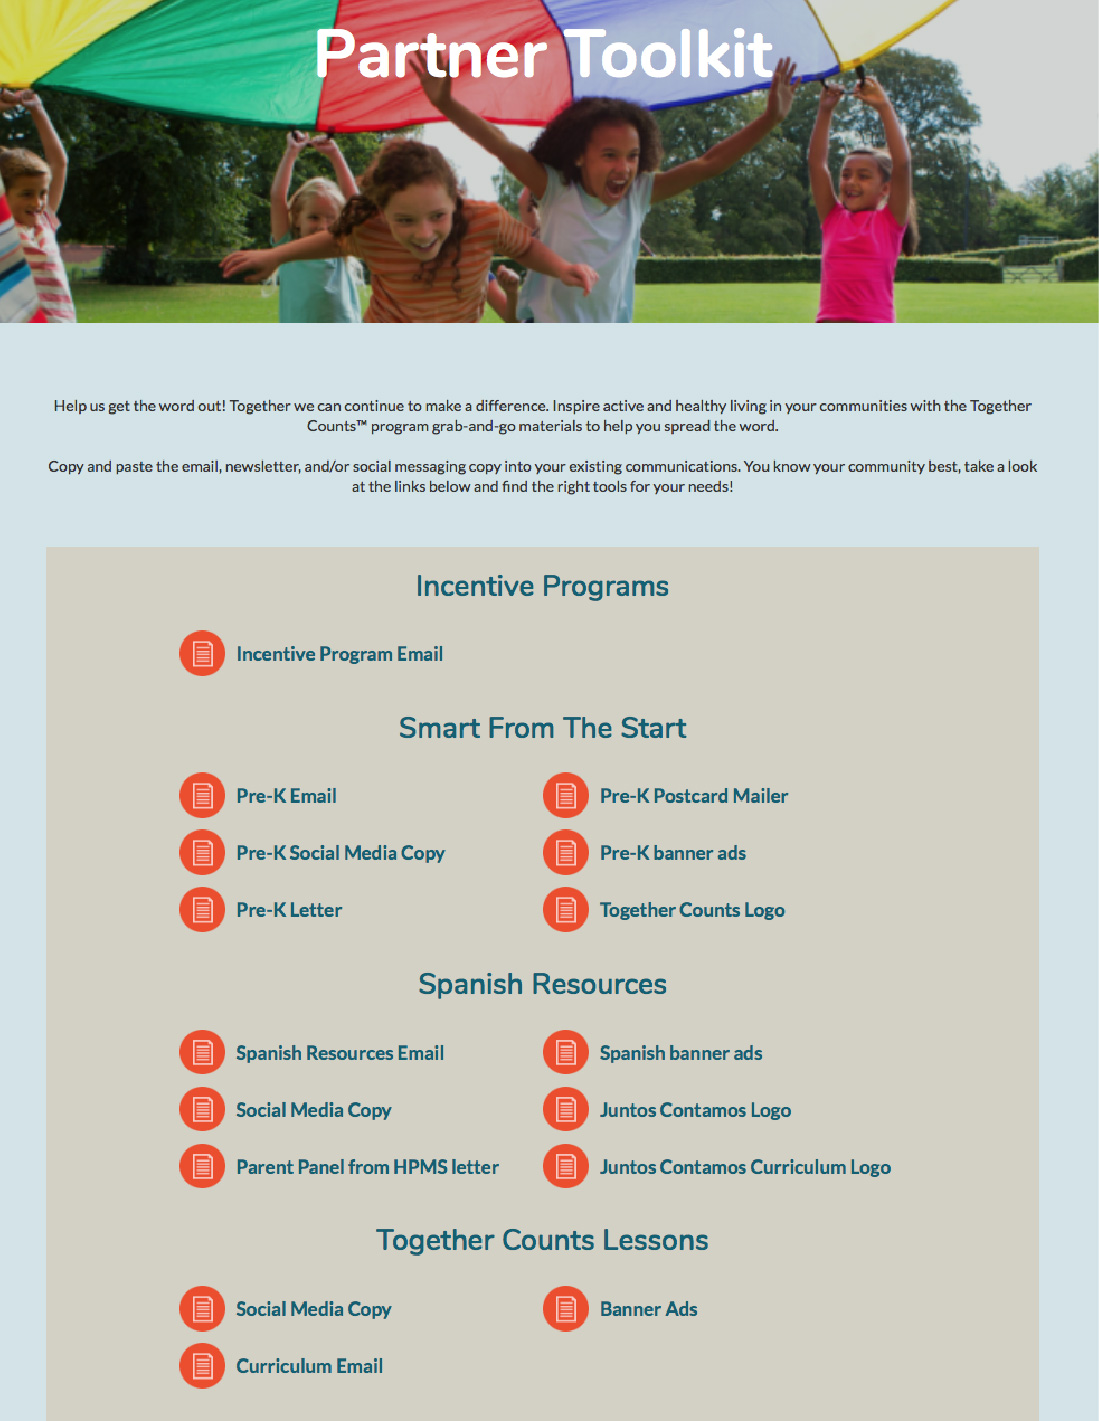
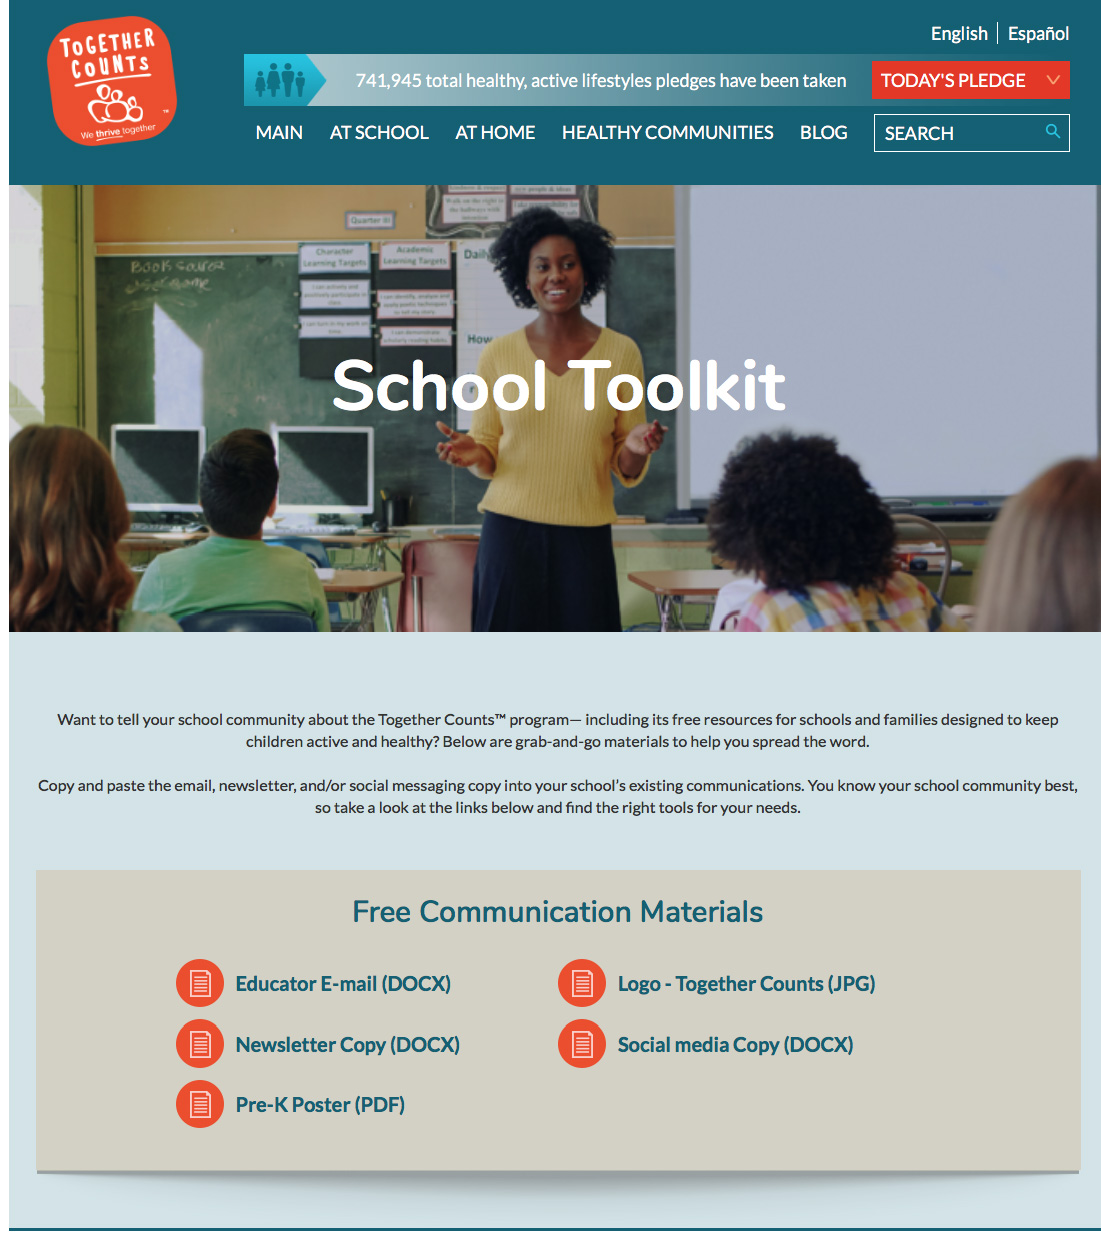
and partner and school toolkits.
REAP
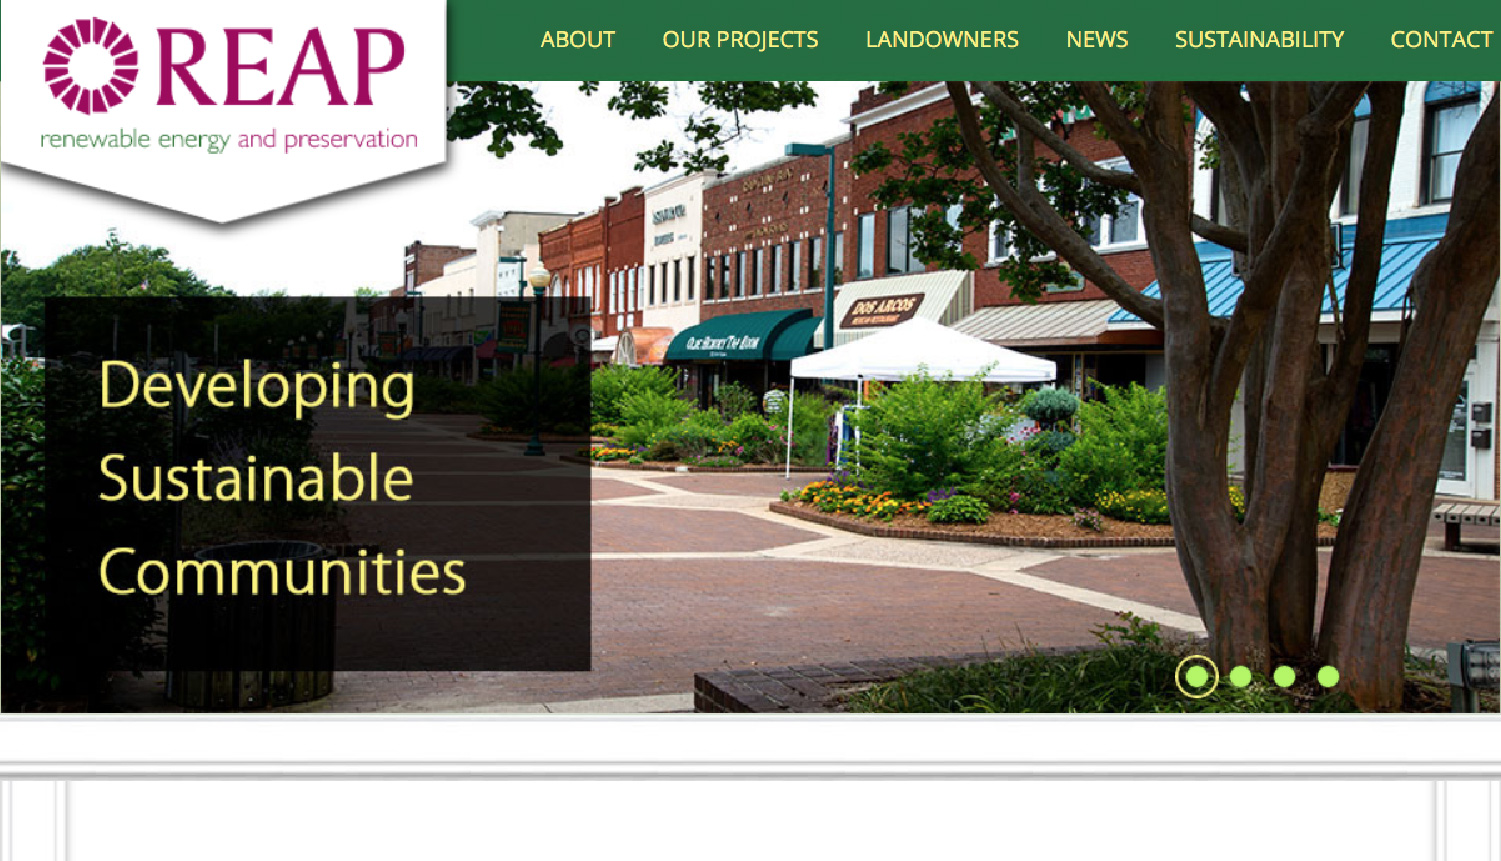
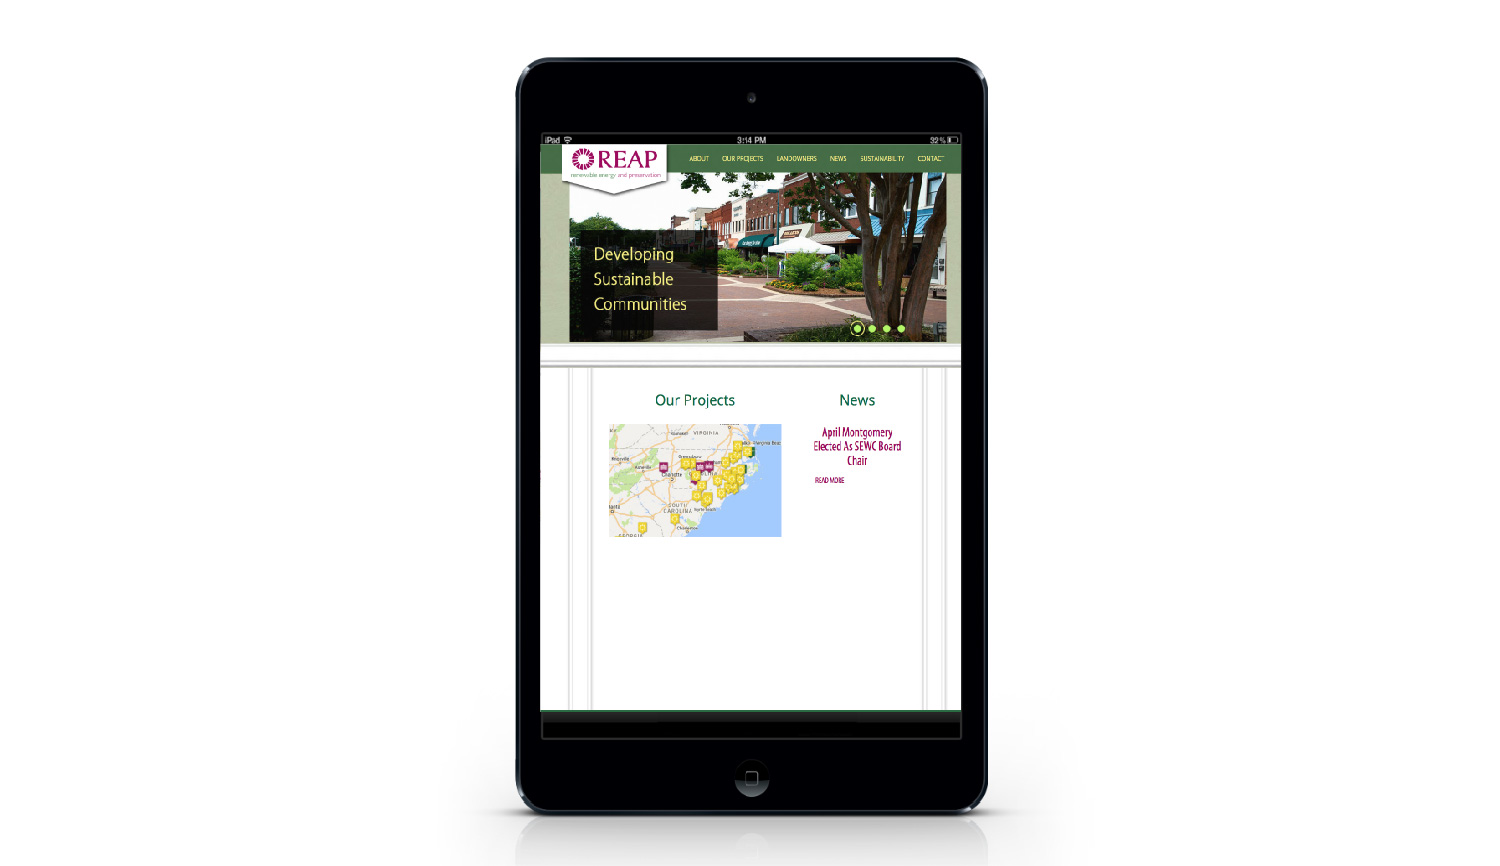
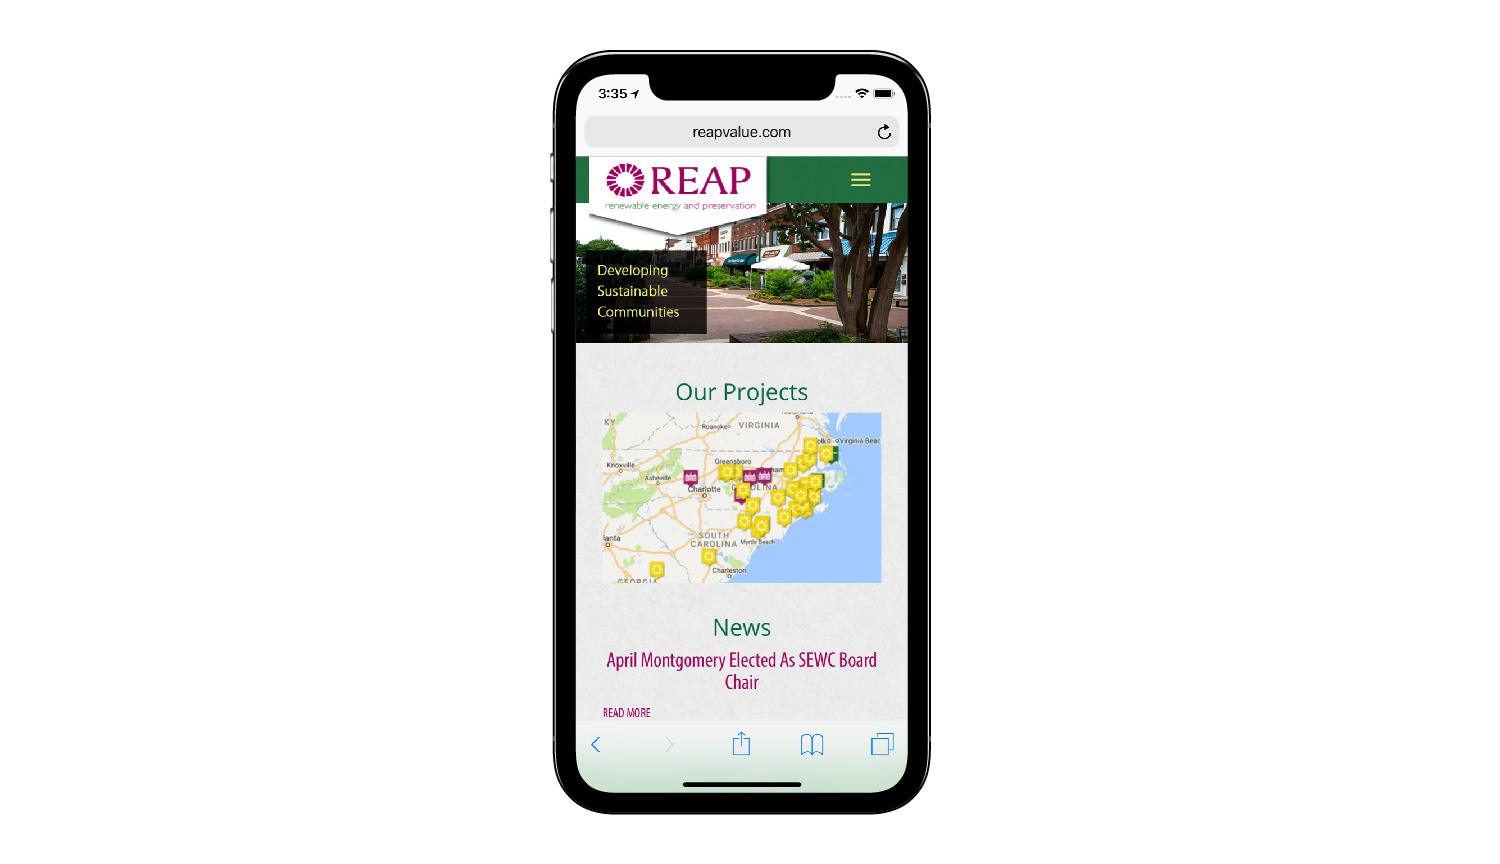
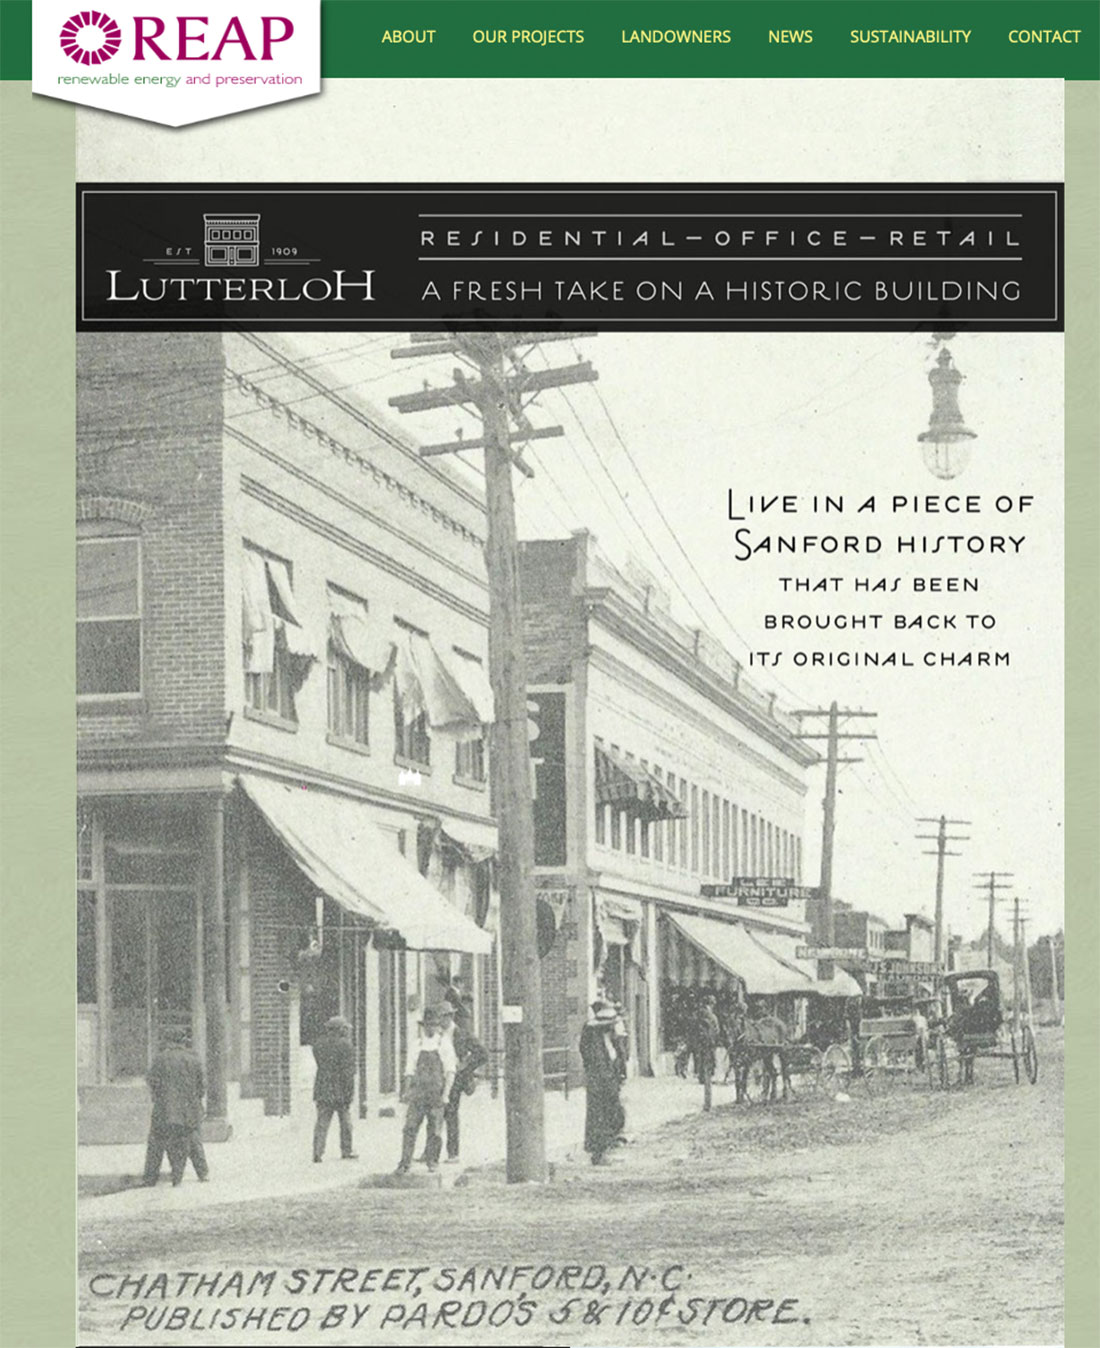
Rouviere Media created the website and other branding materials such as presentation templates and business cards for REAP, a Sanford, North Carolina, company that specialized in renewable energy and historic preservation projects. Rouviere Media did the design, logo, branding, and Expression Engine development for the website and then went on to add interactive infographic maps, infographics and special sections over the next decades as the business grew from a startup to a regional company with projects across the Southeastern United States.
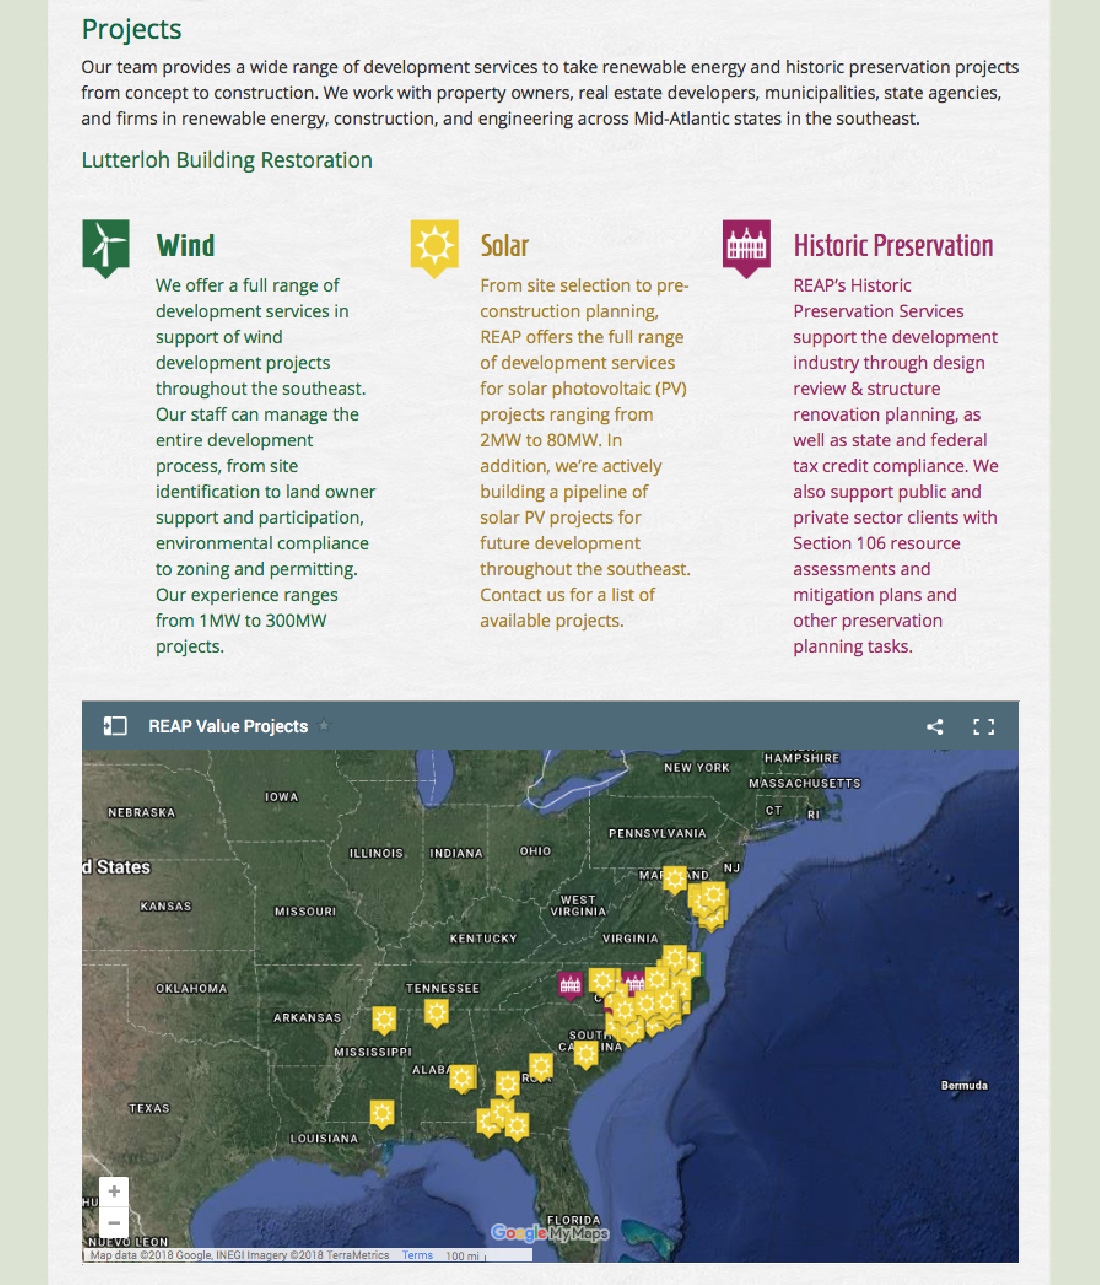
This infographic map shows the location of REAP's many projects.
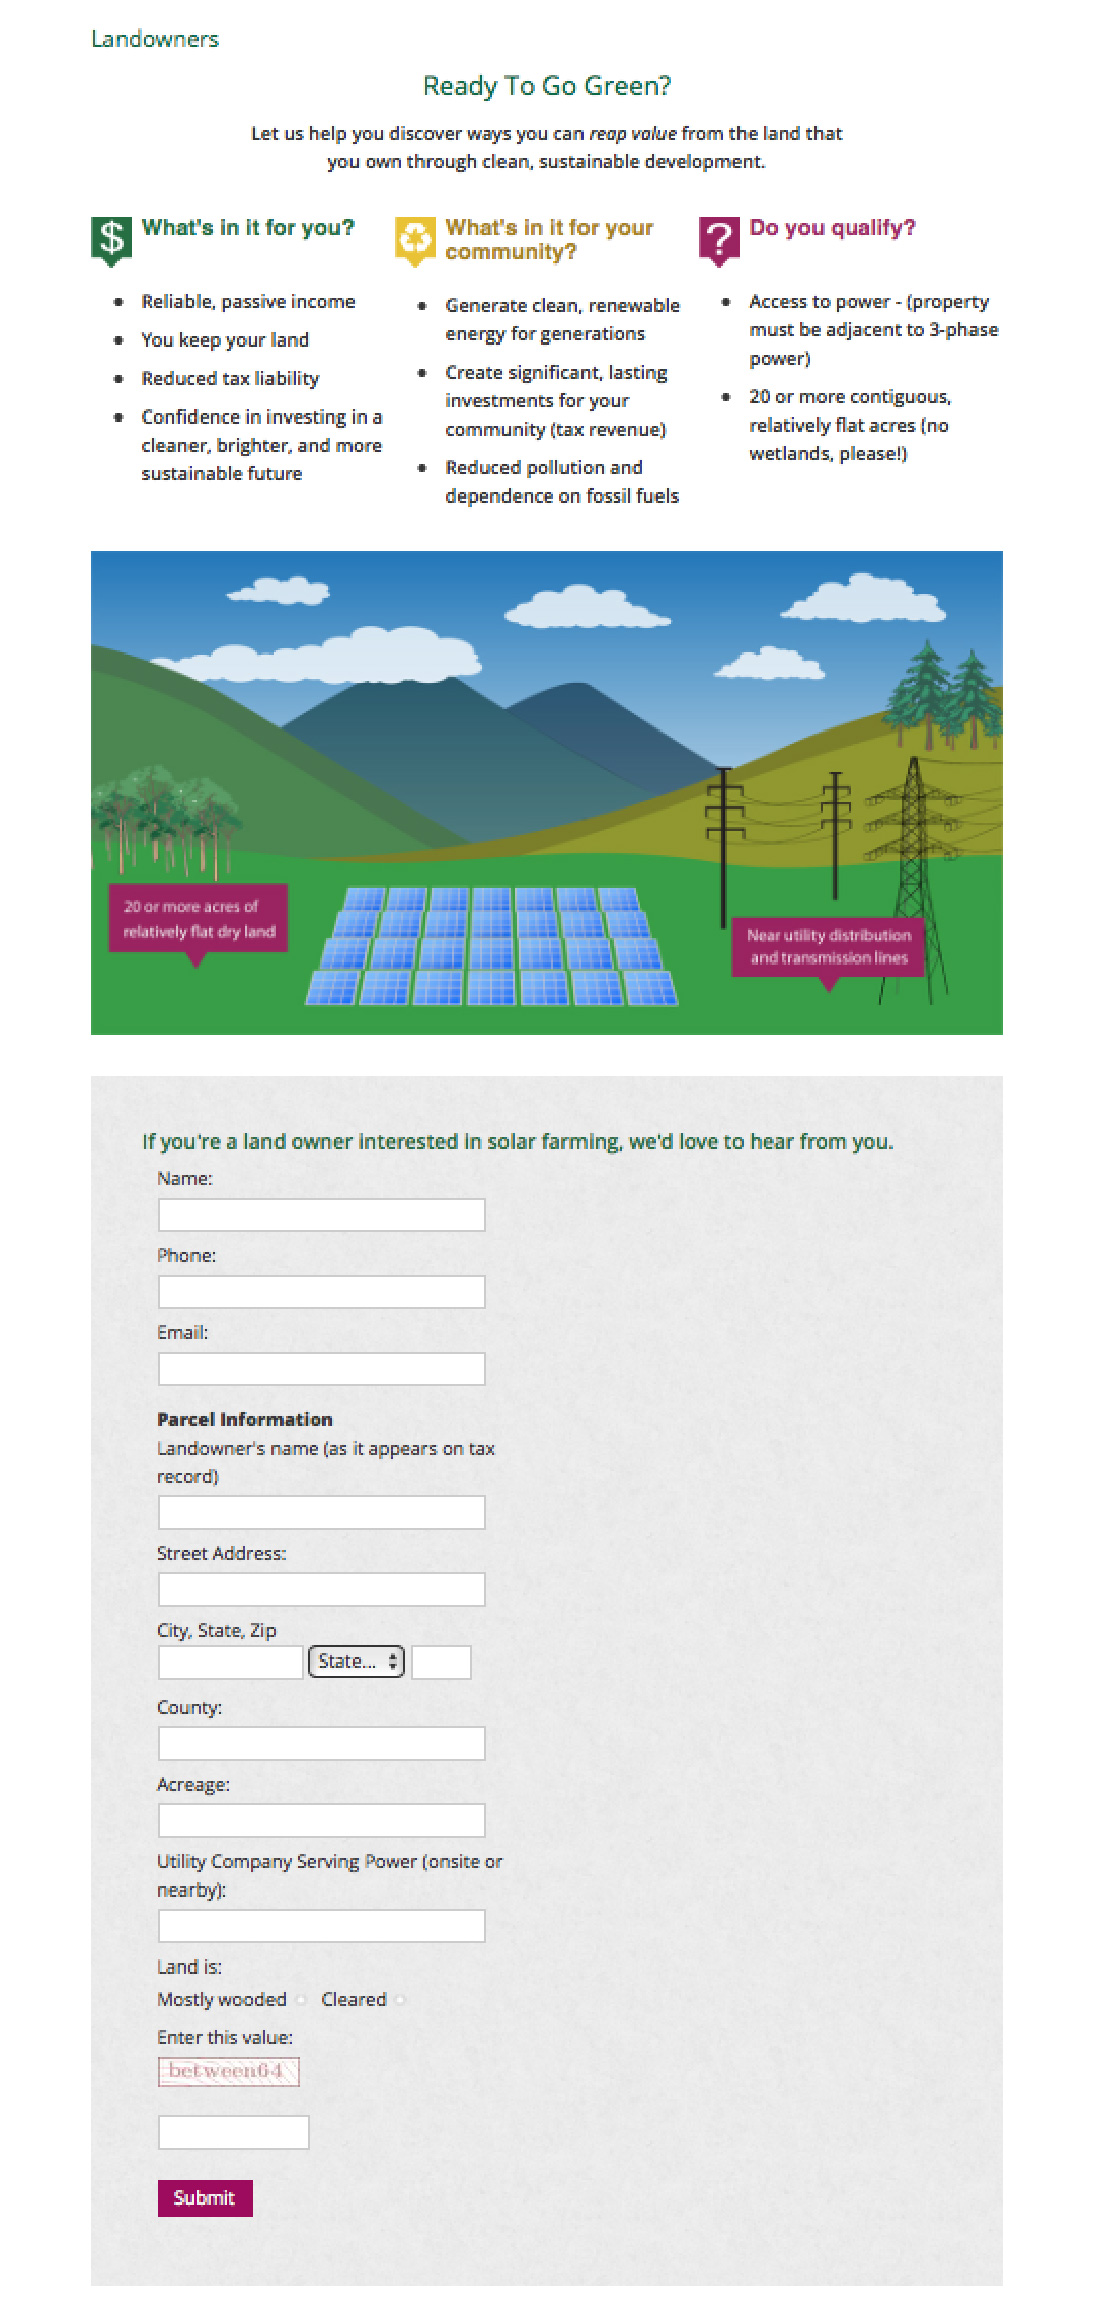
Rouviere Media also designed and developed the infographic and landowners' form below to offer rural landowners an opportunity to retain ownership of their land and reap value from it by developing solar projects on it.
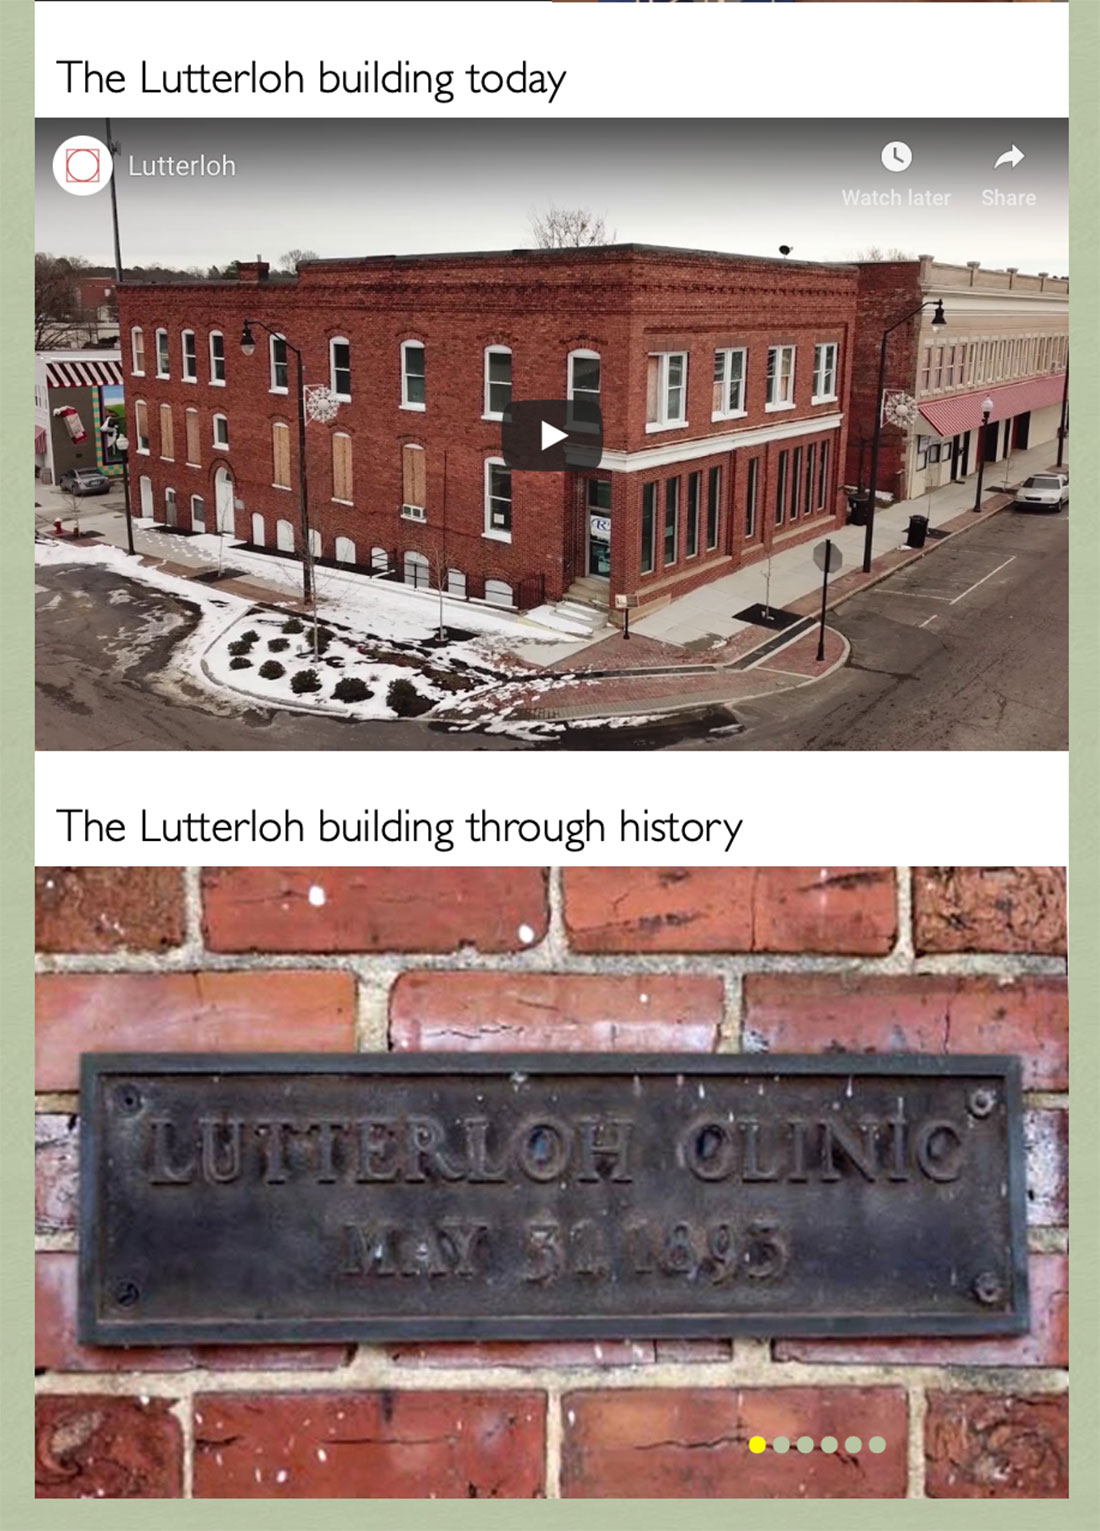
REAP's historic preservation projects included restoration of the historic Lutterloh building in downtown Sanford, North Carolina, for residential and commercial purposes. This landing page by Rouviere Media describes the project, including leasing opportunities, and showed the building in video and photographs.
This special project page has a 360-degree video and a slide show of photos depicting the building's history.
Let Magic Happen
Rouviere Media did the design and the web and Expression Engine development for this author's book and on-line health coaching website, Let Magic Happen.

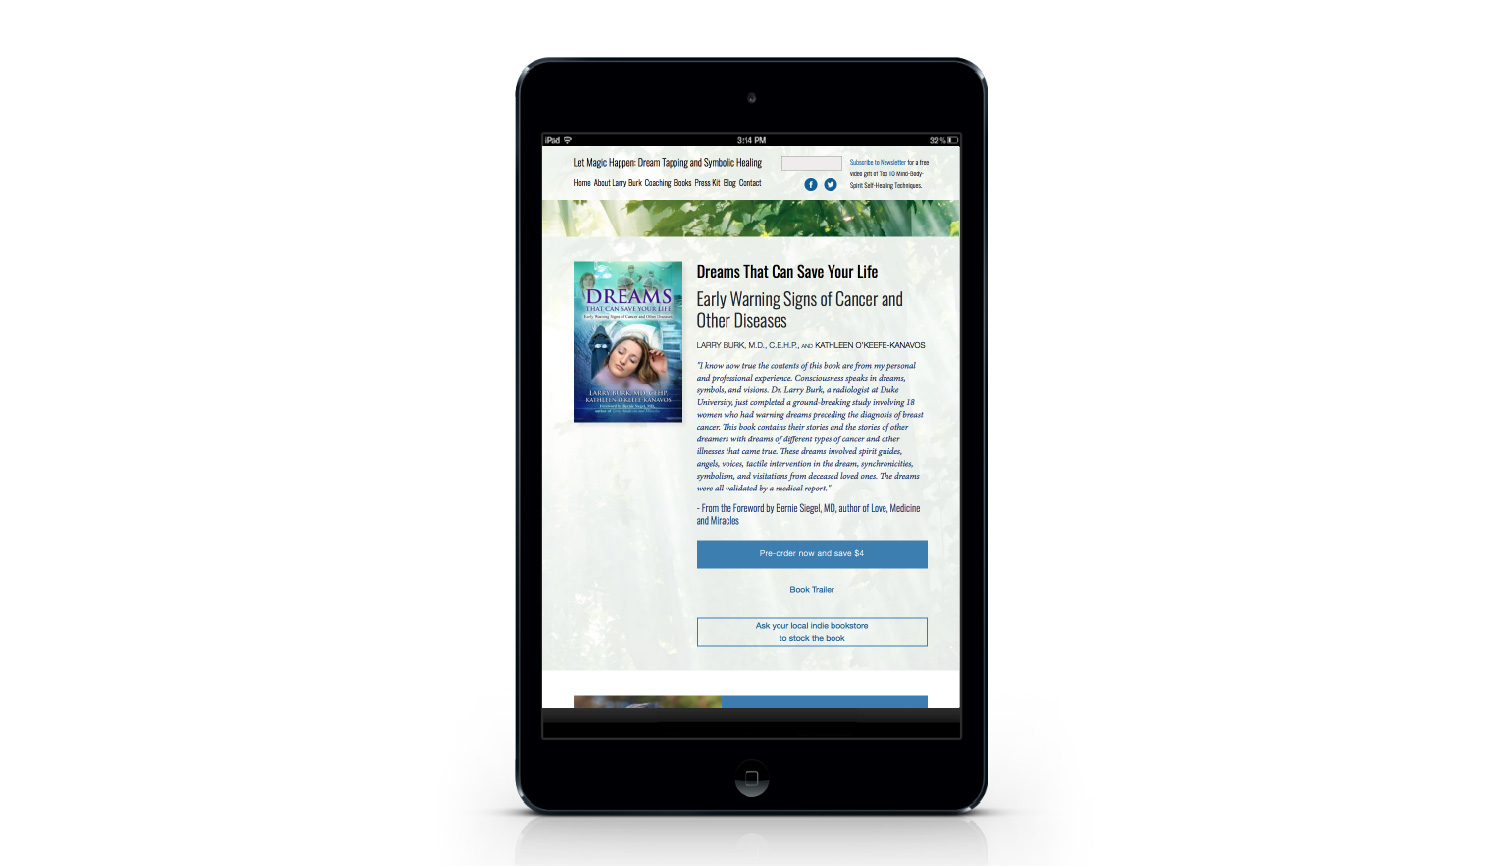
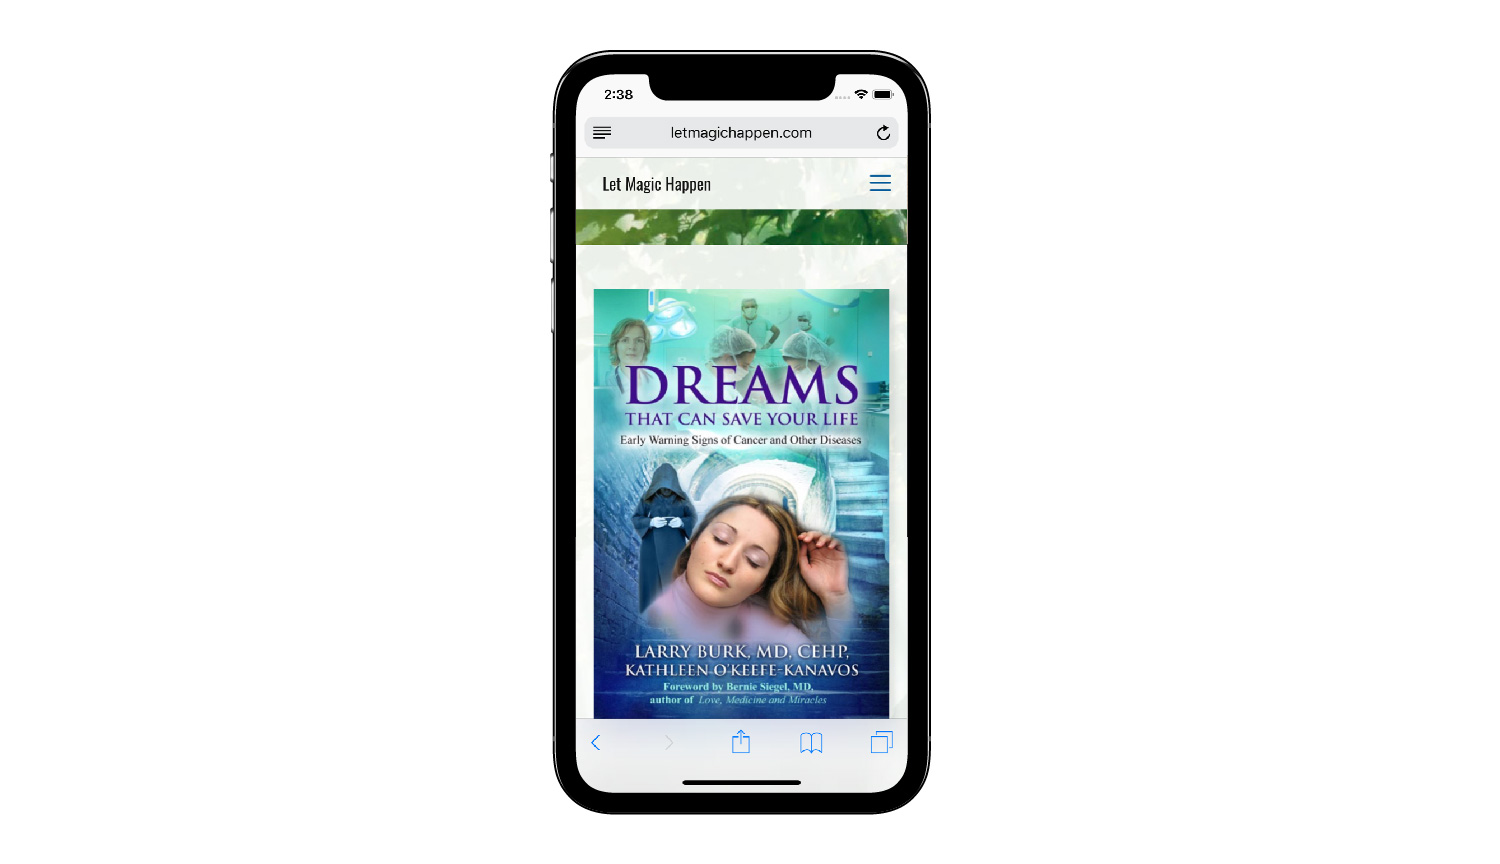
The website is a full-featured author's and speaker's website including a book page, coaching page, an integrated Mailchimp newsletter, press kit, and integrated news links and reviews.
Rouviere Media built this website as a major update to an earlier one that Rouviere Media created for a radiologist and author, Larry Burk, when he had launched his writing career. The redo and expansion of the content management website was necessitated by the growth of the author's career and the addition of on-line life coaching and speaking at conferences. Rouviere Media has maintained and done the design and development for this site for more than ten years during which the author has built his coaching, writing and speaking into a full-time endeavor.
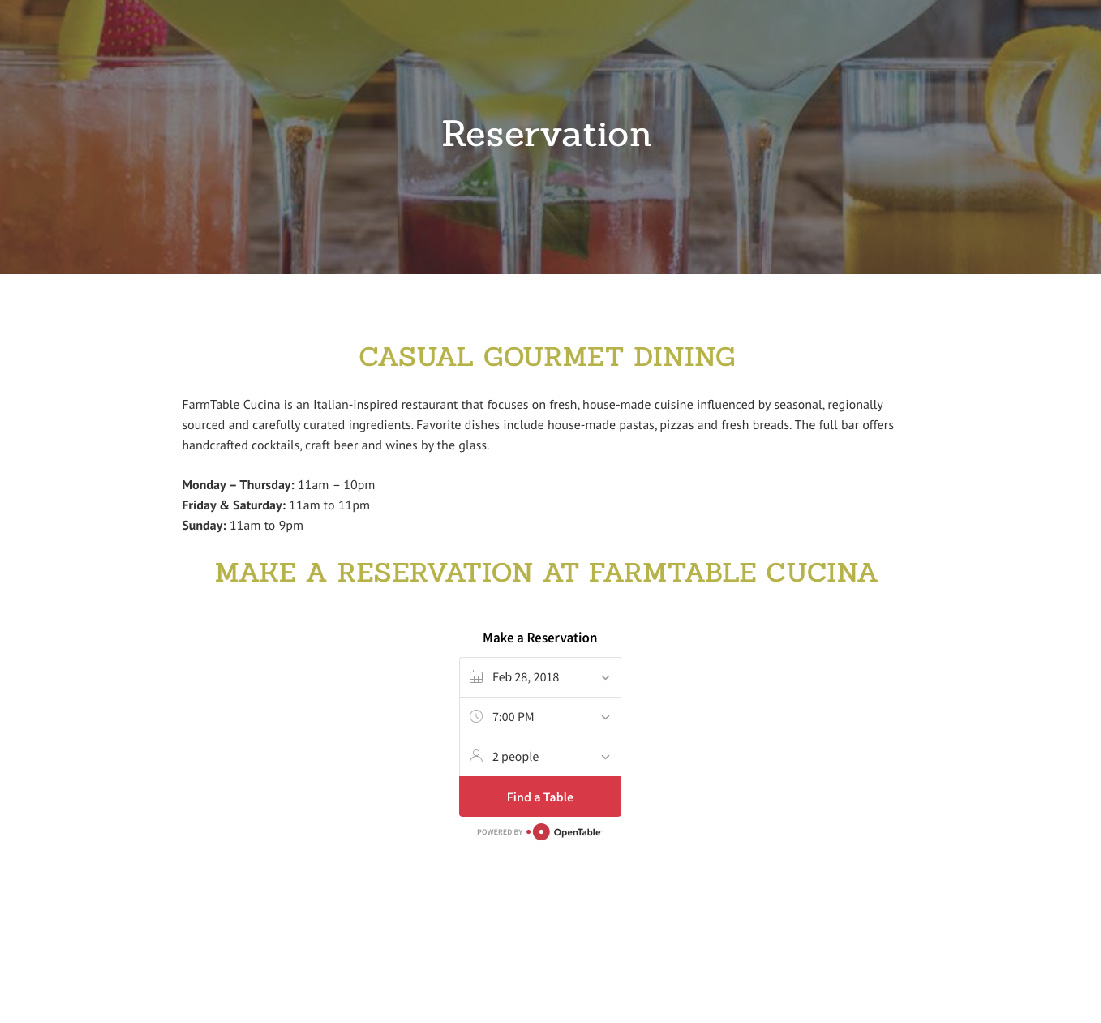
Farm Table
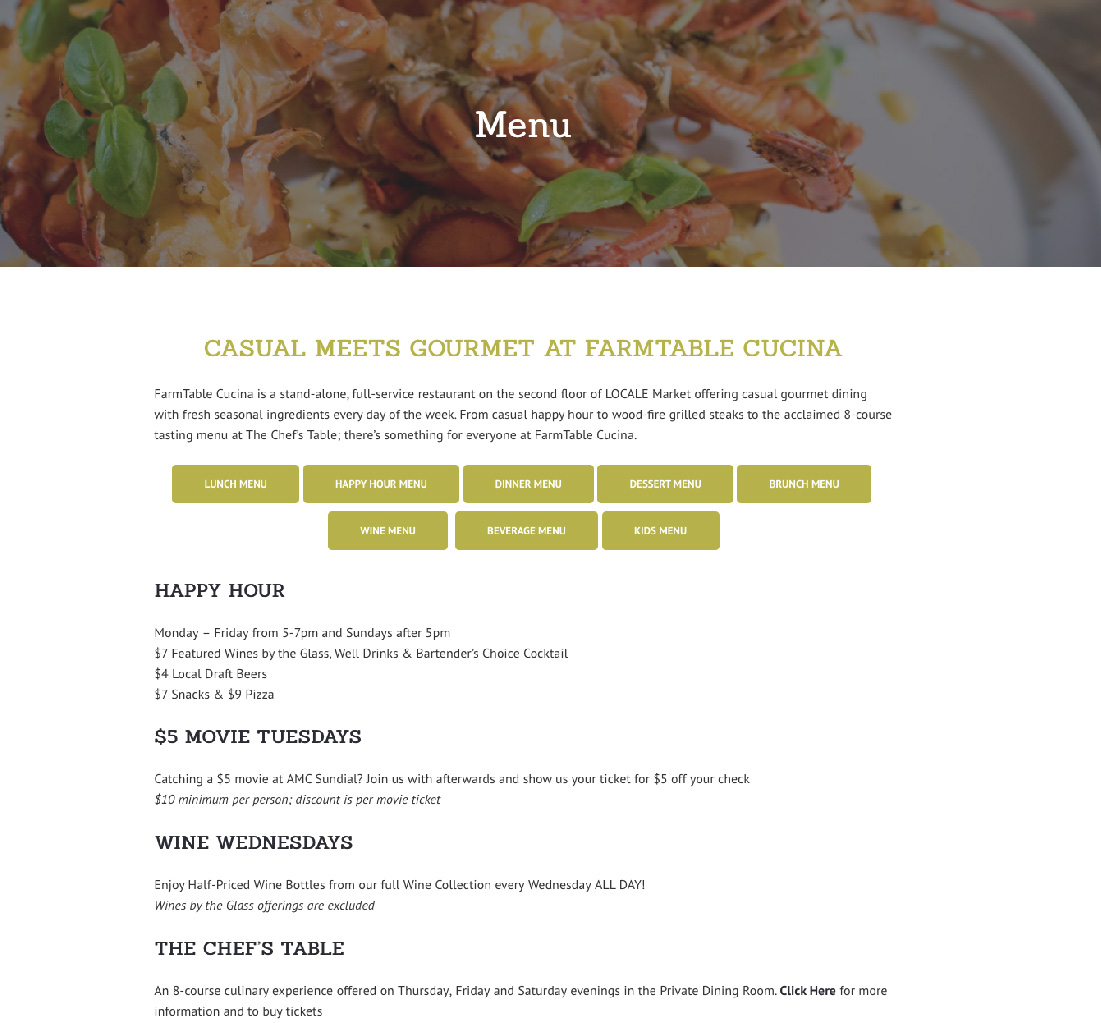
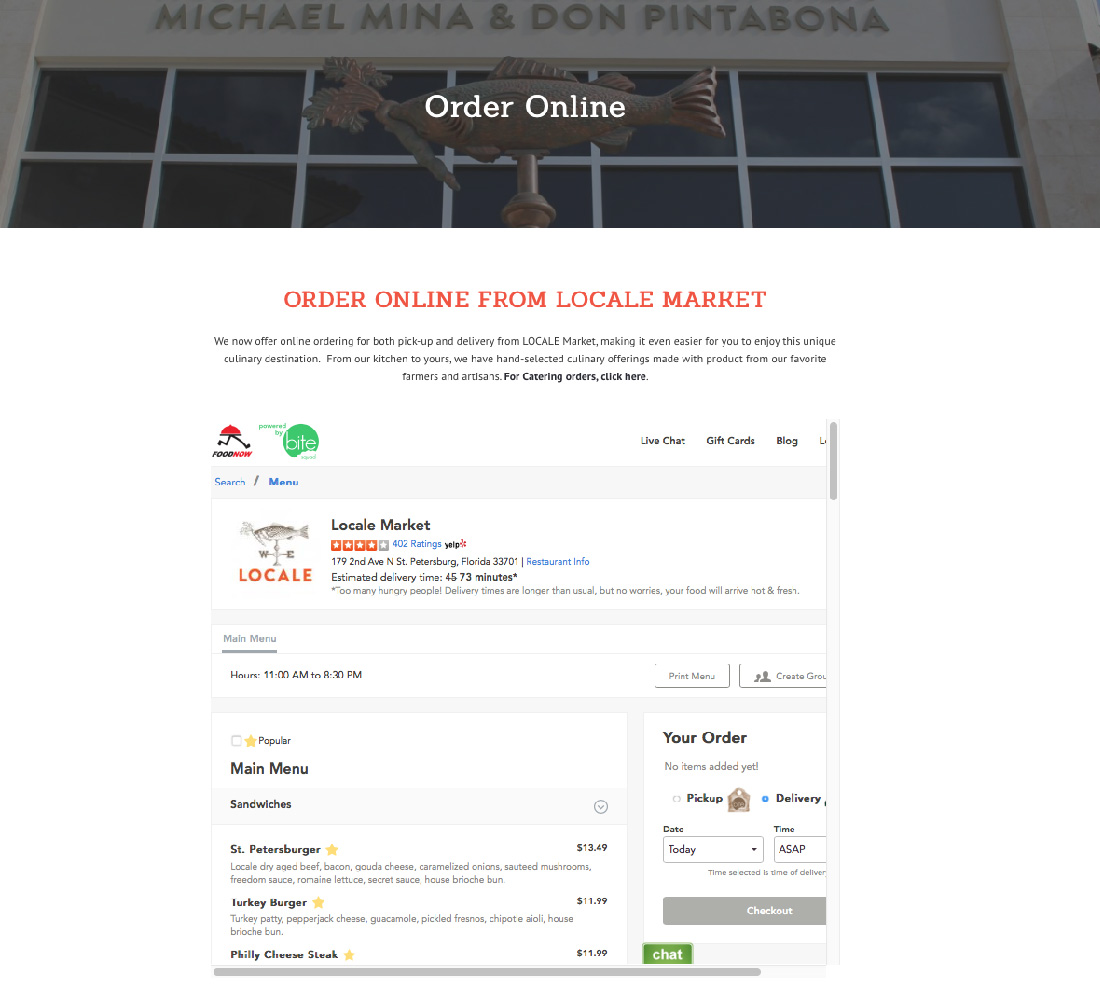
Rouviere Media did WordPress development for Farm Table Cucina, a restaurant website, under the direction of Howard Development.
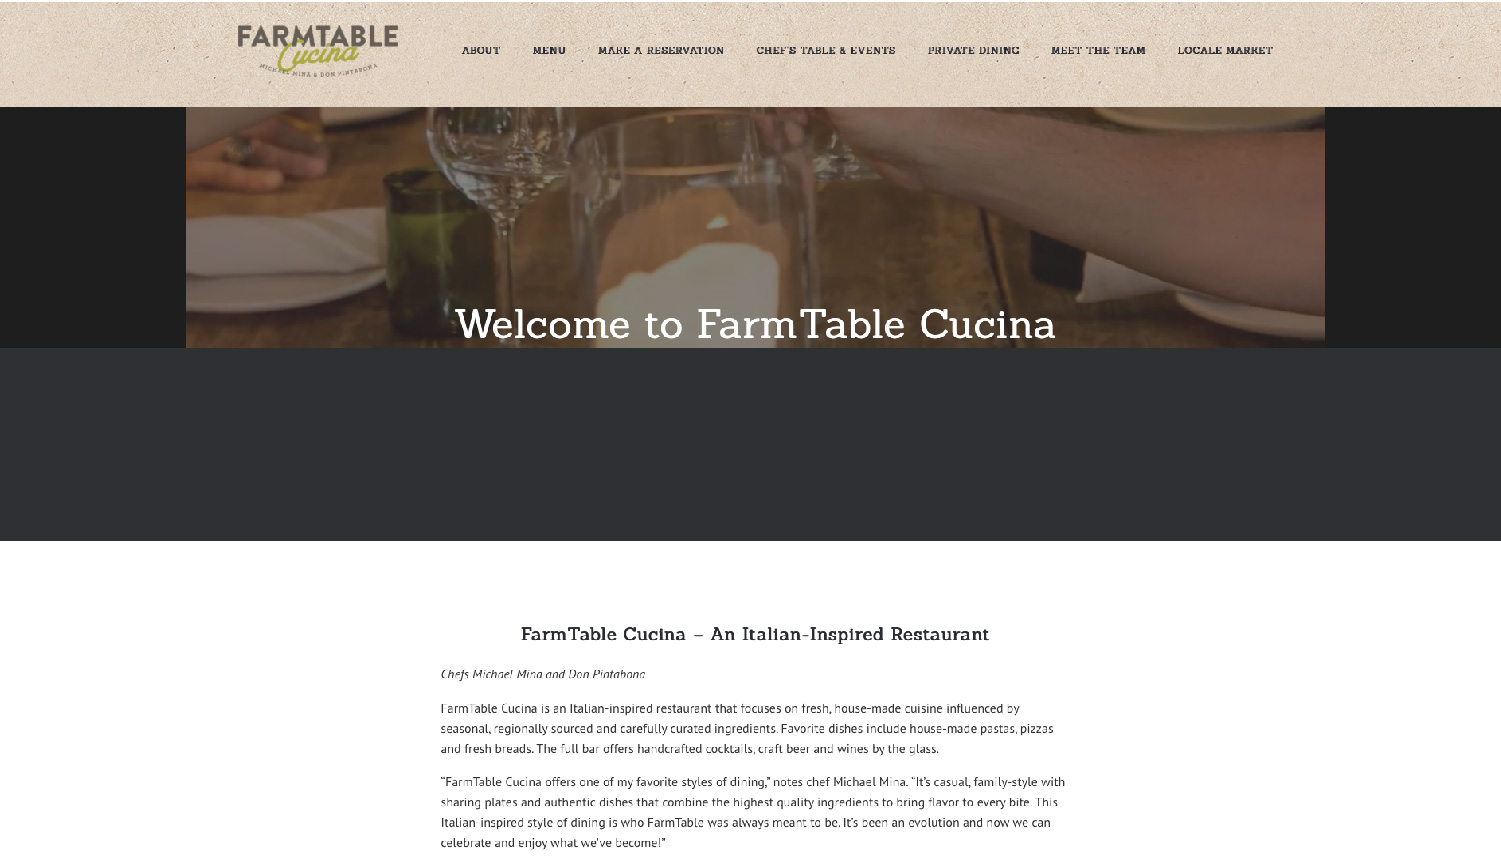
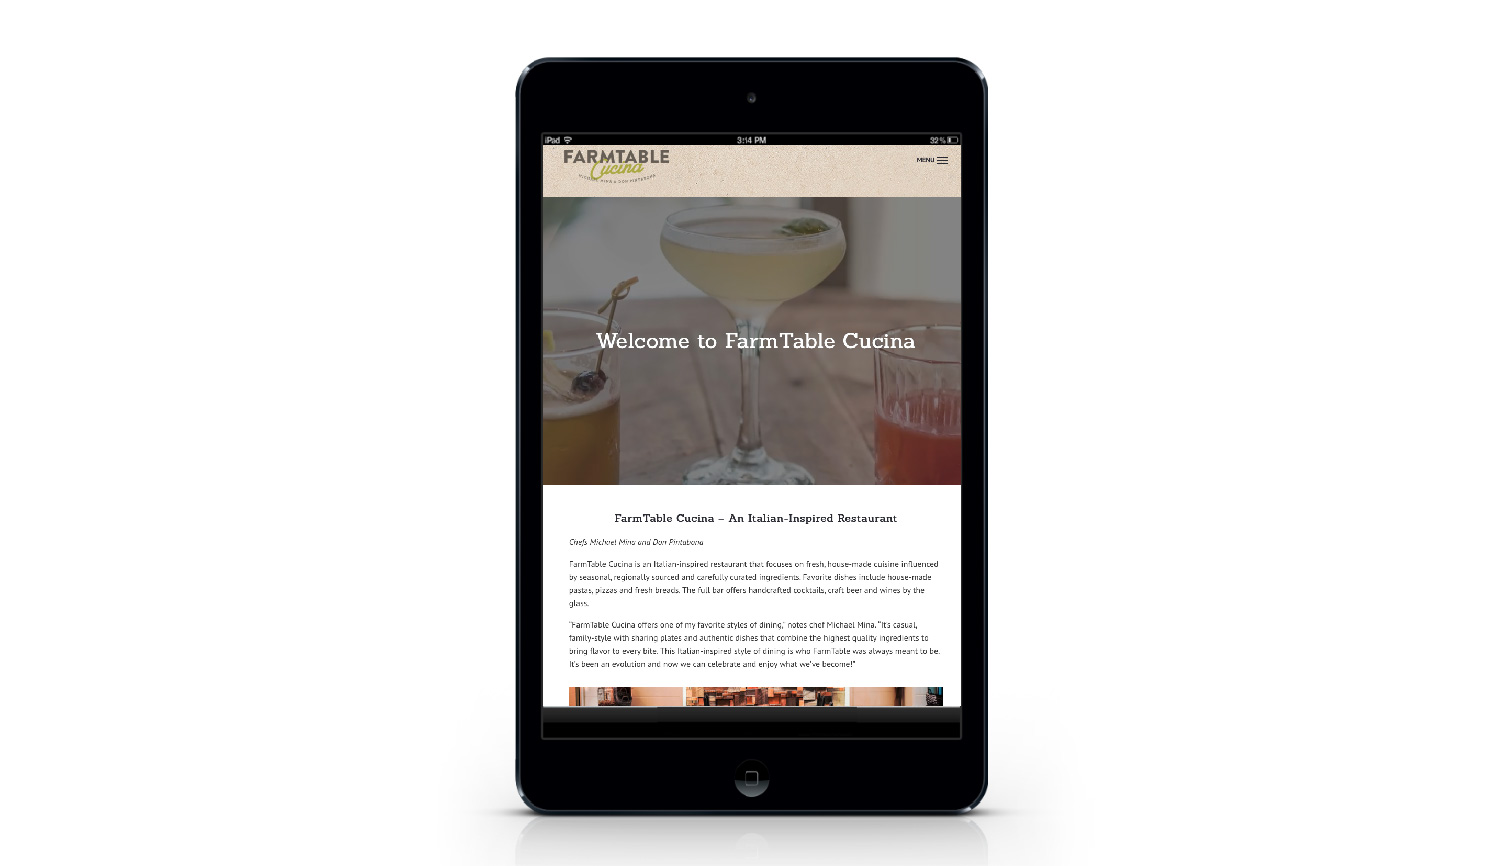
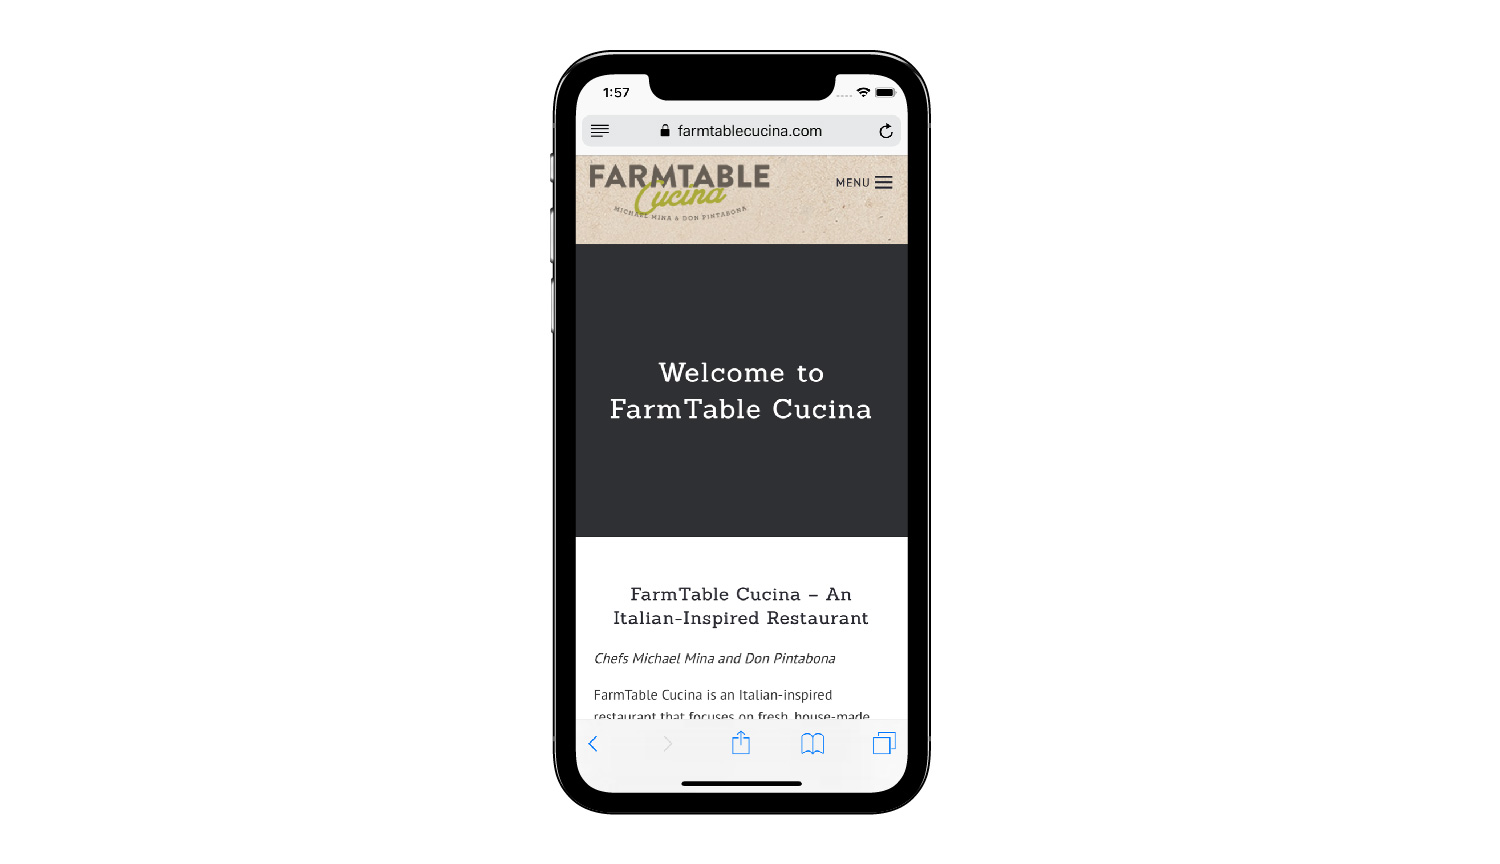
This website for an Italian-style restaurant has on-line menus, an ability to make on-line resrvatons, a section for Chef's Table and events, and an on-line ordering system for a feature called Locale Market. Our lead web developer, Forrest Anderson, spearheaded this project.
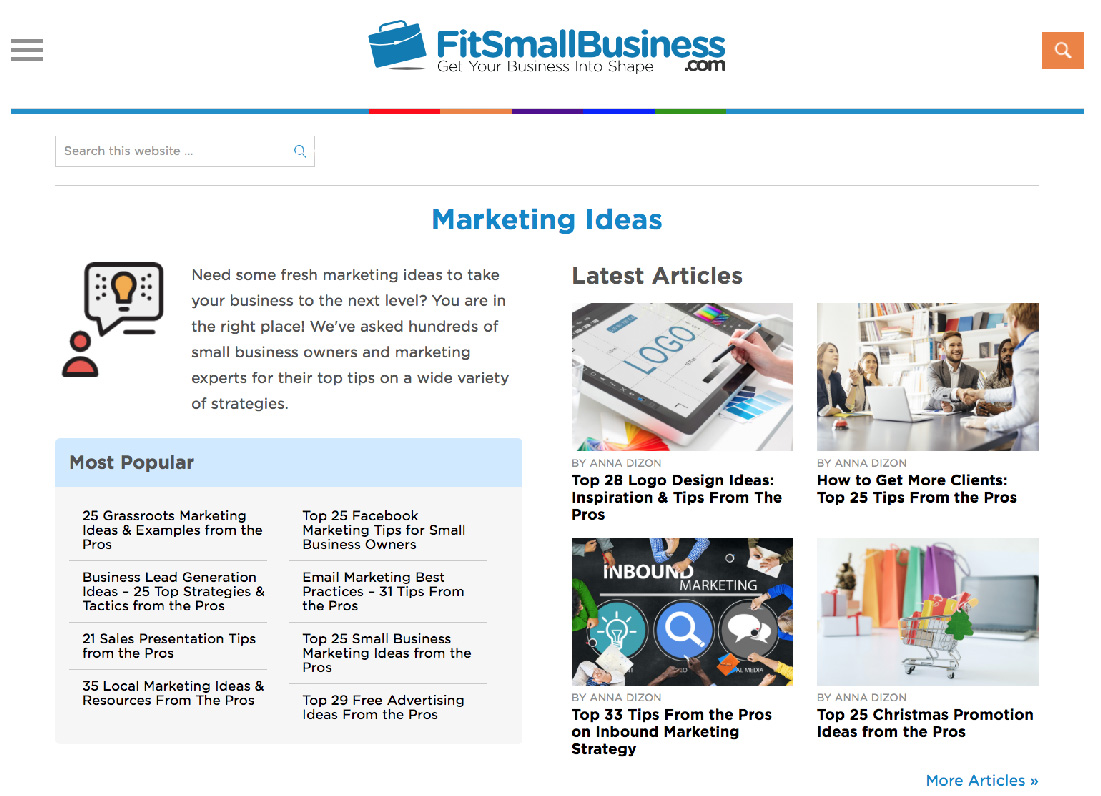
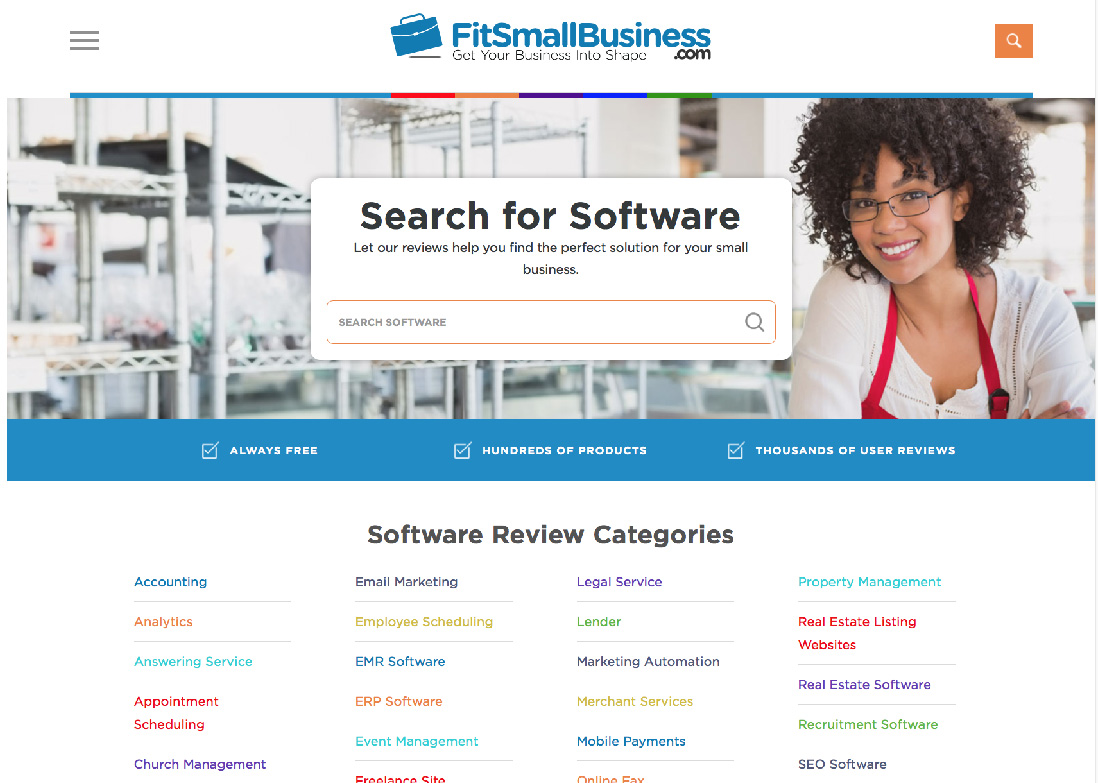
Fit Small Business
Rouviere Media has done WordPress development, maintenance and support for this website, an on-line resource for small businesses, under the direction of Howard Development.
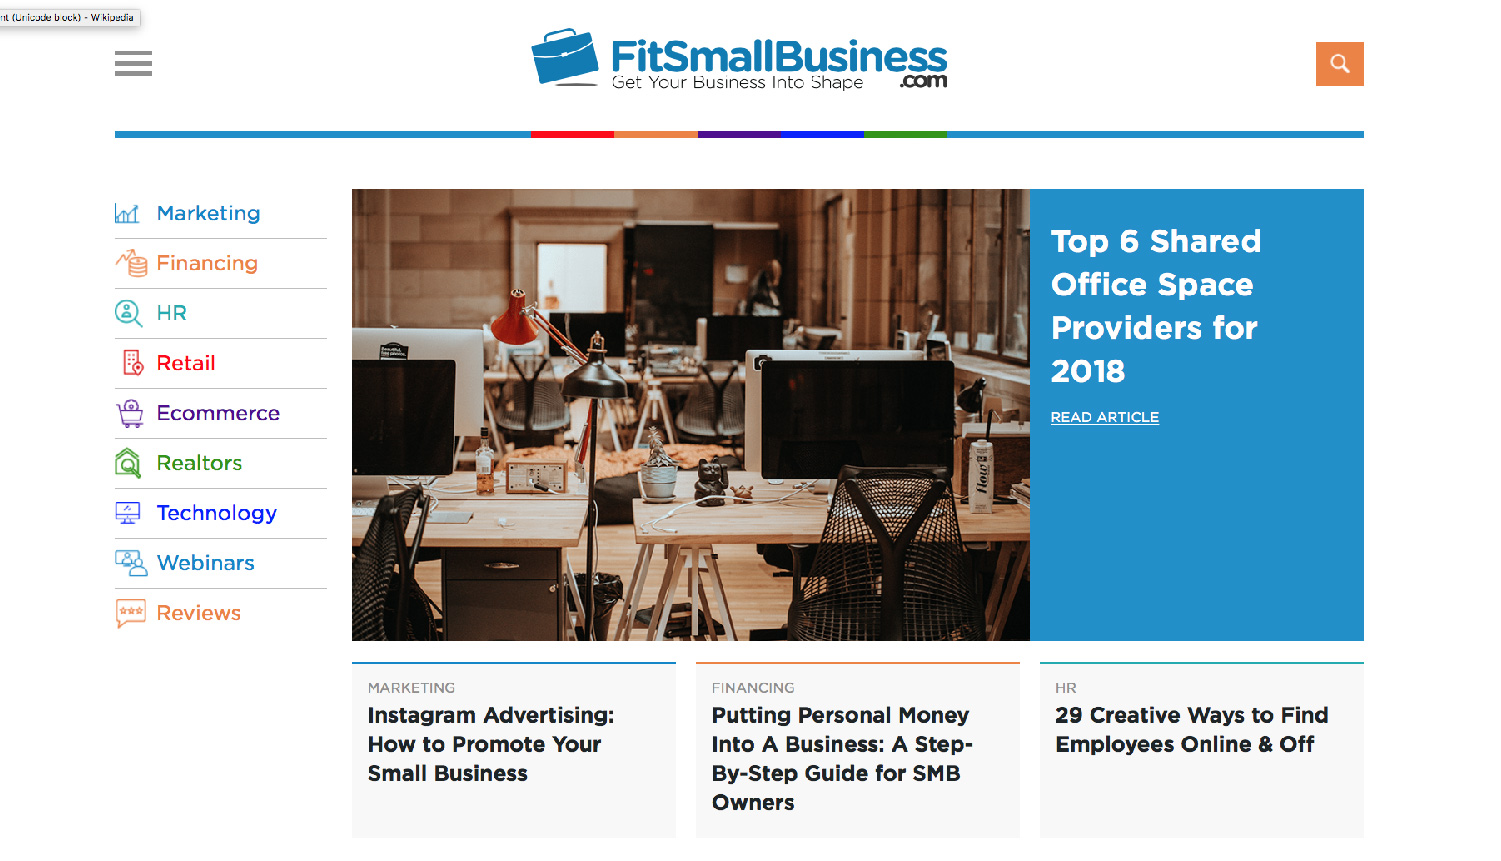
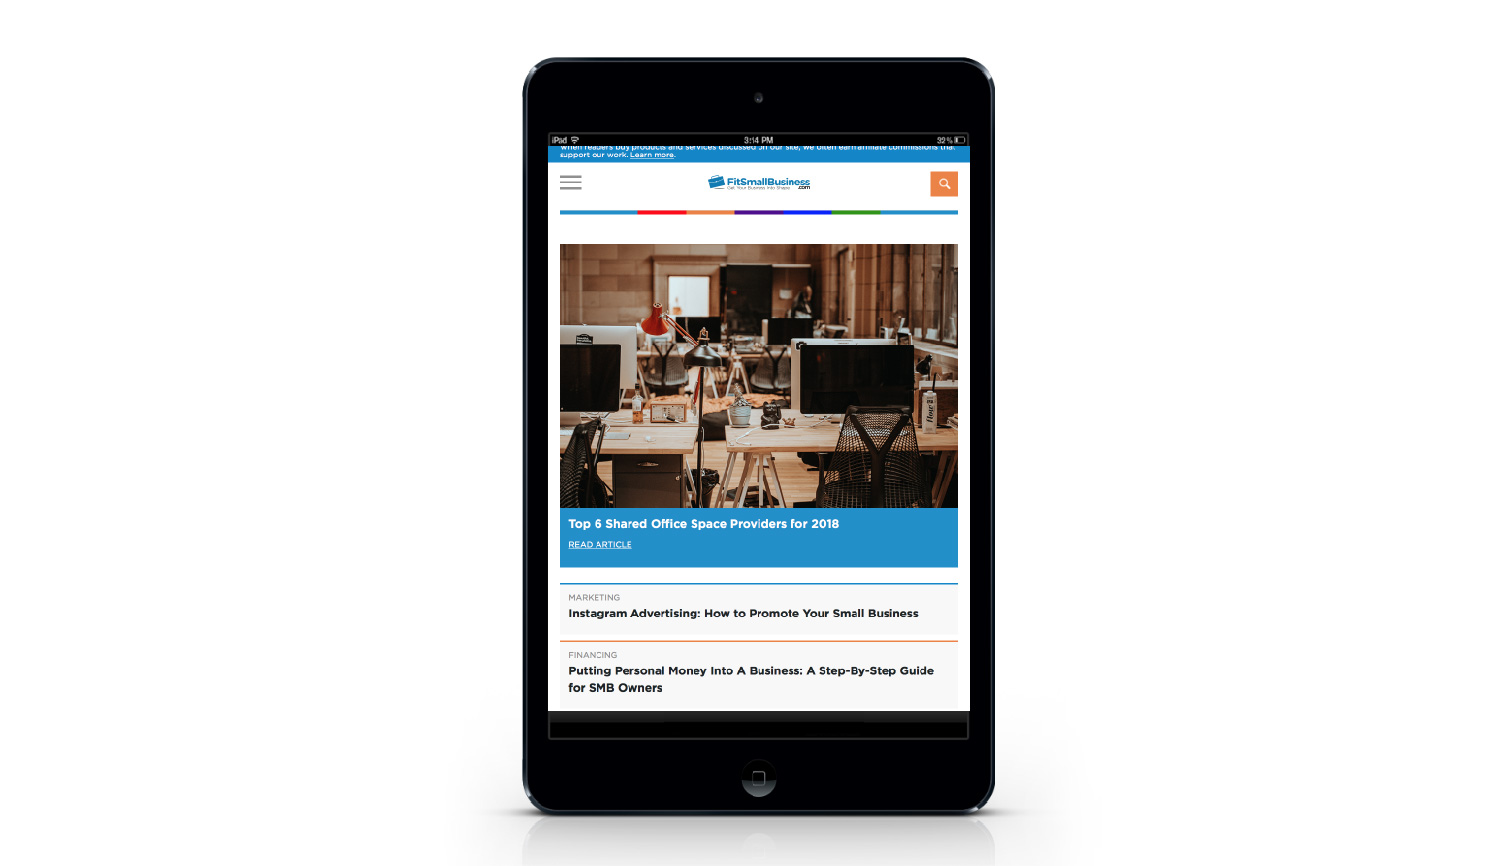
This robust website is a one-stop shop of resources for small businesses. It has a wide variety of information on small business-related concerns from shared office space providers to human resources, financing, marketing, ecommerce, and software.
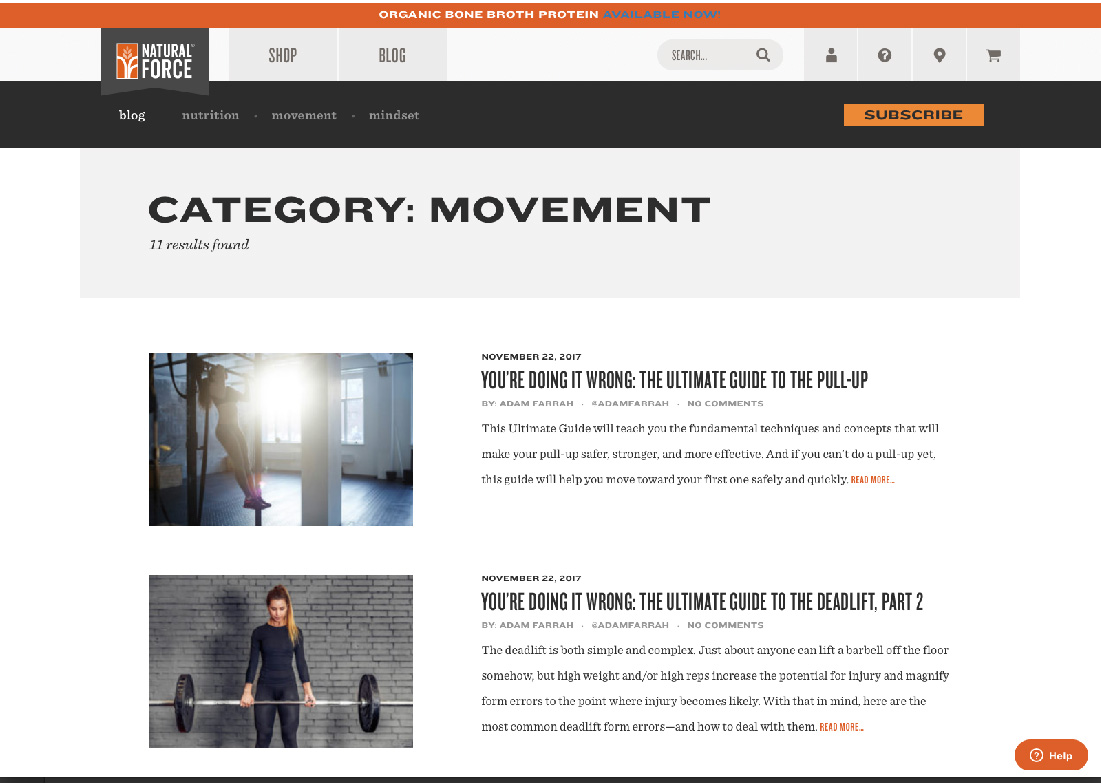
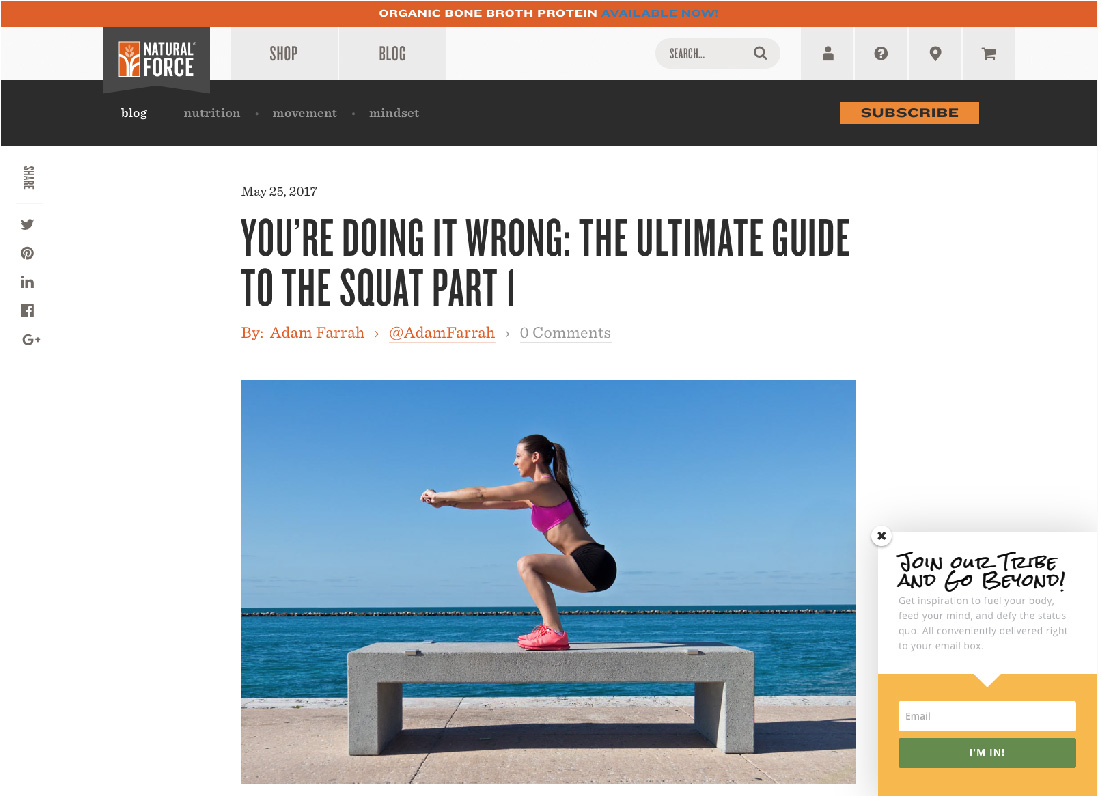
Natural Force
Rouviere Media worked under Howard Development to do the WordPress development for this website, Natural Force.
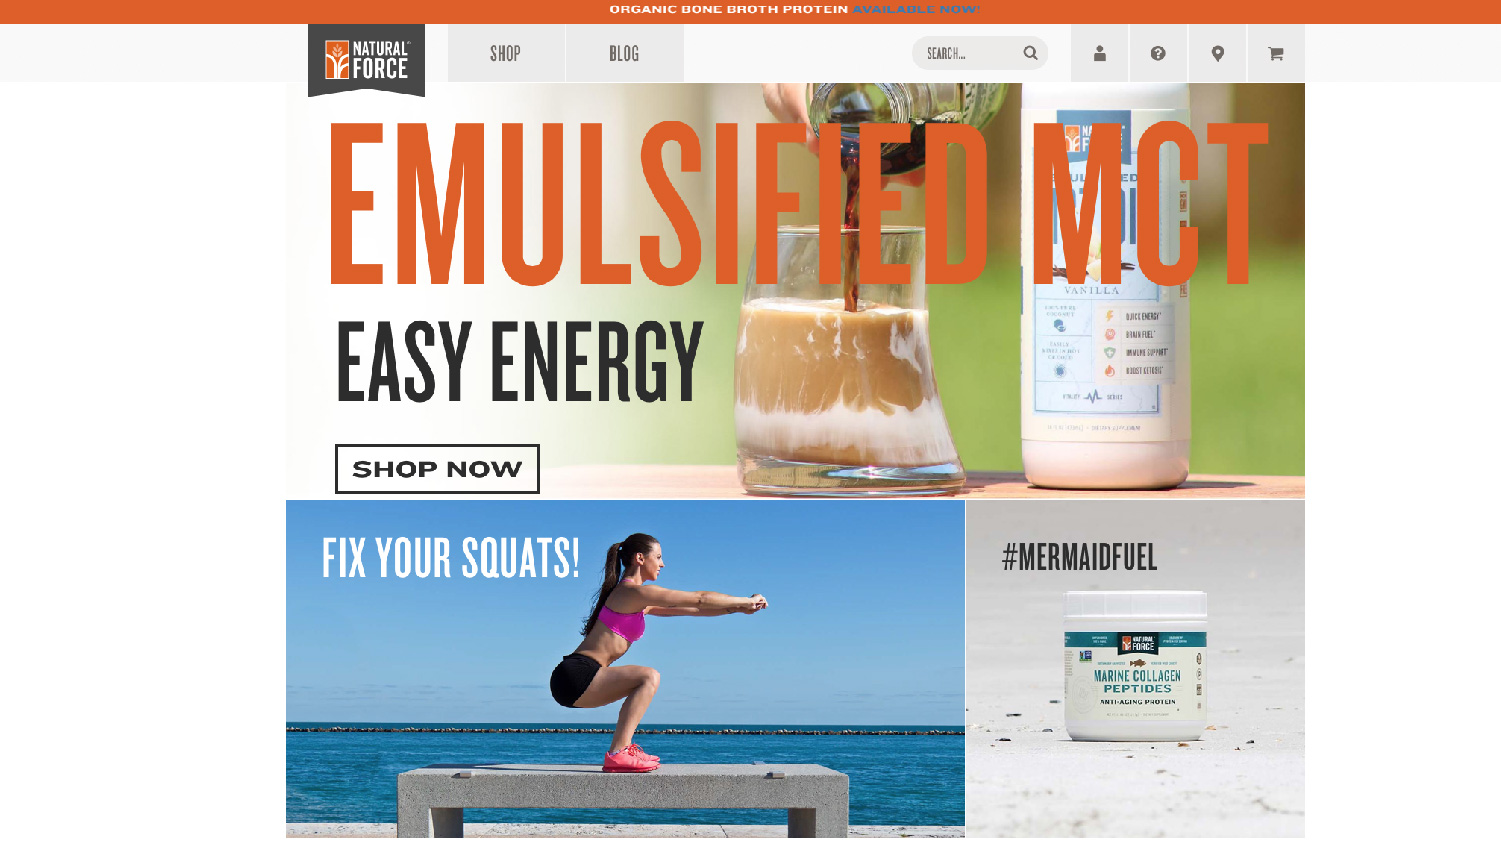
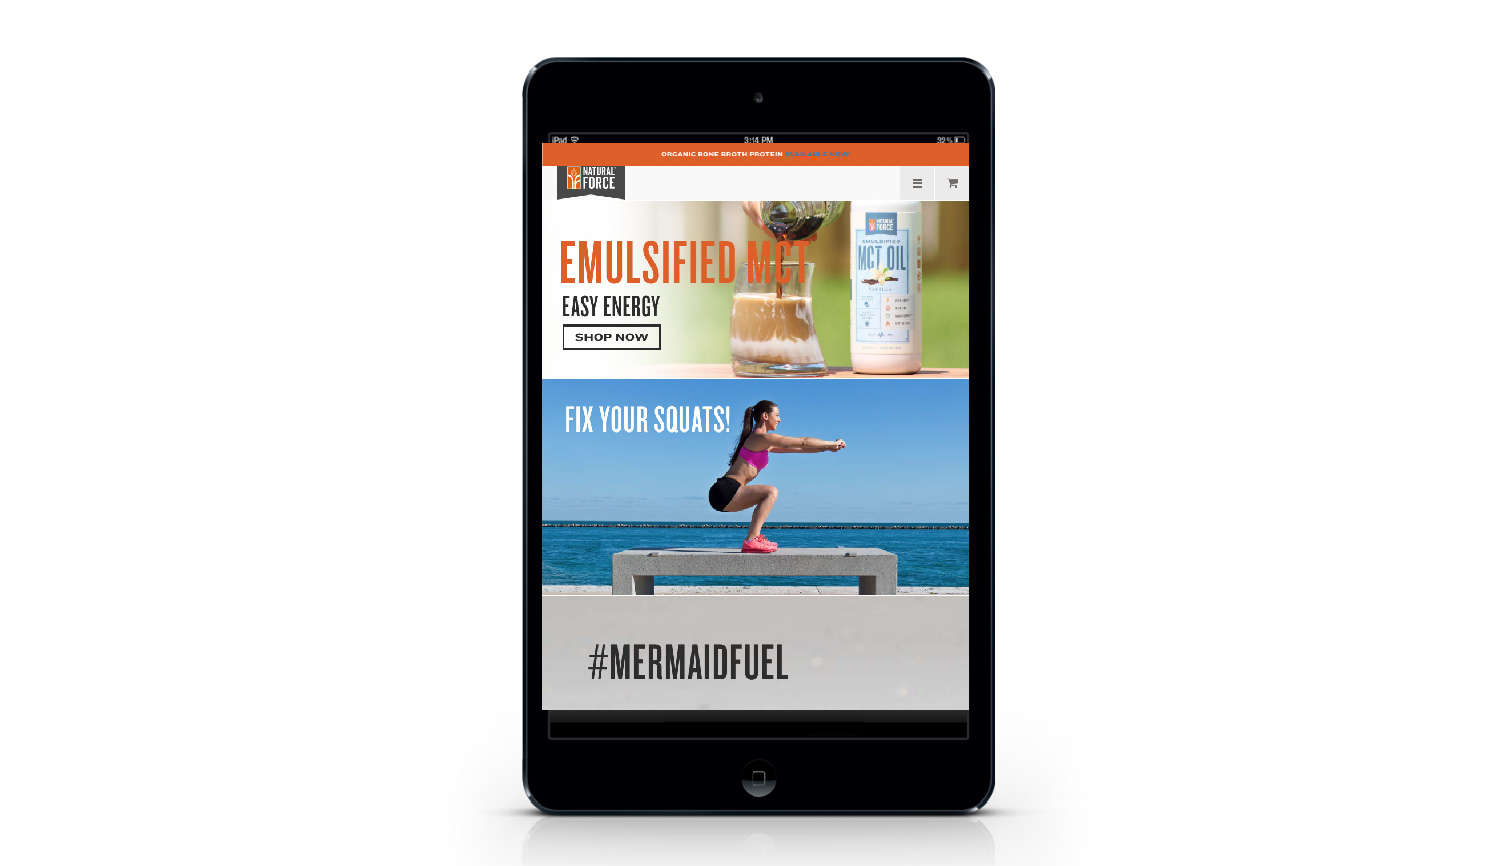
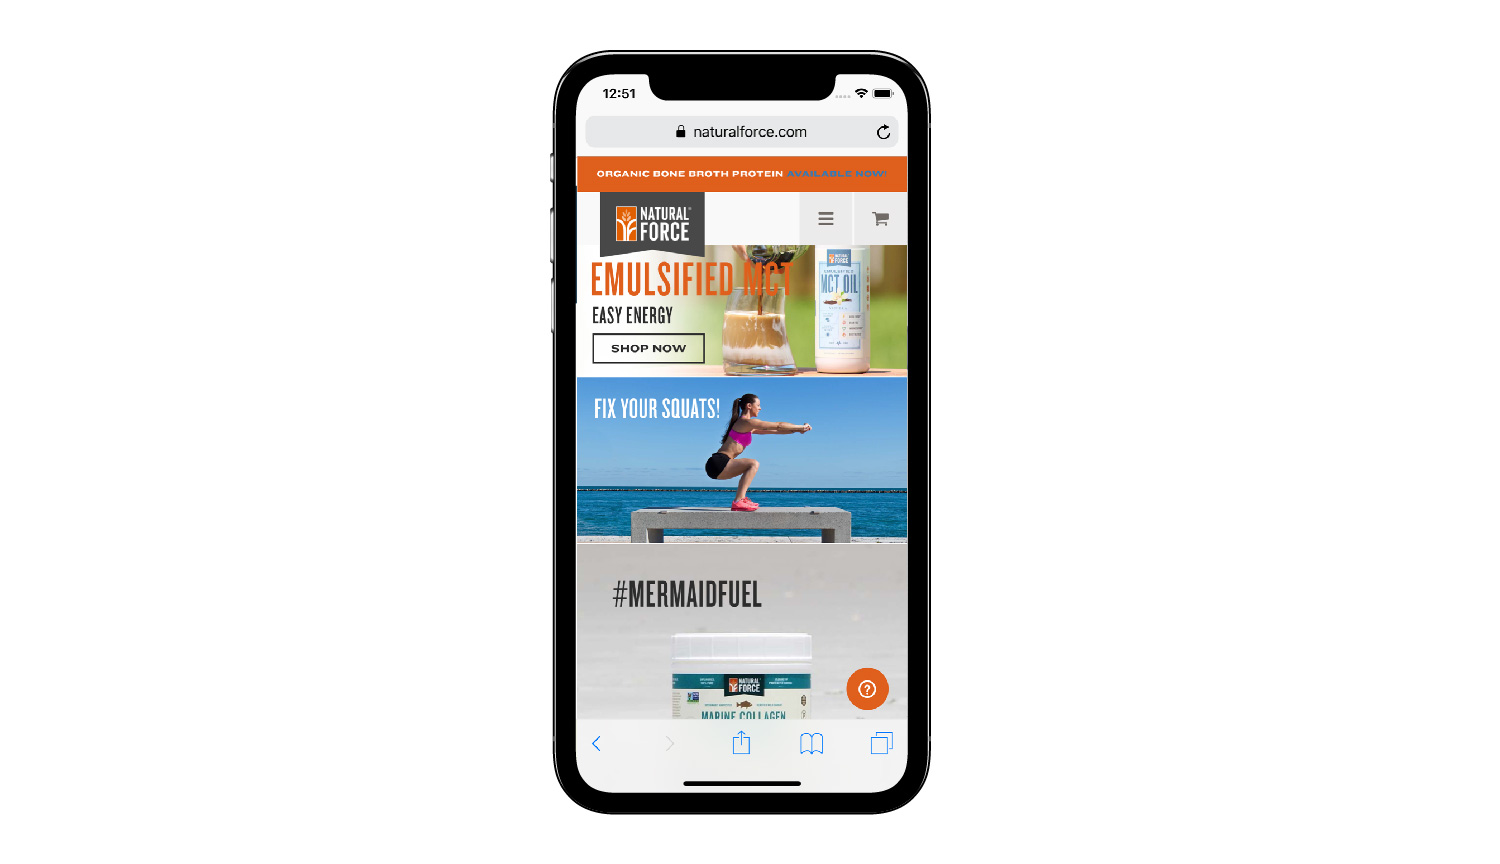
Our lead web developer, Forrest Anderson, built the site, which is a health website that includes a shop for health-related products.
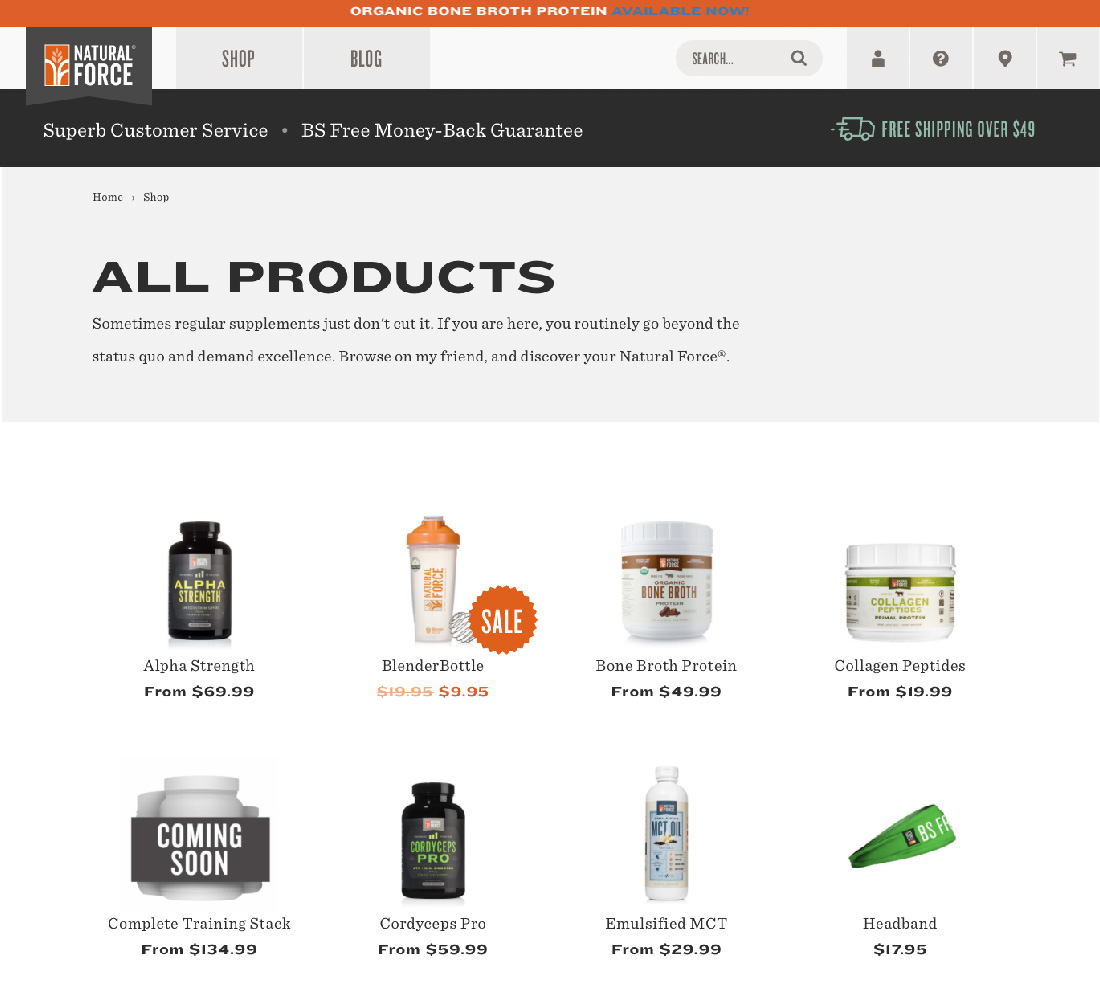
The site also had a blog on health-related topics.
Encounter Telehealth
Under the direction of Howard Development, Rouviere Media did the WordPress development for this innovative health provider website.
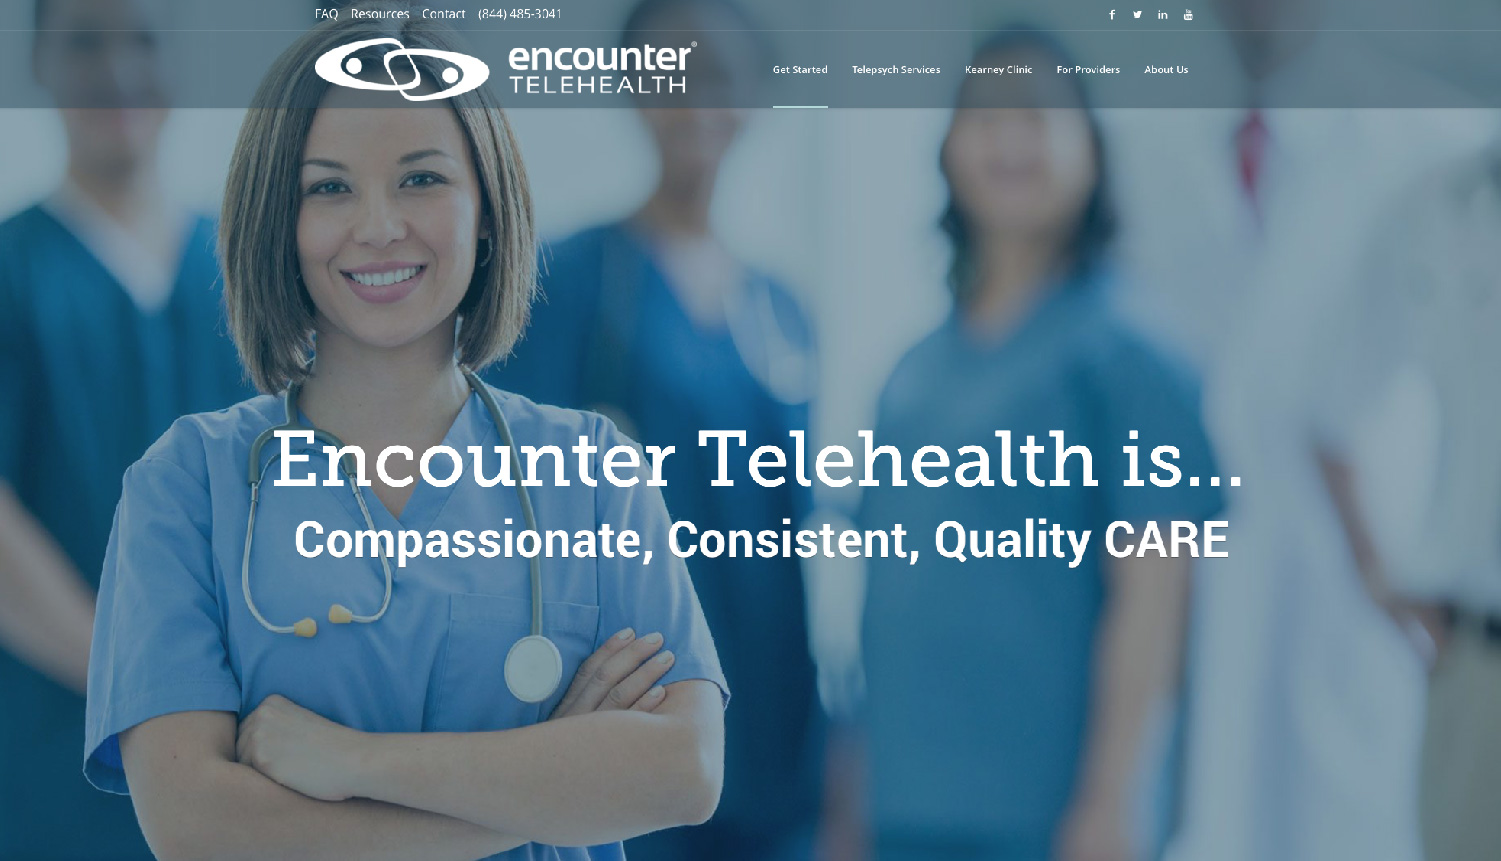
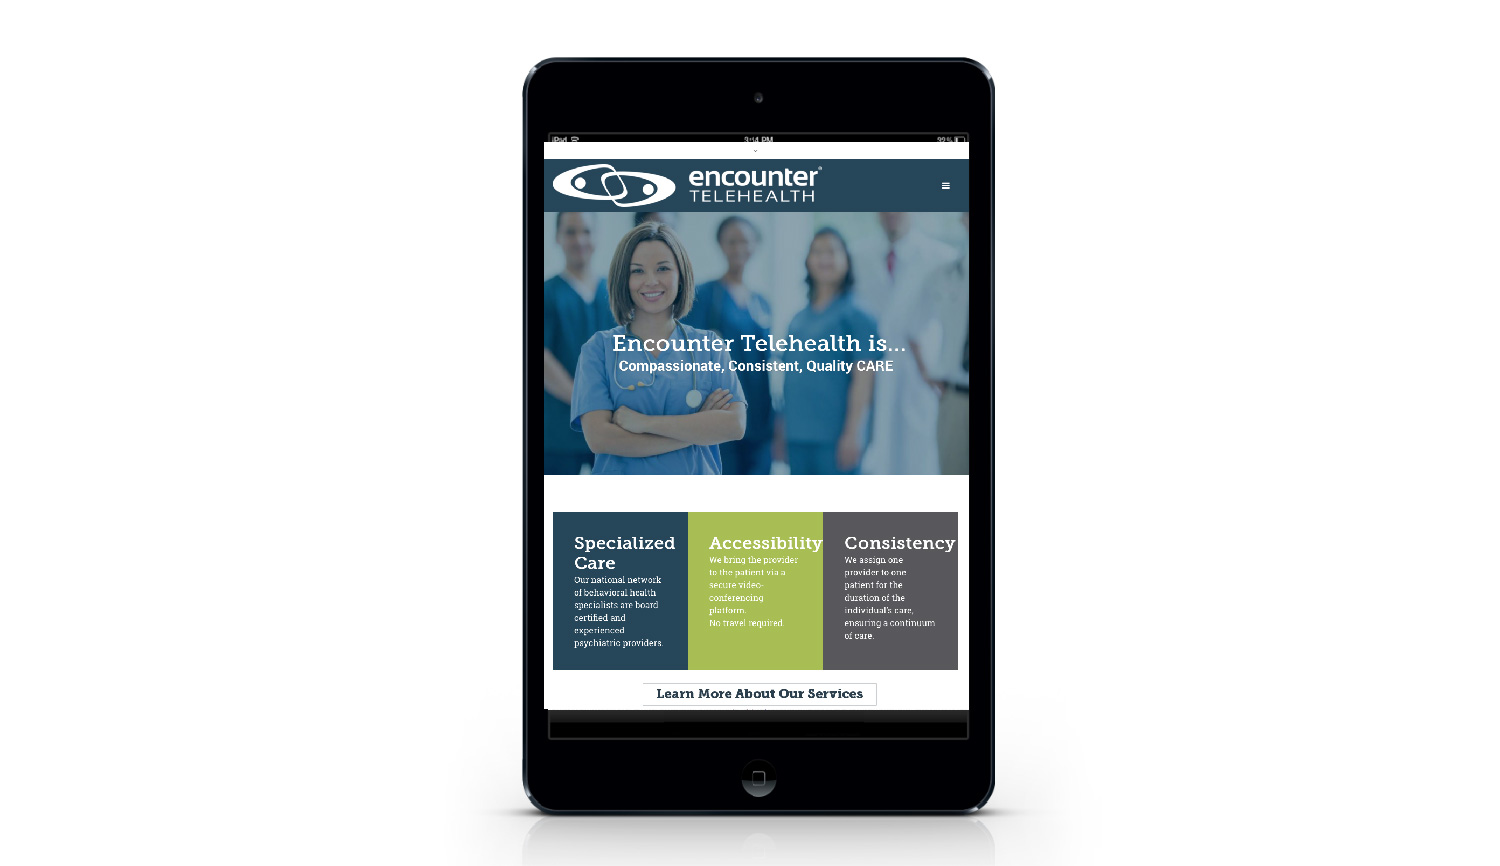
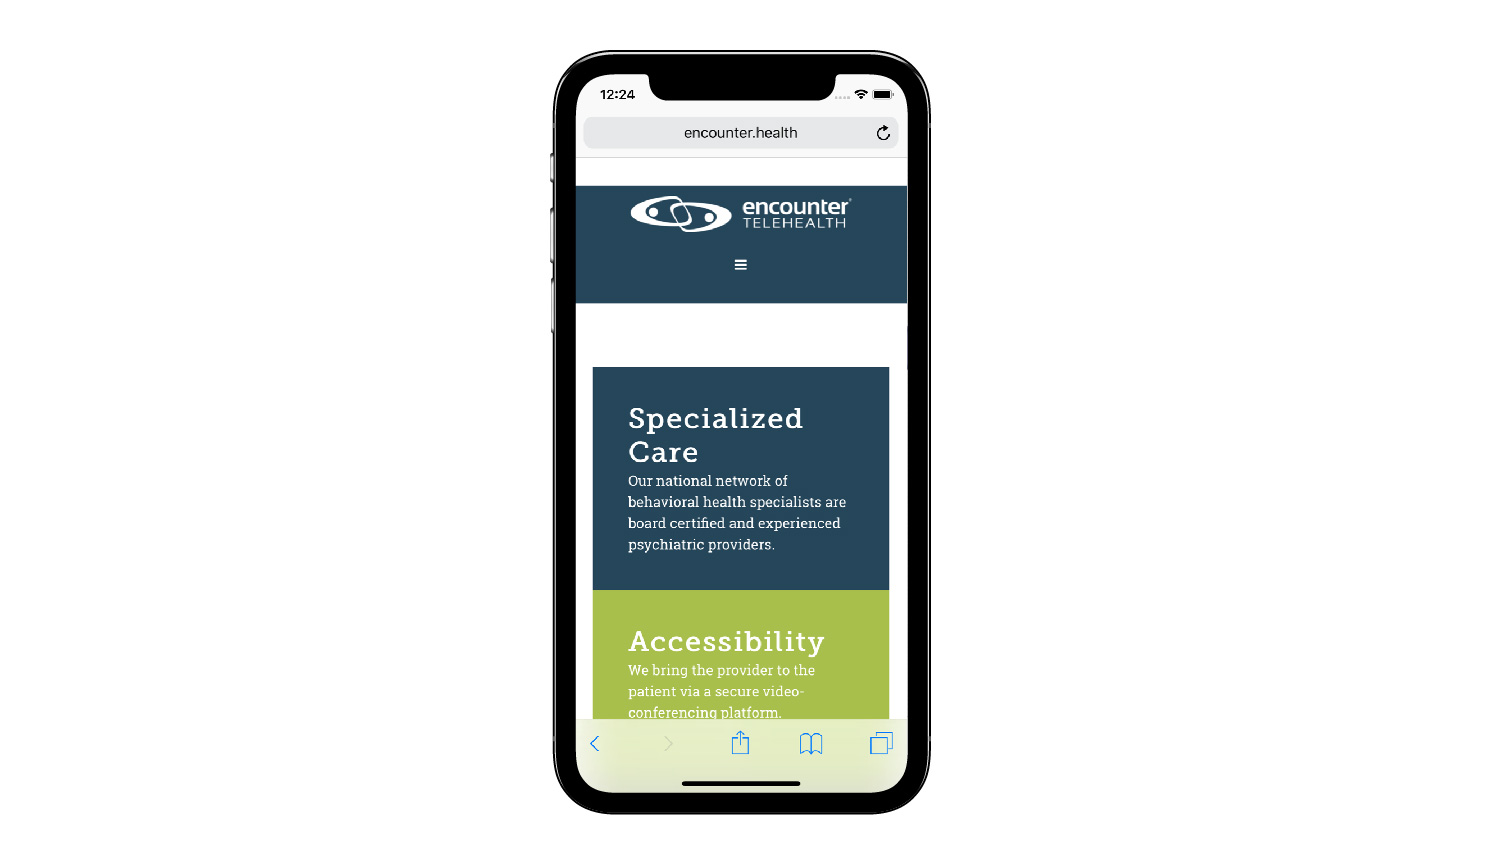
Encounter Telehealth is a cloud-based platform that enables patients to have remote video conferences with health care providers. This website enables health care providers and patients to get information about and apply to participate in the telehealth services and patients to set up appointments.
Our lead web developer, Forrest Anderson, did the original development of the site.
Michael Mina
Rouviere Media, working under Howard development, did some of the WordPress development for this website for the Michael Mina restaurant chain.
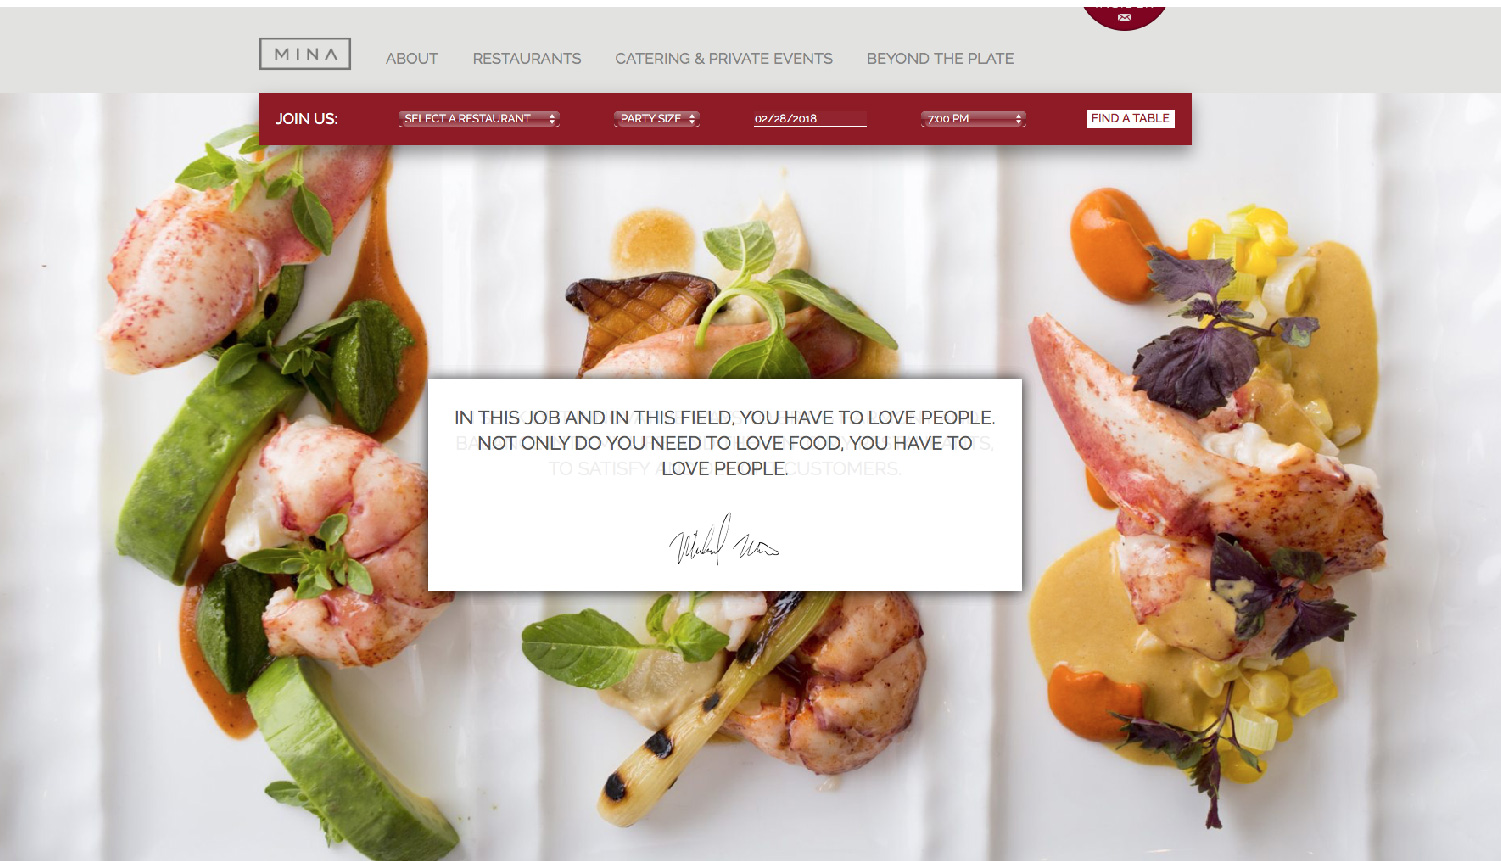
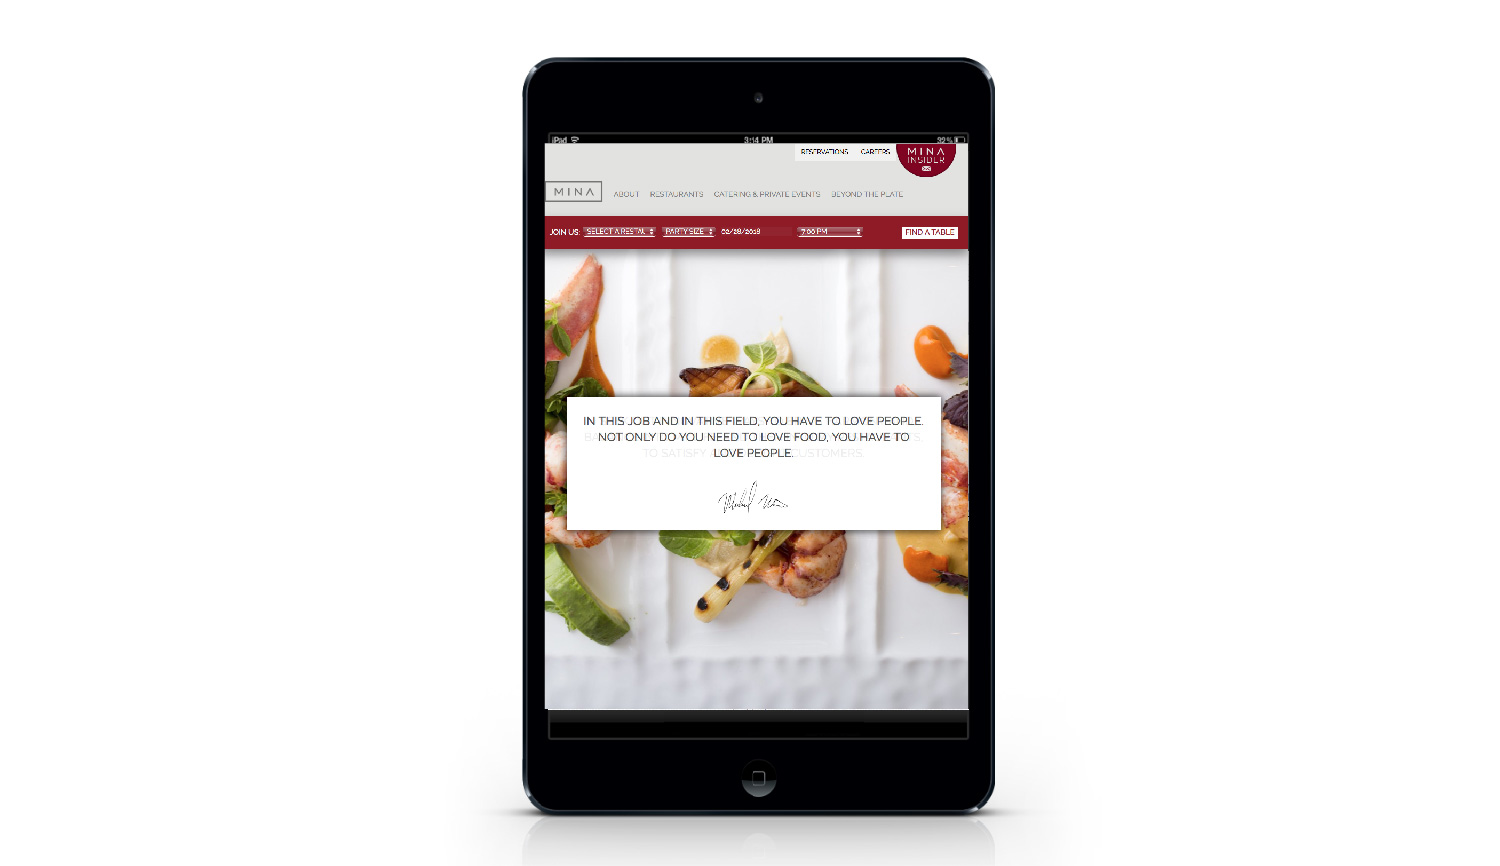
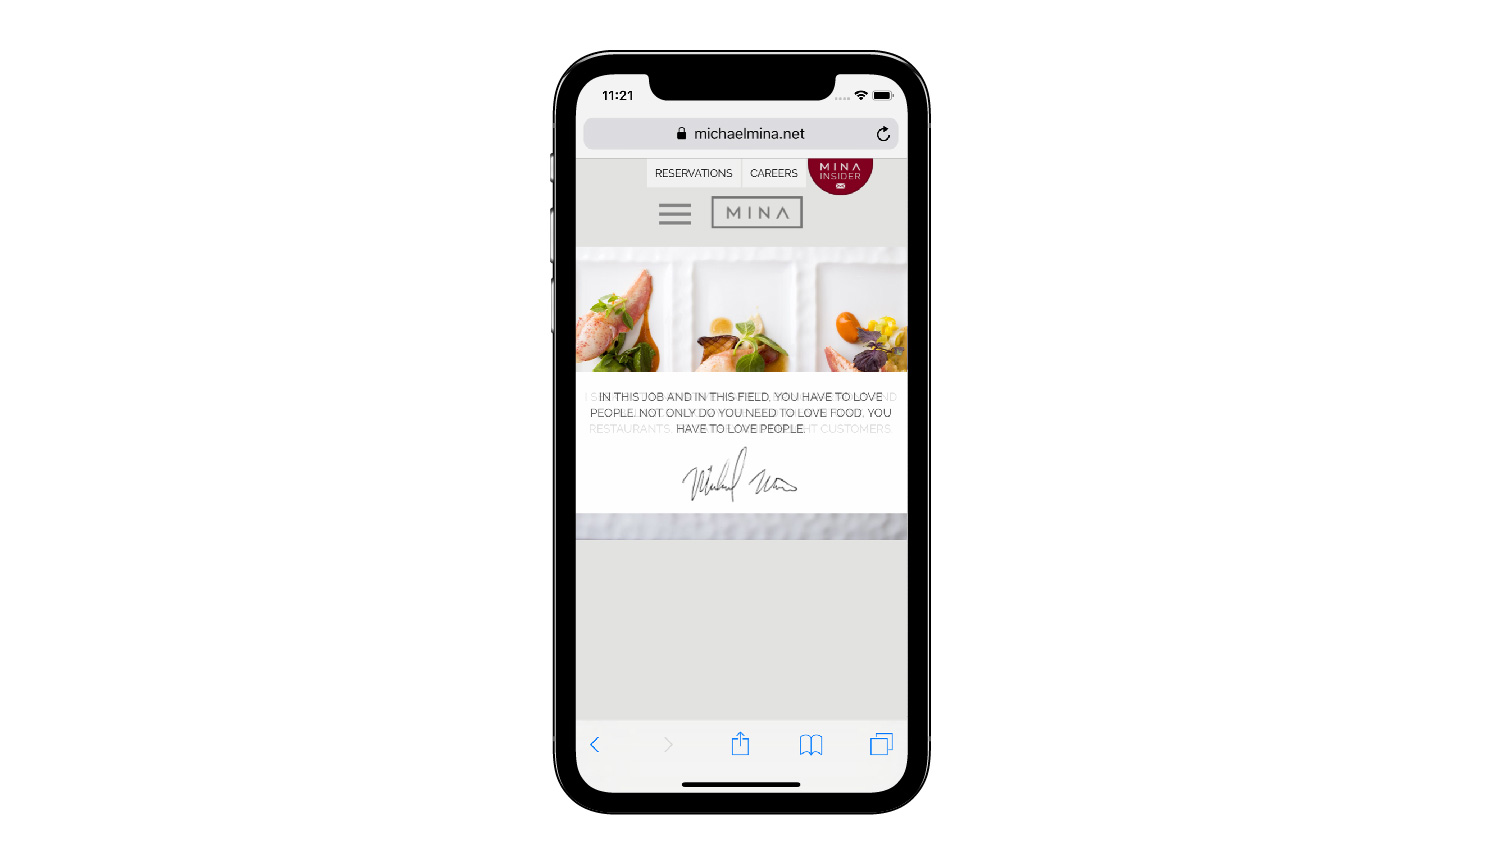
The website has information on catering, events and a reservation selector that allows restaurant patrons to choose from restaurants in 12 states and two countries, the size of their party, the date and time to make automatic reservations.
Our lead developer, Forrest Anderson, built parts of the site.
Optera Creative
Rouviere Media did the web development for this design company website, using designs by Optera Creative.
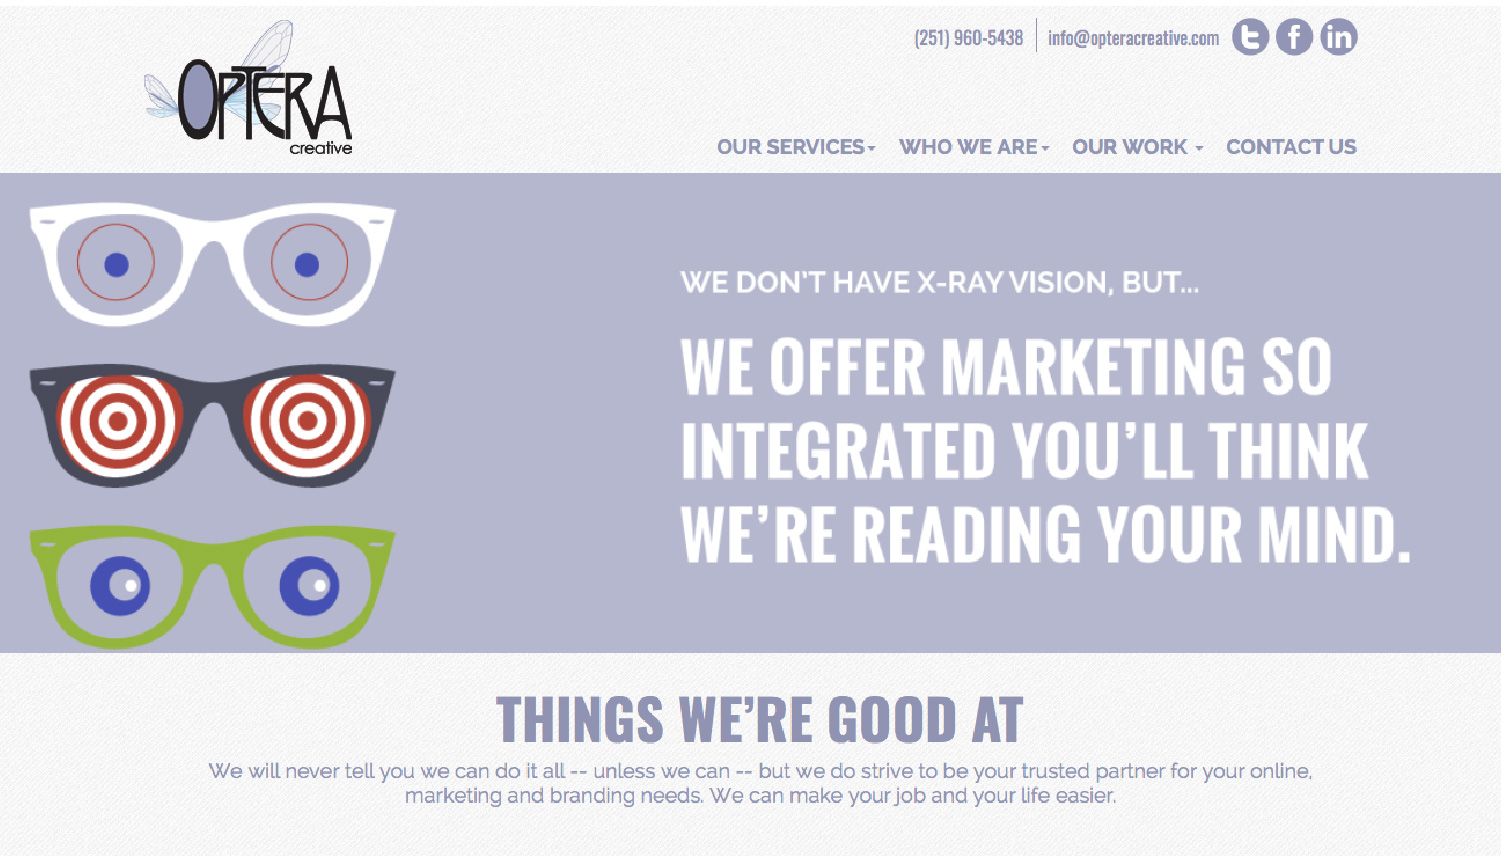
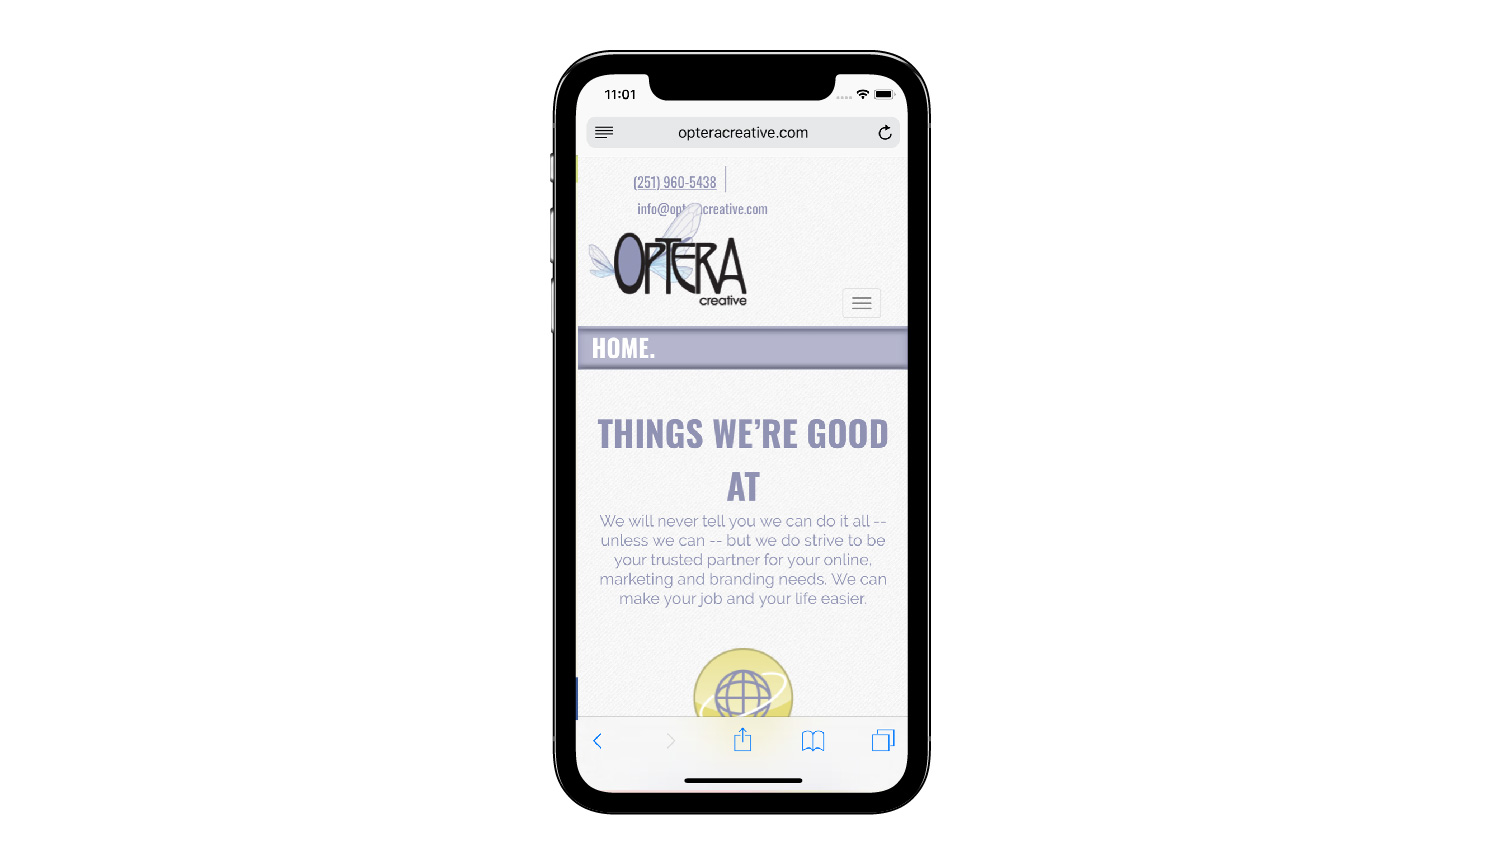
Our lead developer, Forrest Anderson, built the site as an Expression Engine content management system on Bootstrap responsive technology. The site included e-commerce capability.
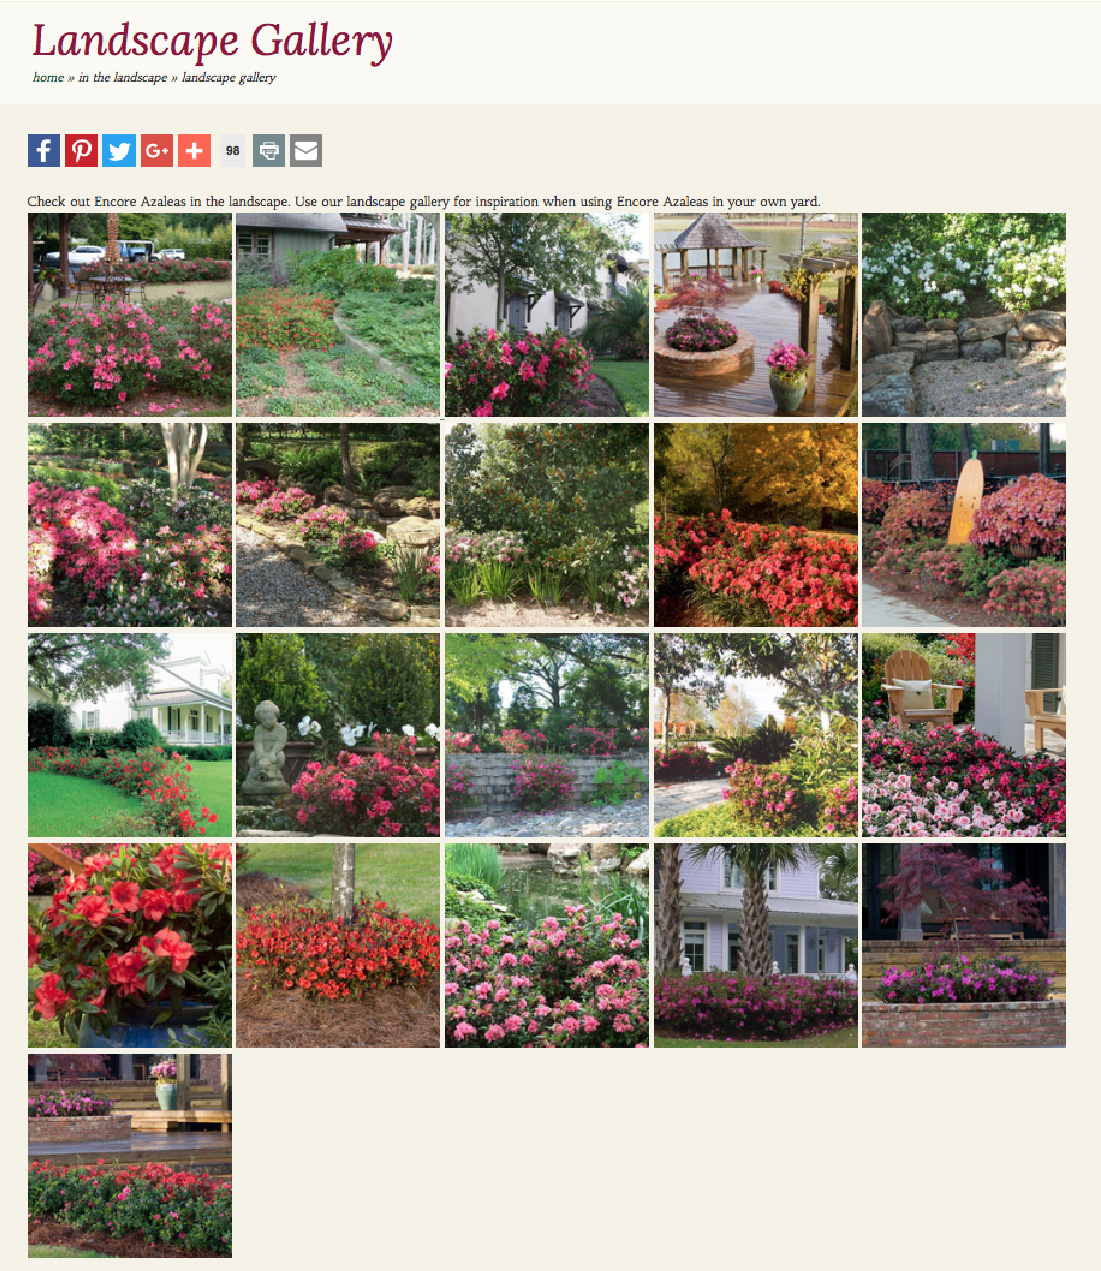
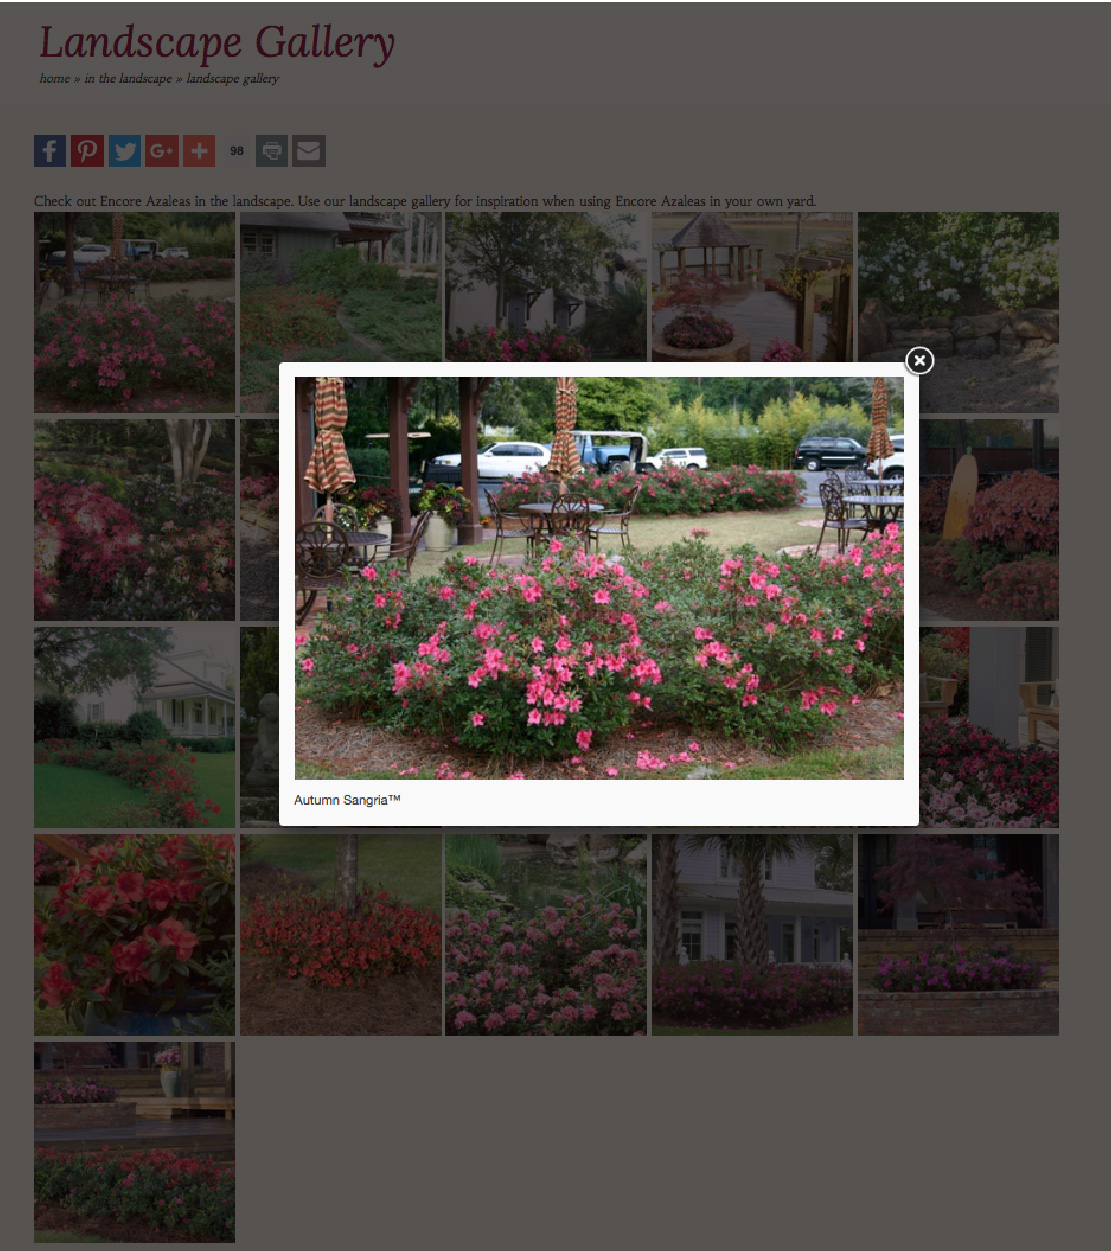
Encore Azalea
Rouviere Media did the web development and Expression Engine content management system for this redo of Encore Azalea's website for Optera Creative, which designed the site.
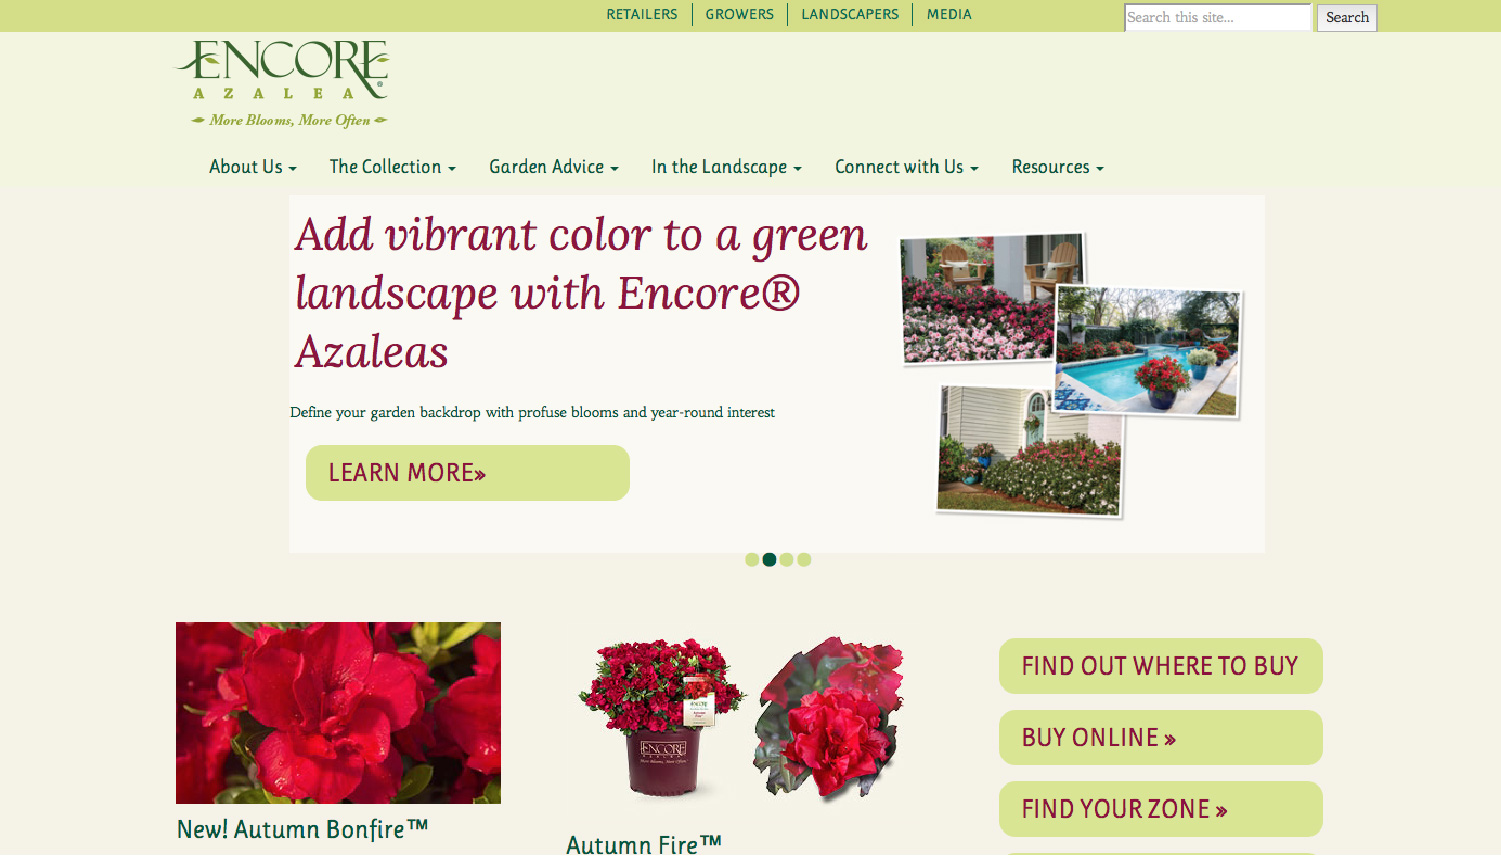
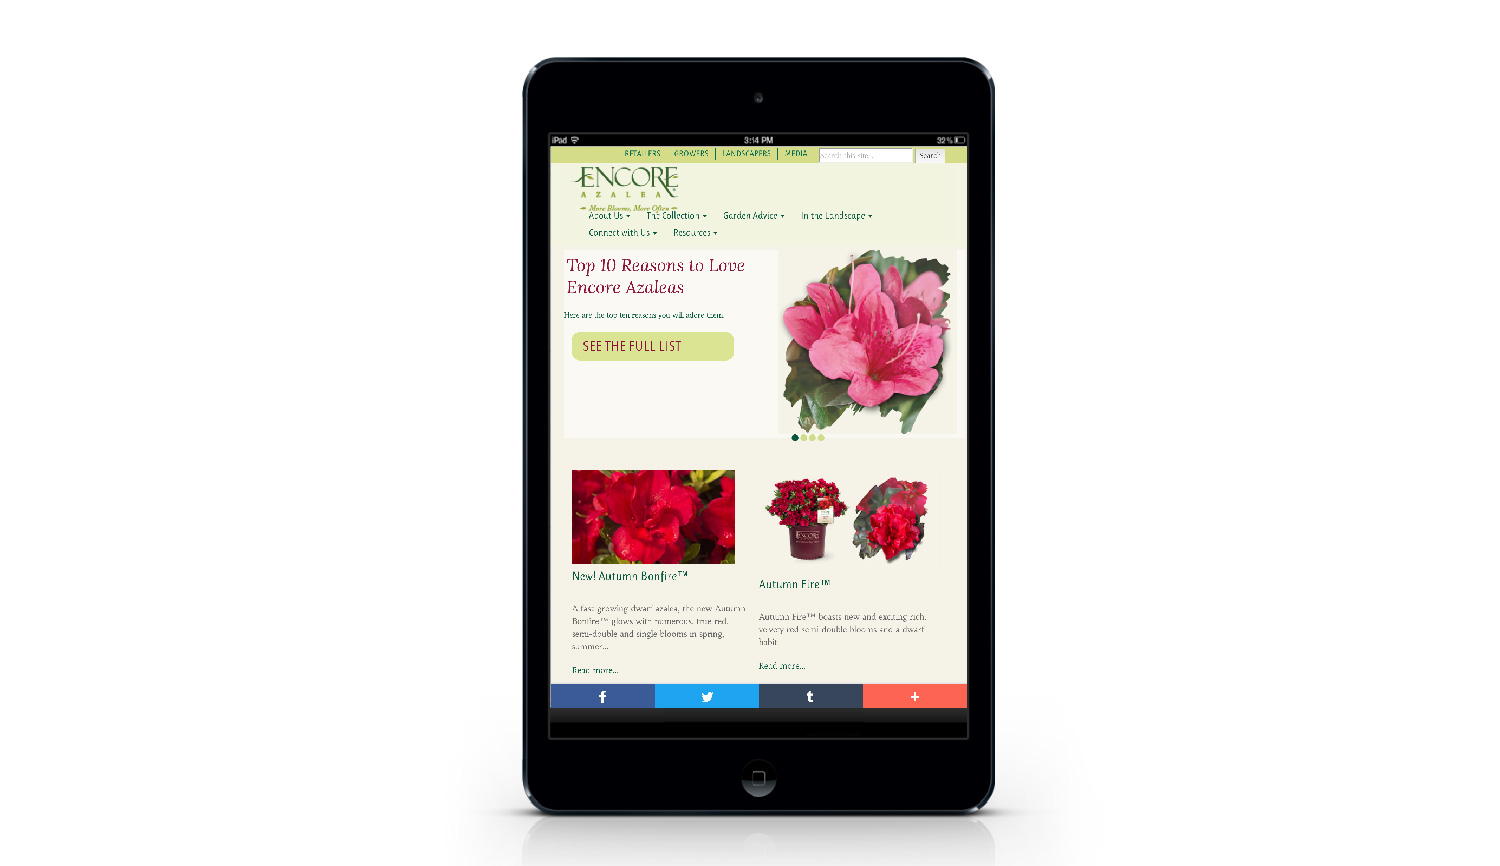
This Expression Engine content management site is a responsive site for all platforms from desktops to tablets and iPhones. It showcases the Encore Azalea, a hardy reblooming variety of azalea with a premier reputation in the plant industry. Encore Azaleas come in 29 different varieties - hence the need for an entire site about them.
Our lead developer, Forrest Anderson, built the site using Bootstrap.
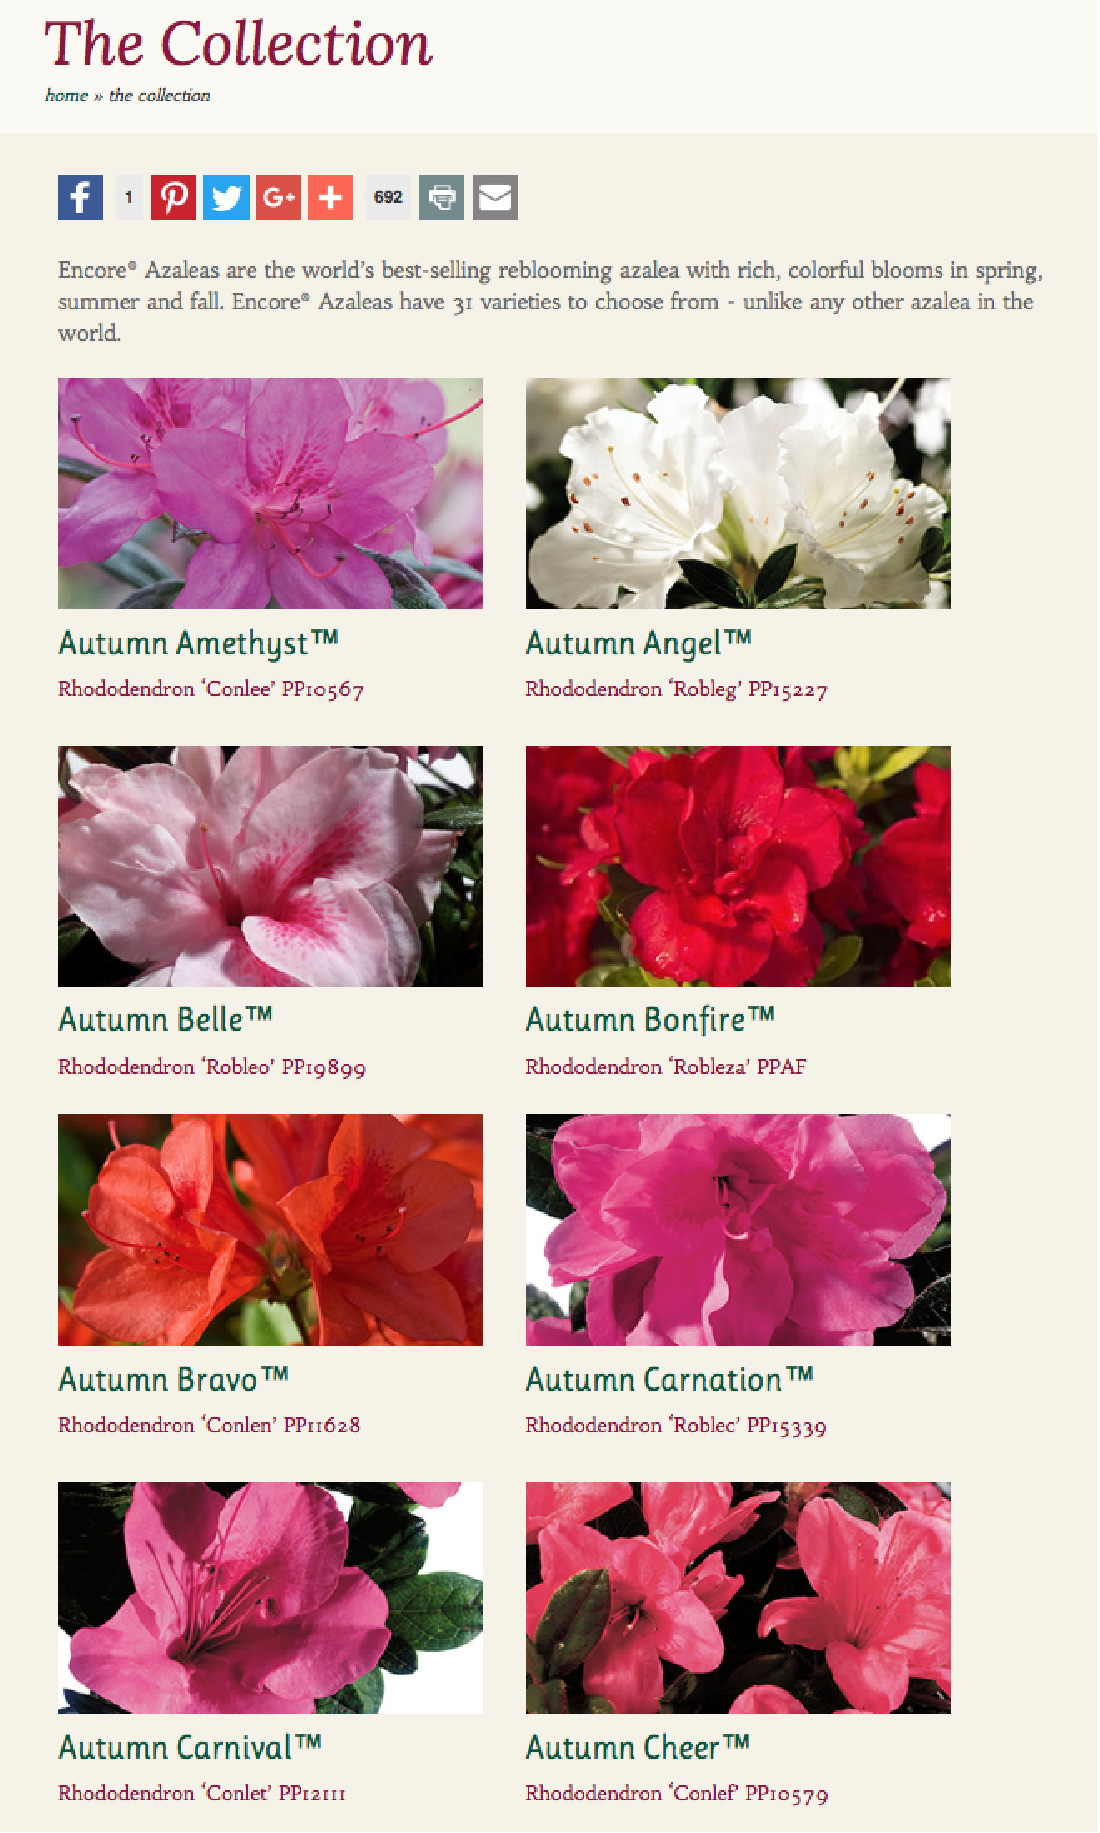
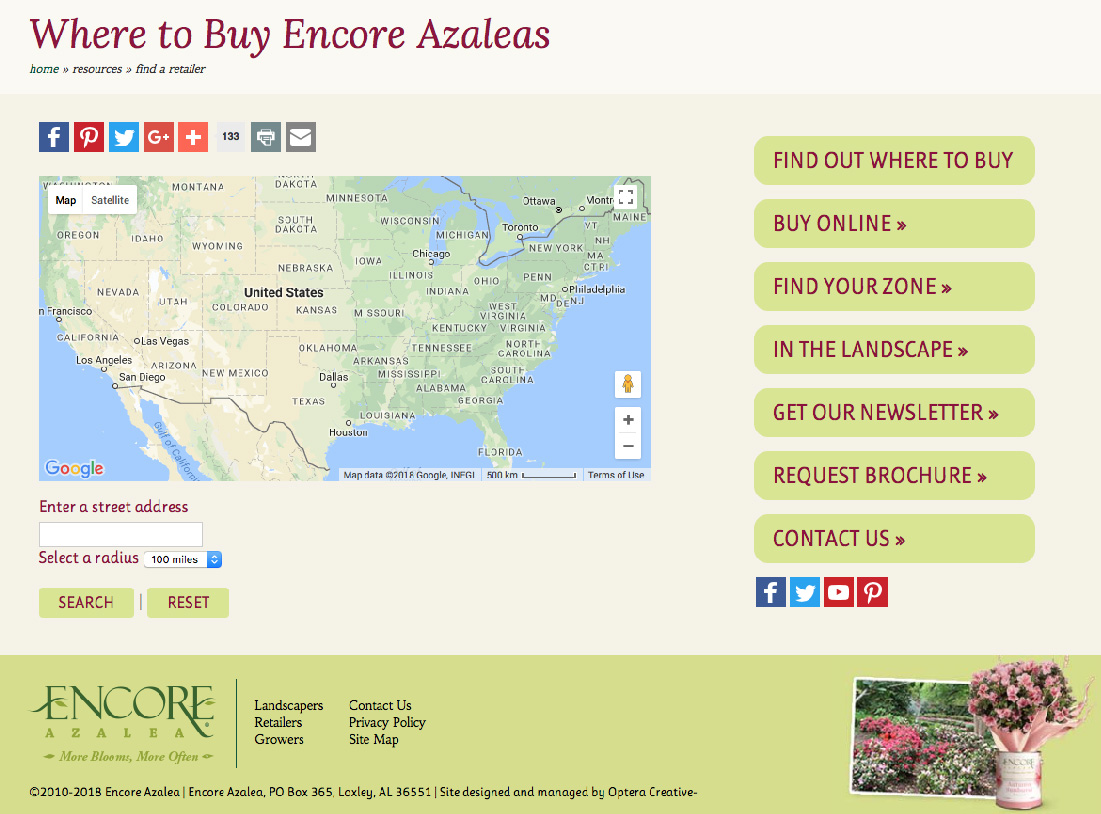
The site’s efficient navigation allows users to quickly find information about how to buy, plant and cultivate Encore Azaleas. Its collection helps users to choose azaleas and is sortable by color and size.
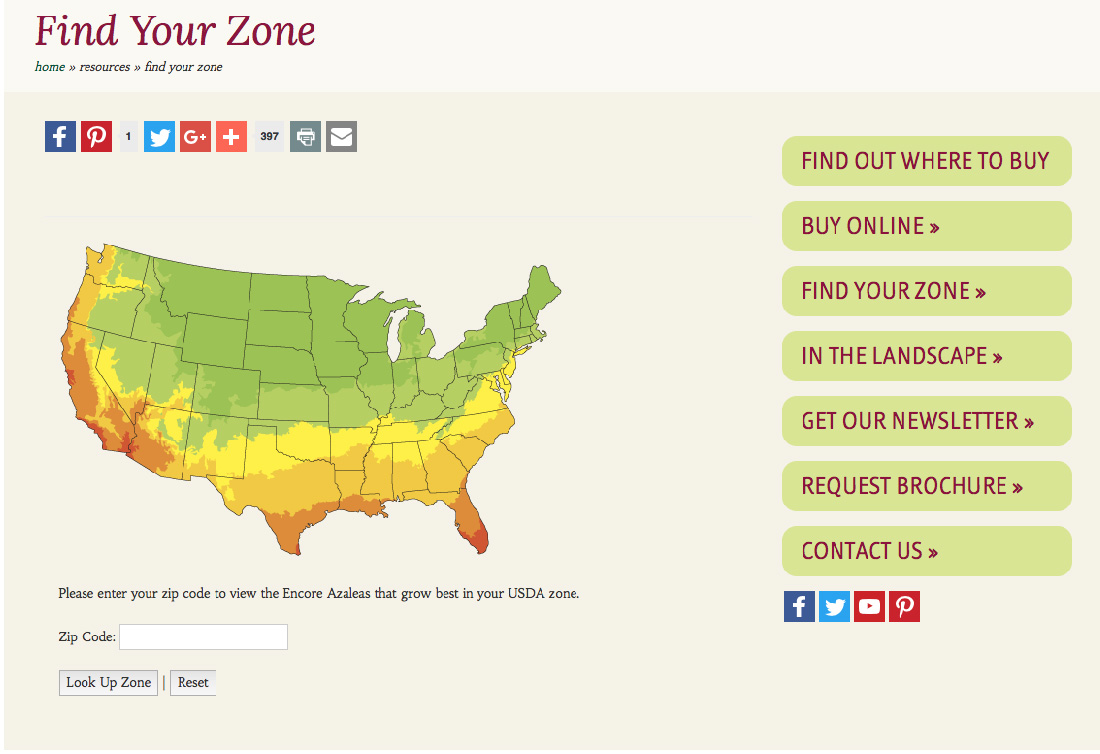
Forrest built two geolocator infographics show ingusers where to buy Encore Azaleas in their area and helping them find recommended Encore Azaleas for their zone.
He also built a Landscape Gallery to help azalea growers get ideas for how to design their gardens.
Kirkland Museum of Fine and Decorative Art
Rouviere Media did Expression Engine content management development for the Kirkland Museum of Fine and Decorative Art website.
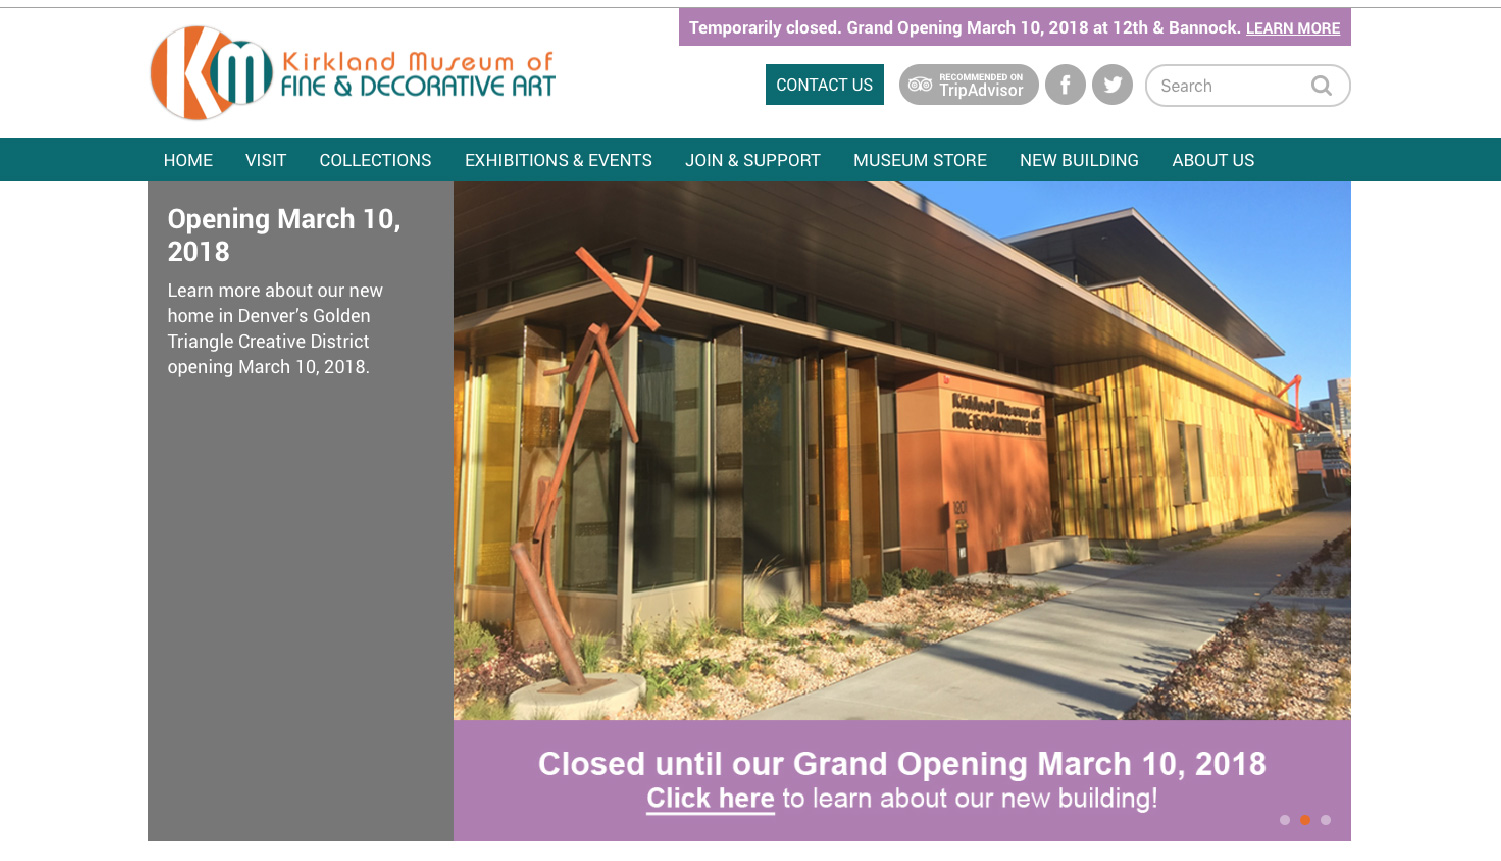
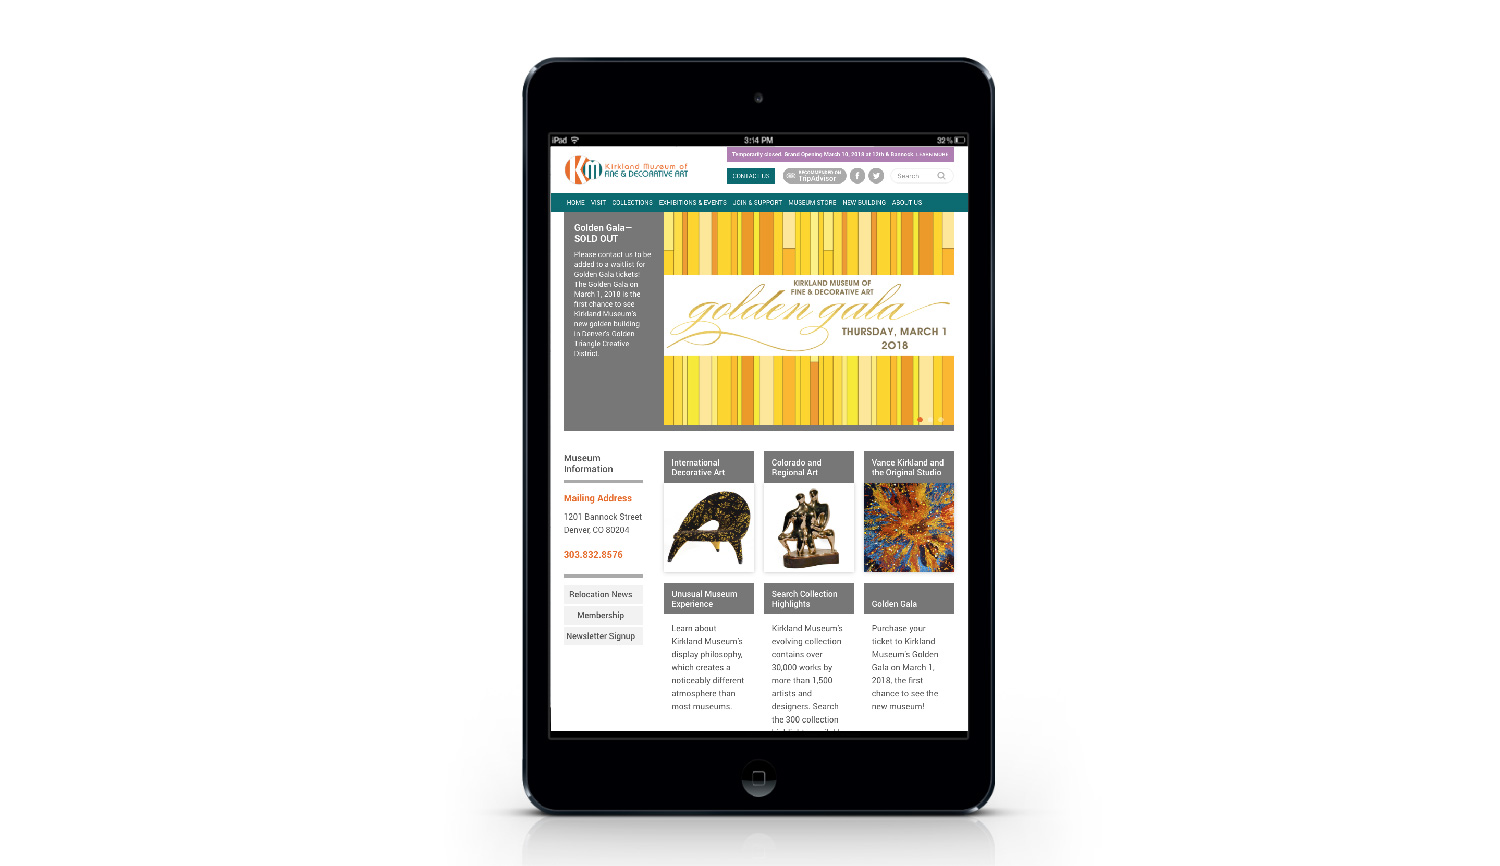
Rouviere Media did this website work for Howard Development.
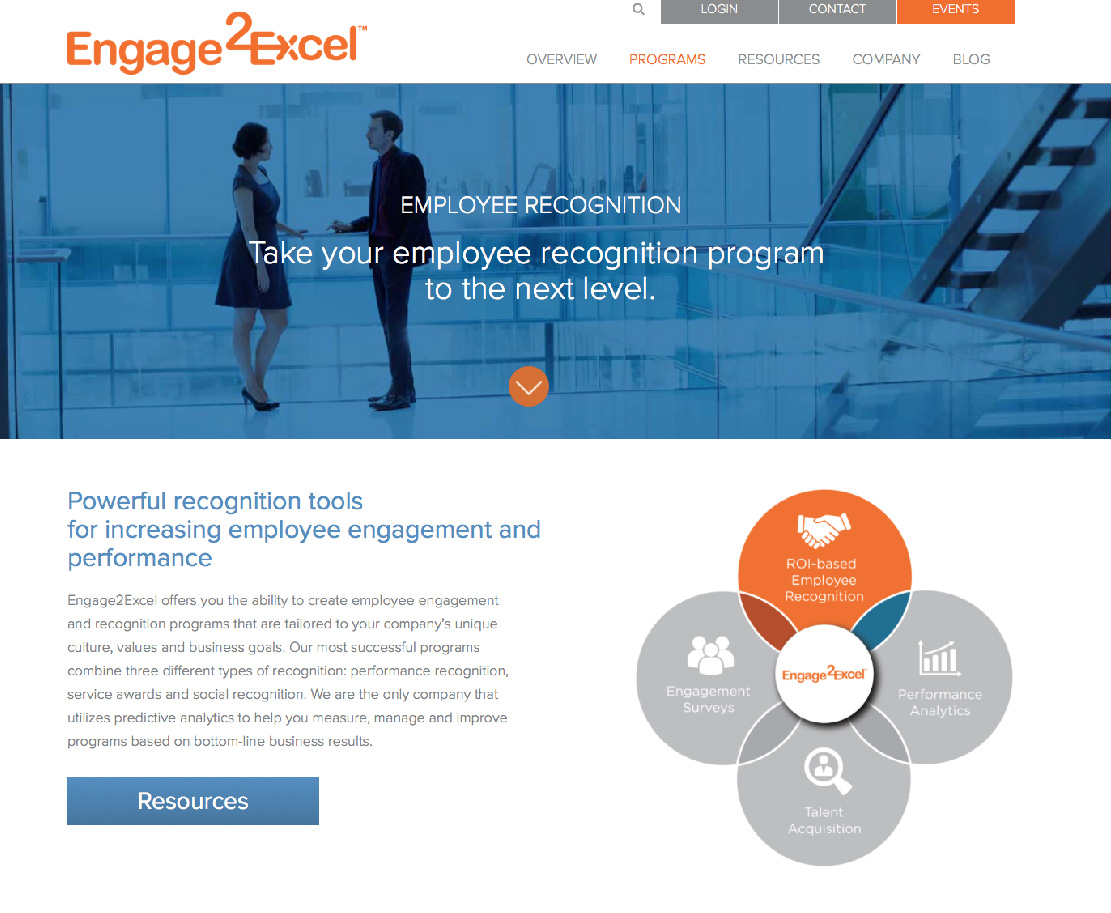
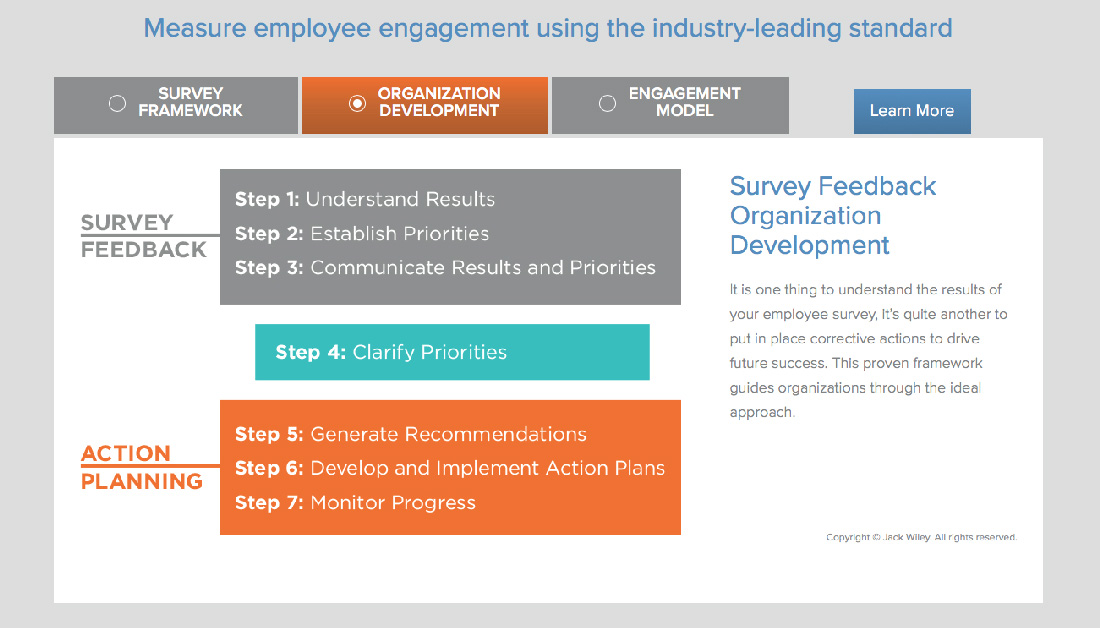
Engage2Excel
Rouviere Media did the Wordpress development for this colorful and informative site for Engage2Excel, an employee recognition compan, under the direction of Howard Development.
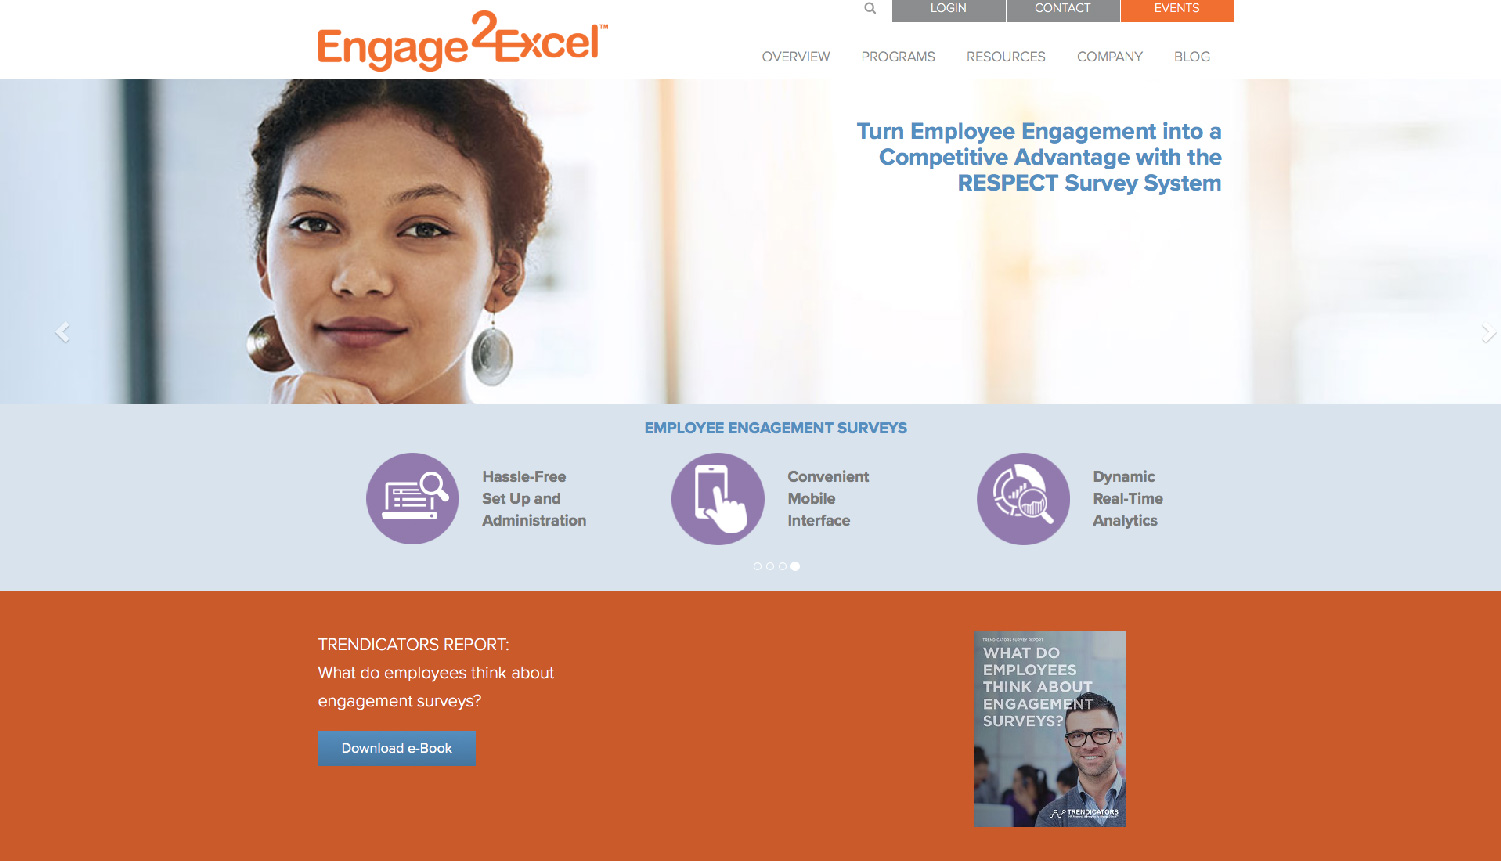
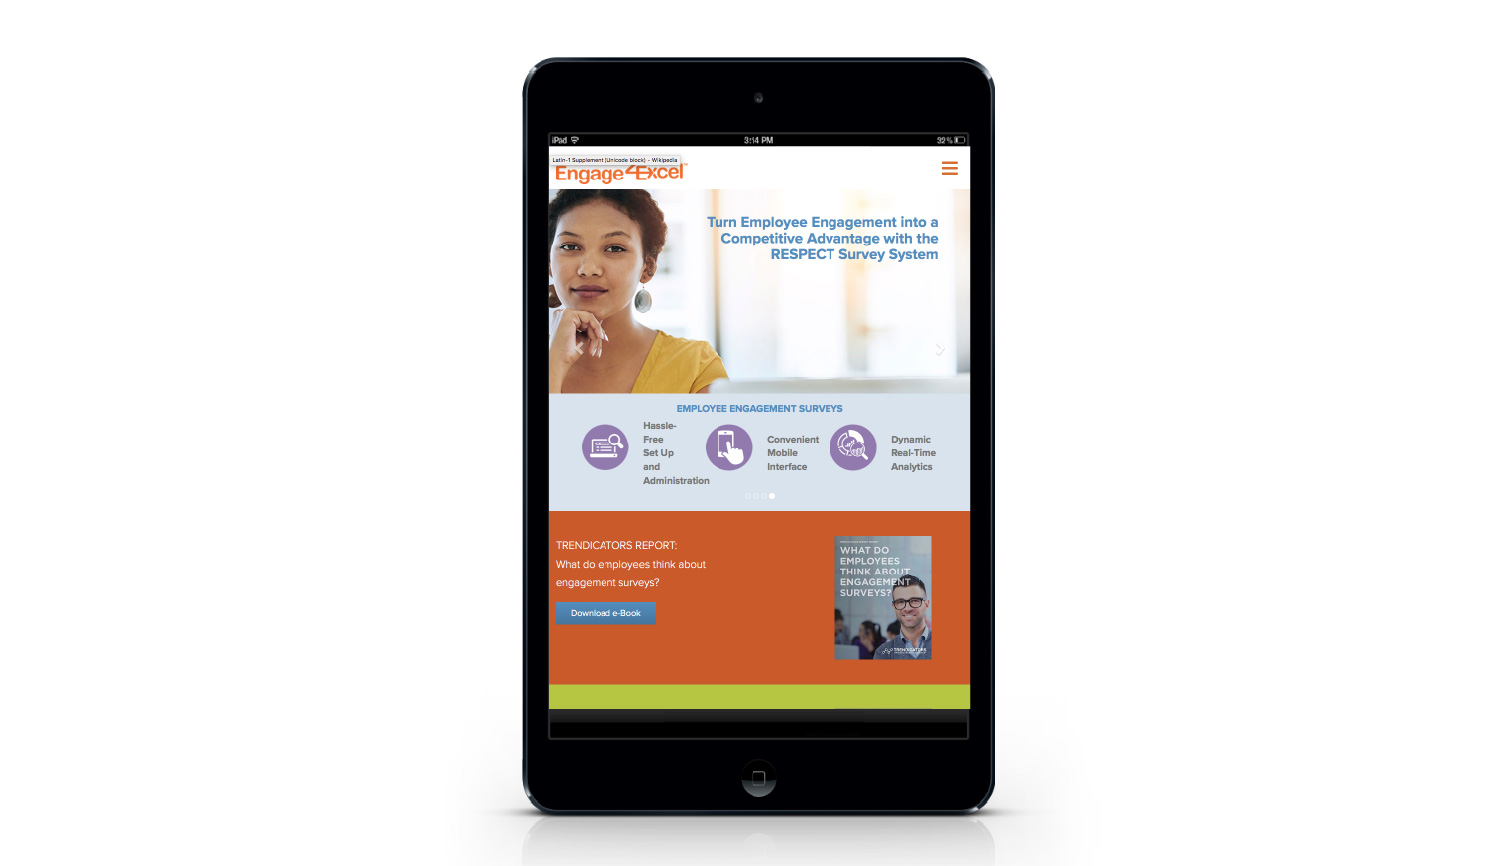
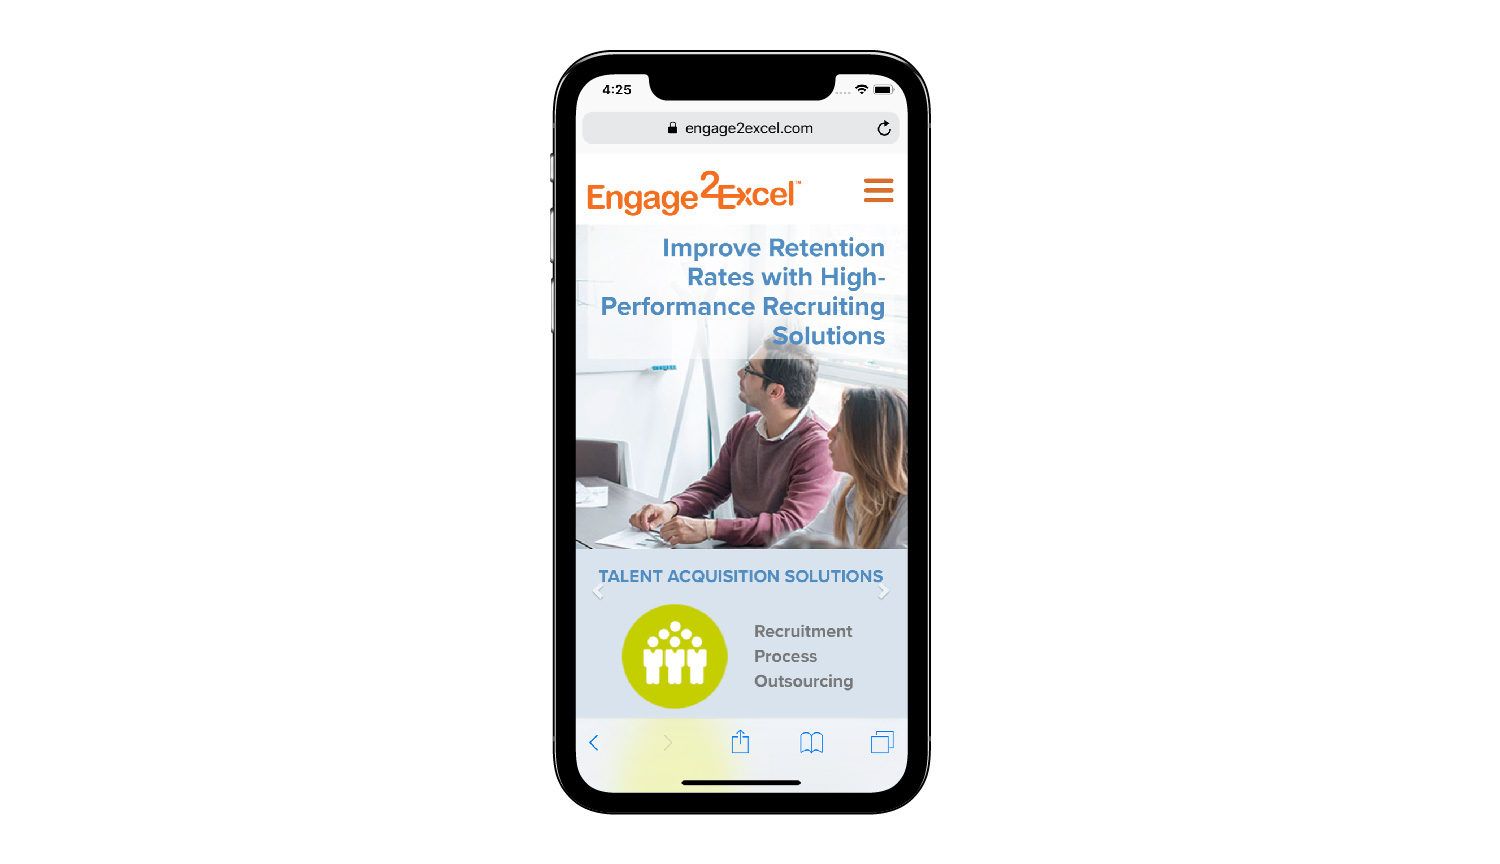
Our lead developer, Forrest Anderson, worked on the site, which is chockful of talent acquisition and recognition information and solutions.
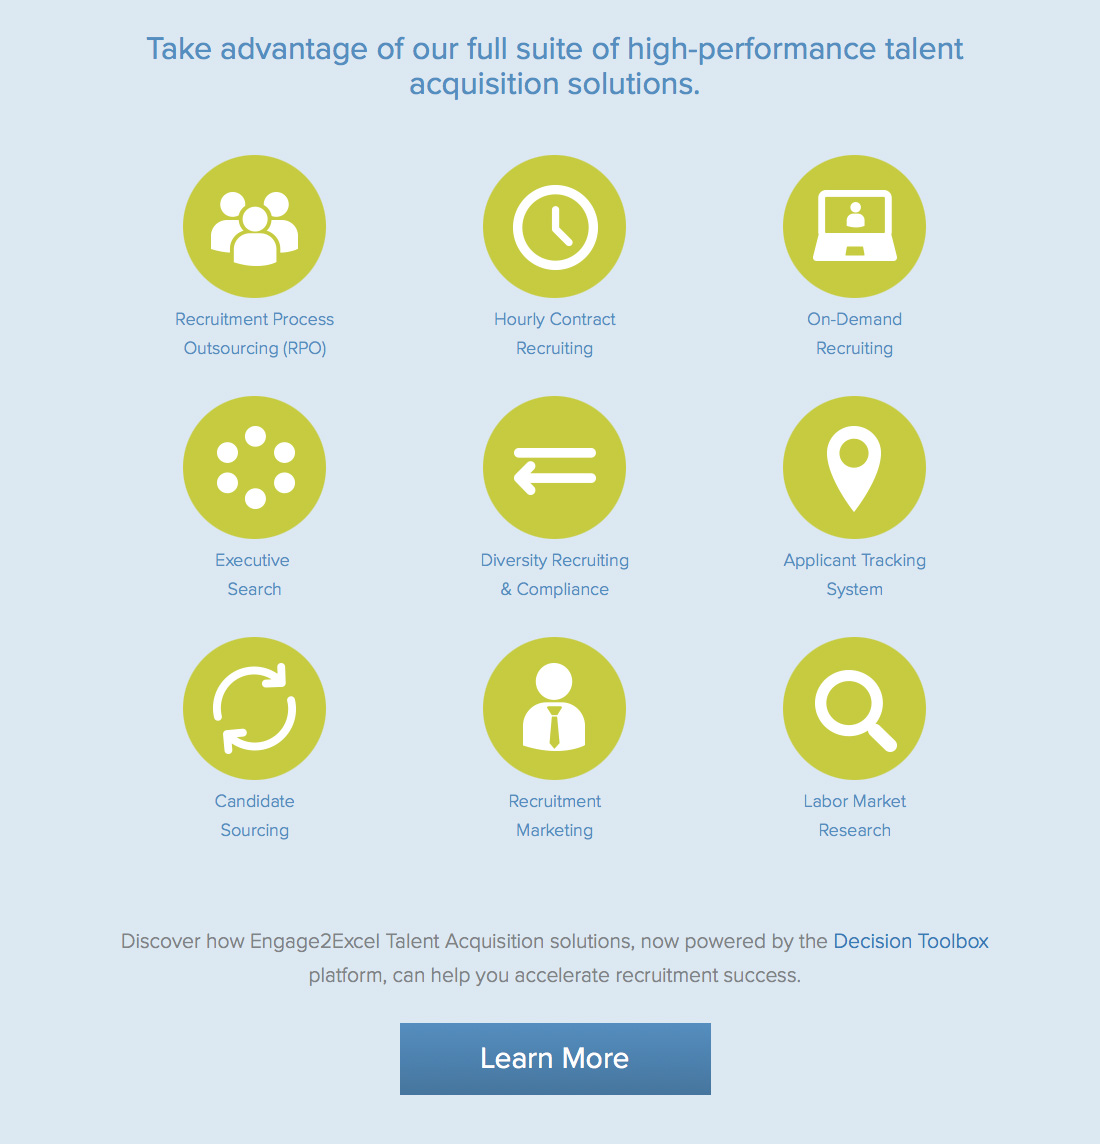
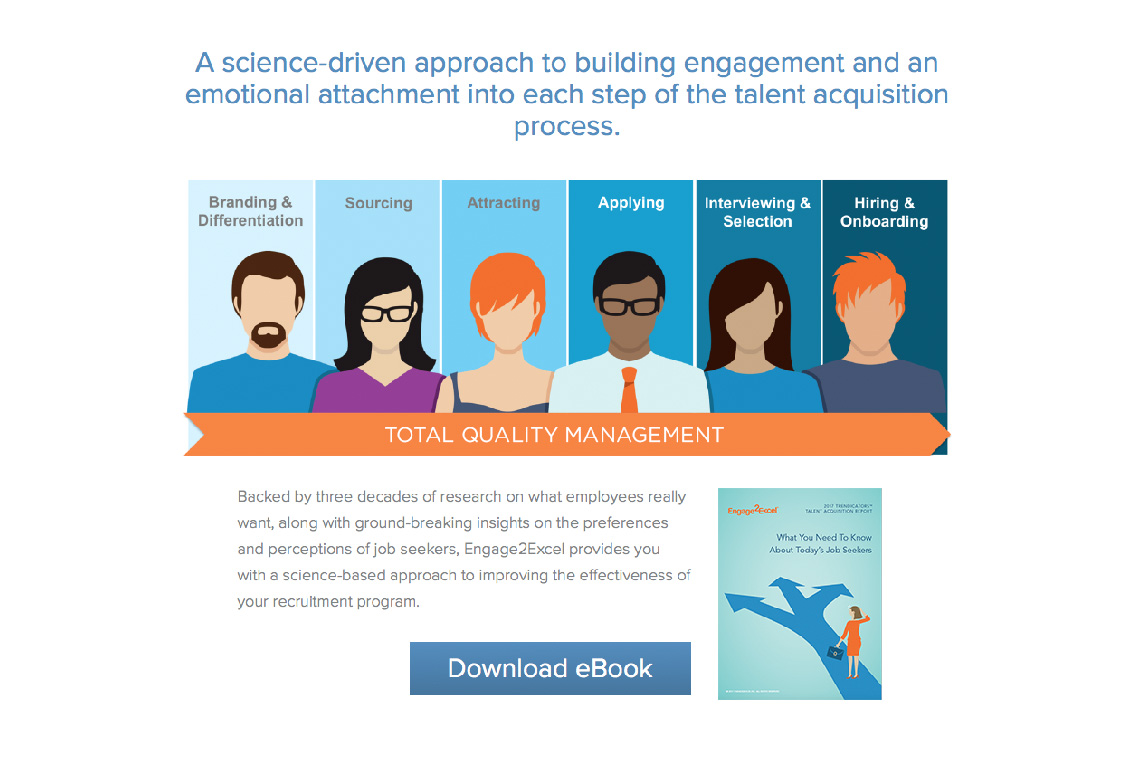
Among its features are infographic slideshows such as this one.
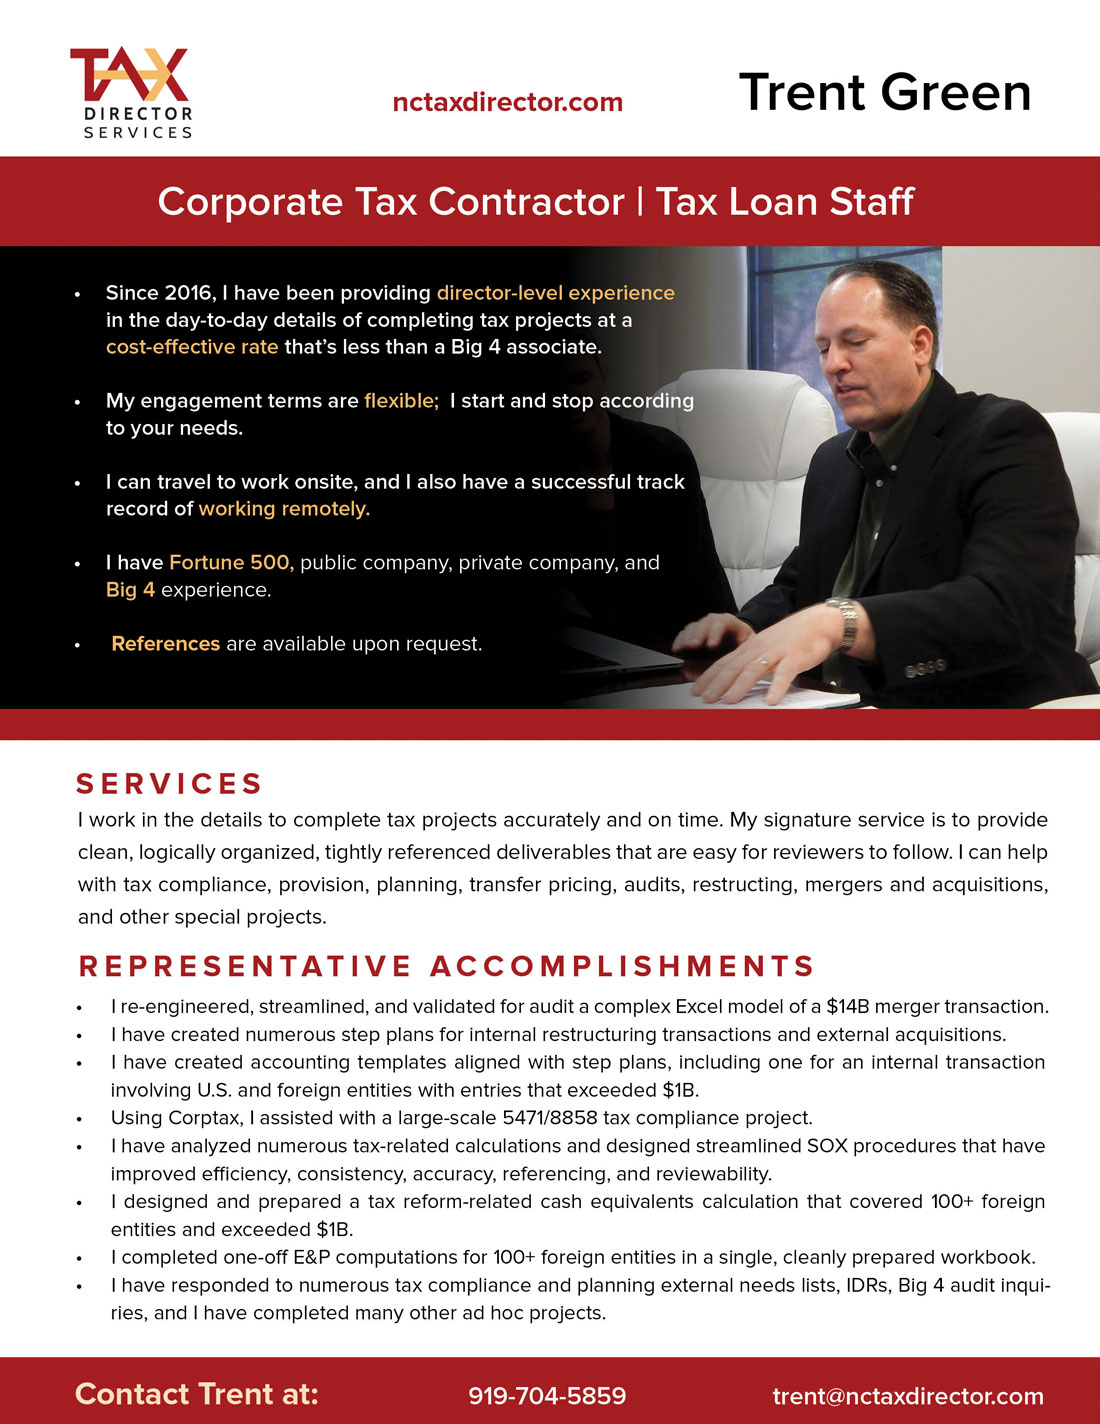
Tax Director Services
Rouviere Media designed, developed and maintains this Expression Engine website for Tax Director Services, a North Carolina company that provides tax director services to Fortune 500 and other companies.
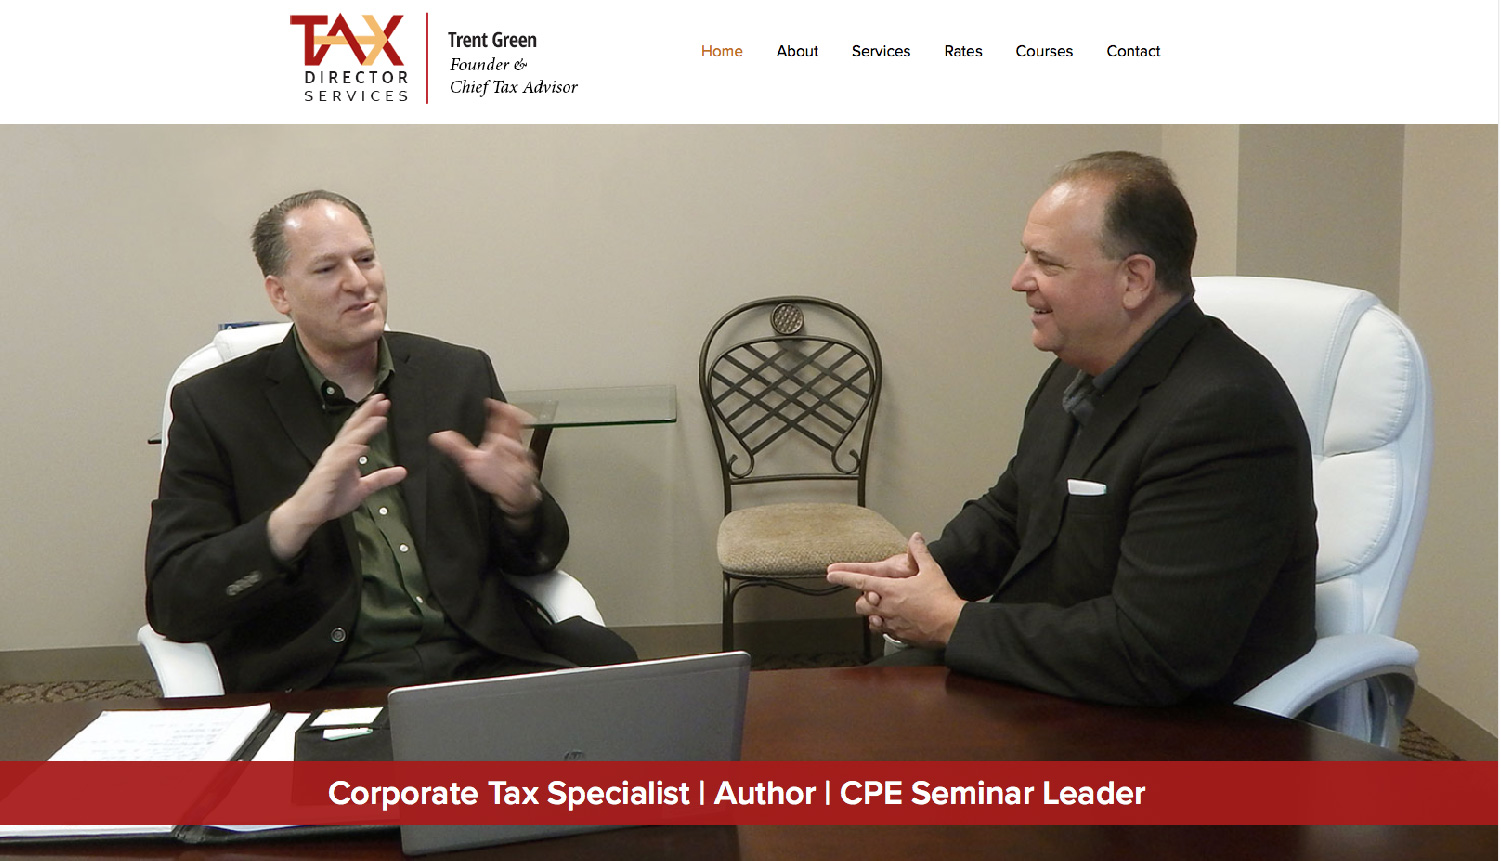
When the owner of Tax Director Services, Trent Green, launched this business, our lead designer Donna Rouviere Anderson worked extensively wtih him to design a logo, website and other branding materials. She designed the website as well as an integrated media package that included a logo, PowerPoint presentation template, letterhead and business card.
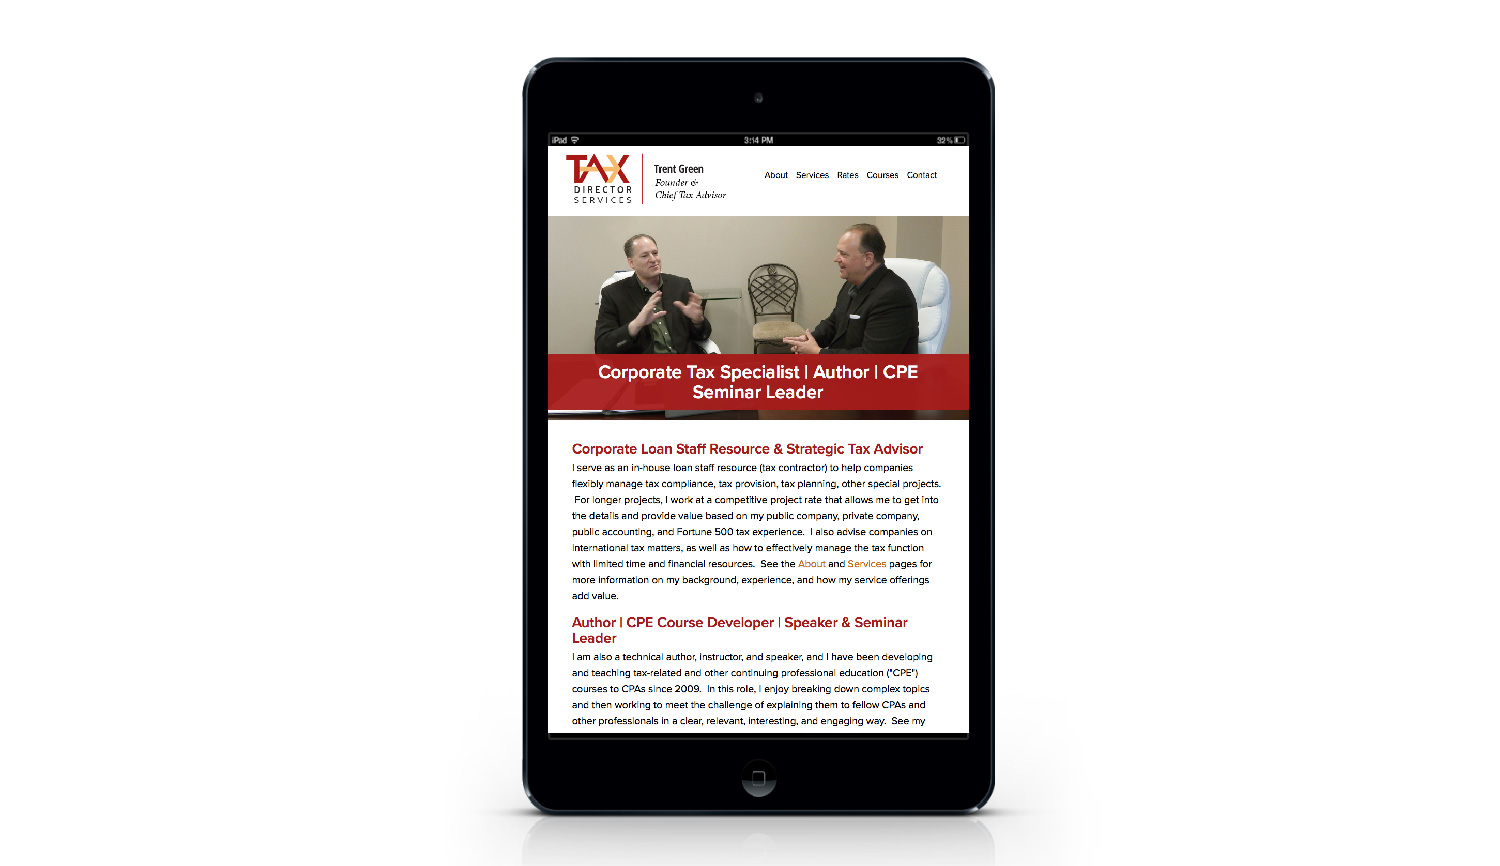
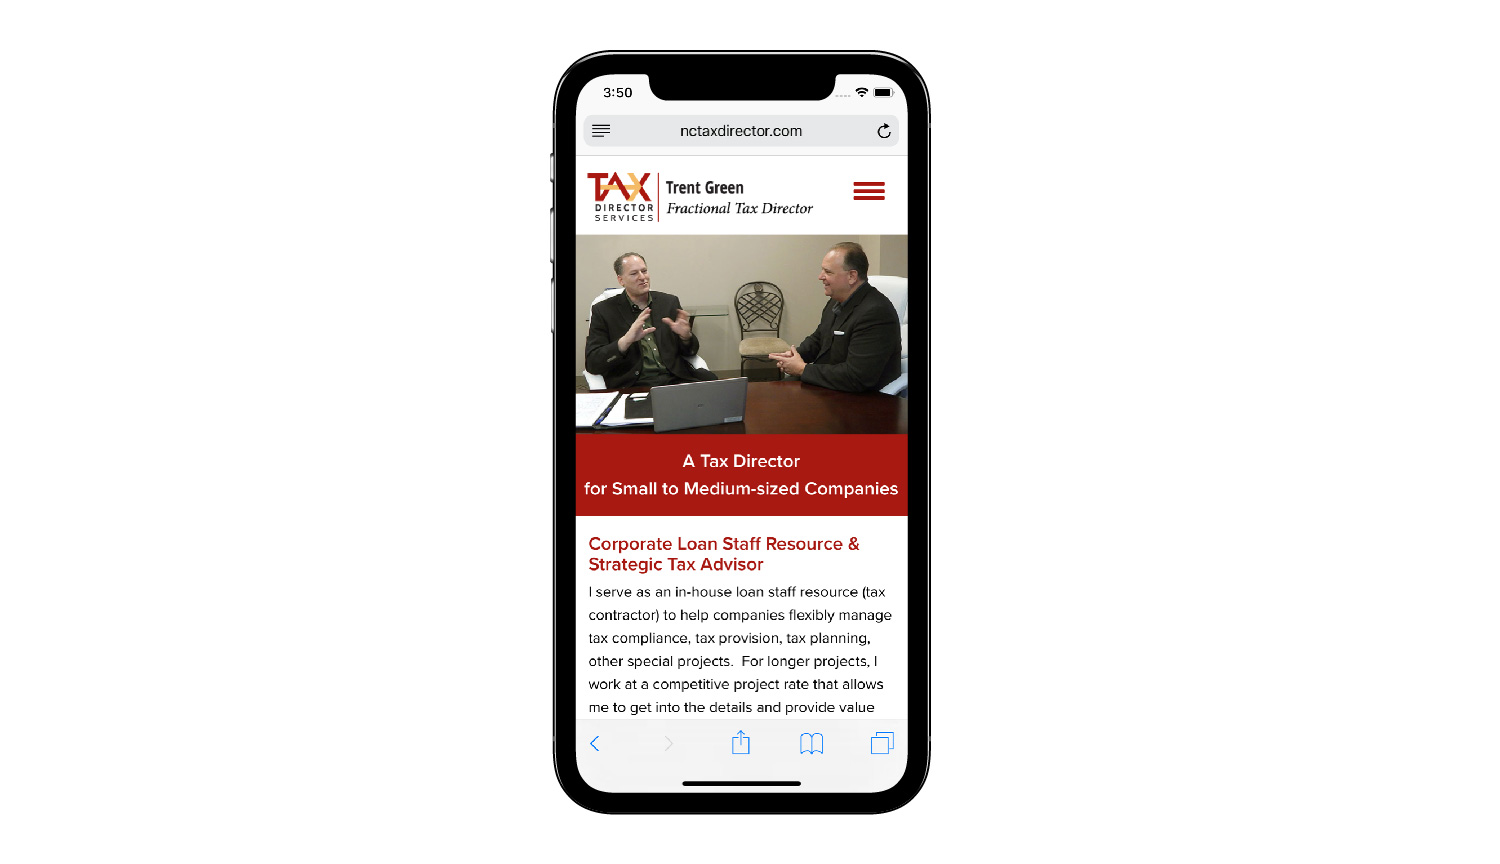
Our lead developer, Forrest Anderson, developed the Expression Engine website using Bootstrap. In the intervening decade, the business has flourished and Rouviere Media has implemented many changes to reflect that.
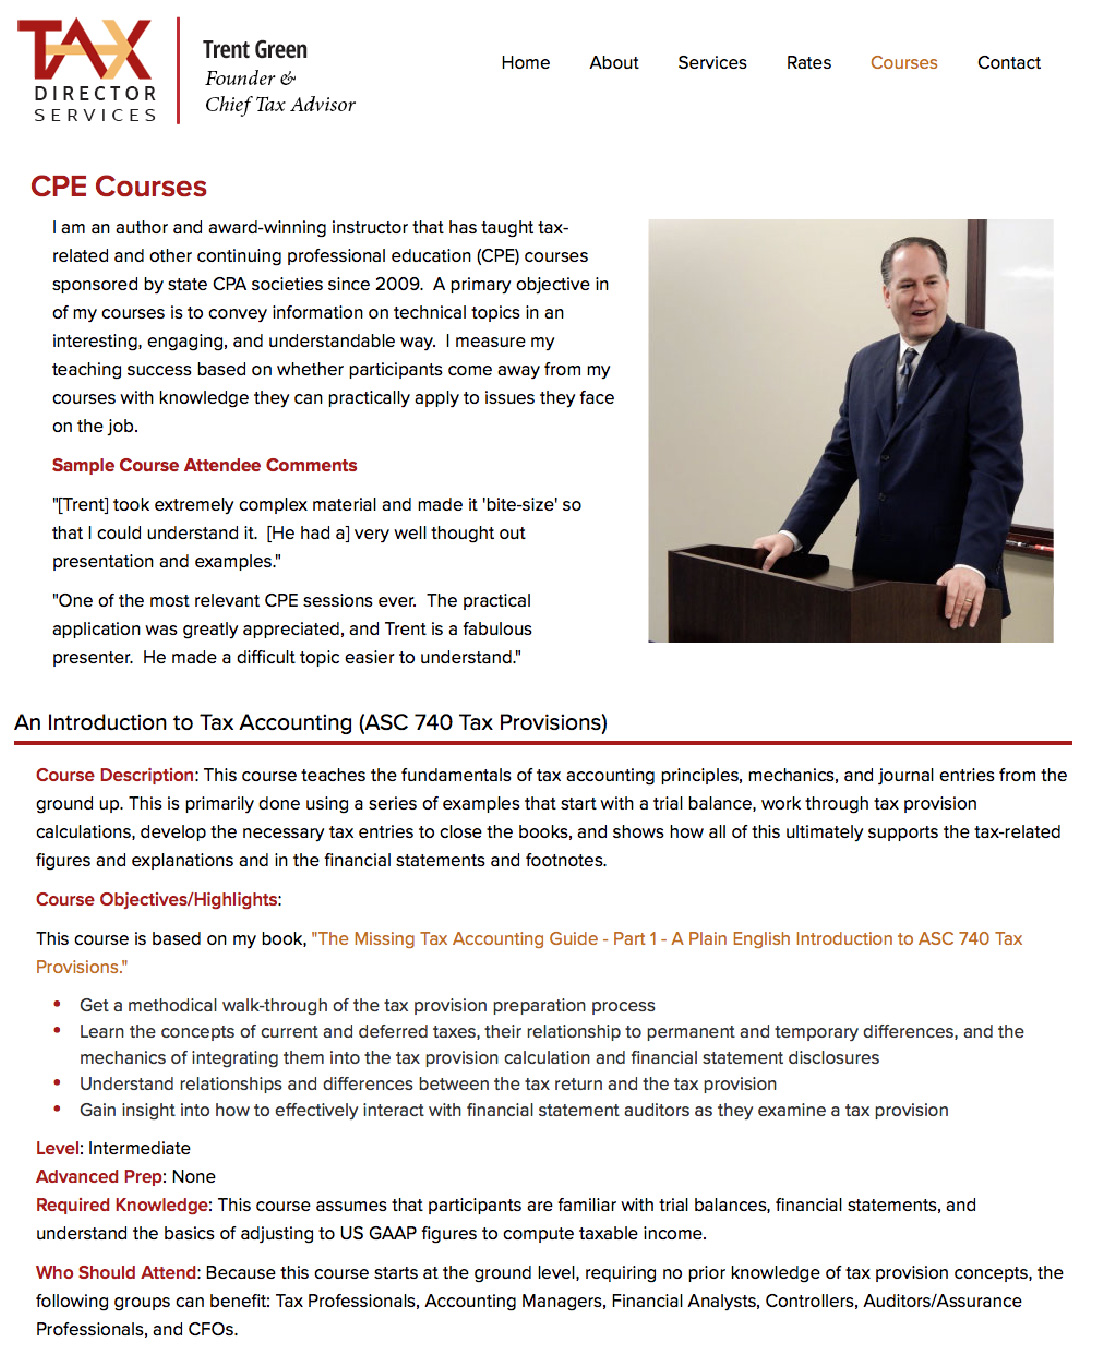
Donna Rouviere Anderson also designed the book cover for Trent Green's book, The Missing Tax Accounting Guide, which has been used as a textbook in Trent Green's CPE courses for tax professionals and has assisted Trent Green with research on aspects of CPE course requirements for instructors.
She also has designed other marketing materials for the business.
The site includes a section of information about courses for tax professionals.
Donna Rouviere Anderson designed this marketing flyer for the business.
Savannah 100 Foundation
Rouviere Media did the web development for this site for the Savannah 100 Foundation, a non-profit in Savannah, Georgia.
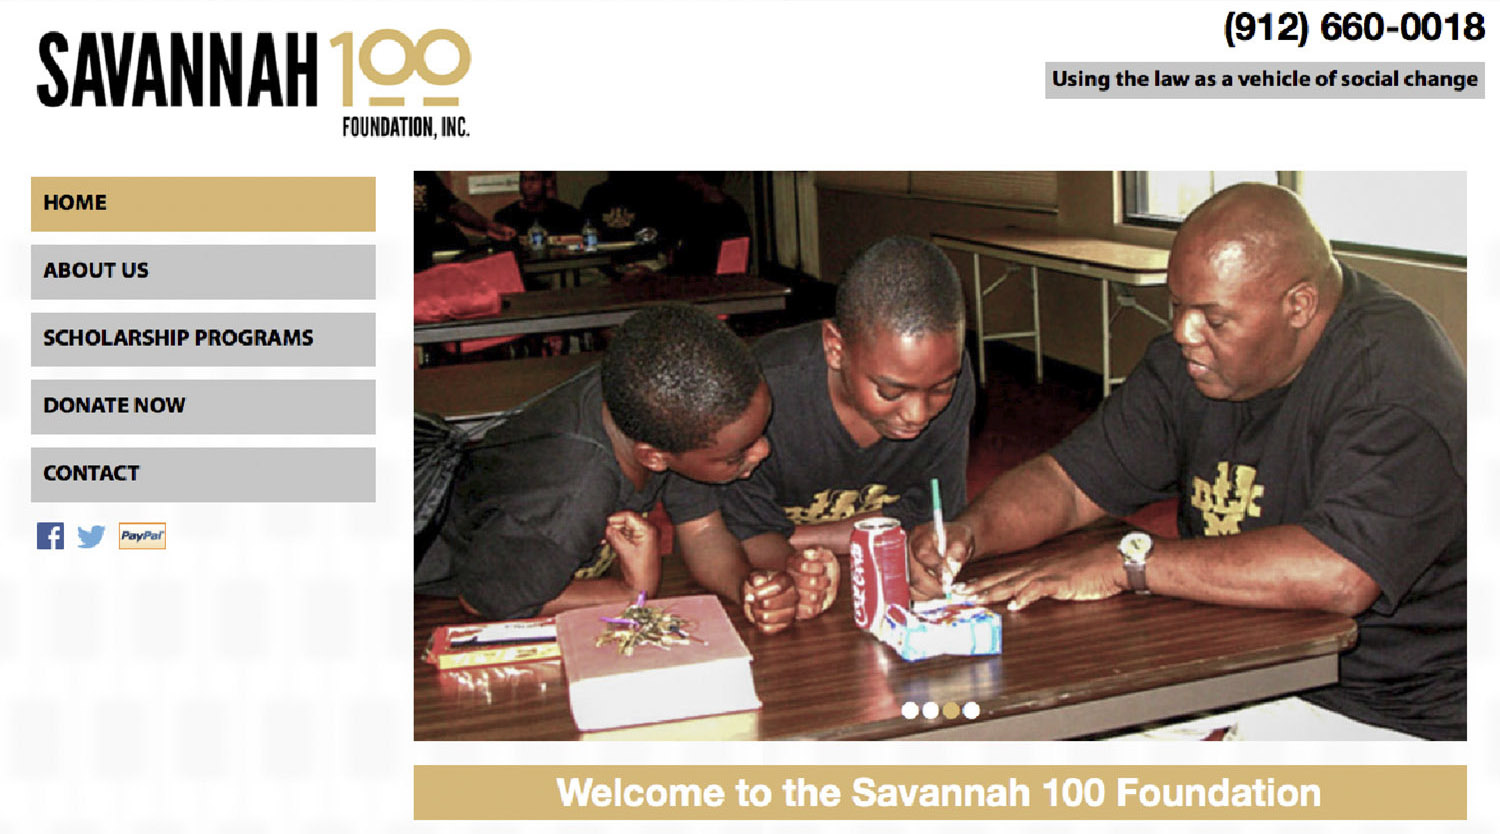
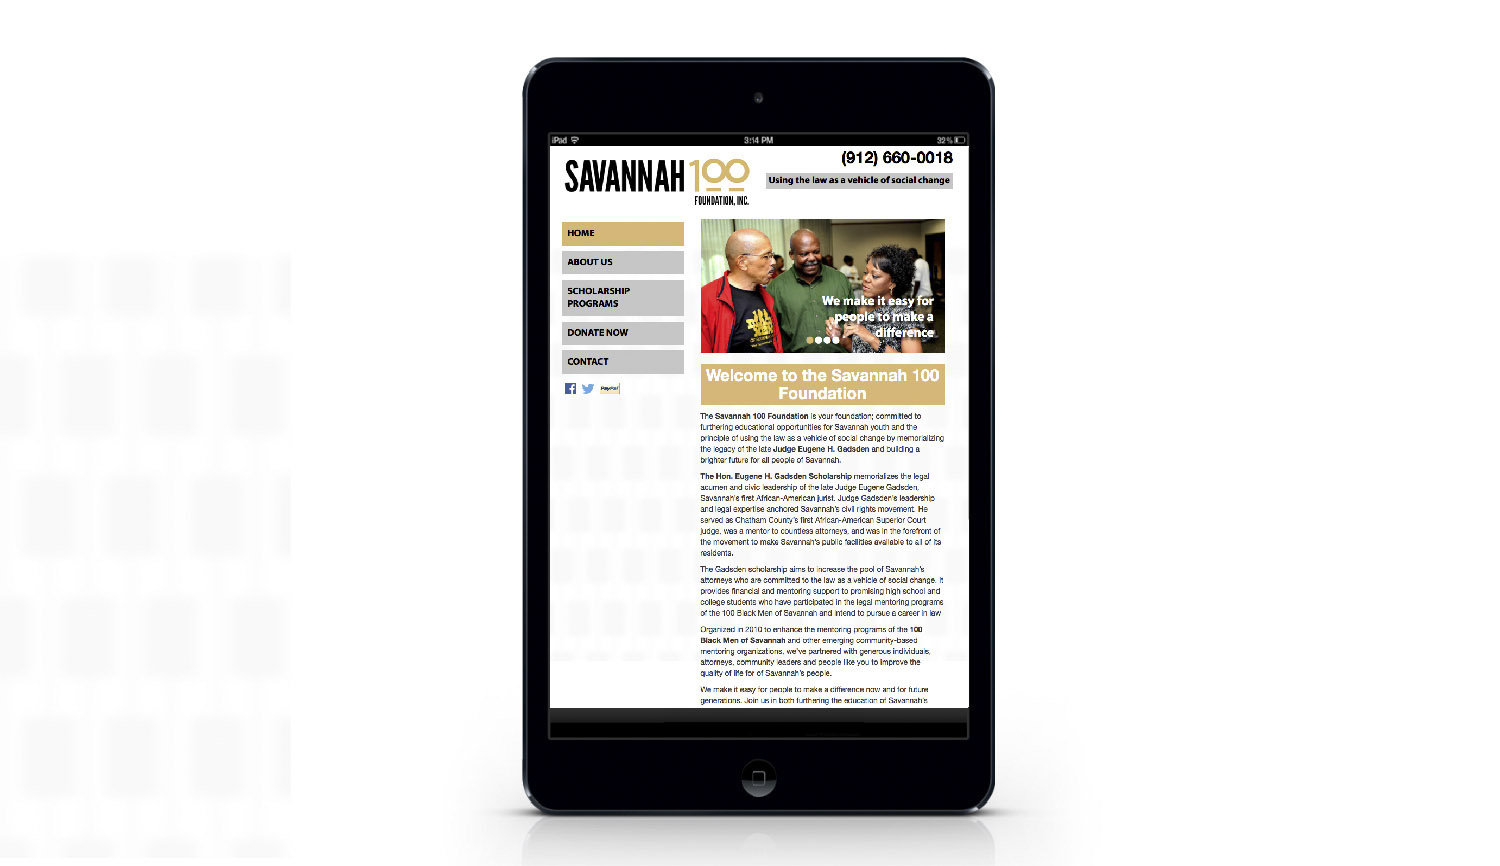
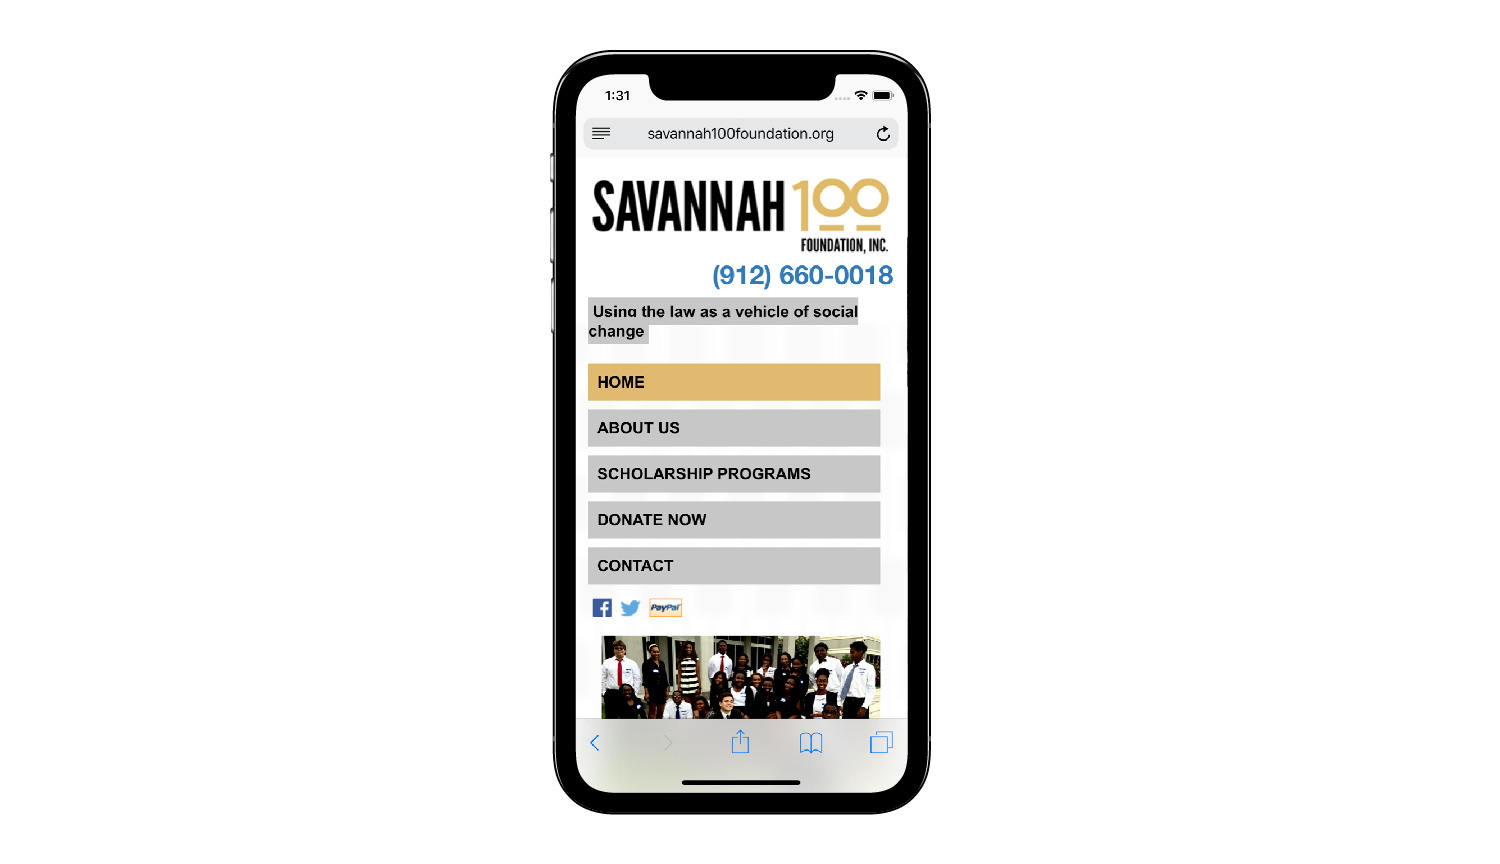
The Savannah 100 Foundation is an organization to help improve the quality of life for children in Savannah, Georgia.
Our lead developer, Forrest Anderson, built the site for eMarketSouth, which did the design work.
Cameron Clinic of Oriental Medicine
Rouviere Media did the design and development for this website for the Cameron Clinic of Oriental Medicine in Wilmington, North Carolina.
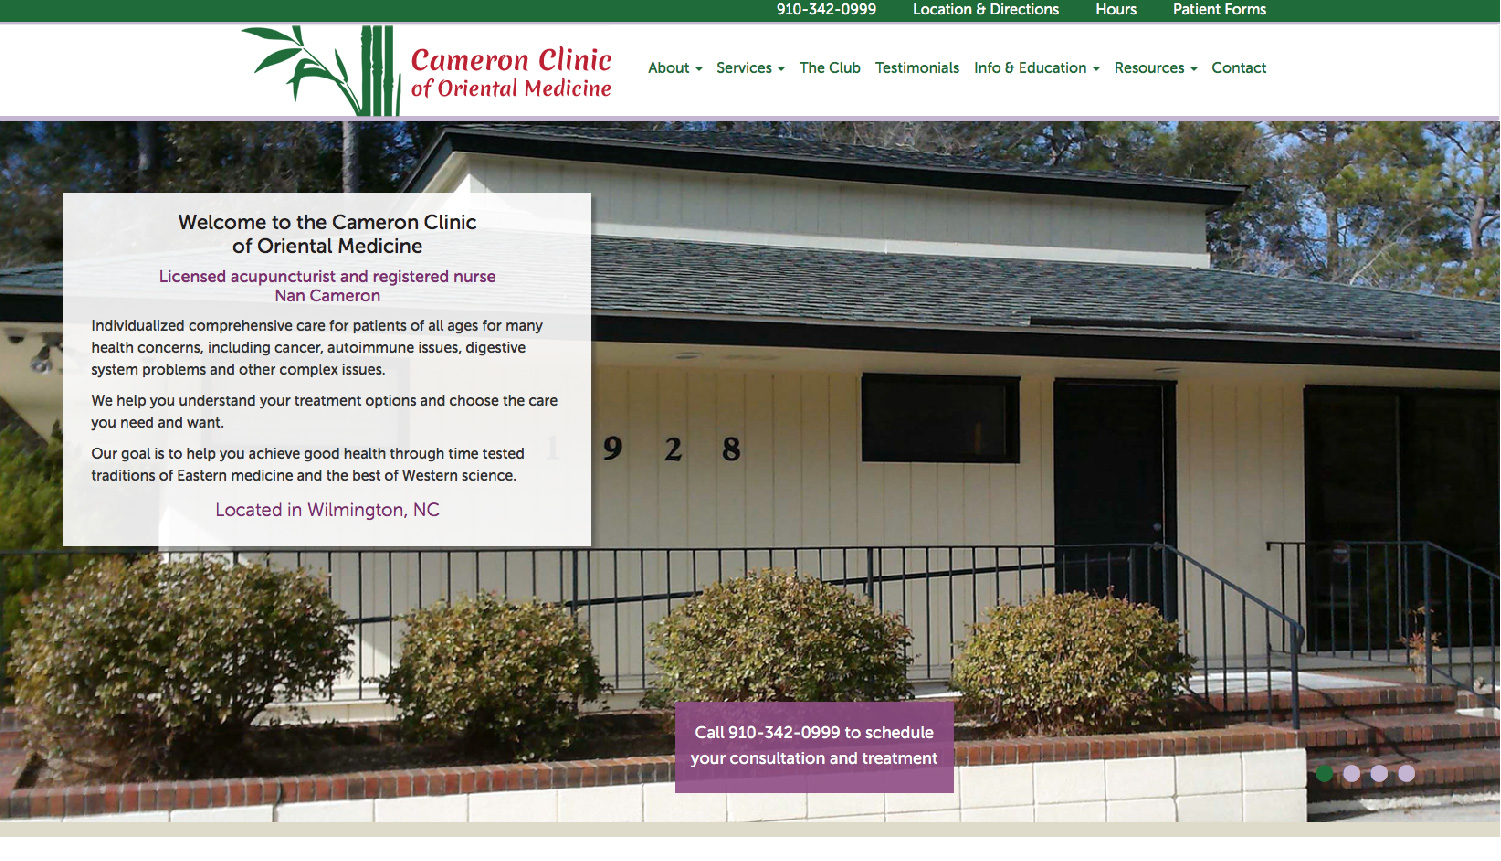
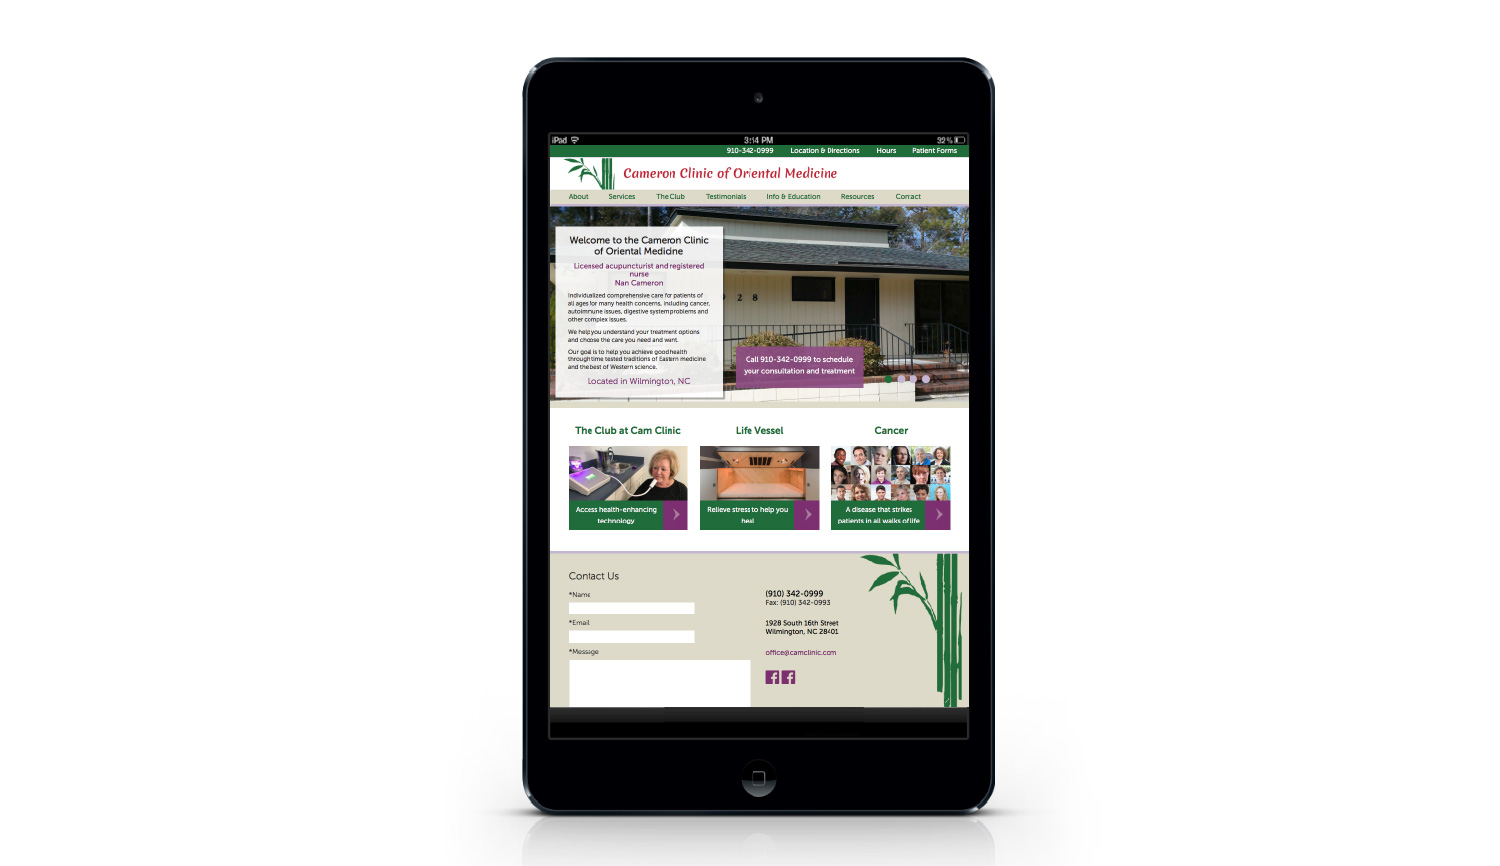
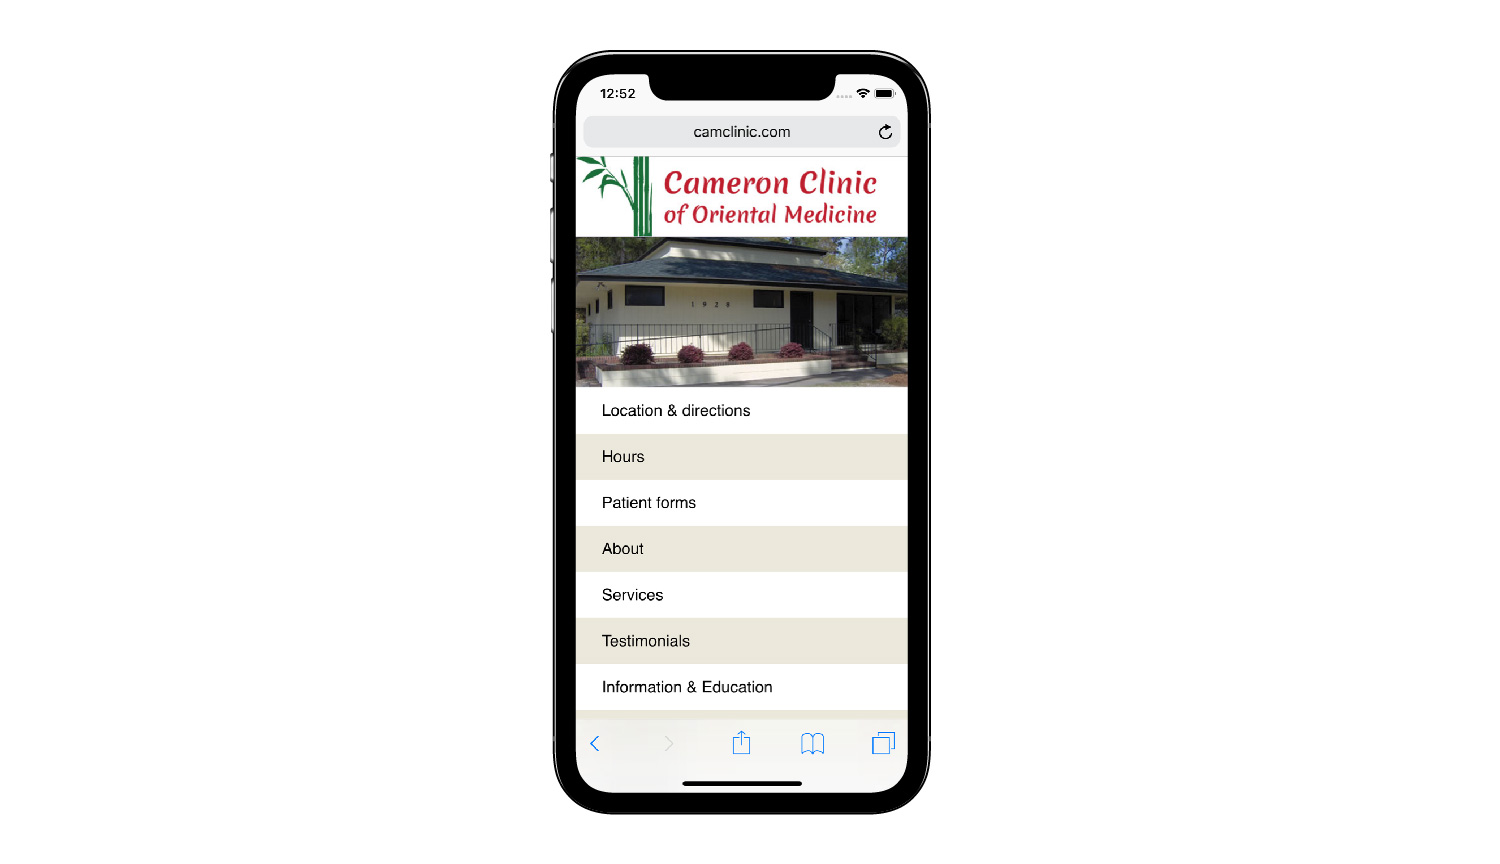
The website is a responsive Bootstrap design with an Expression Engine content management system that enables non-technical staff to update its content. It is a full-service website for a busy health practice. It has a membership section, information about technology used in the clinic, patient forms and other information helpful to patients.
Rouviere Media has maintained the site for more than a decade, during which it has gone through two major design changes and several smaller revisions and upgrades.
Donna Rouviere Anderson, our lead designer, has done the design work for the site and Forrest Anderson, our lead developer, has done the development.
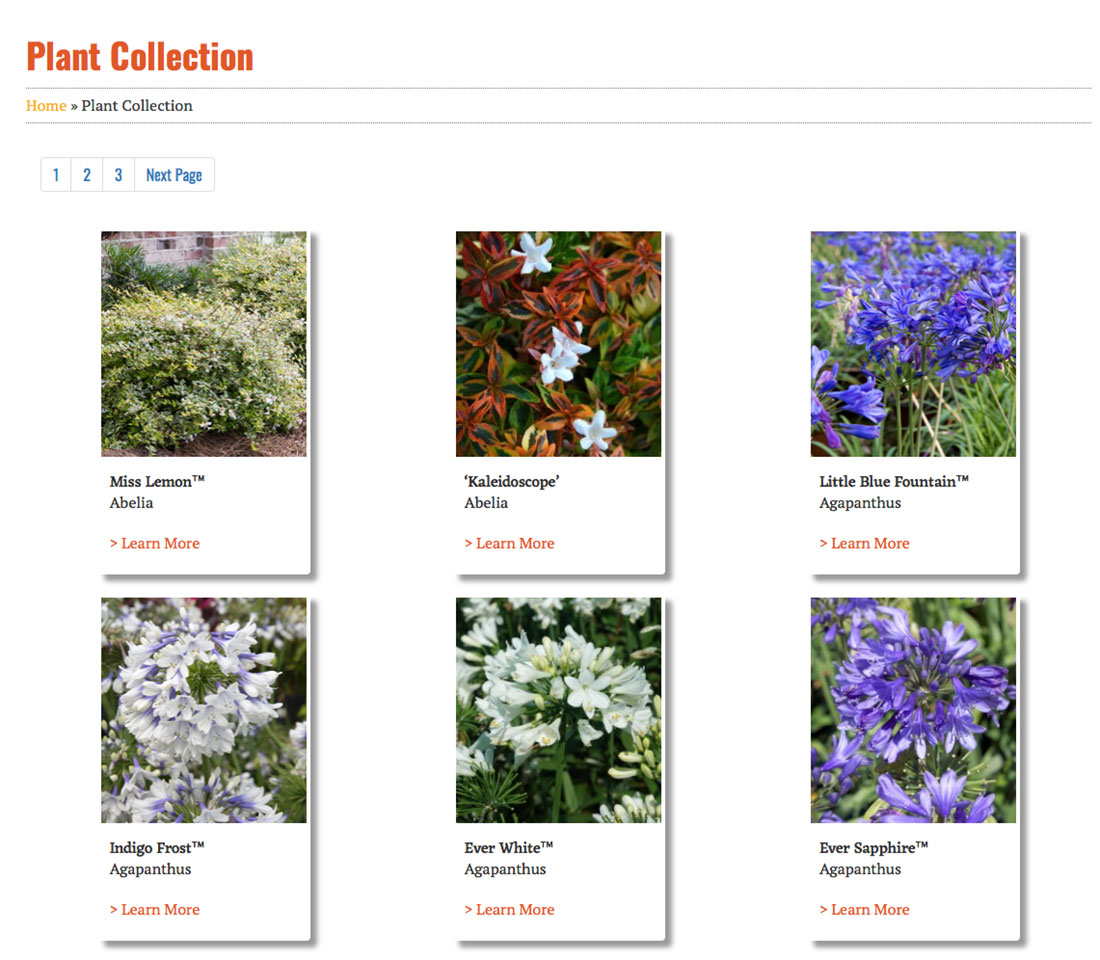
Southern Living Plant Collection
Rouviere Media did the Expression Engine content management system for this robust website for a plant collection.
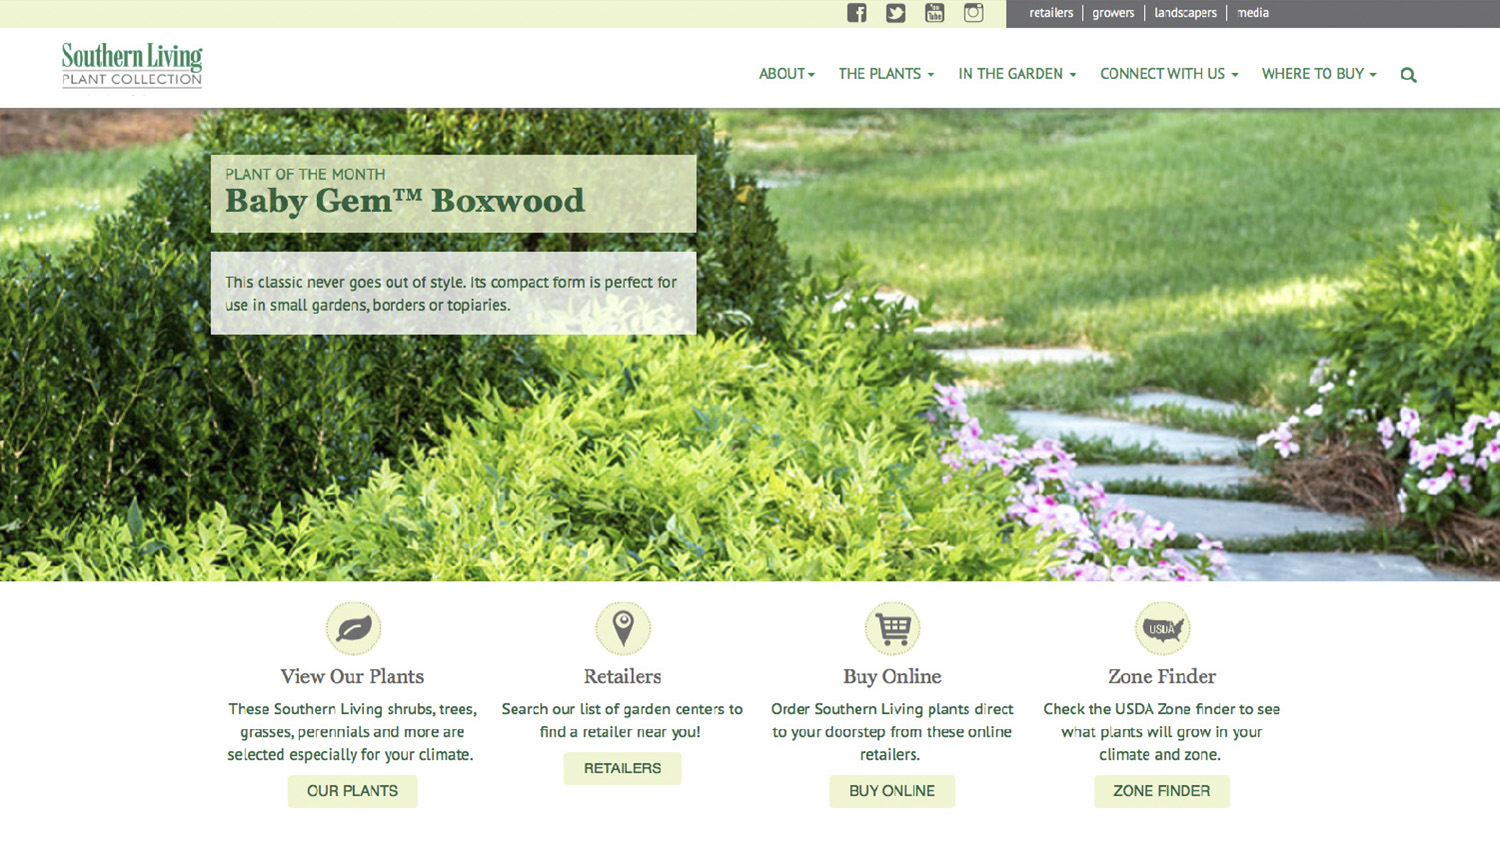
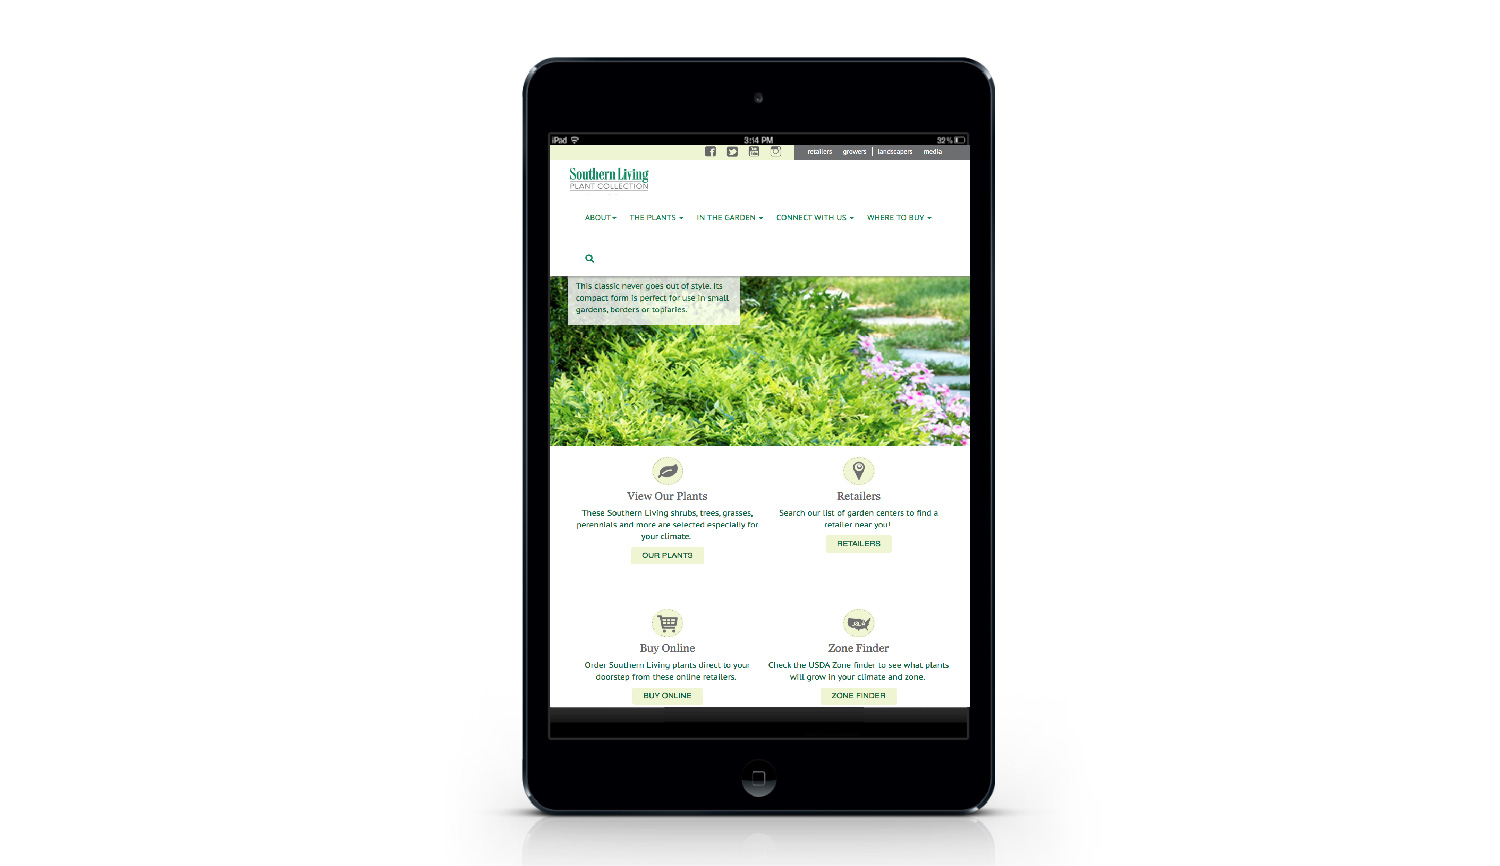
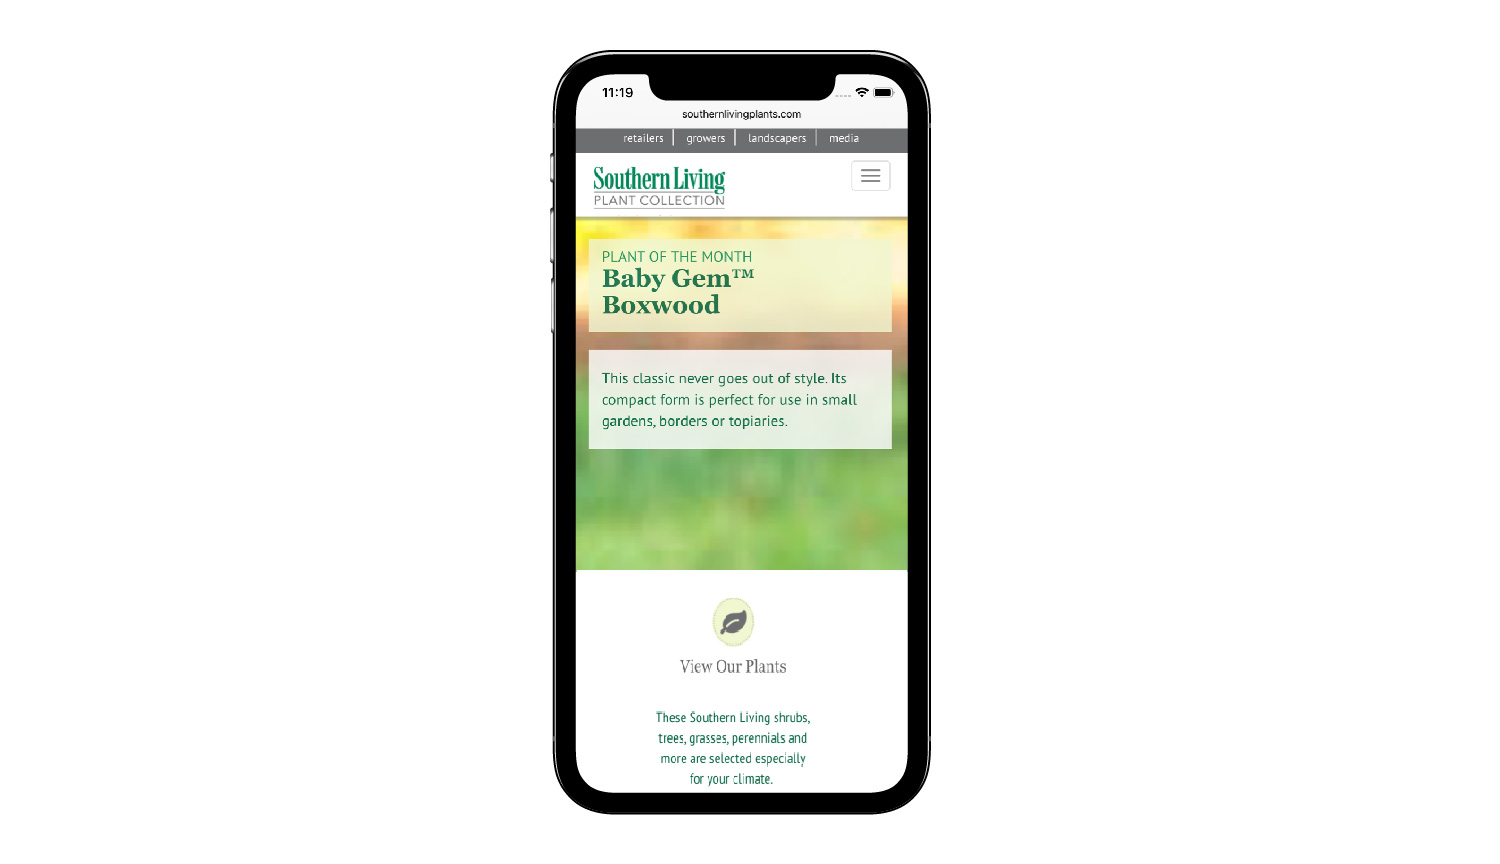
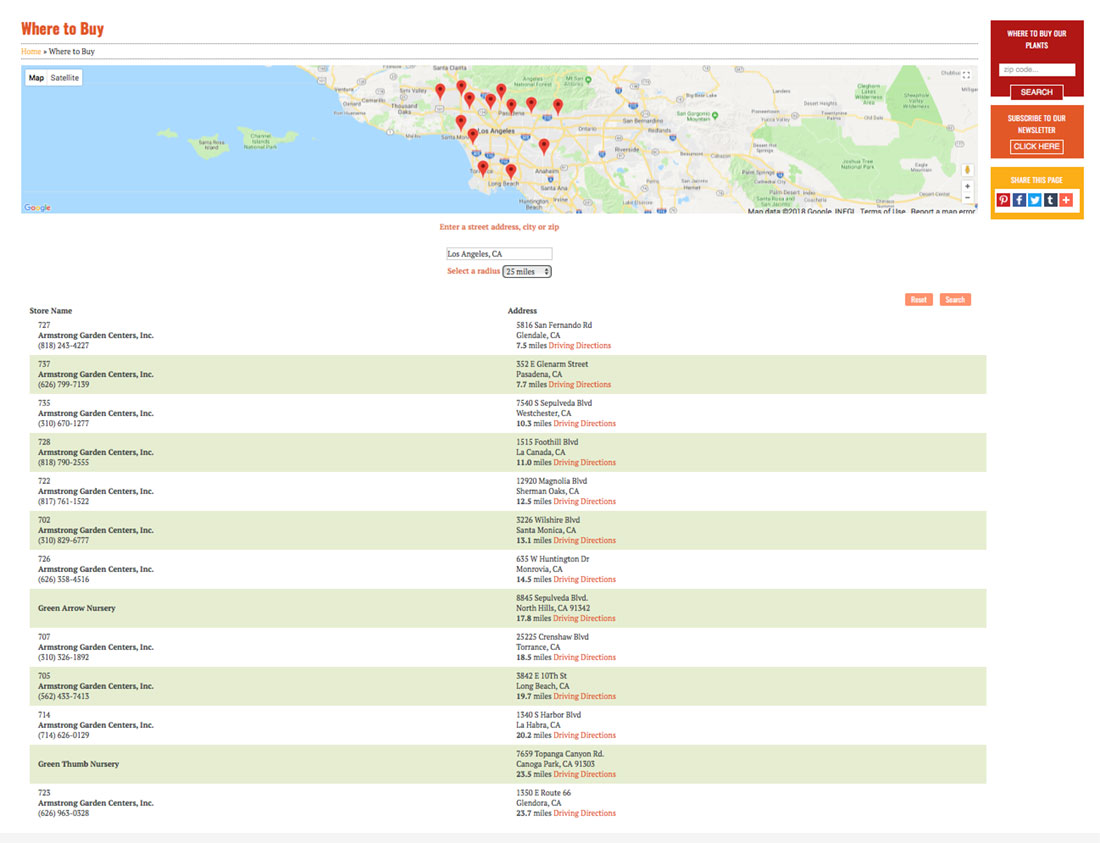
The site was designed by Optera Creative and developed by our lead developer, Forrest Anderson. This website is an Expression Engine content management system with a responsive Bootstrap framework that automatically adjusts in size and function depending on whether it is viewed on a computer, tablet or phone. The site has a retail locator for various plants and a locator for plant growing zones.
Among this site's many helpful features are a how-to gardening section...

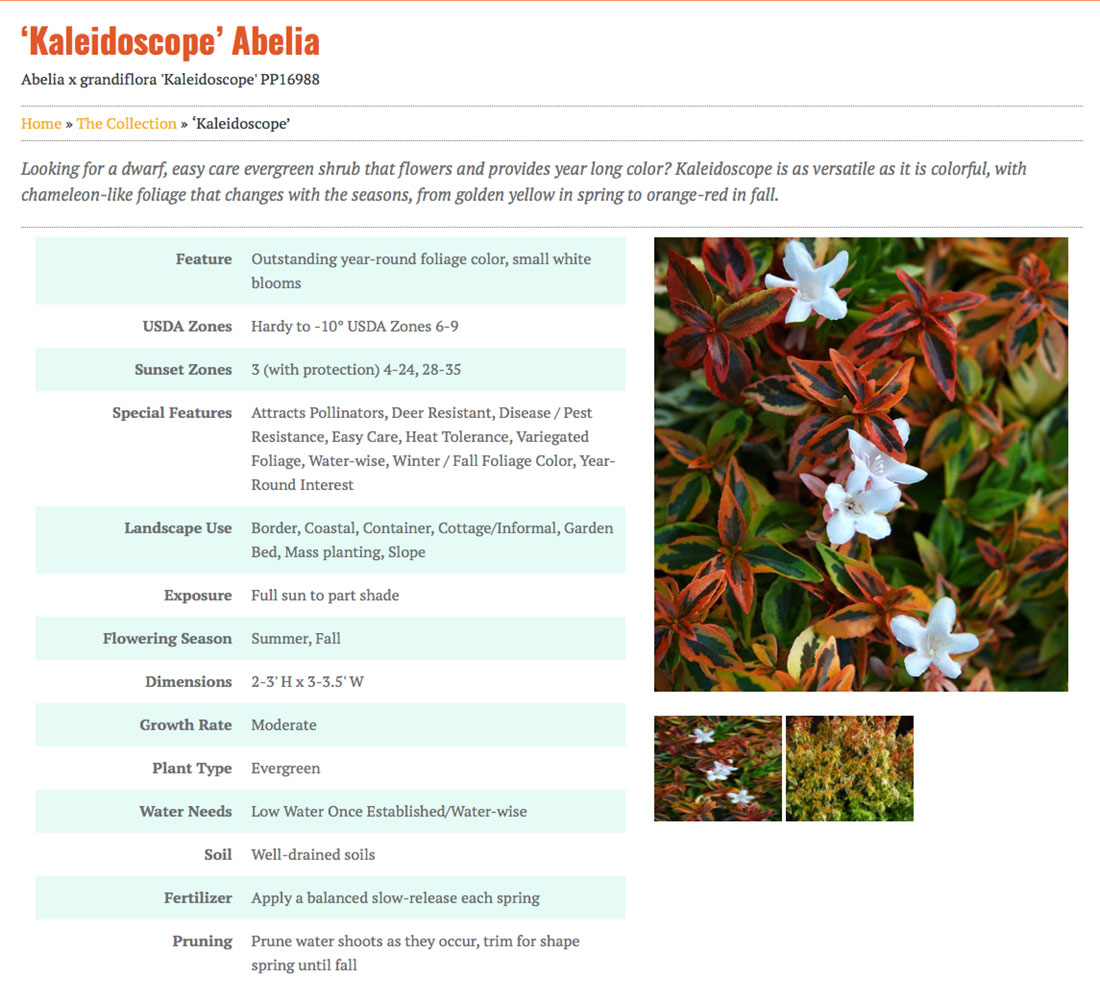
... a plant collection with information on individual plants, their use and care and their zones...
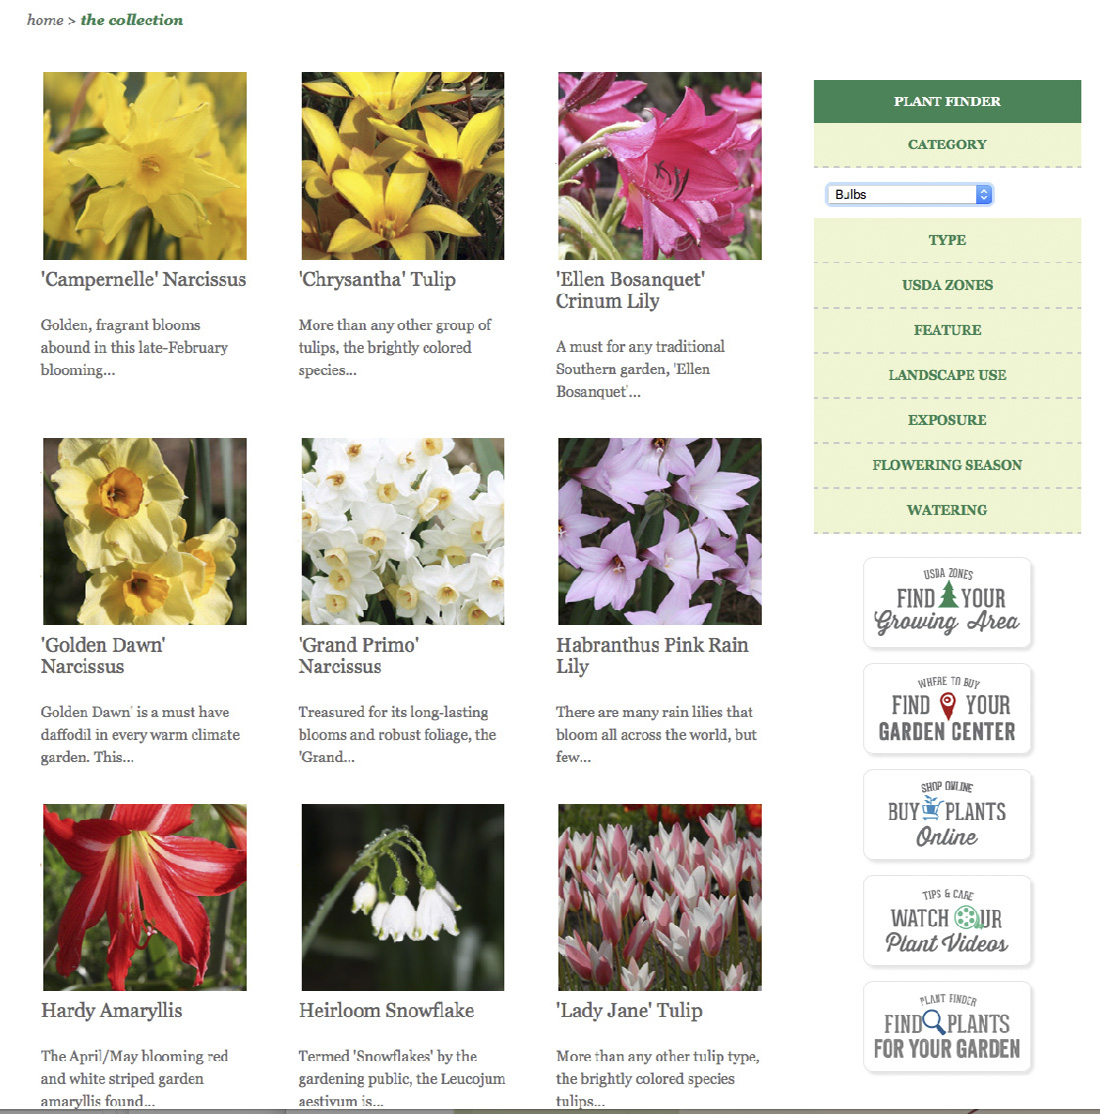
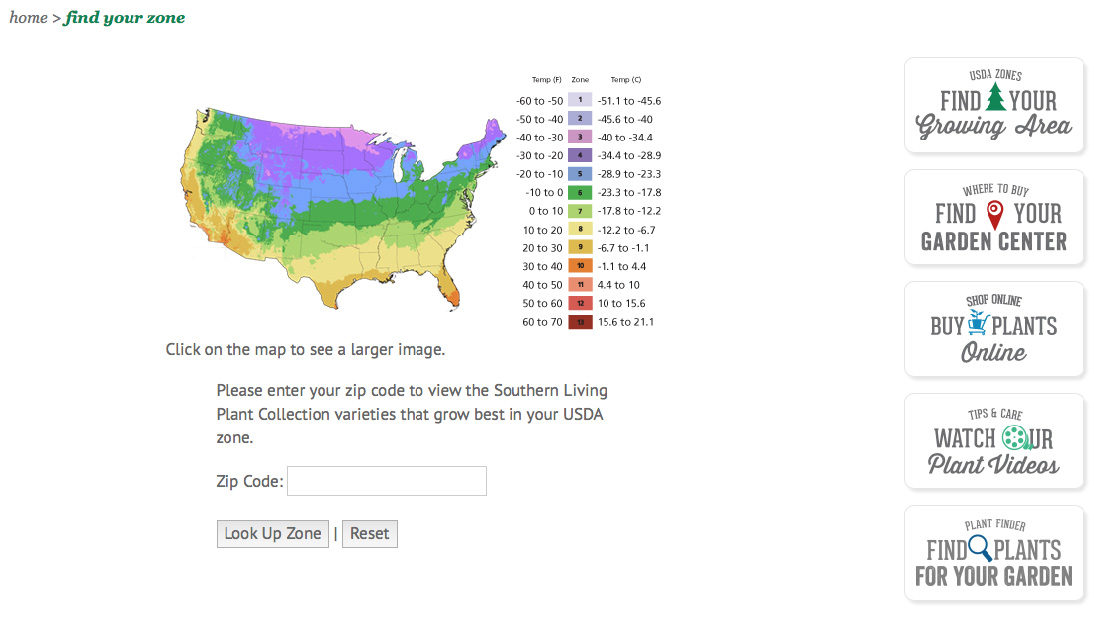
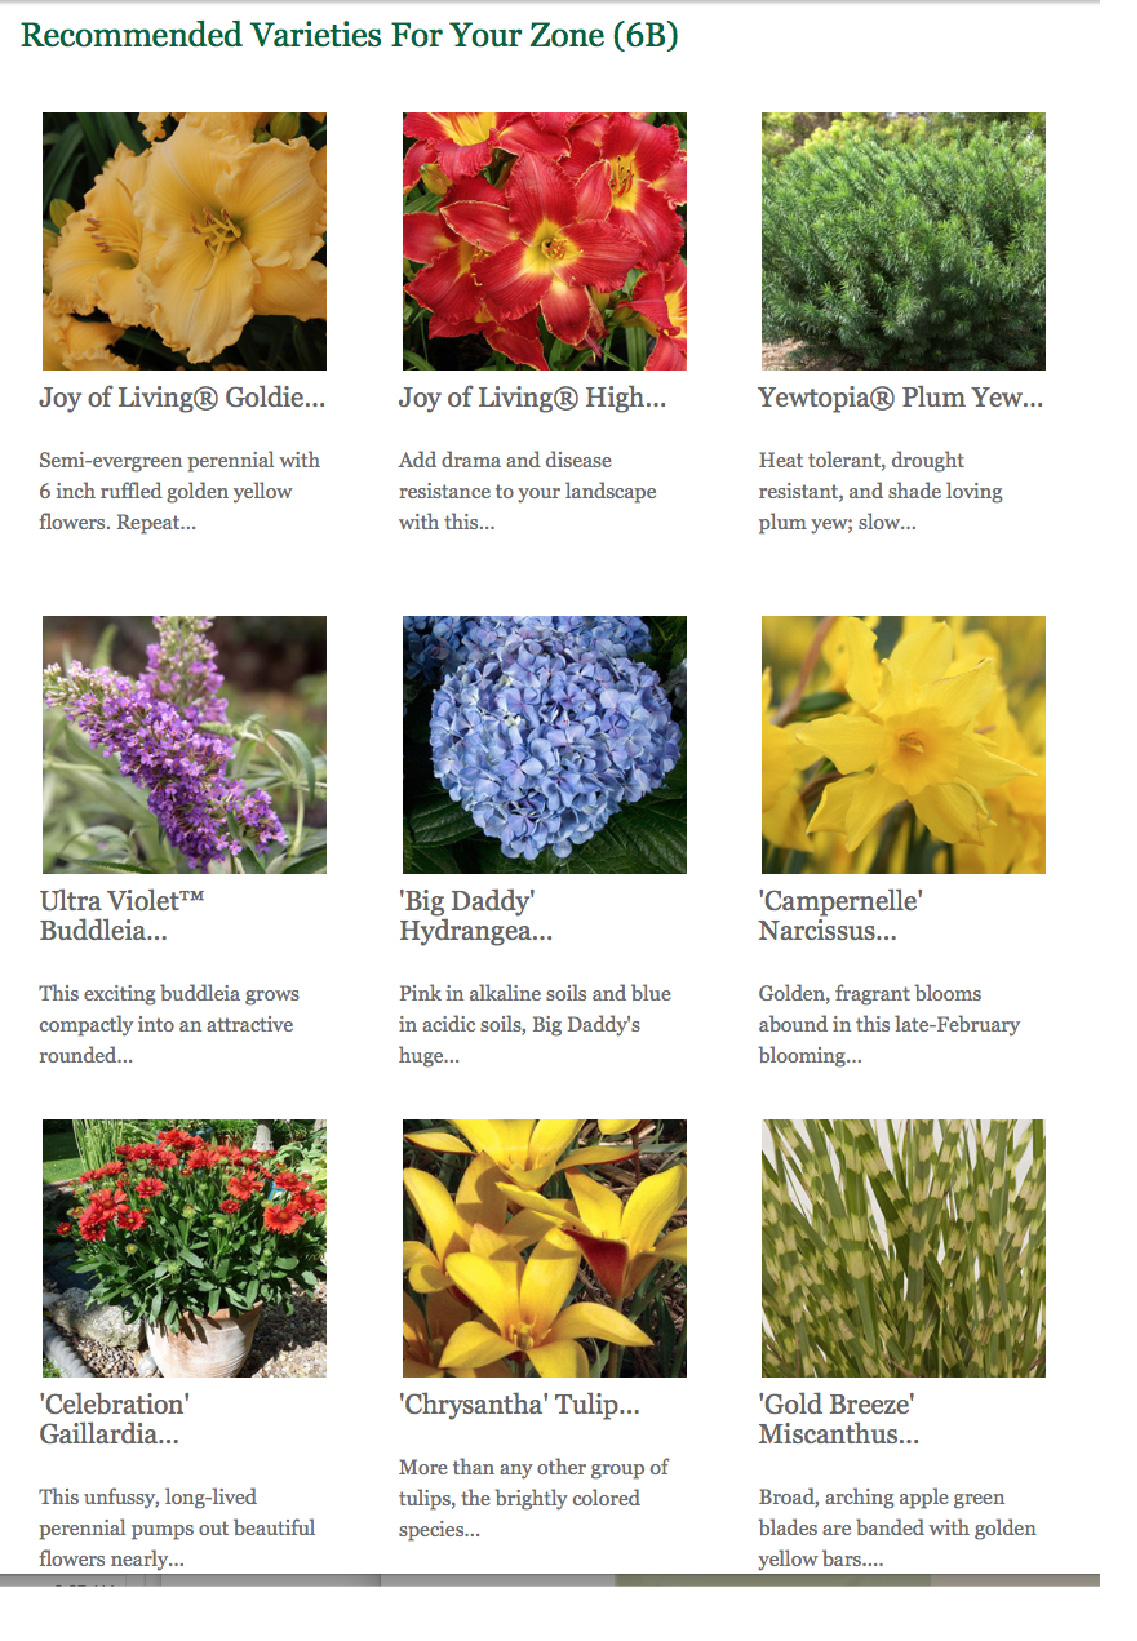
...and a zone locator with plant recommendations for each zone.
Mamie’s Wafers
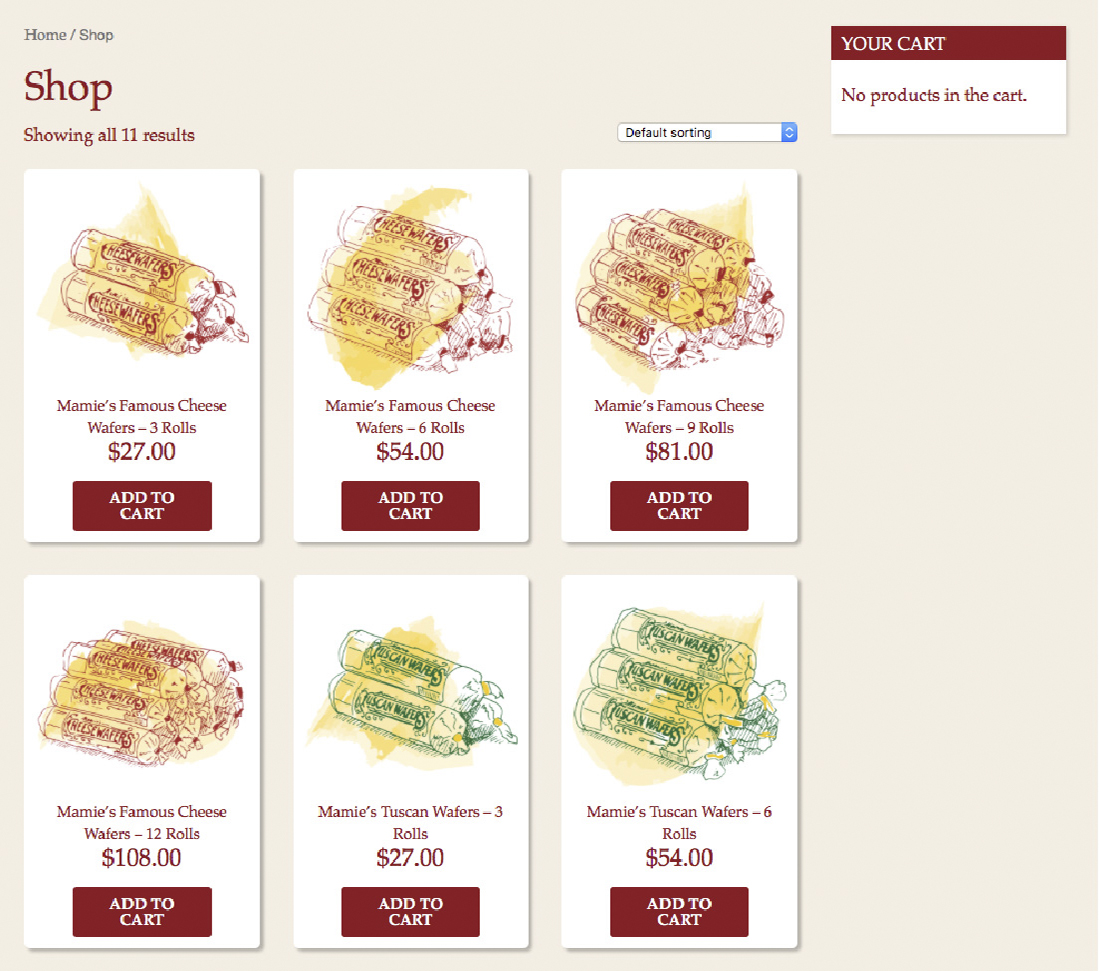
Rouviere Media developed this WordPress content management site for Mamie's Wafers, a food website, using designs produced by Optera Creative.
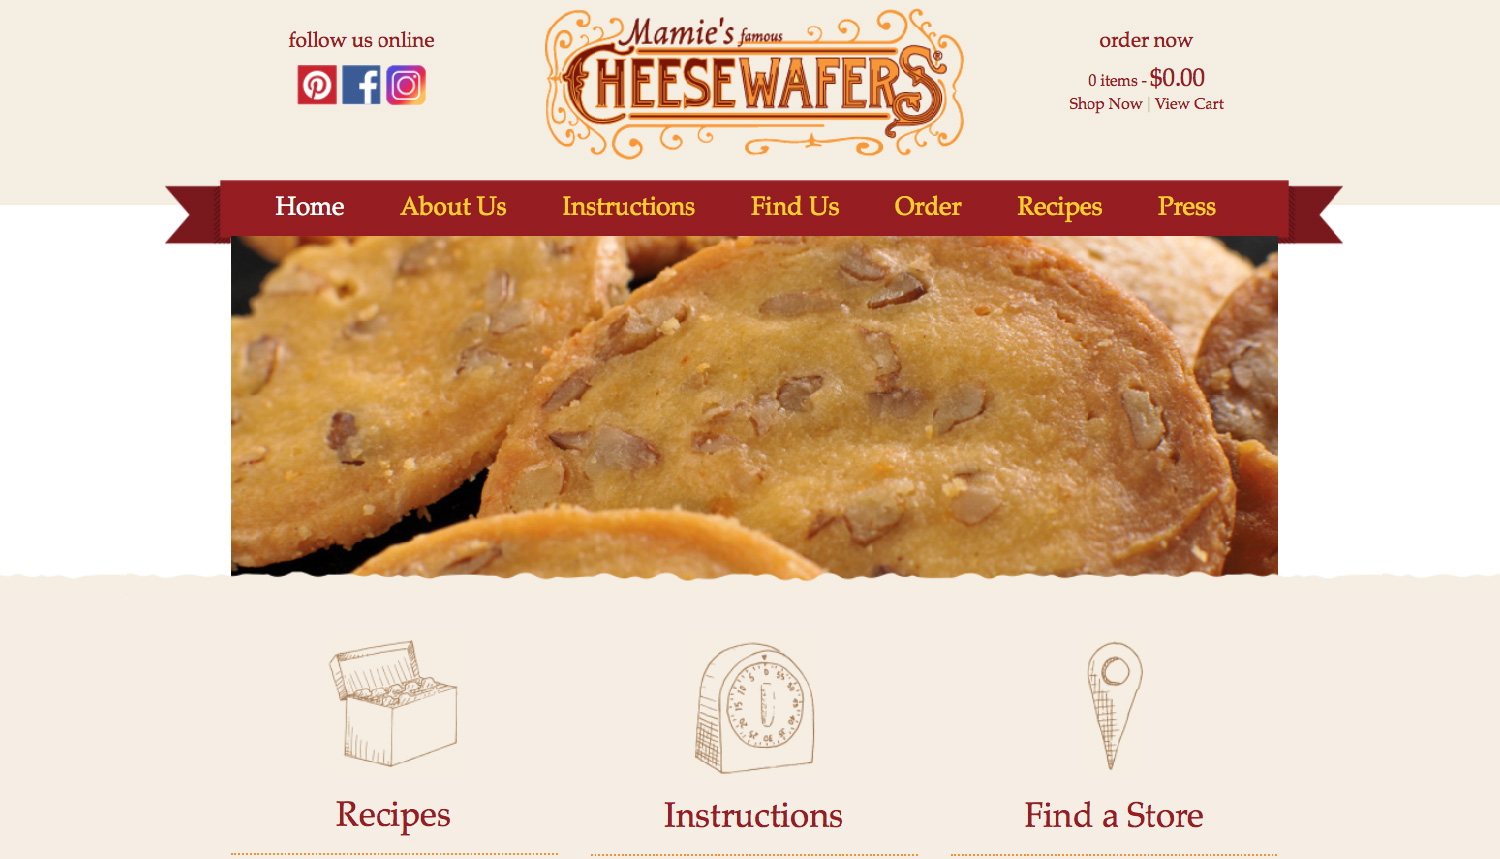
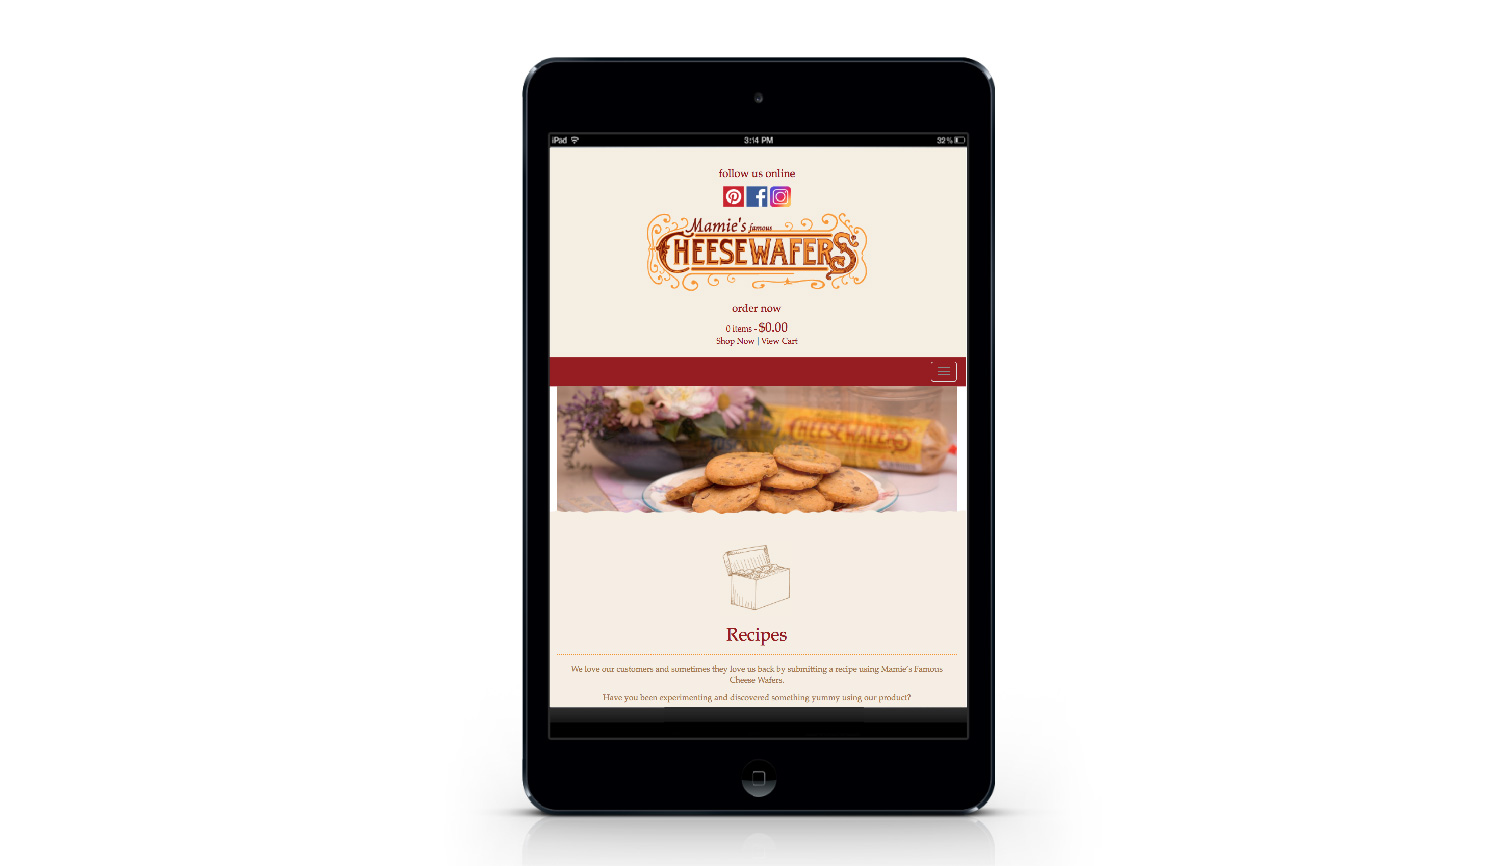
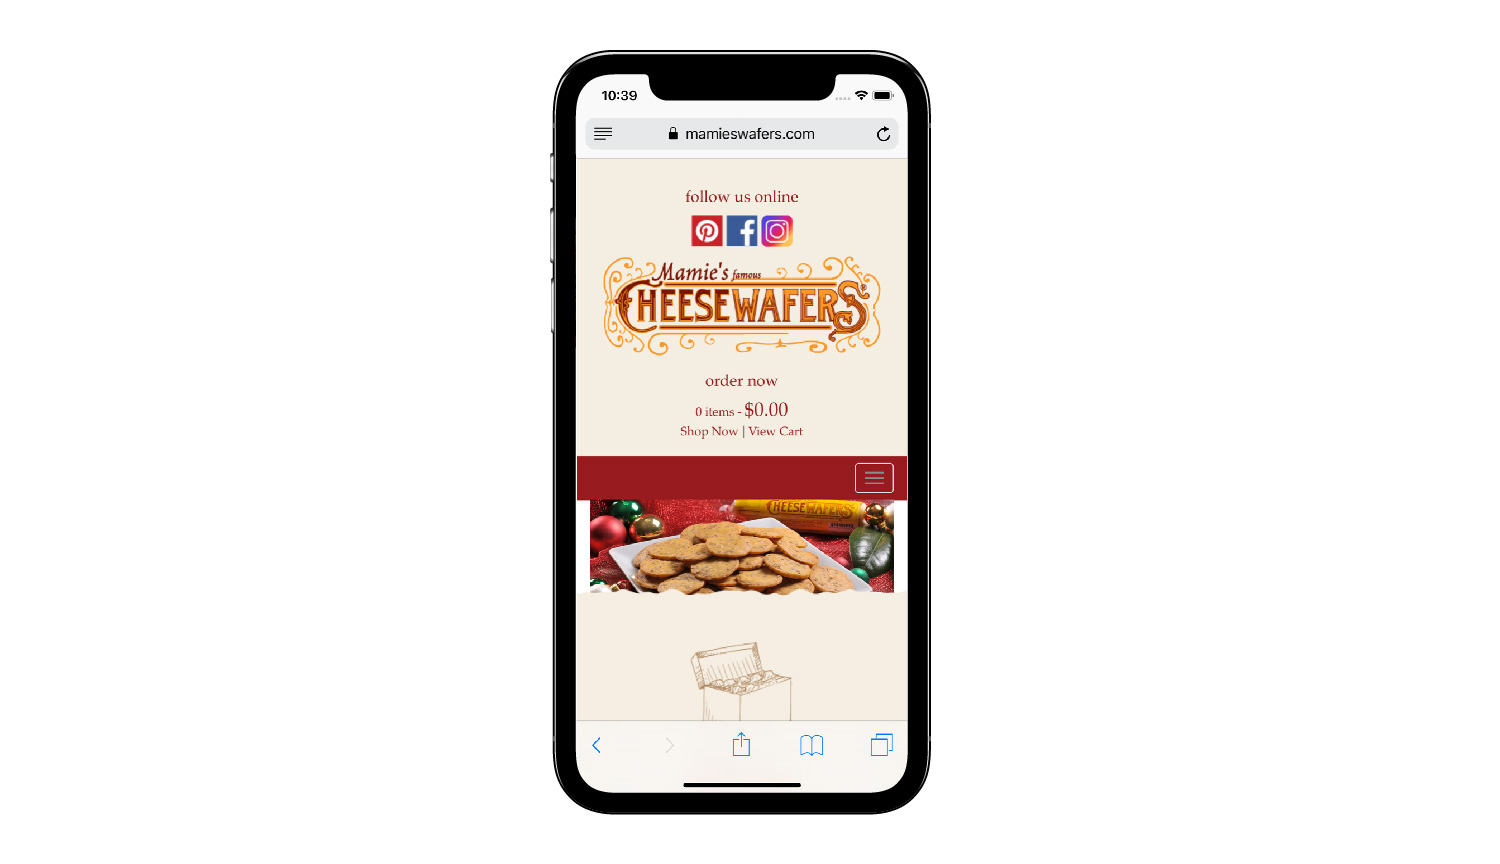
Our lead developer, Forrest Anderson, did the development of the site.
This custom site has an e-commerce shop that sells Mamies' Wafers products.
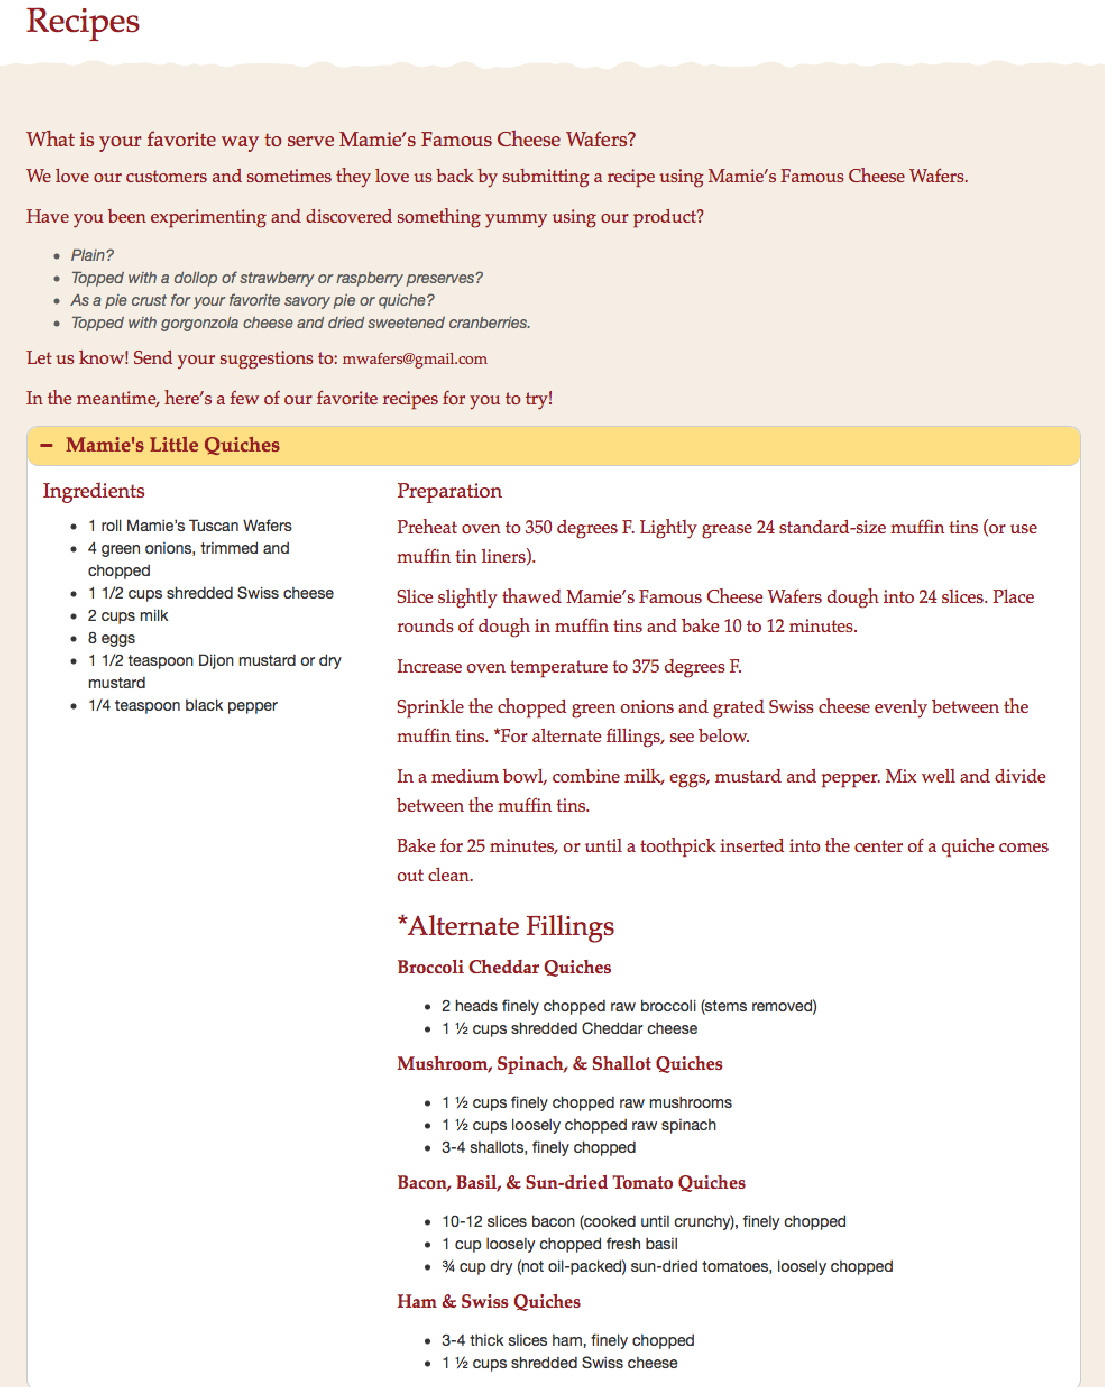
It also has a recipe section...
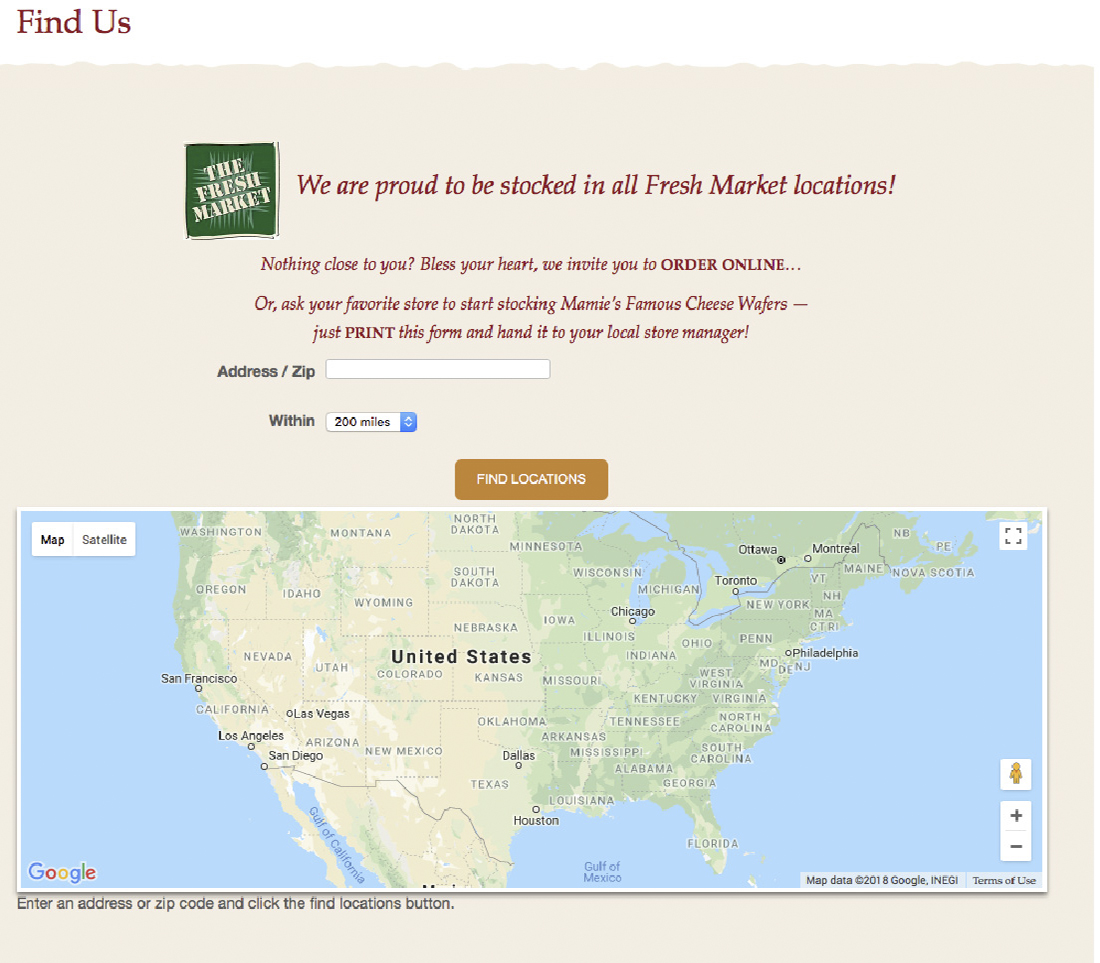
... and a retail locator so customers can find stores to purchase Mamie's Wafers.
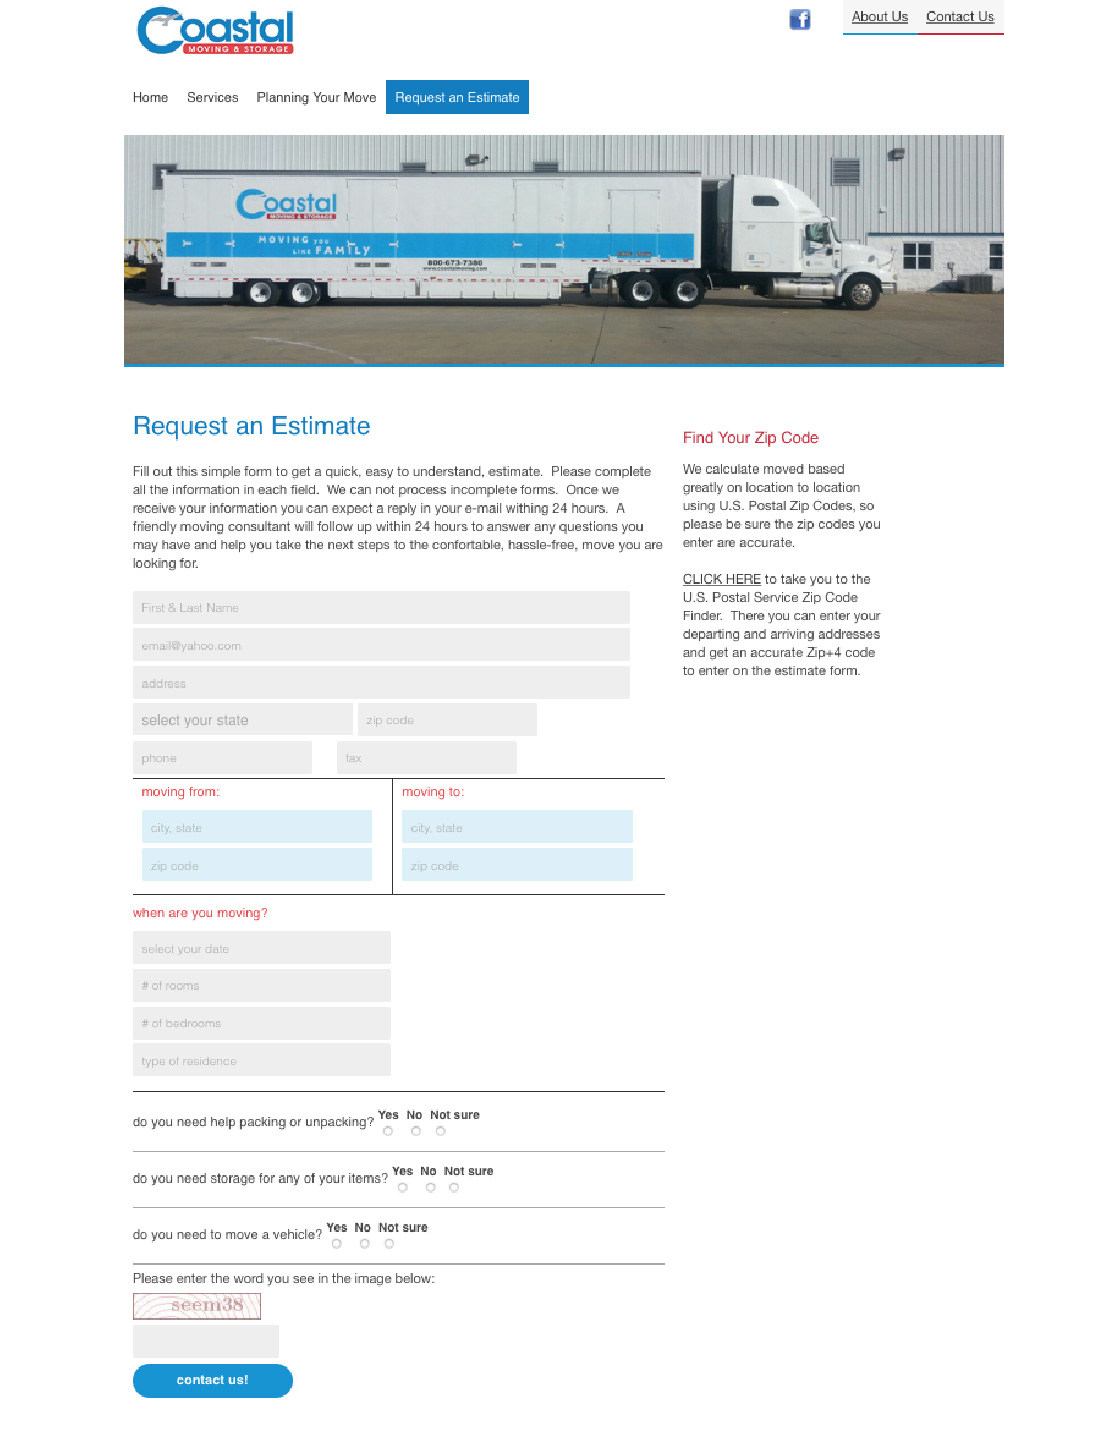
Coastal Moving
Rouviere Media built the Expression Engine content management system for this website, which provides moving services, helpful moving information and estimates of moving costs.
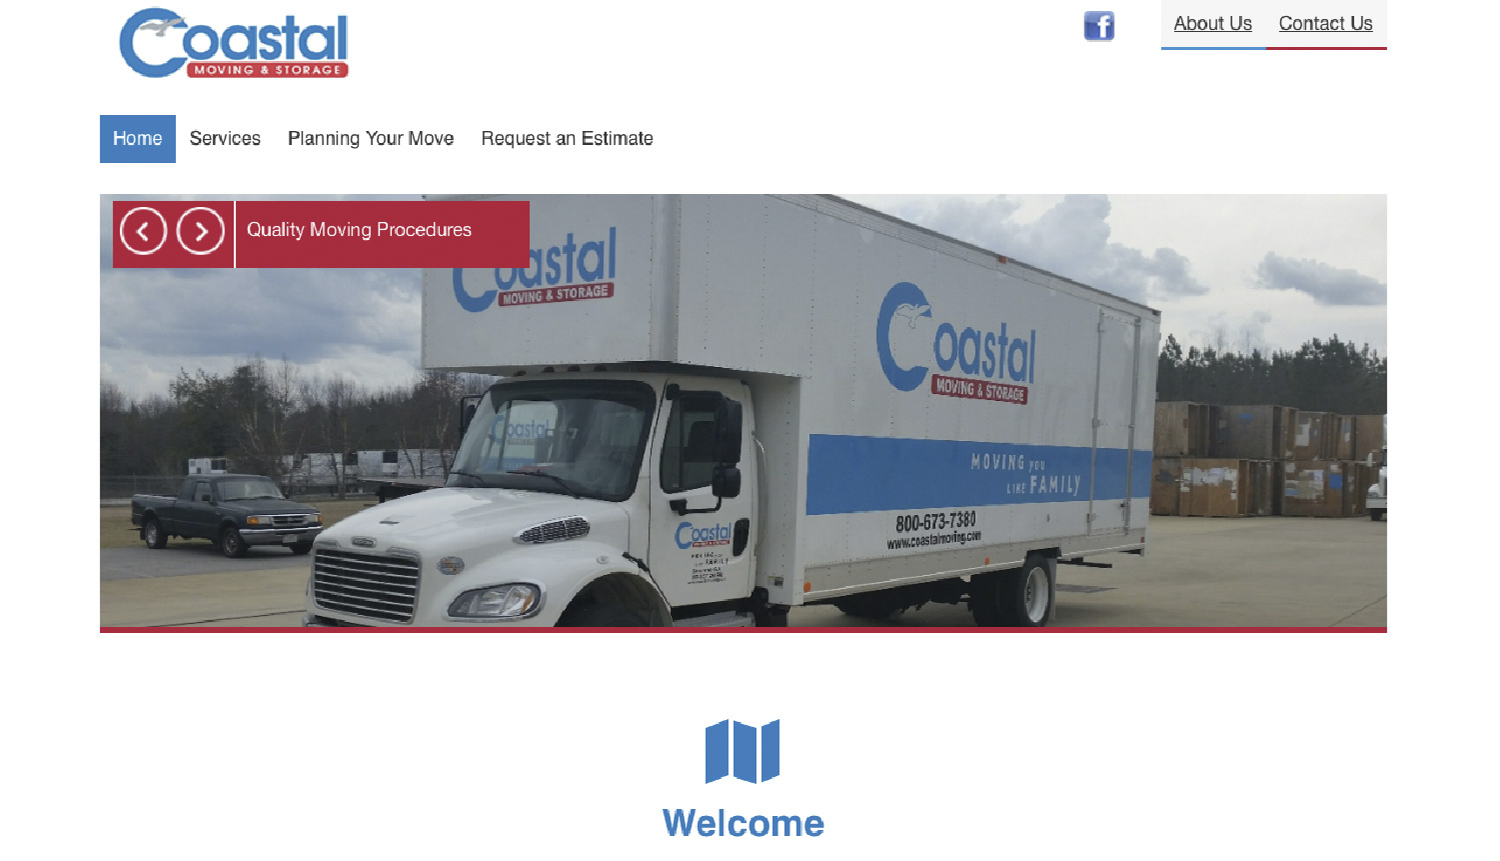
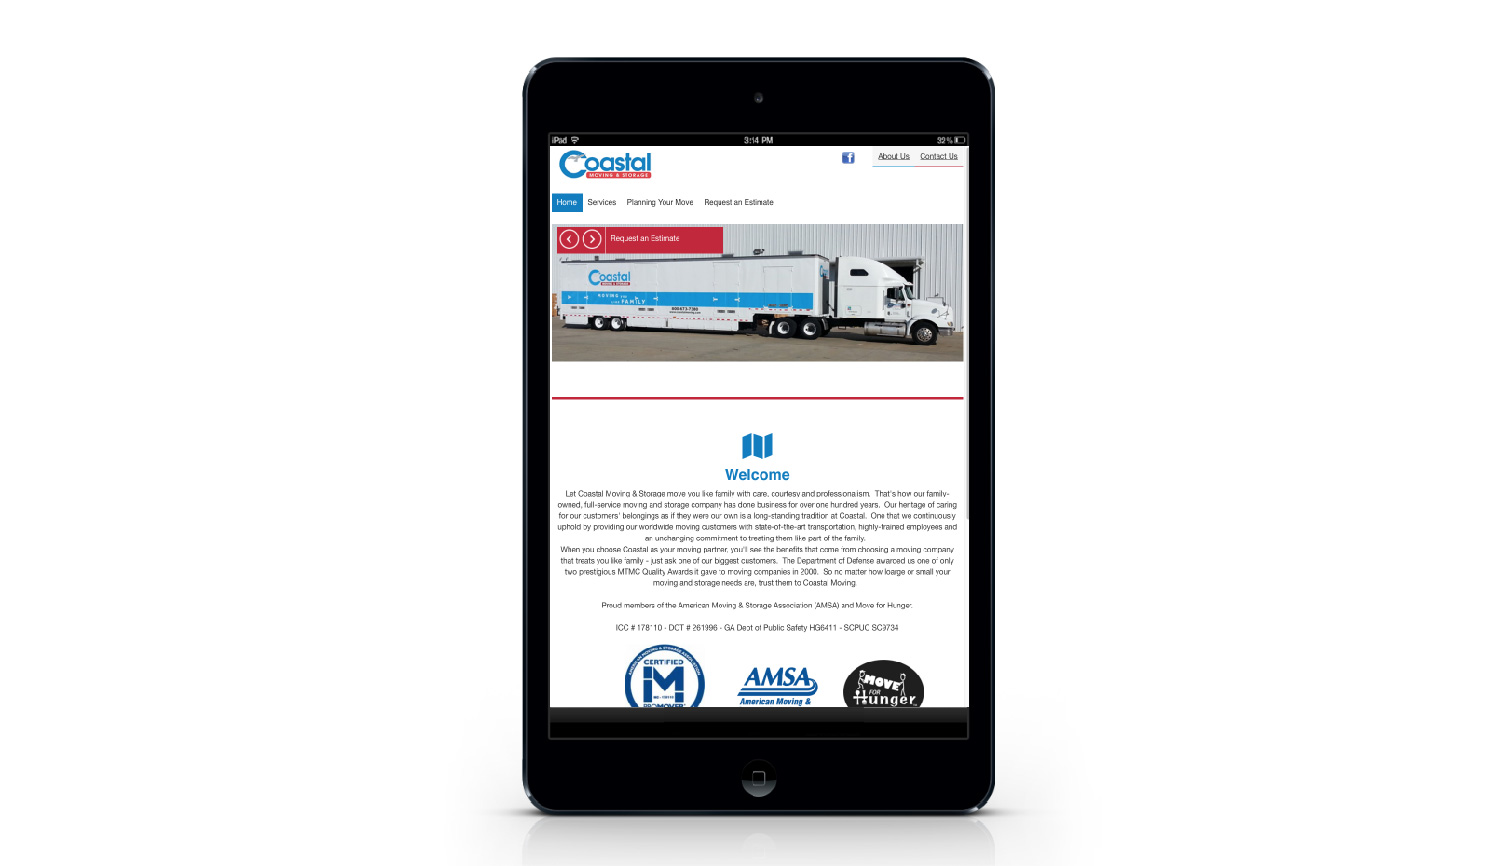
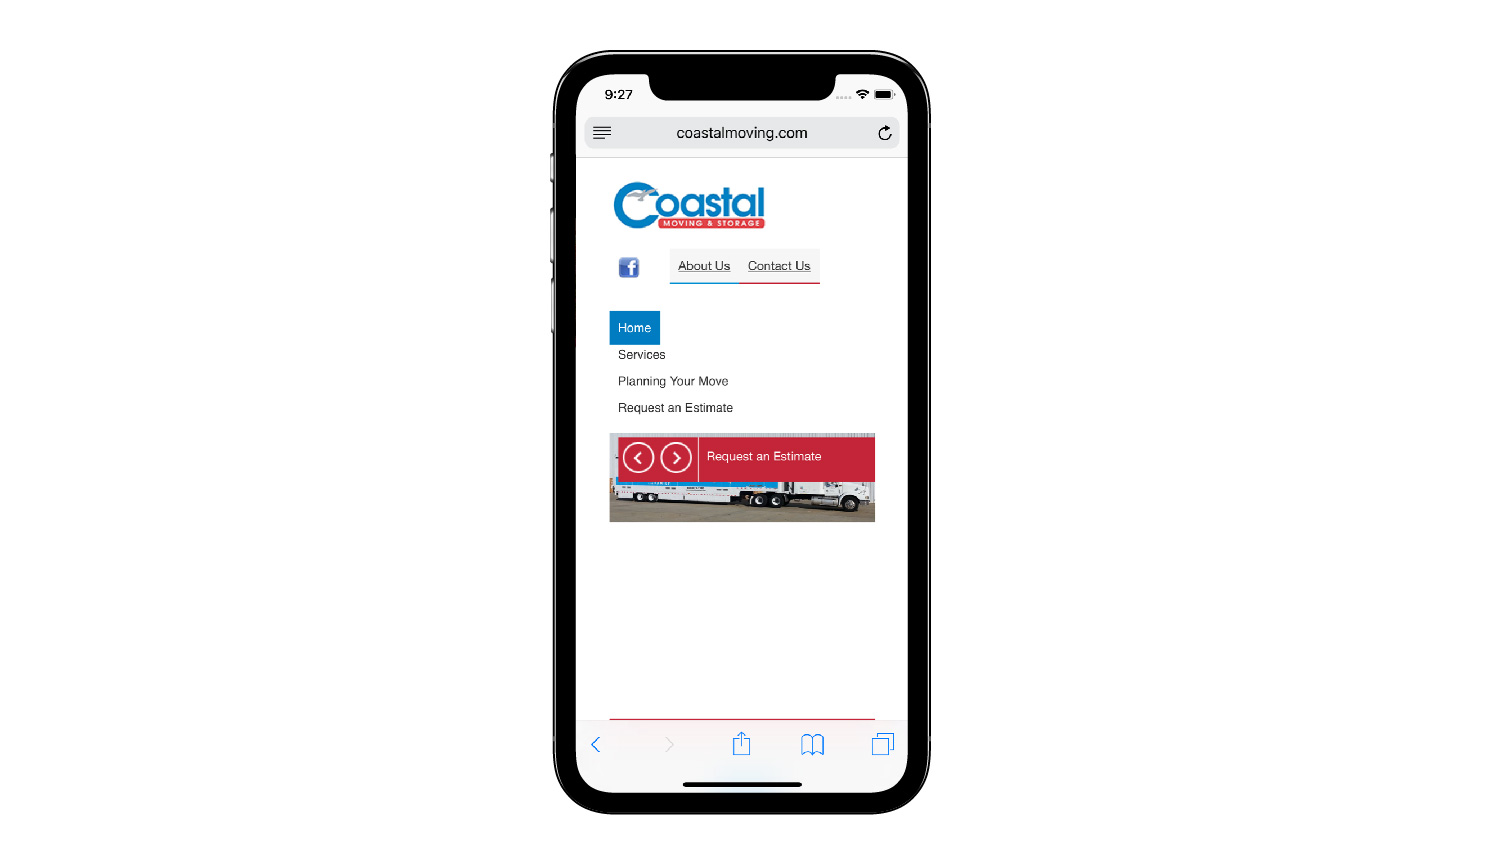
Our technical director, Forrest Anderson, built the Expression Engine content management system for this responsive website in collaboration with eMarketSouth, which did the design and web conversion of the site.
Among the site's features is a form that enables people to estimate the cost of their move.
Mobile Yacht Club
Rouviere Media did the design conversion to HTML and CSS3 and the Wordpress web development for this website that provides services for members of the Mobile Yacht Club.
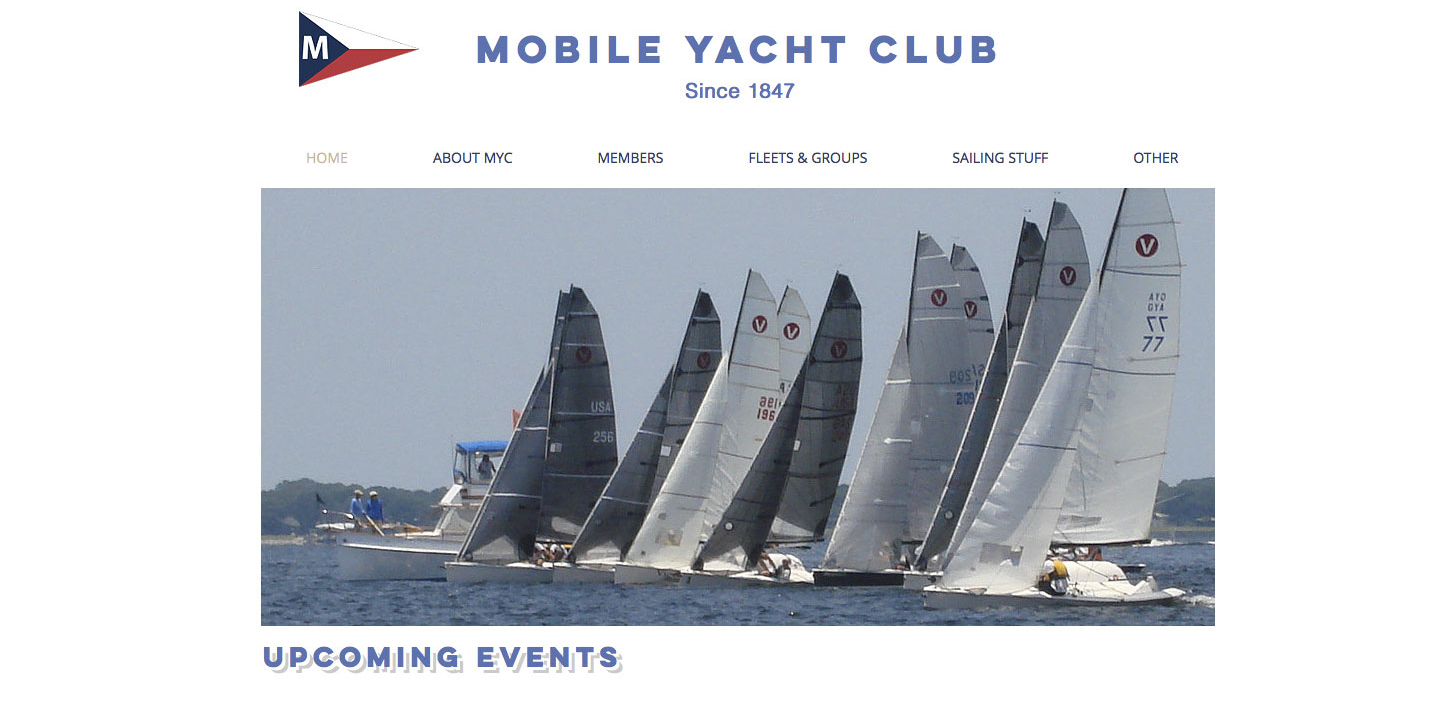
Our technical director, Forrest Anderson, converted the designs for this site from Illustrator to HTML and CSS3 and used Bootstrap and Wordpress to create this customized responsive content management website. The project was a collaboration with Optera Creative, which did the design for the site.
The site includes a calendar of events for club members, links to weather conditions for sailing and membership signup capabilities and information about sailing school and competitions.
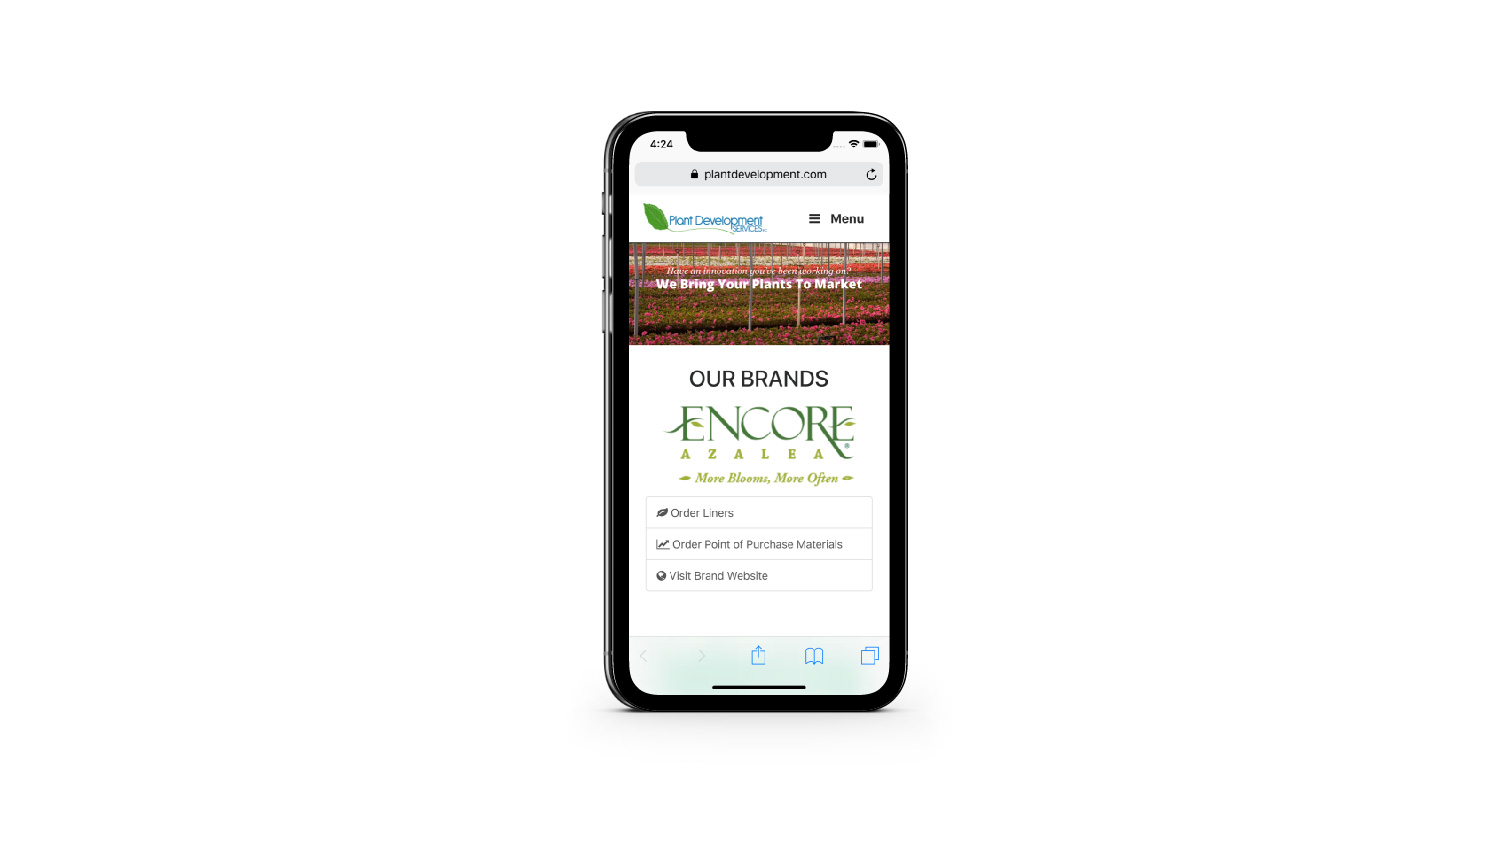
Plant Development Services
Rouviere Media did the web development for a redesign of this website for Plant Development Services, Inc., which introduces plants that solve landscape challenges and have a high impact on the plant marketplace.
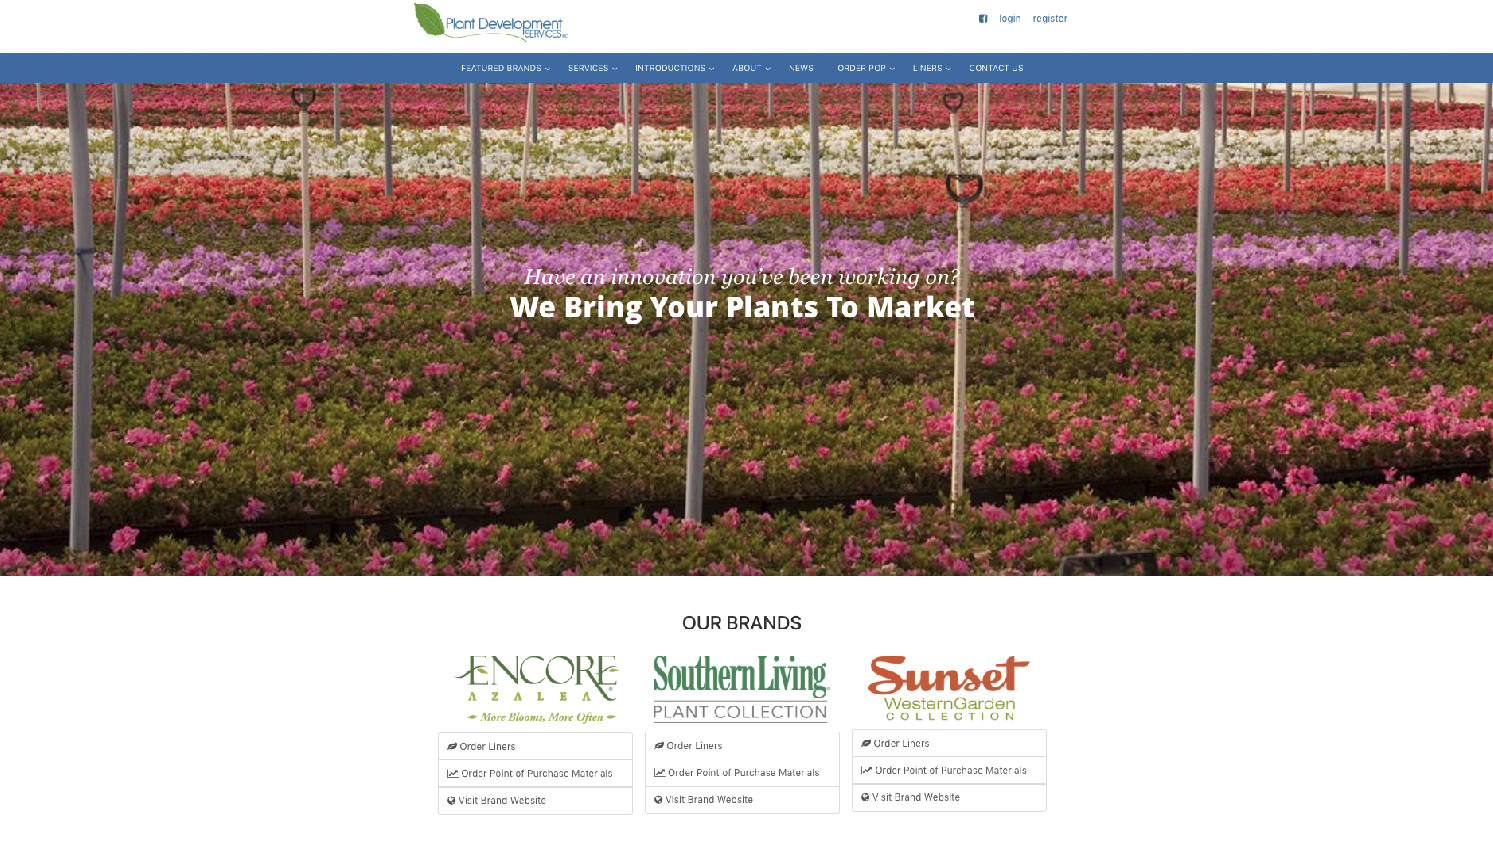
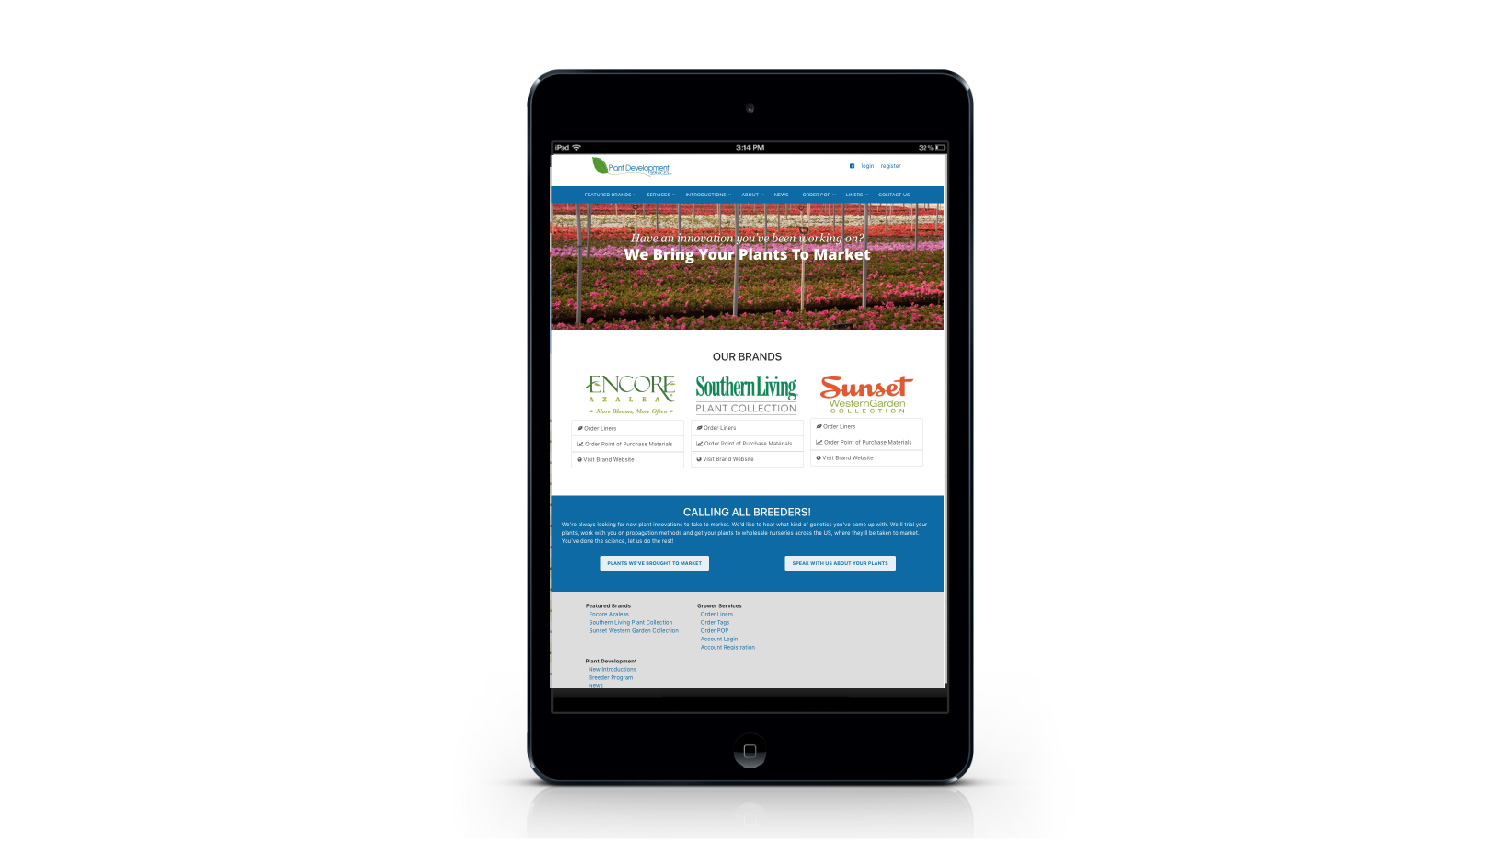
Working with the nation’s top growers and breeders, Plant Development Services brings plants to market that have highly marketable and recognizable trait improvements year after year.
Our lead developer, Forrest Anderson, took over this project from another developer and did most of the development work on it.
This Expression Engine content management website includes a listing of available plants and an online ordering tool for wholesalers. These features enable the website to serve a comprehensive grower network. Non-technical employees can update the content on the site on the backend.
Mobile Arts Council
Rouviere Media did the web development for this website for the Mobile Arts Council of Mobile, Alabama, with design work from Optera Creative.
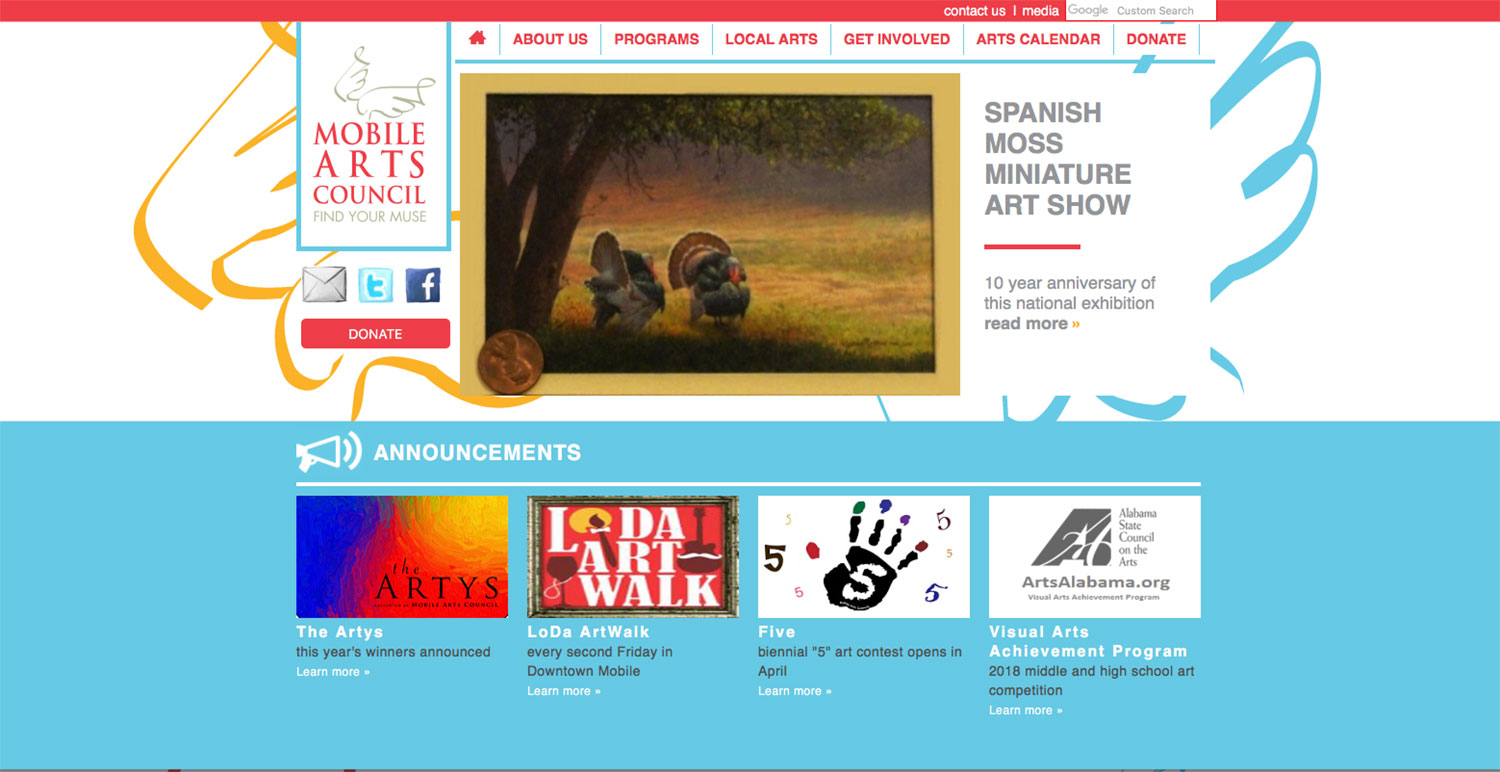
Our lead developer, Forrest Anderson, did the development work for this substantial and complex website.
The website, designed to serve the artists' community of Mobile, Alabama, includes features for artists to register online and upload samples of their artwork for an artists directory.

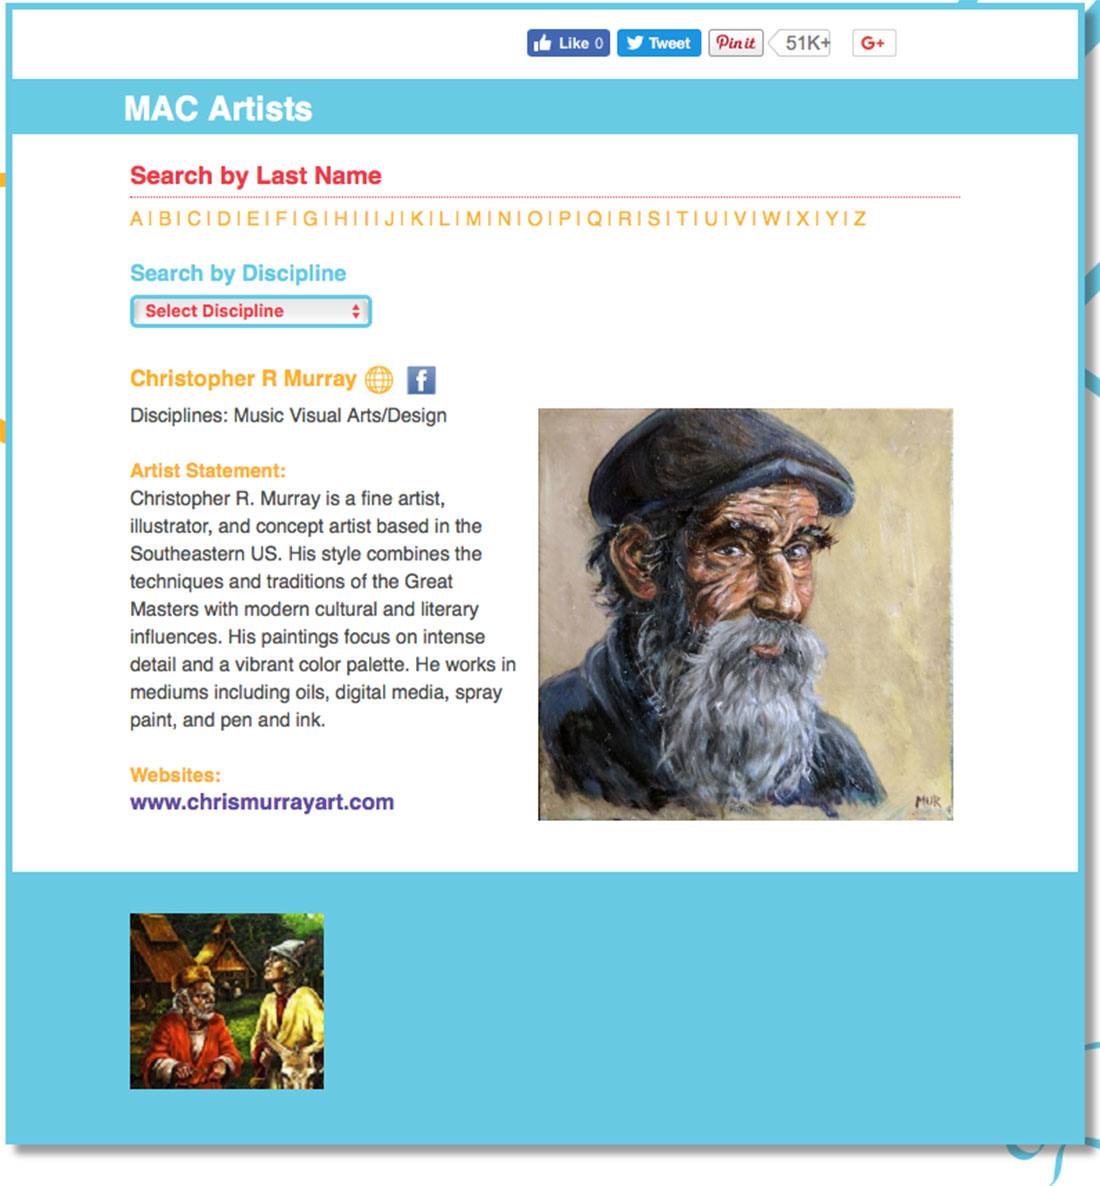
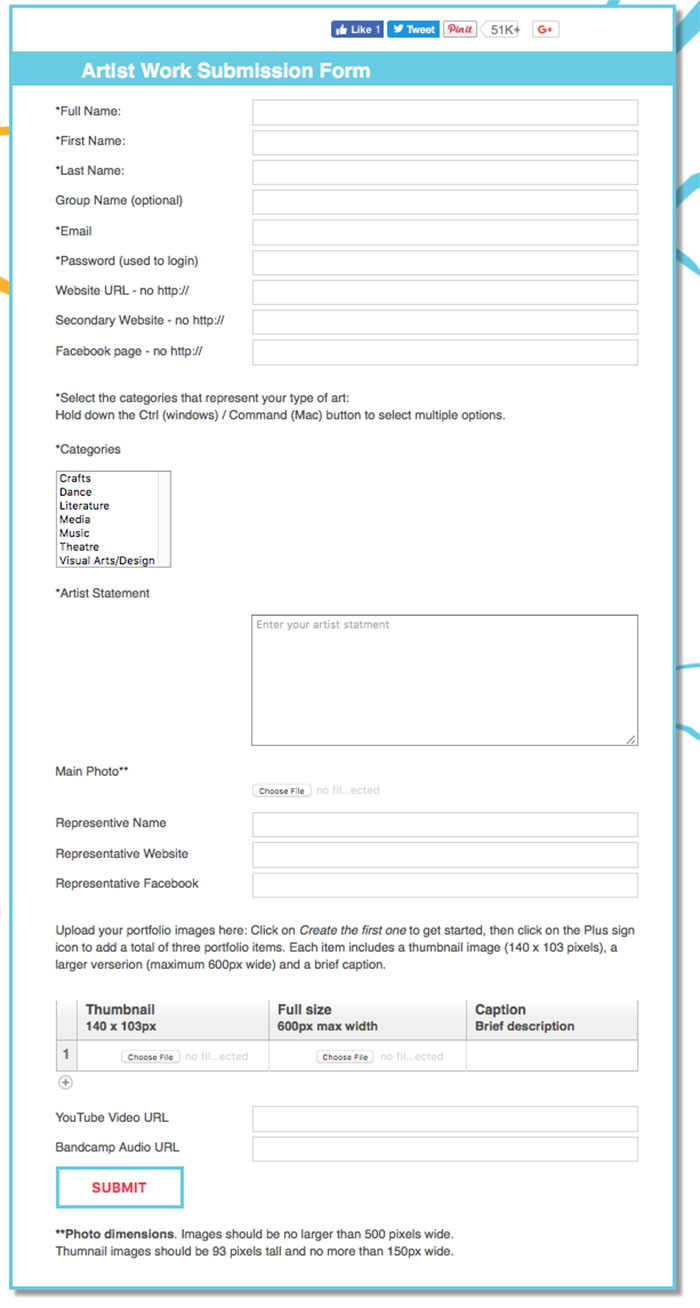
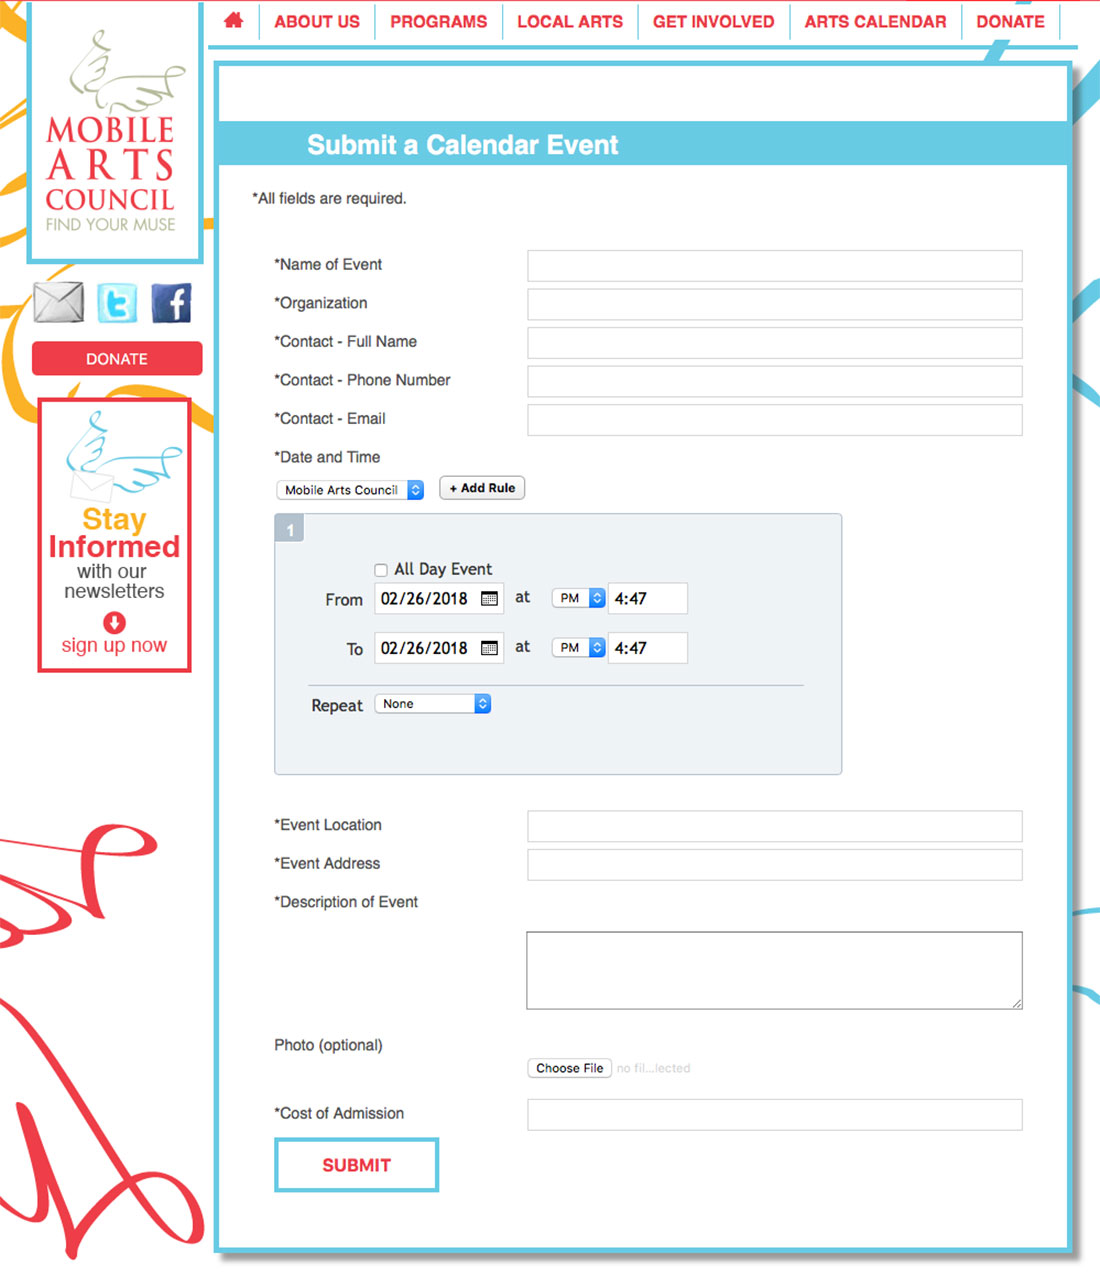
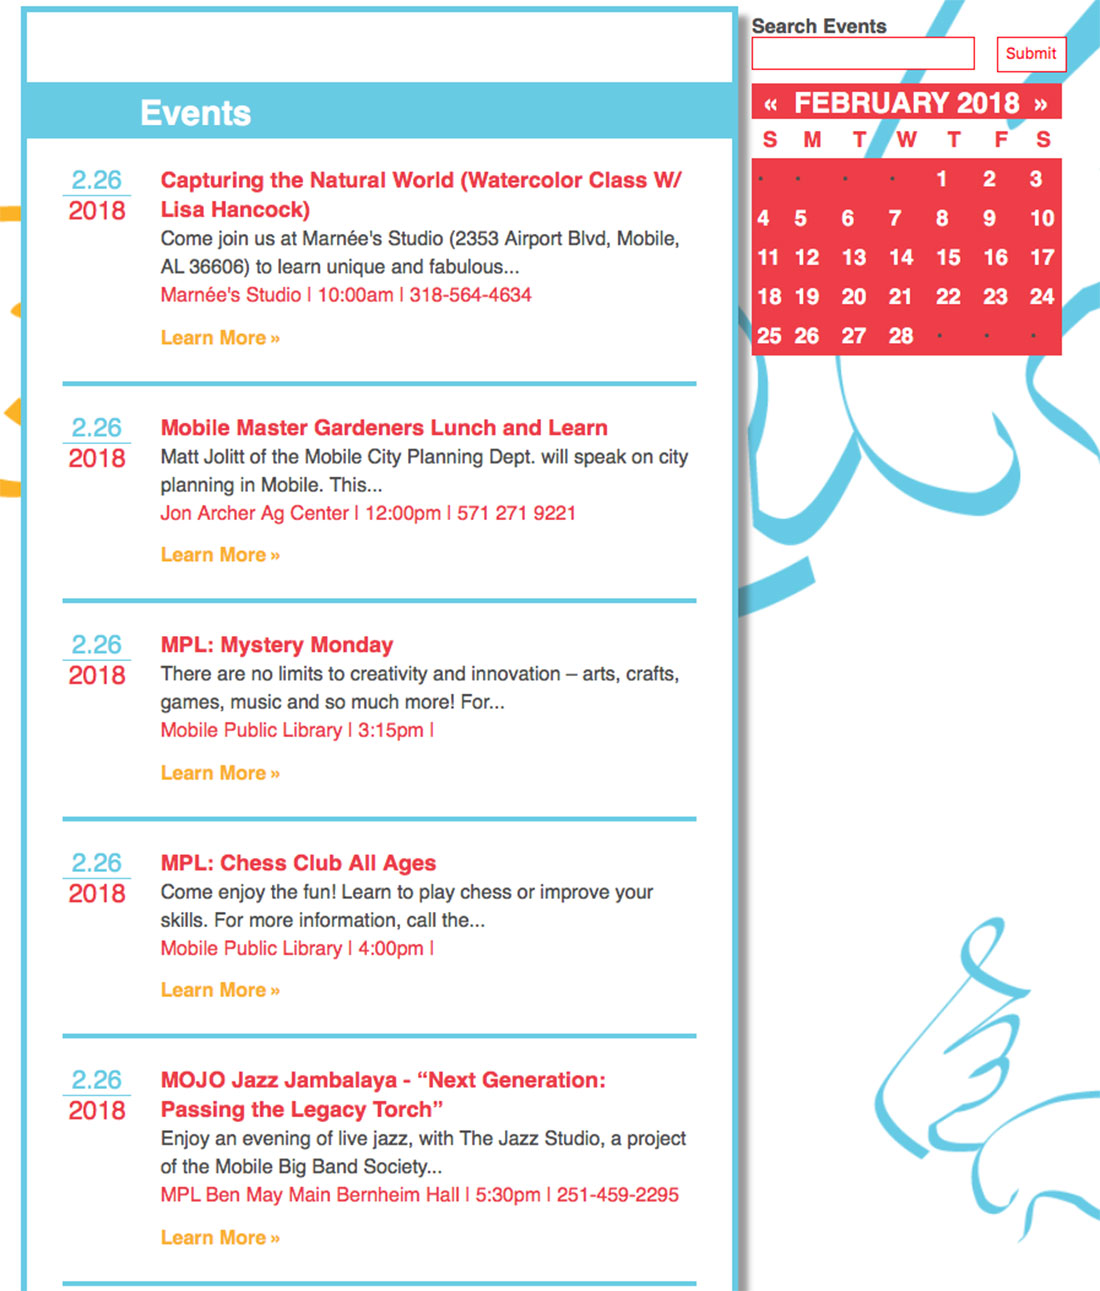
They also can pay fees online. In addition, the site has registration and online payment for sponsors and a full fledged calendar of events to which the public can add.
Wind Industry Supply Chain Database and Map
Rouviere Media designed and developed the Wind Industry Supply Chain Map and Database for the Southeast Wind Coalition in conjunction with developer Christopher Muro.
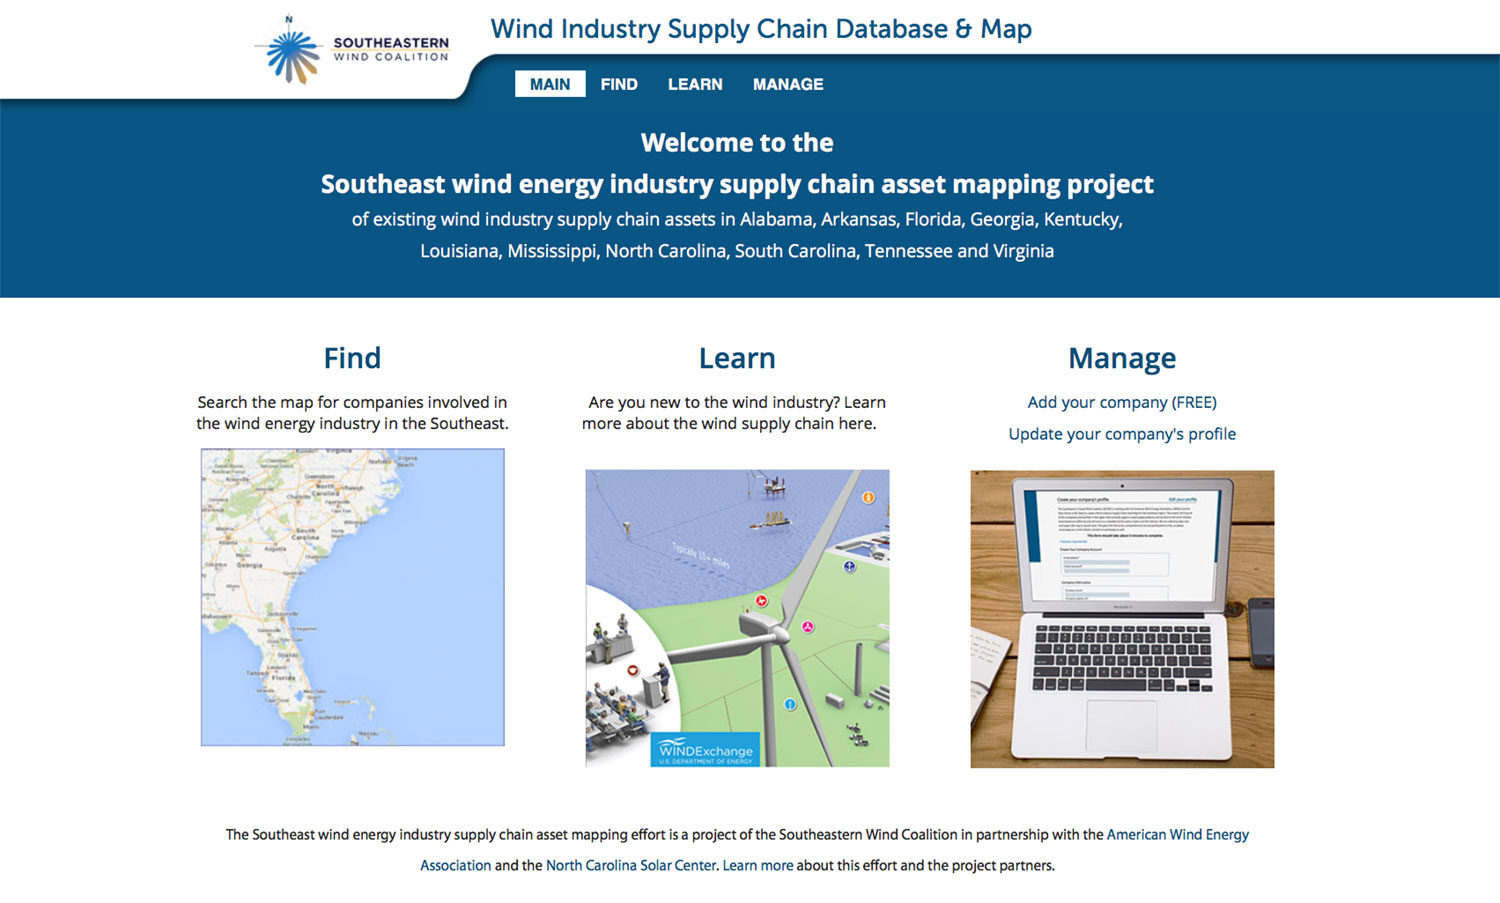
This project began when the Southeast Wind Coalition contacted Rouviere Media to discuss creating an online way for people involved in North Carolina's fledgling wind industry to connect with each other and let each other know what products and services they had to answer. At that time, the state was in the beginning stages of developing its wind energy industry. Lead designer Donna Rouviere Anderson, lead developer Forrest Anderson, and independent developer Christopher Muro worked extensively with the coalition to create this complex three-part interactive map on which wind industry suppliers in a variety of fields can input their information and can find other suppliers whose services and products they need. The map has played a key part in developing the wind energy industry all over the Southeastern United States, and is one of the projects of which Rouviere Media is most proud.
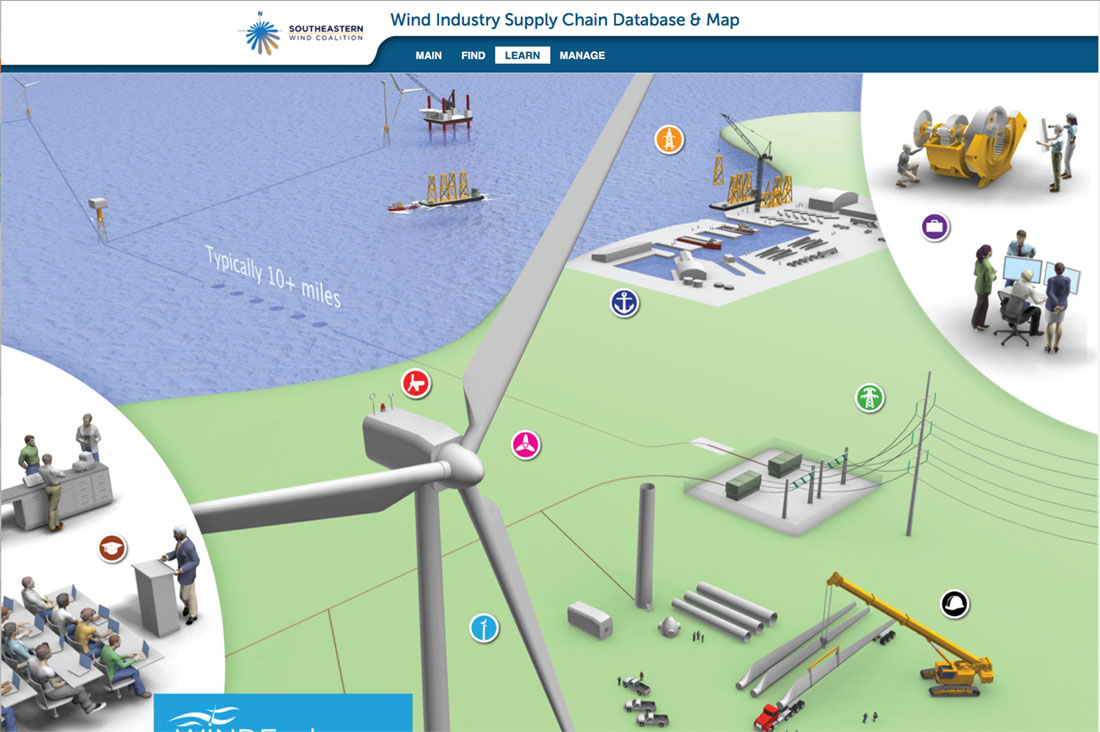
Donna Rouviere Anderson also designed a large set of wind industry icons for the project's interactive map and infographic.
This interactive infographic project has three components:
An interactive, filterable map that shows the location of companies and other organizations that service the wind energy industry in various ways. The map can be changed to a filterable table view that can be output as a PDF report of participating companies and organizations with information about them.

An educational infographic shows the various economic sectors that make up the wind energy industry in the Southeastern United States and provides information about them upon clicking on the icons. .
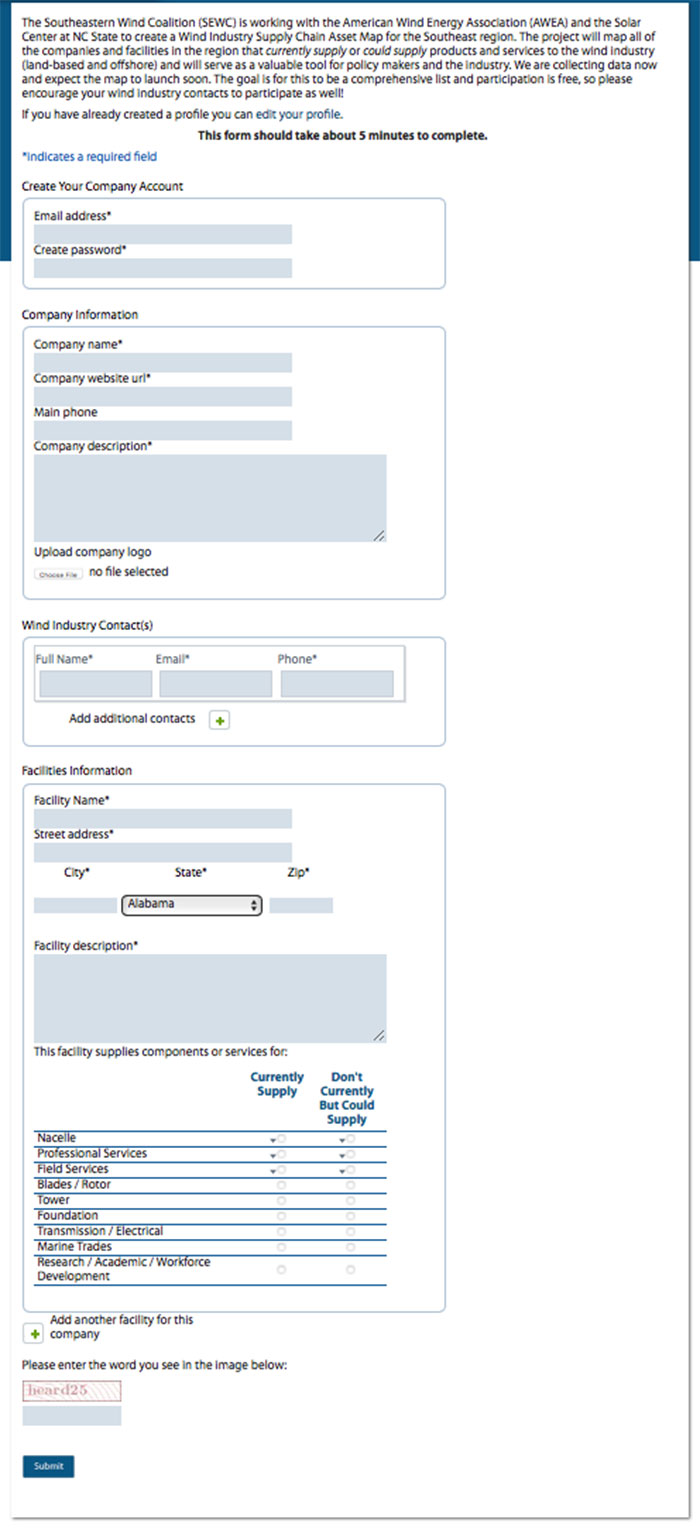
Wind industry members use this form to input information about the services they now provide or can provide for the wind industry.
The map is responsive for desktops and tablets, although not for smart phones because it is too complex to scale down properly to phone size. It is part of the larger Southeast Wind Coalition website which Rouviere Media also designed and developed.
Southeast Wind Coalition
As a media provider for the clean energy industry, we are proud to have designed and developed the website for the Southeastern Wind Coalition.
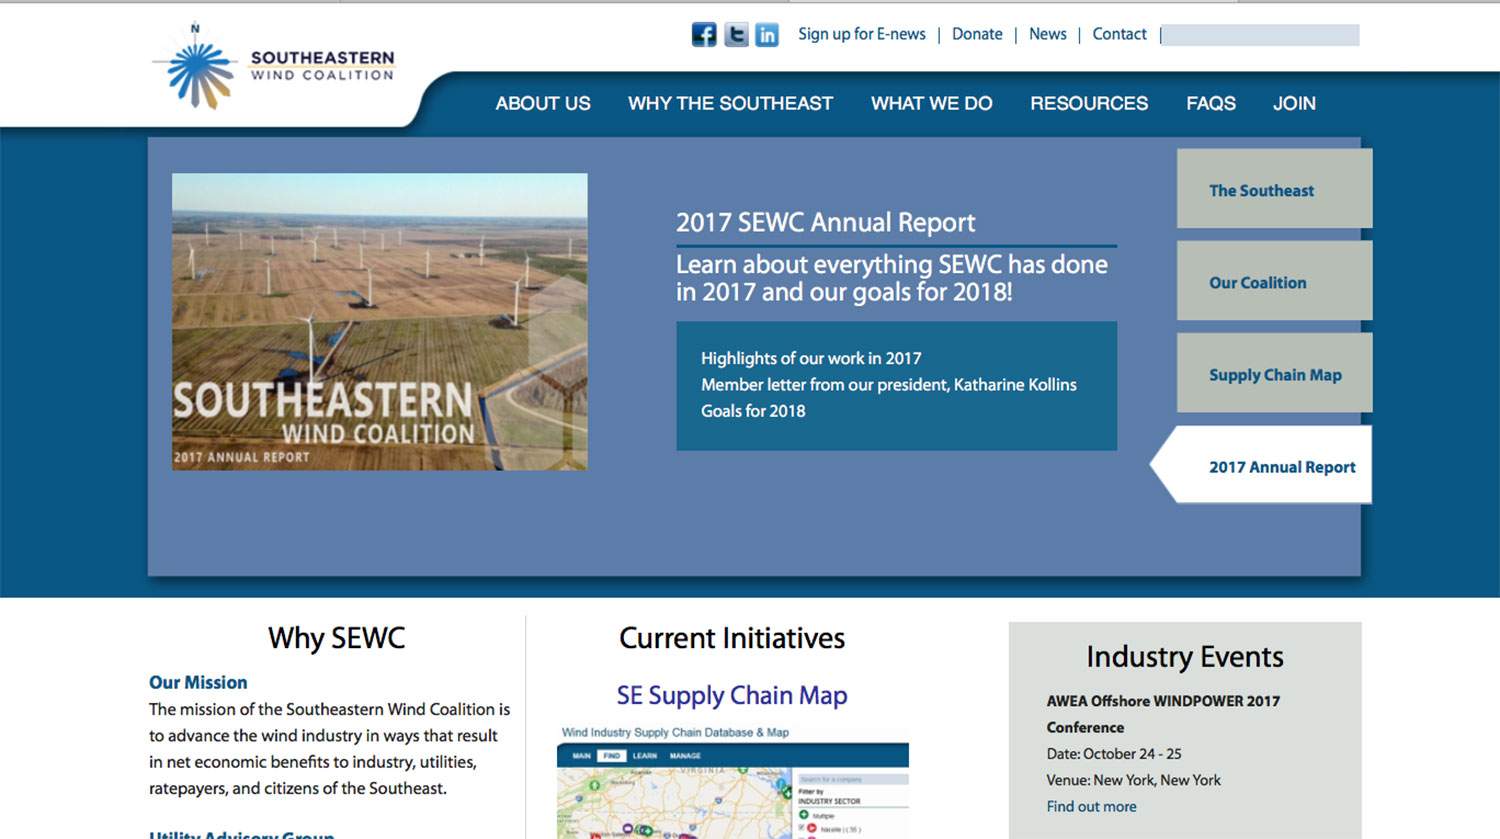
This Expression Engine content management site allows the coalition's staff to update the site's content as needed. Rouviere Media designed and developed the website for the coalition a decade ago when the wind energy industry in the Southeastern United States was just beginning, and the industry has grown ever since. Rouviere Media continues to maintain the site and has taken it through a number of upgrades and revisions since it first went live. Our lead developer, Forrest Anderson, has done the development, and our lead designer, Donna Rouviere Anderson, has done extensive design on the site over the years with a great deal of input from the coalition's staff.
The site is designed to inform the wind energy industry, government decision makers and others about the economic opportunities of wind energy in the U.S. Southeast.
The site has changed substantially over the years, with a variety of features at different times.
The site spells out the benefits of wind energy and suitability of the Southeast for development. It showcases advisory groups and initiatives spearheaded by the coalition.
For a number of years, the site had a section for coalition events with information about them and other industry events.
The site also has a separate section for the wind industry that includes a supply chain map which members of the industry can add thir information too.
The site is fully integrated with social media.
Sunset Western Garden
Rouviere Media did the website development for this plant collection as well as creating a climate zone infographic with maps, a retail locator infographic and a plant collection catalog.
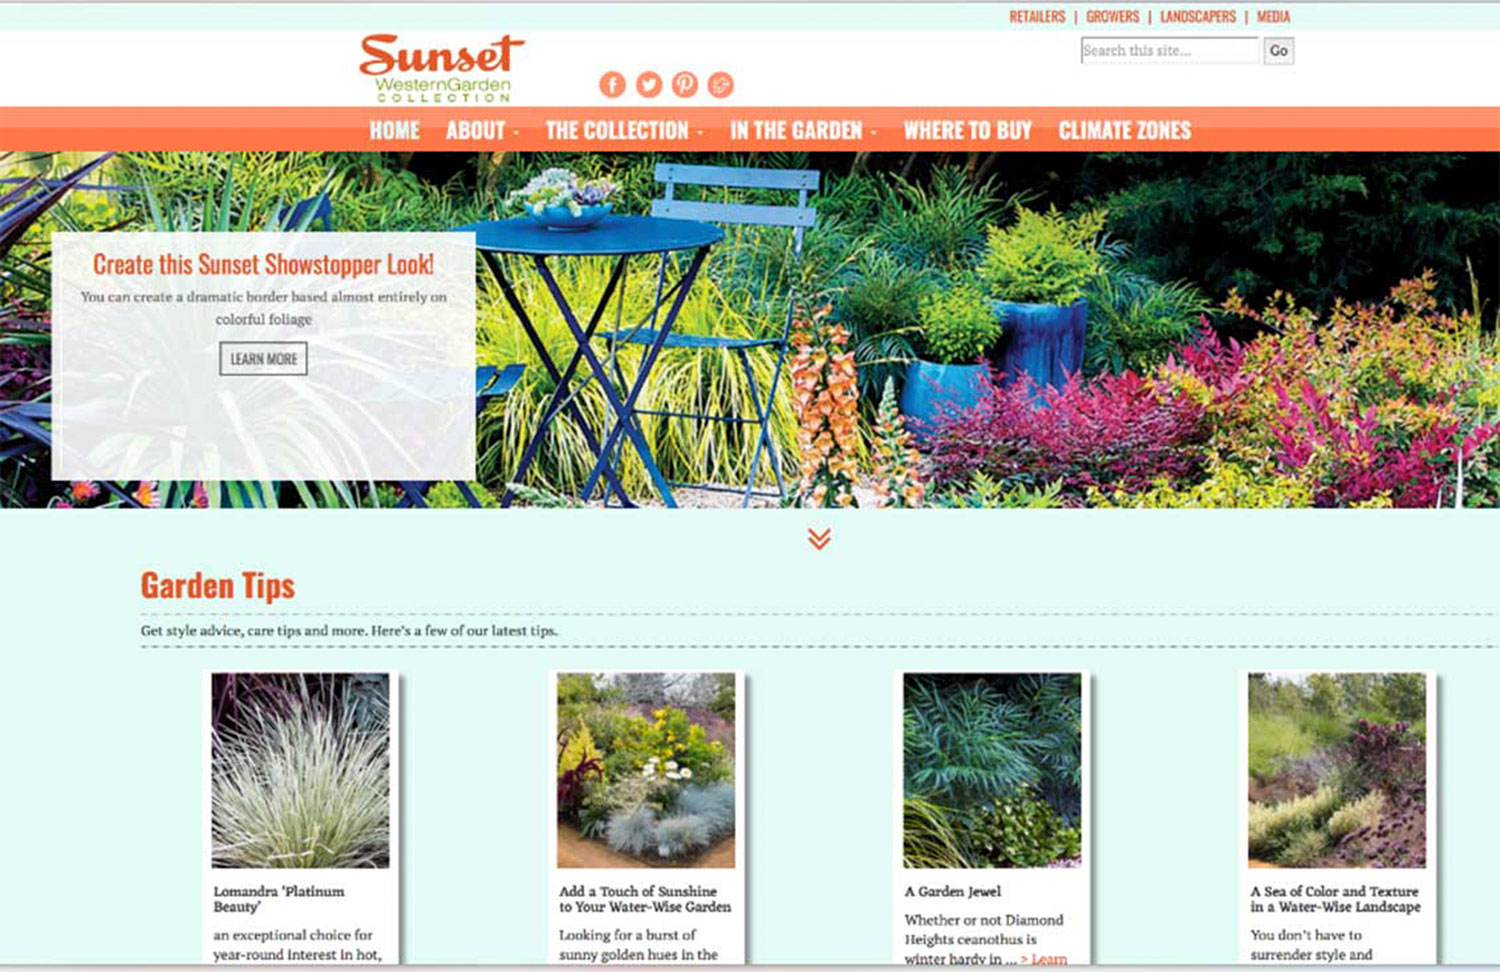
The Sunset Western Garden Collection is a live plant collection that focuses on plants for western gardens. Rouviere Media worked on the development for this site on assignment from Optera Creative, which did the designs. The site's content management system allows non-technical staff to update the site’s content.
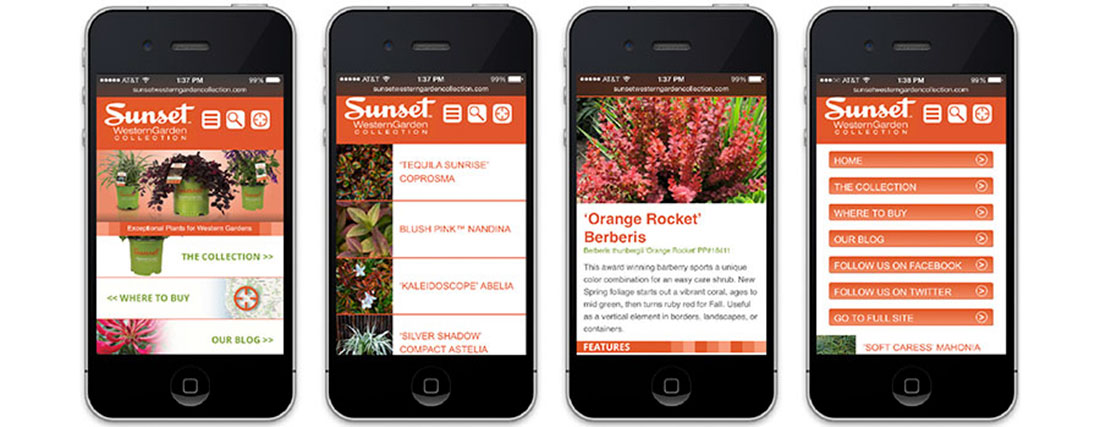
Forrest Anderson, our lead developer, did the development for the site, including the mobile site, for Sunset Western Garden Collection.
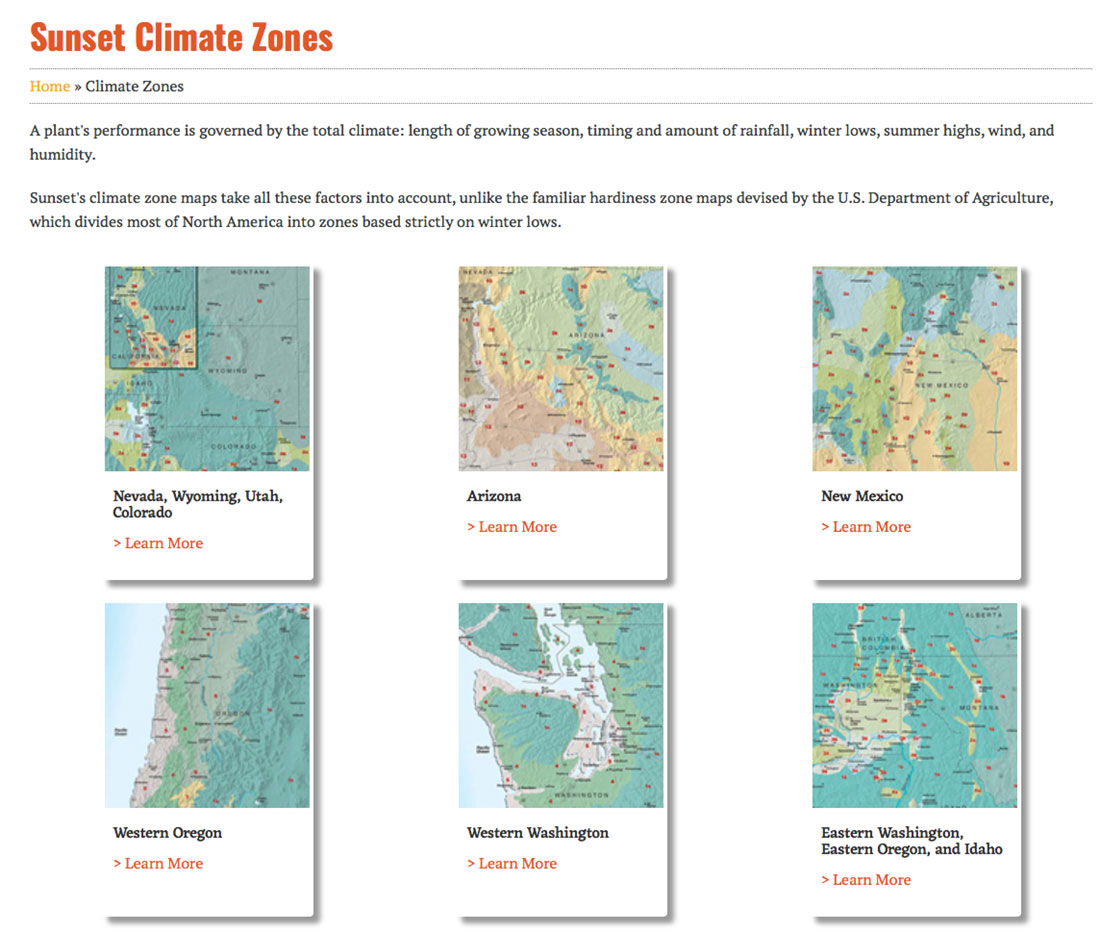
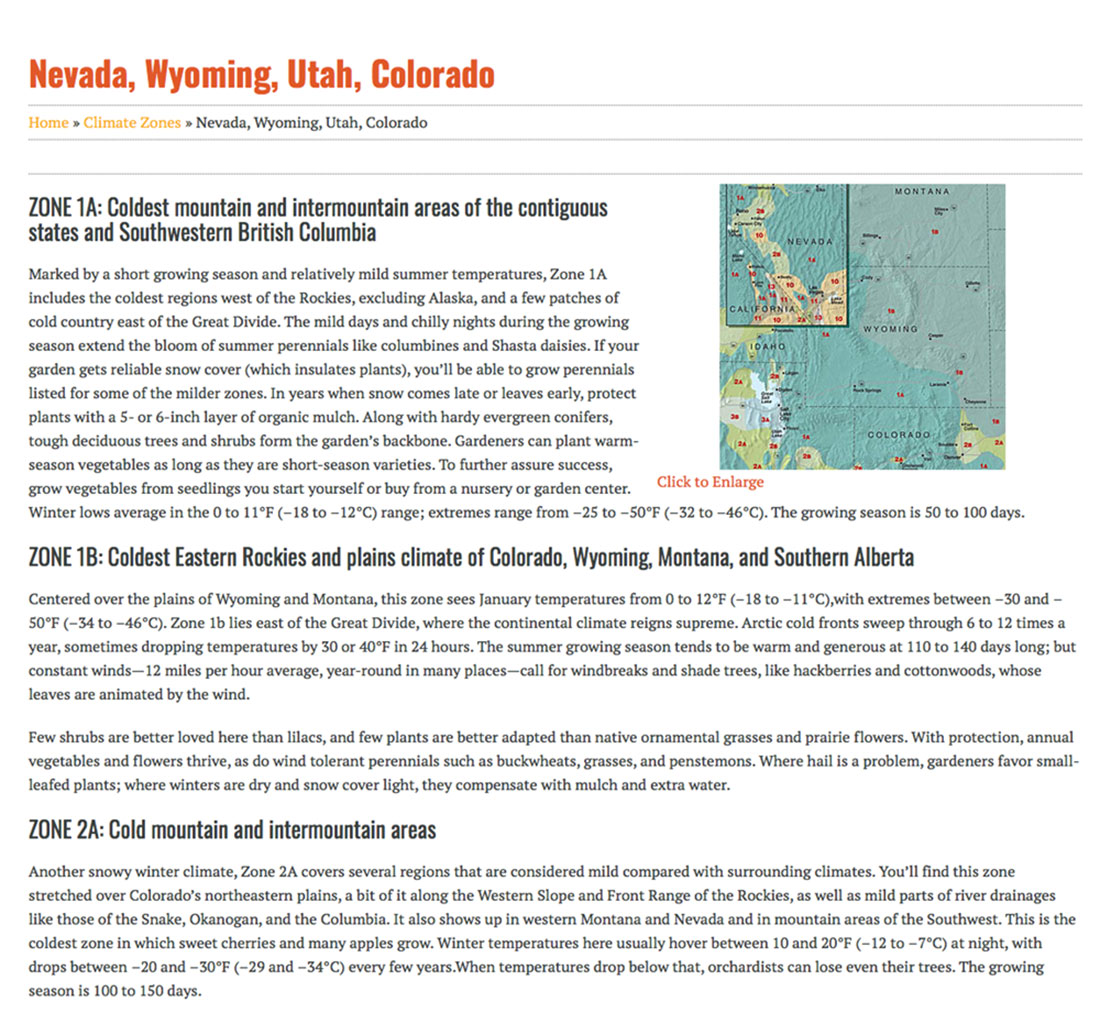
The principal features of this Expression Engine website include a climate zone infographic with maps, a retailer locator infographic and a plant collection catalog.
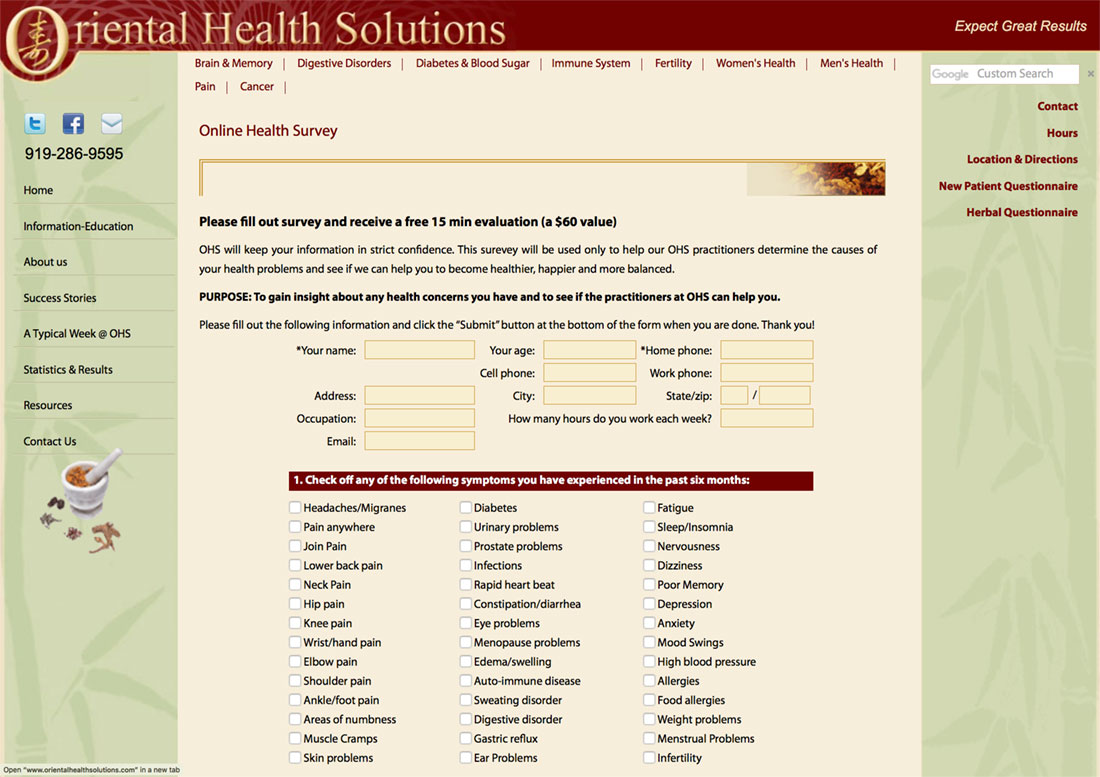
Oriental Health Solutions
Rouviere Media has managed this complex website to handle this health practice's large repository of health information for more than a decade.

Oriental Health Solutions is a busy practice in Durham, North Carolina, that treats a variety of health problems. The practice's website requires a complex but user friendly navigation system with many home page links. Creating a navigation system that was simple and handled the large amount of information without confusing users was the biggest design and development challenge of this site. The navigation design took many hours of consultation, but the result is a streamlined site that is a treasure trove of data on a wide variety of health problems.
Rouviere Media has done two major revisions of the site over the past decade, both under the direction of leed designer Donna Rouviere Anderson, with lead developer Forrest Anderson doing the development.
Among the site’s many features is a complex health assessment questionnaire.
Mongol Warrior Illustration
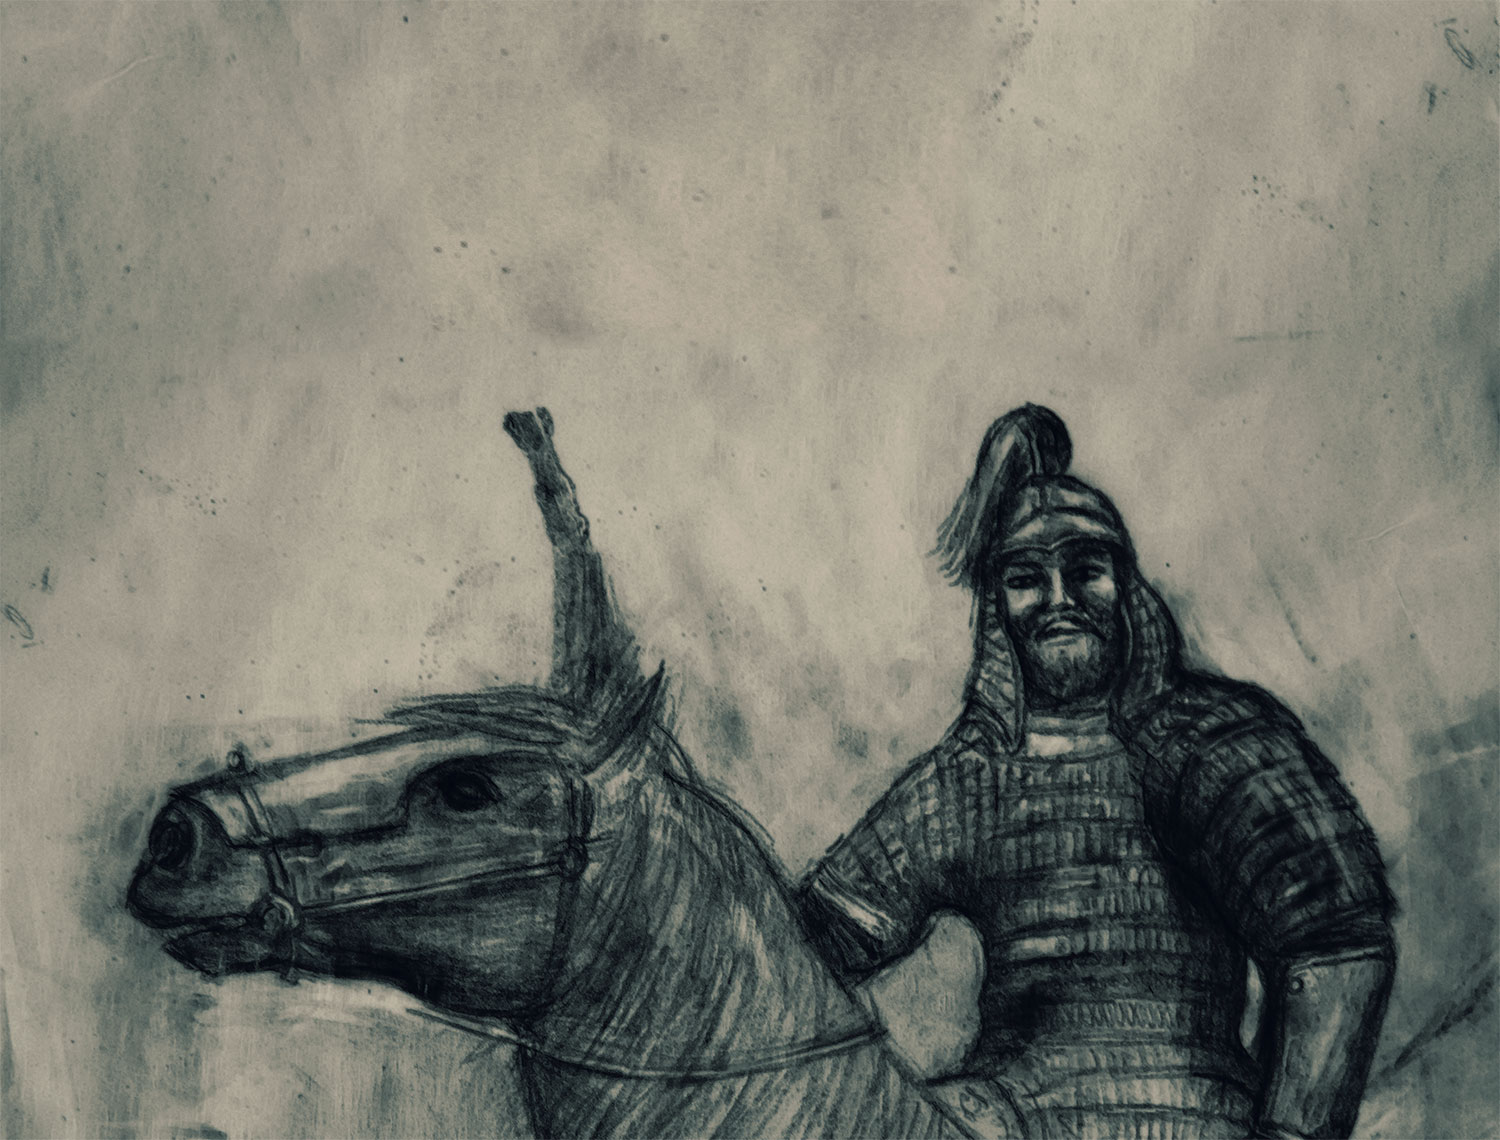
Donna Rouviere Anderson of Rouviere Media created this illustration of a Mongol warrior for an interactive e-book on the history of China. The illustration called for the artwork to be used in conjunction with Mongol leader Genghis Khan's invasion of Beijing and required the mood to be dark and threatening.
Mortise and Tenon Timbers
Rouviere Media produced this video about the building and installation of mortise-and-tenon artisan timbers on The Thoughtful House in Mapleton, Utah. See hobblecreek.us for our blog about the timbers and the history of mortise-and-timber construction. The music is by one of our favorite composers, Kai Engel.
Creating a Website Design Language
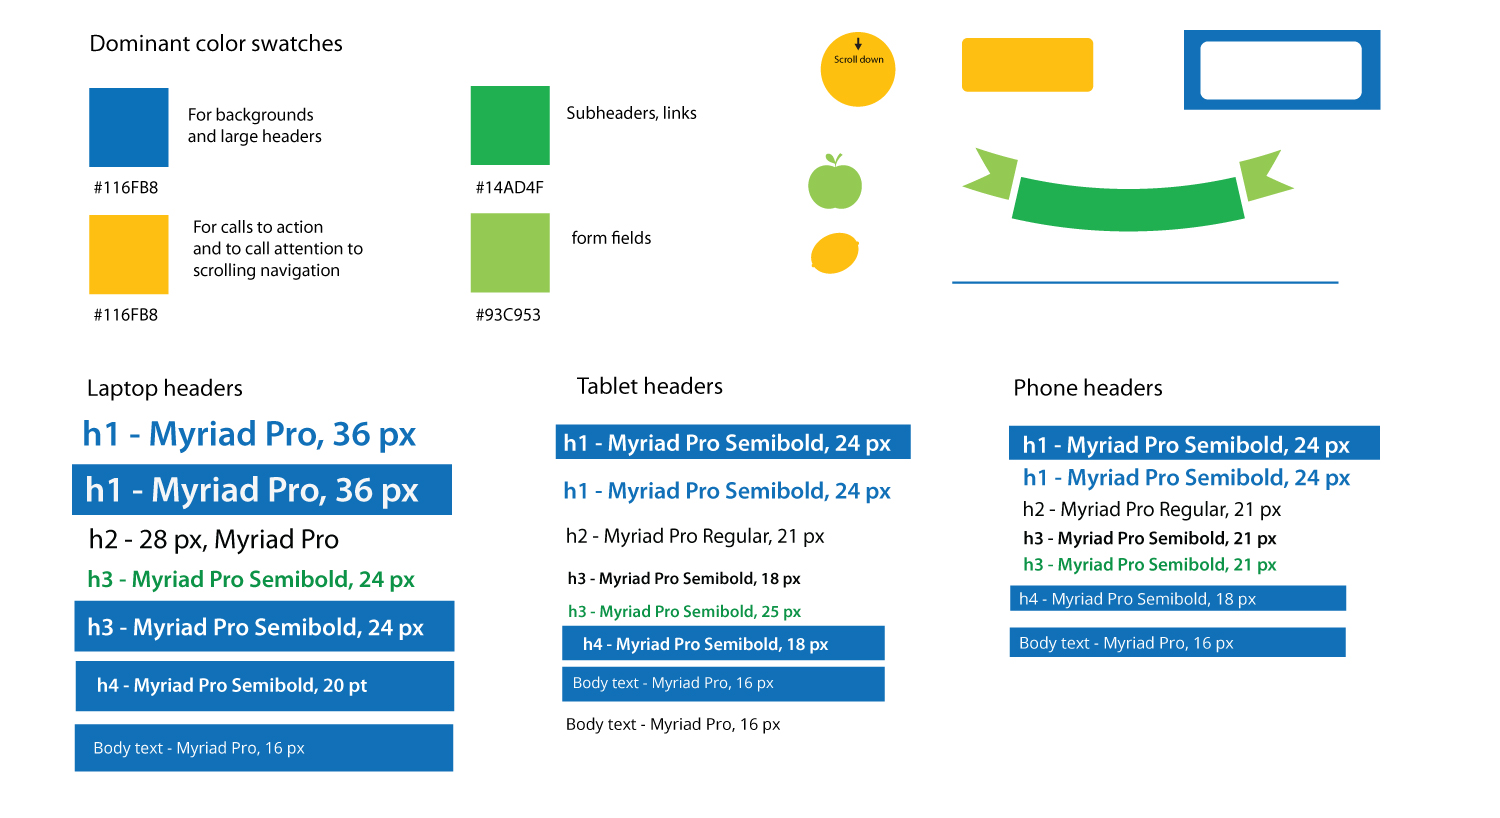
Once you have gone through Parts 1 and 2 of Designing and Building a Website, as outlined in our previous two website workflow blogs, it’s time to establish a design language for the website. This includes the colors, media, typefaces and other visual language components that will convey the right information and experience for your website users.
This is visual design for meaning. You need to ensure that all of the visual components of the site come together to tell a coherent and compelling story that covers the website’s most critical needs. Consider the aesthetic and emotional aspects of the design language in addition to the website’s function. Consider how the website should look, feel and behave.
Your design language needs to be purposeful, so you should have a good reason for every decision you make about colors, shapes, textures and graphics. Don’t stick in boxes, borders or other visual elements that serve no purpose because they will distract from communicating the website’s purpose.
Make sure the design language is unified across all services and elements of the website and employs the shortest effective path to communicate.
Visual language + content = meaning. Use the visual design elements to set users' expectations about their experience with the brand and website, to communicate what various parts of the website will do.
Make sure you design for both the client and the client’s audience.
The design language should include a color palette, typefaces, textures and shapes based on the experience attributes that you have previously decided on for the site. It should reflect the type of content the website will have - photos, graphs, tables and infographics of various kinds. It should include common interface controls such as buttons, tabs and navigation bars and a representative icon or two if you are using icons.
Often, you want to create more than one potential design language for a website, each of which focuses on one primary experience attribute that you want the website to have. Then consult with the client and eliminate the less effective ones. This helps stakeholders to choose the best ones and eliminate the ones they don’t like. These small design languages are an inexpensive way to help stakeholders agree on a website’s strategy before applying expensive detailed visual design to multiple screen states.
Assess your various design languages when you have finished them to decide if they clearly emphasize one experience attribute without losing the others. If one seems to be missing, vary one or two visual properties such as shape, texture or line style to introduce the missing attribute.
A design language should include:
Hierarchy
A clear hierarchy that draws attention to the most important items and creates an aesthetic impression. If the controls and text are large, they will be friendly, playful and simple. This works well for children’s websites and consumer products. Smaller controls and text work for sophisticated and professional sites. Make sure all text in the hierarchy is large enough to be seen well on an iPad and iPhone. Size everything according to what you are trying to communicate. Larger elements are more important.
Design for the device that is most important to the product, so if the phone is the most important, design for it first and then work up to larger devices in their order of importance. Use grid templates in the right sizes for your design languages. Make the text and images scale, buttons shrink and columns change as needed. Work with ratios to resize your images and fonts.
Color
Choose a color palette for the user interface, background and text that is appropriate to your client's needs. Consider the industry, business, target audience, medium, the site's mood, its history, current trends and competitors. Create a color palette with 2-4 colors - a main color, a secondary one and 2-3 accents.
Use color to draw attention to important information or controls, show relationships, evoke emotions and reinforce brand identity. Set it up so it has meaning - shows location, page titles, headers and links and highlights actions and interactive elements. Use it to unify the overall navigation system. Try colors on different displays to see how they look. A little color goes a long way. Use warm, bright, saturated colors for emphasis and desaturated ones for less important information. Any color contrast, especially red, yellow and orange, draws attention. Don't use one saturated color on top of another - it causes eye strain.
Don't necessarily use dominant brand colors as dominant interface colors. Use bold colors only for accents, and more subdued ones for backgrounds and large areas.
Use pops of color for headings.
Color choices
Tints of nearly any color are seen as softer. A shiny, metallic version of any hue is richer, colder and more high-tech. Sharp contrasts are more bold and decisive. Using closely related colors makes less of a statement but is more mellow.
Various industries use different colors, so take a look at many websites in your website’s industry so you get a feel for what colors are associated with the industry.
Contrast can draw attention to the main focal point. Create specific areas of interest with contrast that draw visitors in and keep them engaged.
Gradients and drop shadows can give an illusion of depth. Don’t use them unless you have a reason for doing so.
Background
Keep it subtle and decide whether the site will expand to fill the width of the window or stay the same with the background expanding behind it when the window is enlarged.
Decide how you want to do scrolling and navigation from the home page.
Decide whether the background will move with the content or stay fixed and the content goes over it when it is scrolled.
Elements
Include the following elements in your design language.
- Branding and logo
- Main navigation
- Tag line
- Section header
- Images
- Body text with clear headers
- Footer with icons, etc.
Shapes
Rounded corners are soft, human, friendly and simple. Sharp ones appear clean, modern, precise and professional. Complex shapes are not easy to recognize. You should have a clear reason for using them.
Line weight and style
Thin, sharp lines look precise and sophisticated, while thick, bold ones are simple, friendly and less mature.
Consider curved lines or ones in different styles to communicate your message.
Use borders where they communicate well.
Type
Use it to create navigation hierarchy, hierarchy of importance, reinforce the brand and identify the type of site.
Pair fonts harmoniously, contrasting serif and san serifs and avoiding two very similar fonts together.
Match the fonts with the tone of the site and its scale. Use an infographic approach.
All sections need to be clearly labeled with headers, sub headers, etc. Images can be used to draw attention to the important text. Keep typefaces for headers and sub headers to one or two.
Sans serif is generally more legible than serif, especially at small sizes. Use mixed case type. Don't use anything smaller than 14-16 point if you are displaying it on mobile devices. Left justified is easier to read.
Corporate identity is usually the best place to start in choosing typefaces. However, identity fonts are often best applied to headers and other large elements rather than the majority of a screen's content.
Use script and creative fonts sparingly and with good reason.
If a linked text is accompanied by an icon or a photo, make both clickable. You can make icons bigger when you roll over them.
Rollover effects are important. Changing the color or underlining text provide simple feedback. Create a good hypertext style guide to achieve unity that includes inline text links, featured items, buttons, icons and footers. For buttons, scale them in 10-20% increments and use the most important in a larger size.
Build CSS styles to easily make changes.
Creative options - overlap fonts, add shadows or texture, play with letter case and spacing. Make sure the fonts convey meaning.
Texture
Texture can work well as a background, or on header, footers, navigation bars, buttons and dividers if used sparingly. Combined with photos, it can convey a weathered or grunge look.
Textures and three dimensionality indicate that items are moveable or clickable and can add some aesthetic richness if not overused.
Bright highlights convey high tech.
Subtle mottling conveys a softness to the touch.
Subtle ridges indicate something can be moved.
Visual textures can help to create a mood, but they aren’t a good choice to convey important information.
Patterns, rhythm and shapes used repeatedly can unify a design.
Images
Photography is often the best choice for images. Image style should be consistent with the website brand and the experience you want users to have and the style should be unified throughout. It gives a polish that's difficult to achieve with illustration.
White Space
Show only what is essential in the design, with plenty of space to keep it uncluttered.
Movement
Make sure design languages move logically and smoothly from one area to the next. Consider ways to lead the visitor through the design and anticipate their habits as you choose visual elements.
Overall
When you've finished a design language, step back and look at it as a whole and make sure the elements relate to each other and look like they are meant to go together.
Concrete Slabs Video
Rouviere Media produced this video about the pouring of the concrete slabs for The Thoughtful House for a blog entry on hobblecreek.us.
Carmel Video
Rouviere Media produced this video about Carmel-by-the-Sea for a blog entry, Why isn't Every Town like Carmel? on hobblecreek.us.
The Thoughtful House Foundation
Rouviere Media created this video of the building of The Thoughtful House's foundation. See our blog on Hobble Creek about the process of creating the foundation.
The Wide World of Food Photography

Photos by Forrest Anderson
Food photography is an exceptionally broad field of photography that encompasses a wide variety of photographs in many styles.
We honed our food photography skills while working as international journalists in Asia in general and China in particular. China is a country with a rich and varied cuisine as well as an obsession with food. Food is both a fun and very serious matter in China because of the constant fierce pressure to feed 1.3 billion people in a country with limited arable land and a water shortage. We learned through this experience that food photography touches on many other styles of photography – landscape, agricultural, environmental, fashion, advertising, editorial, historical, art, documentary, scientific, closeup and others. It also deals with some of the major issues of our time – population growth, climate change, immigration, consumerism, health, biological engineering and globalization, to name a few. Food photography often involves a food stylist and lighting set, which introduces a whole new dimension of artistry.
The key to good food photography, like most other photography, is to always keep in mind that you are creating a portrait of human life. In order to be meaningful to your audience, your photography must communicate something interesting and significant about the human condition.
Food photography is one of our passions. We photograph food for cookbook projects, website projects, books and a variety of other purposes.
This blog is the first of several future ones we plan to post about food photography. and is a general survey of the many possibilities for great food photos.
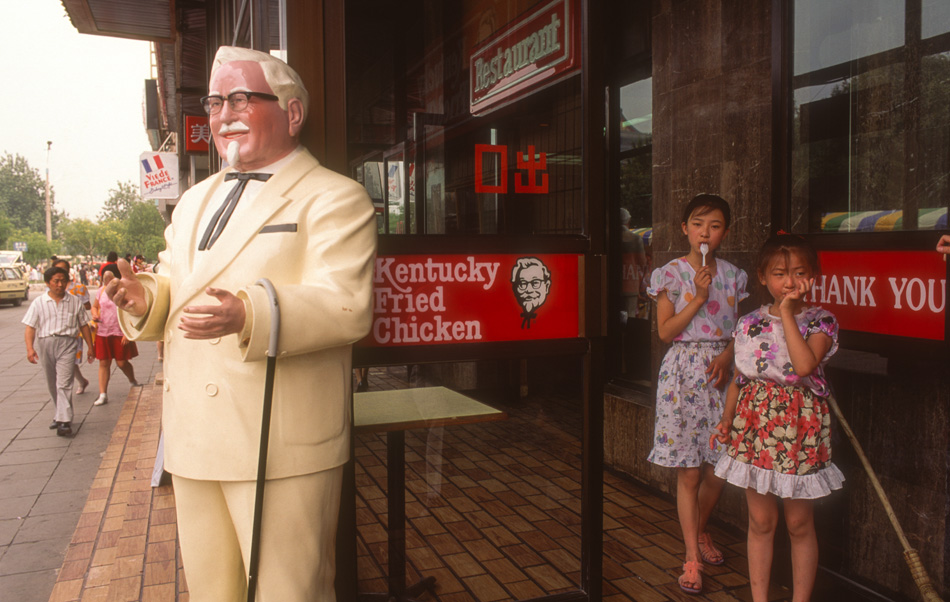
People eat
Our favorite food photos are ones that we capture while shooting broader topics about people. Food is an important part of life, but is somtimes ignored when documenting people's lives. When shooting pictures, don't take a break at lunchtime. Instead, accompany your subjects to lunch and photograph them. Come early and have breakfast with them, snapping a few pictures. Photograph them having dinner with friends or family at the end of the day. This photo of two girls exiting a Kentucky Fried Chicken restaurant in Beijing, China, transcends cultural barriers.
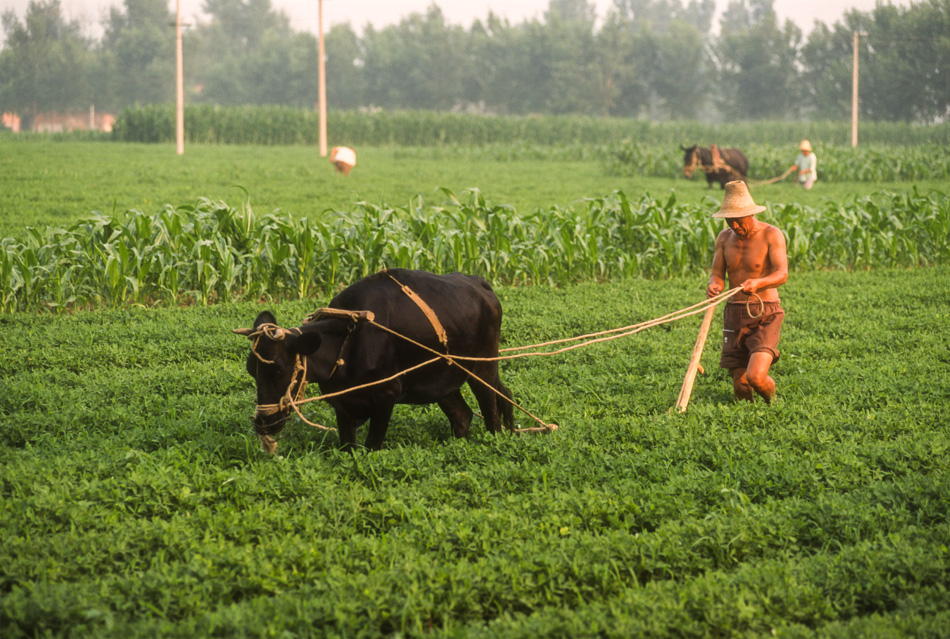
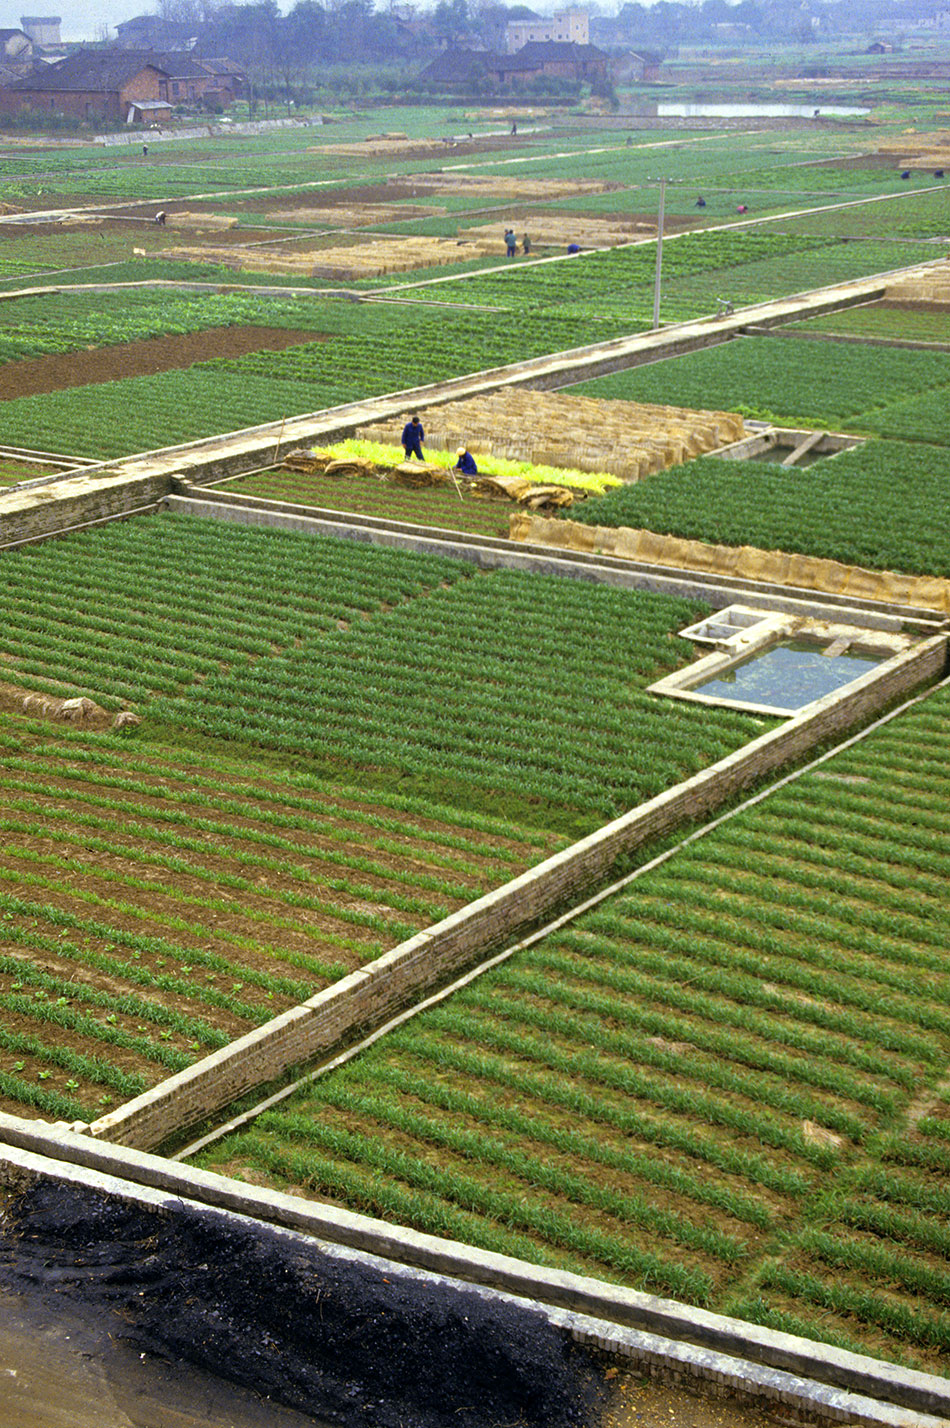
Agricultural Landscapes
Food photography includes agricultural landscapes - sweeping views of fields planted with crops. Wheat, barley, corn, potatoes, carrots, cabbages, lettuce and other vegetables as well as fruits are always worth shooting. Photograph in the spring, when new crops are being planted and then every few weeks as crops mature. Harvest time is another great photo opp. Capture with a wide angle lens the converging lines created by young crops planted in tidy rows. Get down low with a wide-angle lenses to capture crops growing against the sky. Isolate individual plants. When you have a chance to fly, photograph the patterns created by different crops planted in neighboring fields. Photograph tractors and combine harvesters, as well as crop dusters spraying crops.

If you live in California, photograph effects of the drought on agriculture. When there is a natural disaster, photograph farmers looking over ruined crops in your areas. Photograph farm animals from when they are newborns until they are herded into trucks for butchering.
If you are interested in quirkier photos, experiment with closeups of cows and sheep with a wide-angle lens.
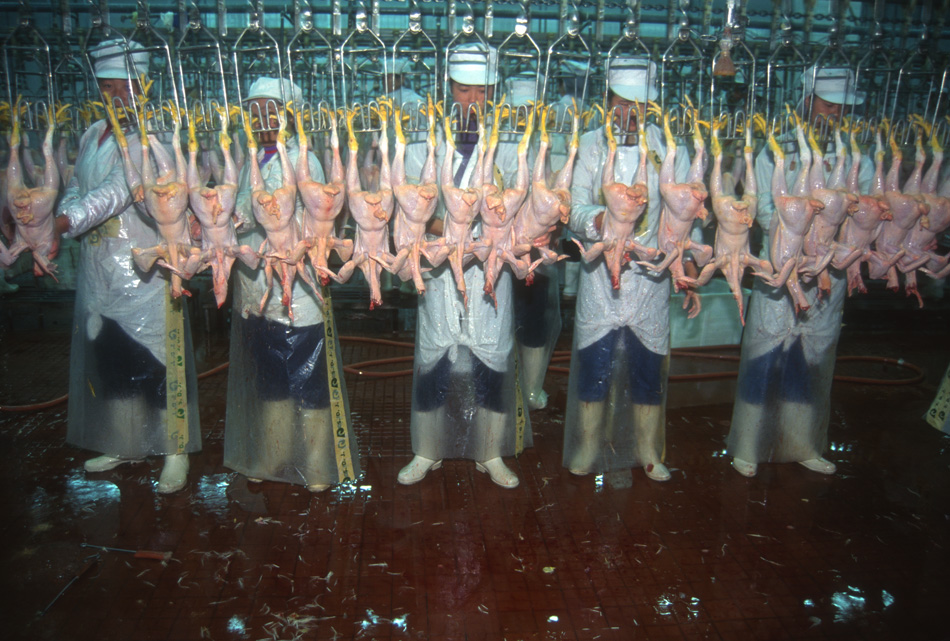
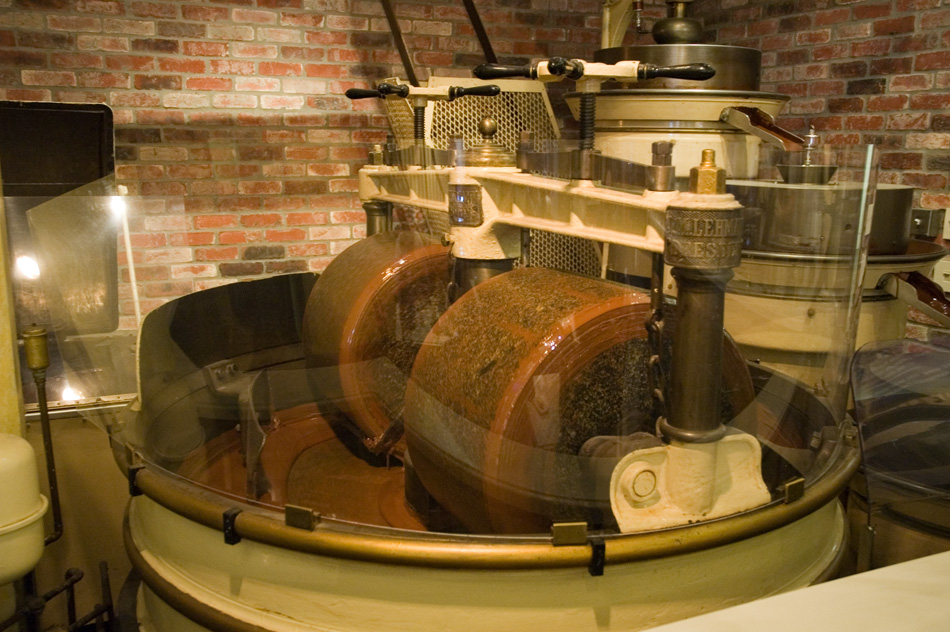
The Manufacture of Food
Most manufacturing is extremely interesting to photograph, especially food manufacturing.
Chocolate making at Ghirardelli Square in San Francisco.
The Transportation of Food
Food travels globally to get from farm to dinner table. This journey can make for fascinating photographs. Below, truckloads of cabbages enter Beijing, China.

American grain is unloaded at a granary in Beijing, China.

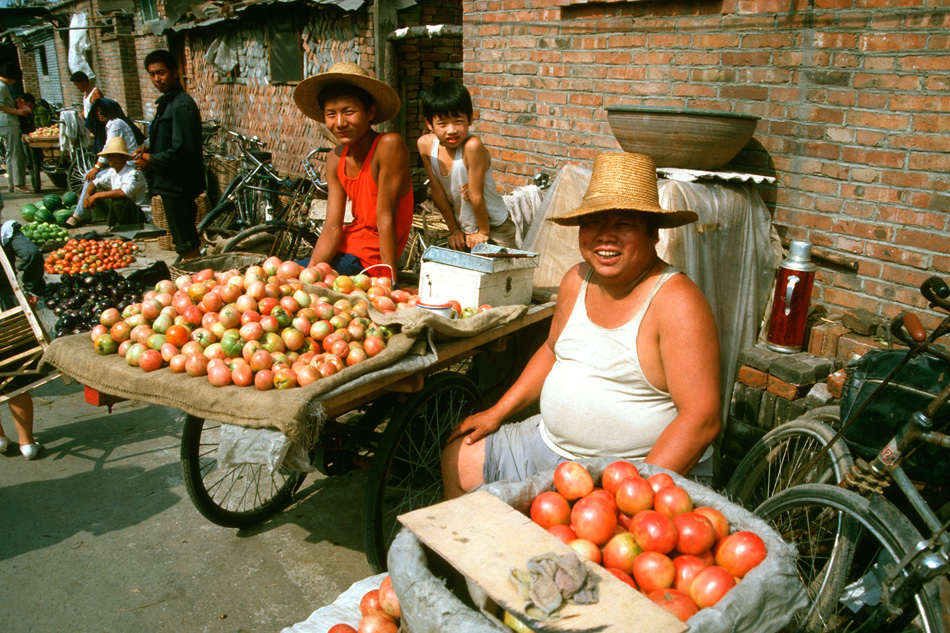
The Marketing of Food
Markets, stores and restaurants are a huge proportion of the global economy and are always colorful subjects.
Food Still Lifes

This type of food photography is what most people think of when they think of food photography. Some photographers go to great lengths to ensure that their food still lifes are perfect, with perfect food prepared by stylists who are concentrating on how the food looks rather than its consumption. Great pains are taken with props, lighting and artificial means such as invisible toothpicks, glue and other devices are used to make food look perfect. This style was the gold standard for food photography in the advertising world of the 1980s and 1990s. It is still seen (why do your favorite hamburger joint’s advertising photos not look anything like the lopsided hamburger that is shoved hurriedly at you by the teenager behind the counter?) However, the food bloggers and Pinterest have changed the food photography world dramatically. Many food photographers now insist on creating more realistic, natural looking food in natural settings - food that will actually end up being consumed and enjoyed after the shoot.
We find this style refreshing. Our food still life photography ranges from beautiful food photographed in a farmers’ market or a roadside stand to plates of food that we carefully craft and style. So we’re in the middle between the perfect advertising style and the blogger. Our goal is to concentrate on what makes food meaningful from a human perspective. We’re more focused on that than on whether we have spent half an hour perfectly arranging a ruffle of lettuce.
Food photography is as susceptible as anything else to style trends, but we concentrate on simple, cluttered shots that tell the story we want to tell.
We photograph food everywhere – at the supermarket, farmer’s markets, at home before eating dinner or a special feast, in the kitchen while it is being prepared, at a fish market and anywhere else we can.
Vegetables, fruits, simple plates of food and bread all make great still lifes. For mineral water or any other bubbly drink, photograph it quickly after pouring it so you can capture the bubbles.
A subset of food still lifes are symbolic food concept photos. This photograph of a man's hands holding rice can be a symbol of feeding billions of people in some parts of the world.

Fresh strawberries shout freshness and good health.

Creating an environment for food
What if the food that is the main subject doesn’t look that great in a still life no matter what you do? Create or find an environment for it that tells the story. Put the food at the bottom of the frame on a butcher block counter, with the raw ingredients arranged behind it so you are telling the story of its creation. Or take it outside and put it on a picnic table with a picnic basket behind it. Arrange items so that the lines lead to the food.
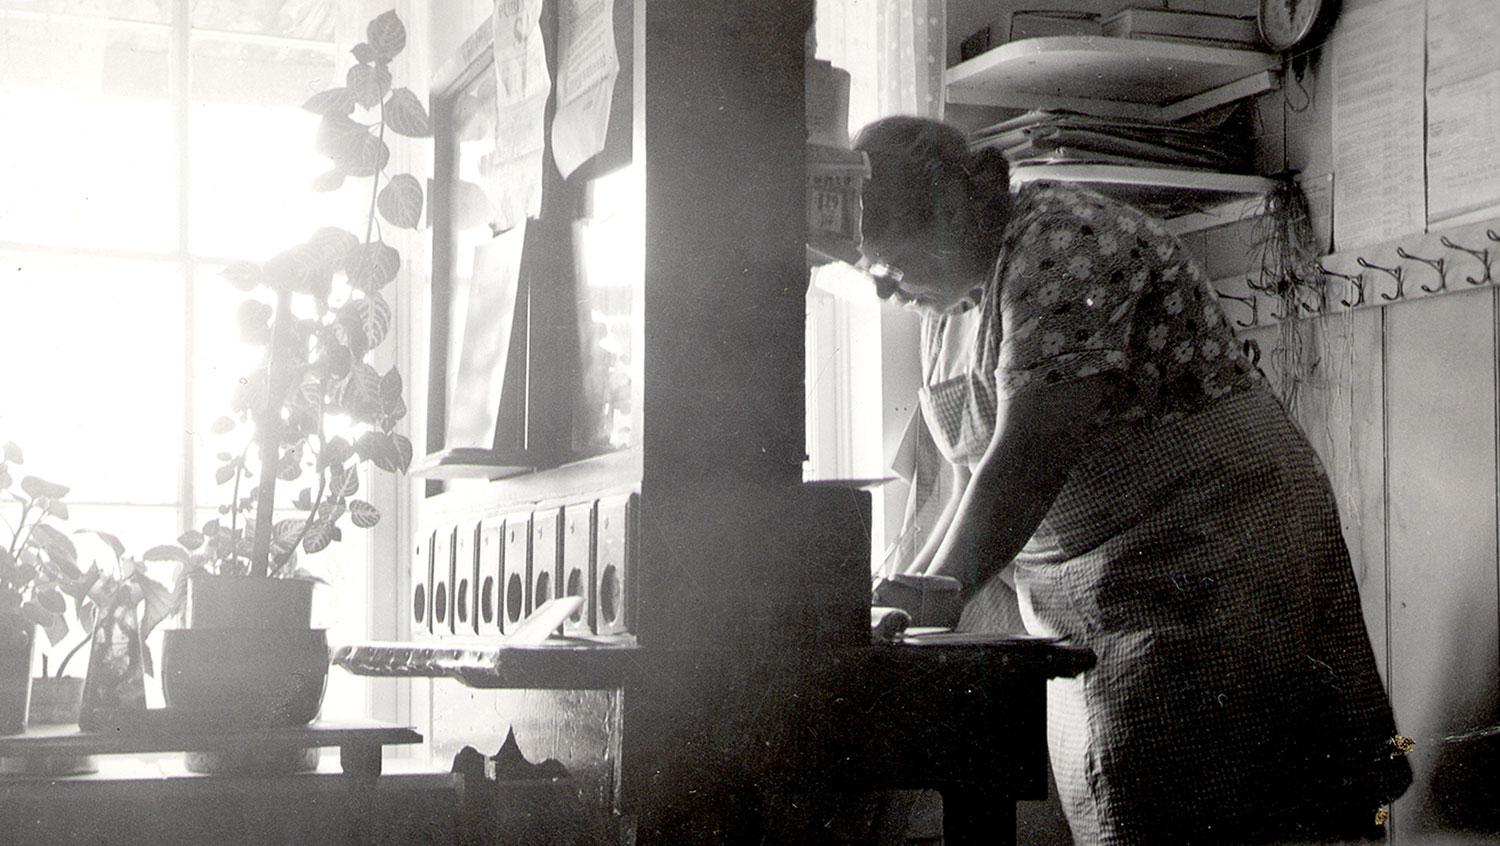
Photographing food in a restaurant or kitchen
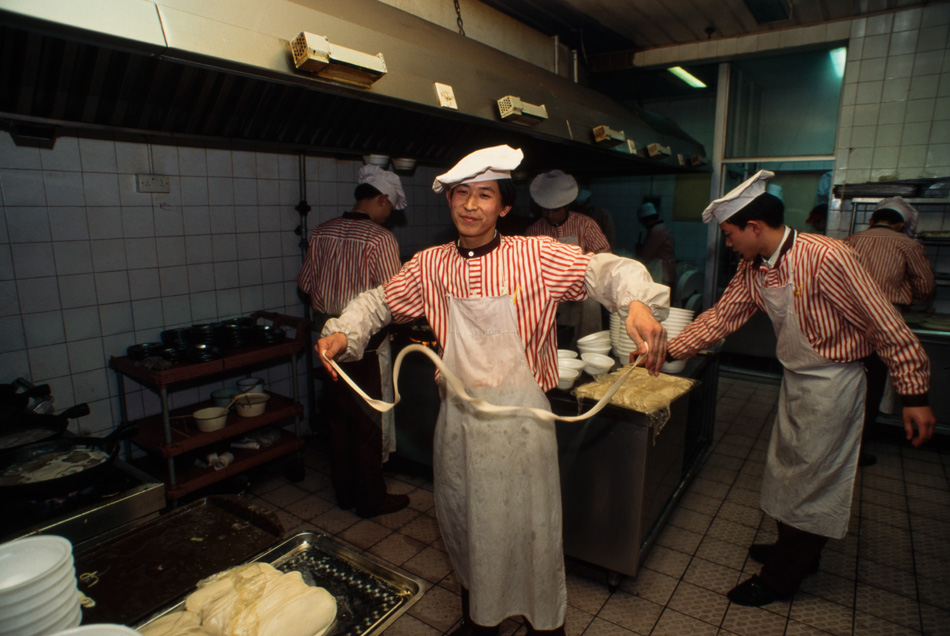
Start by making sure the background isn’t too busy and the items you are photographing all look good in a kitchen. Try to find locations where large polished pans are hanging in the background or there is an inviting scene in the background, for example.
In a restaurant, the best time to photograph chefs is 11 a.m. and late afternoon., because the food has been prepared but the crunch of guests haven't arrived yet. Arrange the shot so they look good for a picture. Try to take someone with you to assist you so that you can work quickly and get out before the chefs become busy.
If you can, shoot on a tripod and use light bounced from an umbrella with soft side lighting.
In a restaurant dining room, photograph with a strobe bounced from an umbrella or through a soft box. Bring people with to pose as patrons in the restaurant if you like. Have them wear simple clothing. If you want to sell the pictures, make sure you get model releases and also written permission to photograph in the restaurant.
Don’t be afraid to rearrange items on a table to get a good shot. After the shot, restore anything you may have gotten out of place for the shot.
With this type of food photography, correct color can be important and you might want to photograph a GretagMacBeth color checker and match it to your photos later.
Don’t forget to include the chef, owners and waiters in the environment.

Shooting food outdoors
This often involves the logistics of buying and cooking food and getting to the site, so you need to plan well in advance for that. You also need to consider what time of day is best and check the weather and angle of the sun. Generally, about two or three hours before sunset is best for shooting food outside because you have nice warm light.
Start by composing the background, and then light the food area if necessary to balance it. Put the food close to the lens so it dominates the pictures. Do test photos and arrange the food and drink as you do. Shoot both horizontals and verticals.
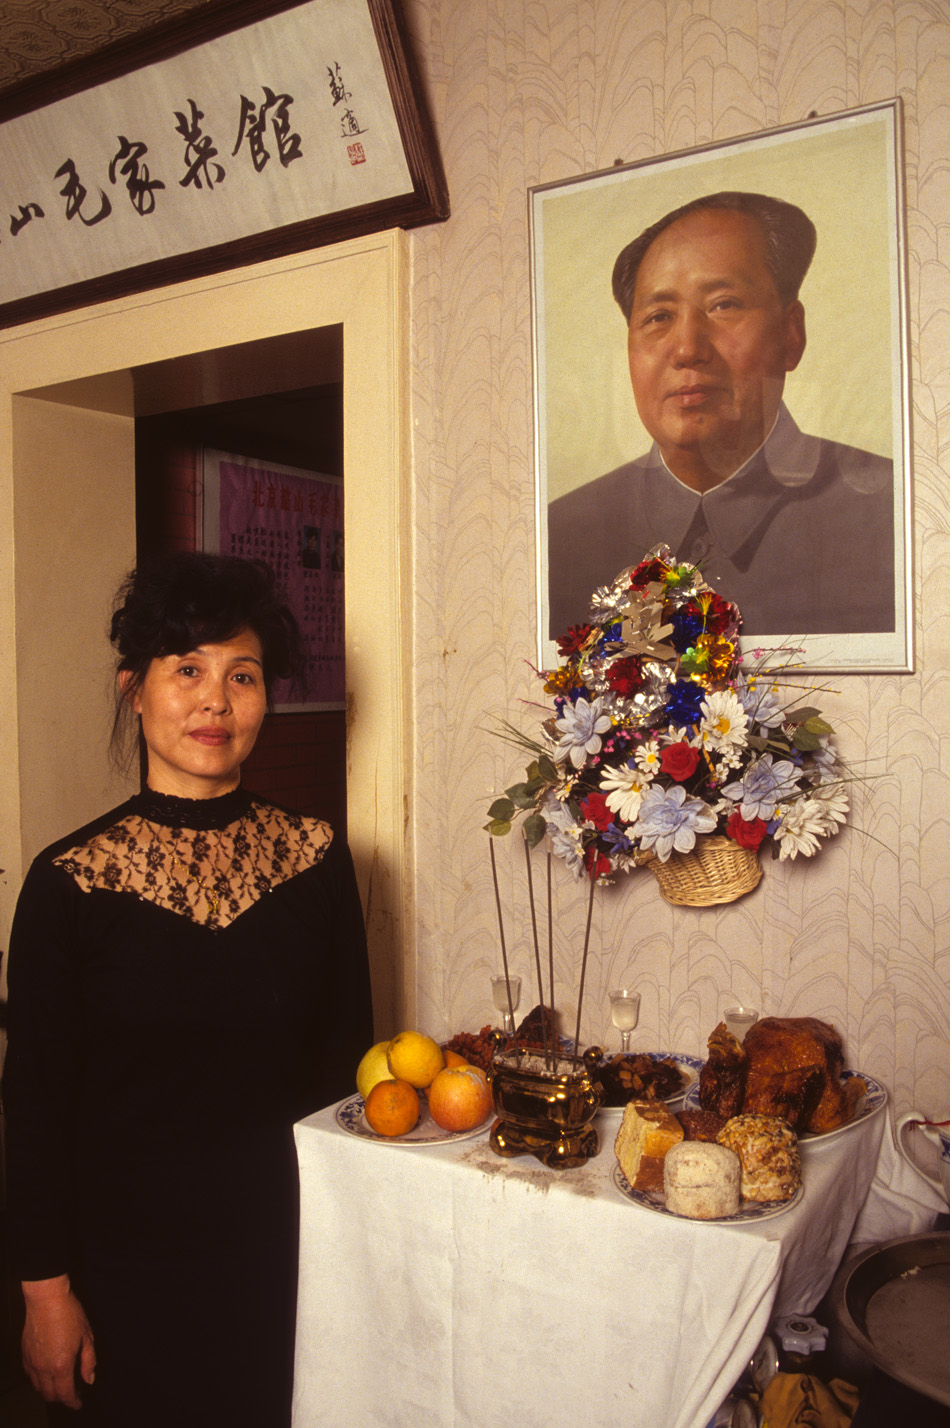
The rituals of food
Food has intensely symbolic meaning in most cultures. In the photo below, a restaurant owner in China offers food to a photograph of Mao Zedong as a symbol of respect.
Optera Creative
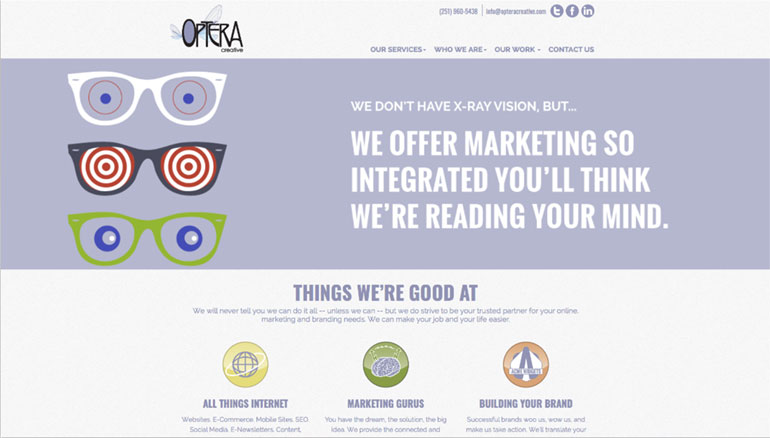
Rouviere Media did the web development for this design company website, using designs by Optera Creative. The site is an Expression Engine content management system on Bootstrap responsive technology, so it adjusts to various mobile devices. It also has e-commerce capability.
Live by Design
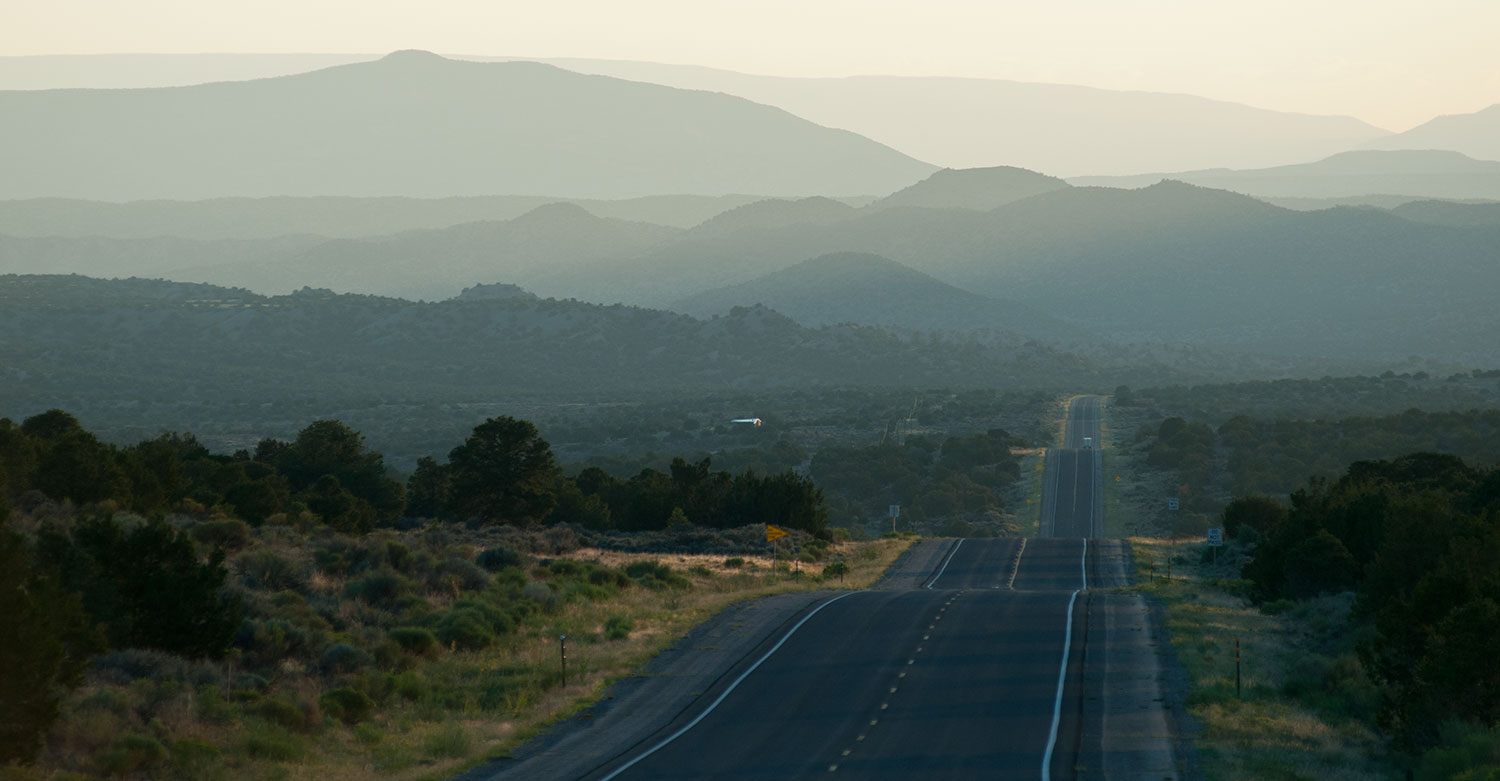
Photo by Forrest Anderson
Successful creative professionals never give up vigilance over their soul to anyone else. They live by design.
They include in their lifestyle the time to care for themselves. They set aside blocks of time to bring their lives into order so that they can live simply, civilly and with a sense of balance, beauty and good design.
They respect their own choices and give themselves a right to refuse projects that they believe won’t end well. They stand back before spiraling down into bruising experiences that prevent them from getting good results.
They fill their minds with good ideas and then nourish the best of those ideas until they come together in reality. They nourish the thoughts that will take them in the right direction and shun those that stunt their creativity.
They are willing to get away from the crowds to chart their direction, a clear step-by-step one toward real fruit and away from obstacles that impede their progress. They are not reluctant to get off the beaten path when necessary to accomplish their goals.
Successful creatives realize that a desire to bring order or clarify in some way is the foundation of creativity. They realize that order doesn’t just mean trains that run on time but that go in the right direction to the right destination and that provide a joyful and relatively safe journey along the way. They realize that it’s an oxymoron to think that they can be miserable now and get to a joyful place in the end. Both the journey and the destination count.
Ideas and impressions come to all of us from outside – some wrong, some right. It is through the act of thinking that we decide what to do with them. This is the beginning of the creative workflow. Good ideas are the consequence of constant exposure to good, fun, productive things. We can decide what to do with the impressions and ideas we get in a self-aware, proactive way or in a semi-automatic “victim” way that is not self-aware. If we choose the second, we allow our thoughts to be processed or moved along an assembly line that we were taught by our families or other influences.This automated approach can lead to erroneous conclusions which we can assume reflect reality.
This type of superficial, unplanned thinking is very dangerous to a creative. It spawns thinking that the grass is greener on the other side of the fence. People think in this way because:
They aren’t paying for the grass.
They aren’t willing to spend the time and effort planting something that will really grow in their own location and climate.
Creativity requires careful, thorough selection of the ideas you will pursue depending on not only the direction you want to go in, but what will work in your environment with your chosen resources. It requires being open minded about pulling up what doesn’t grow and replacing it with what does, paying the price in time and labor for a good product.
This approach is the key to not just a successful creative career but a happy marriage, family and a healthy lifestyle.
To use another metaphor, only internally powered, light, highly maneuverable ships that avoid iceberg zones and have a clear charted destination avoid disaster. Those that are weighed down with unnecessary cargo, that don’t easily adjust to changing circumstances and that haven’t charted a wise course and destination are sitting ducks. Both oceans and the world are natural minefields for the unwary, uneducated, naïve and directionless. You don’t have to be a bad person to become mired in problems that will sink your creative career; you just have to be rudderless and drifting with the winds.
As creatives make conscious, wise choices about the direction of their professional lives, they find themselves abandoning the icebergs in their lives and sailing more smoothly in the direction they want to go. They learn to simply decide to do that which works, then the next thing that works and the next and the next, being discerning about their choices.
Successful creatives choose to live in a world of real talent and real production, deciding where they operate, what they want to accomplish and therefore the results they will get. They don’t worry about feeling overwhelmed. They realize that everyone in the world is overwhelmed - it's a given.
That unexpected things, both good and bad, will happen on the way to a creative destination is also a given, and real professionals never use it as an excuse not to plan and make discerning decisions.
Here are the basic creative tools to set the right direction and keep yourself on the right route:
Creative brief/statement of work - Articulate clearly the goals you want to achieve for a creative project. The creative brief/statement of work is a valuable assessment tool to determine what you want to achieve, because it helps you to know what is expected and decide what you can handle.
The resources available to achieve those goals. These include time, software, the Internet, research materials, access, complimentary projects, your skills.
A project plan. This is crucial. It should preferably build on previous plans and be based on best practices and past experiences.
Risk management – anti-iceberg plans to avoid as many obstacles as possible.
A schedule so you realistically determine how long it will take you to do a project and can set realistic milestones and deadlines.
A completion plan to wrap up the project and deliver it. Ta Da done!
Evaluation, then immediately moving into your next project.
This type of workflow is the foundation of creative professionalism.
Design and Build a Website Part 2
After holding an in-depth design workshop with our client as outlined in our previous blog entry, Design and Build a Website Part 1, the designer and developer need to work collaboratively on the next stage of designing and building the site.
The designer:
- Refines the scenarios and sketches that she started in previous stages of the project.
- Lays out every screen, capturing the decisions made in the design workshop with the client and adjusting them as needed.
- Revises the list of requirements as needed, listing problems and incomplete items.
- Starts the creation of a visual style guide and makes sure that it works coherently with the website's behavior and form.
- Collaborates with others to ensure that graphics and labels are appropriate to the brand.
- Keeps the project on schedule and supplies mockups and image files to the developer and client as needed.
- Creates one or two archetypal screens showing the website's visual design, then follows this up with mockups of the other screens based on the archetypes but containing appropriate page-specific features. The screens include a grid for the layout, the fonts that will be used and their size, color and style for various purposes, and how website controls and data will appear visually. The designer is responsible for adjusting and evolving this visual system as more detailed designs for the content and structure of each screen are create
- Reviews the screens with the developer to ensure that the controls are drawn so that they will be compatible with the way the code is being drawn.
- Defines the components of the website and its interaction with any associated products and services.
The developer:
- Iterates and refines the form and underlying structure of the site and applies the design language and function to that form to create the site.
- Interfaces with other technical experts to create the system as needed.
In an in-depth design session, the designer and developer first need to figure out what they need to accomplish to finish the site, listing the tasks and deciding which to address first.
They need to work through:
- Every scenario that was modified during the client design meeting.
- All of the sketches from the client design meeting.
- Every design decision that was made in the client design meeting.
- Every still-open question, deciding how it will be addressed.
- Every remaining action item, the person responsible for completing it and when it should be done.
- Any important design directions that have been ruled out, why and the implications for the design.
They need to consider the website’s context. Is it an application that people will use for long periods of time to accomplish complicated tasks? If so, the tools and navigation can be optimized for people with intermediate skills who can quickly master the features that they generally use but not every aspect of the website. The data or content should be the main focus. The interface can include drop down menus, icon buttons and other space-saving techniques. If, on the other hand, the website is intended for people to perform a narrowly focused simple task, users will be less willing to invest time in learning the navigation. It should be simple and in plain language. Many websites are a combination of both, with complicated tasks performed by a limited group of users in one section and simple ones performed by a more general audience.
Next, the designer and developer need to consider how to avoid behaviors that will do harm - features that are awkward or hard to use and may cause users frustration, overbearing design that makes people feel ill at ease and bad design that can lead to costly errors or waste the user's time. The goal is to produce a website that improves people's condition in some way and makes their tasks more pleasant and natural, especially in the environment in which it will be used. The website needs to be as practical as possible while fulfilling requirements such as advertising.
If the website fits into a particular niche, the designer and developer need to ruthlessly cull anything that doesn’t fit its purpose.
The developer needs to purchase all domain names needed for 5-10 years and consider the needed space requirements for the website's hosting as well as making a list of needed e-mails and social media urls associated with the site.
The next consideration should be the website design's elegance. An elegant solution is usually the simplest complete one. A design is complete when it accomplishes all that it must, but there's nothing that can be thrown out. Use the smallest number of screens, widgets, and hardware buttons possible to accomplish the task. Minimalism isn't the goal; coherance is the goal. The site must have an internal consistency that makes all of its parts seem to belong together so that the underlying design will become invisible to the users. The designer should make careful use of contrast and layout to emphasize certain information and functions and to give the design some pop.
The website should enable people to think very hard about the task they are trying to accomplish, not the functions of the website. Make sure people can easily find what's available on it and the content is easy to read. It should be easy for people recall or retrieve passwords, file names, locations and procedures on the site as well as to recognize what icons mean. Physical actions such as typing, using a mouse or other behaviors should be as easy to use as possible. As much as possible, a single screen should contain easy access to all of the information and tools necessary to perform common related tasks. Don't make people navigate more than necessary.
Use your scenarios to decide what tools and information should be tucked away on drop-down menus or tabs. Don't force users to do anything you can make a reasonable guess about. Set it up so that users can get started with as few decisions as possible.
Don’t present data in the way the company is organized or the product is built. Instead present it in a way that fits the user’s mental model of how it should work.
Whenever you are inconsistent, have a compelling reason for doing so as it increases work for users.
Consider all of the ways someone could break the product, but don’t let those drive the design unless they are a central issue.
Consider whether you should use these technologies to present information:
- Filtered searches
- Hierarchical navigation menus. These are common on mobile phones, kiosks and some other technology, but are inefficient and annoying when users constantly switch between tasks.
- Tabbed interface. These let users switch views between distinct sets of tools and information, with the navigation still available. They are useful when people perform distinct sets of tasks within a single project, but are inappropriate for tightly intertwined tasks. They generally don’t work well on small devices. They often work well for sequential activities.
- Wizards - These are a set sequence of actions that users must pass through, step by step. Most offer the ability to page forward and back. They are not a good choice for anything users need to do often.
- Multiple document interface - These are interfaces that allow multiple windows to be open at one time and be free-floating and resizable. They are useful for comparing content between two documents or copying and pasting content from one document to another.
Combining some version of these different patterns often provides a more flexible solution, but patterns should be used as consistently as you can. For example, organize navigation either by nouns (objects) or verbs (actions) consistently.
Determine what platforms will be used and how that will affect the site’s structure, how it will work on a handheld device and how it will work on a large screen in a conference room.
Determine by what mechanisms the user is likely to navigate, select items, enter data – a touch screen, keyboard, mouse, etc. How much text will the users enter and how will they need to navigate? How will the output need to be optimized and made available? Touch screens are generally not great for text input. They require large controls. A cursor-based selection with a mouse or trackball is slower than touch or buttons if you have just a few options. The size and orientation of the screen you design for should be guided by the type of content you need to display and the environment it will be used in. For lists, require portrait orientation, as extra horizontal space is usually wasted. Landscape screens, on the other hand, are better for columns of data, graphs of events over time and video. When possible and appropriate to the content, allow for viewing either way on mobile devices.
Now choose among the possibilities raised for this project those that are the most successful to refine and present to stakeholders. To do this, do fast iterations on a white board or sketch book and throw out the inferior ones. Then refine the ones you have chosen before showing them to the client.
Now quickly run through all of the main user scenarios to see if they work within the framework you are creating. Find alternatives if necessary and throw out any far-out solutions after considering what is worthwhile that you could incorporate.
If you have multiple ideas about any part of the project, choose at least two to refine, one that represents the best interaction but may involve pricier components and one that will provide a decent experience at a lower cost.
Consider what will look most distinct from the competition, what will be the smallest or sturdiest or will emphasize another desirable quality. Consider what you are trying to say and then whether your design iterations do it.
The two ideas the designer and developer present to stakeholders need to include a concrete vision of what the website is, how it works and how it looks. The solution should be thought of as a complete system even if it goes beyond your specific mandates. Try to anticipate the functionality you expect to build over at least the next three to five years.
Show stakeholders your ideas as soon as they are coherent.
The interaction design should drive the visual design by determining what data or controls get visual emphasis. Visual design should drive interaction design by determining how much data can legibly fit on the screen and how the brand will be presented.
The designer should refine the chosen ideas while the developer is working on a sketch of the technical structure. Sketch the major screen states (each distinct screen, interaction or other change that's essential to understanding the flow), what's going on in each and define how users get from one to another.
Use smaller thumbnails with arrows to indicate relationships and state changes, such as when a selection in one pane on the screen makes something appear in another. Use short notes to point out critical issues or describe the action. Number each picture and corresponding scenario and caption it at the bottom.
Sketch:
- The main navigation -- Home, About, Products/Services, News, Blog, Contact, Client log-in, etc. and any sub-menus under them.
- Sub navigation
- Footer navigation - Testimonials, Privacy Policy, Contact
- Other components - Buttons that promote action, e-mail signup box, Social Media buttons.
- The home page, which needs to clearly communicate who the website represents, what it does and who it serves – the ideal customers. It must attract them. You need to include a logo, photos, a privacy policy and other similar information on this page.
Revise the site map. Include all functions, modules, etc.
Decide on naming conventions for the pages. Assume that file names affect pages’ rank in search engines. Name them for the content of the file, whether the file is an HTML, PDF, or a graphic,. Keep them brief. Make the website address easy to remember, quick to type without error, and easy to link to. If you are posting newsletters or other periodicals on the web, in html, pdf, or word format, organize your files numerically from larger to smaller time unit - year, month, day. This enables sorting chronologically and alphabetically at the same time. Section names should be succinct, standard web conventions, and every department should use the same wording to apply to the same type of information. Use the same text for a link as for the page heading of a link target. Page names should enable users to recognize what content the page contains.
Revise storyboards/wireframes, giving each page in the wireframe its own storyboard page that defines all of the functions, features and content. Show them to the client for approval.
Write the text for the pages or insert the copy provided by the client if applicable.
Now revise the project plan to list remaining tasks, the effort they will take, priorities and the order they need to be done in. Add ten to 15 percent time to allow for forgotten details, unexpected problems, communication delays and other potential frustrations.
Photographing a Big Event

Photos by Forrest Anderson
Whether you are a professional photographer covering the Olympics or just want to photograph a family reunion or community sports event that your children are involved in, there are techniques that will help you capture all the major highlights.
Covering big events begins with advance planning. Start by checking with the organizers to make sure you can get credentials that will provide you the access you need and to get the schedule of events. Sometimes you can get better access by offering to provide some photographs to the organizers.
We got permission to photograph this Civil War reenactment battle in Bentonville, North Carolina, and planned out the schedule months before it occurred.

For plays, concerts or other stage events, try to get permission to shoot the rehearsal – you can usually get much better access during a rehearsal than during the actual performance when photography is often prohibited or severely restricted.
Actors posed for this photo before a Peking opera performance at a theater in Beijing, China.

Go through the schedule carefully and plan out what highlights you want to cover. This is particularly important if you are shooting video, as you don’t want to shoot everything unless you have a very large post-production budget that will allow you several days to go through and edit the video down.
If possible, go to the venue for the shoot and plan out your movements the day before the event. If you are part of a press corps, find out where photographers will be expected to stand and what restrictions will be placed on their movement. Draw diagrams of what will happen and where you need to stand to get the best shots. Also decide whether you will need to bring a small ladder to shoot over people’s heads in a crowd.
Plan out how you will get the following shots, both from a position and equipment point of view.
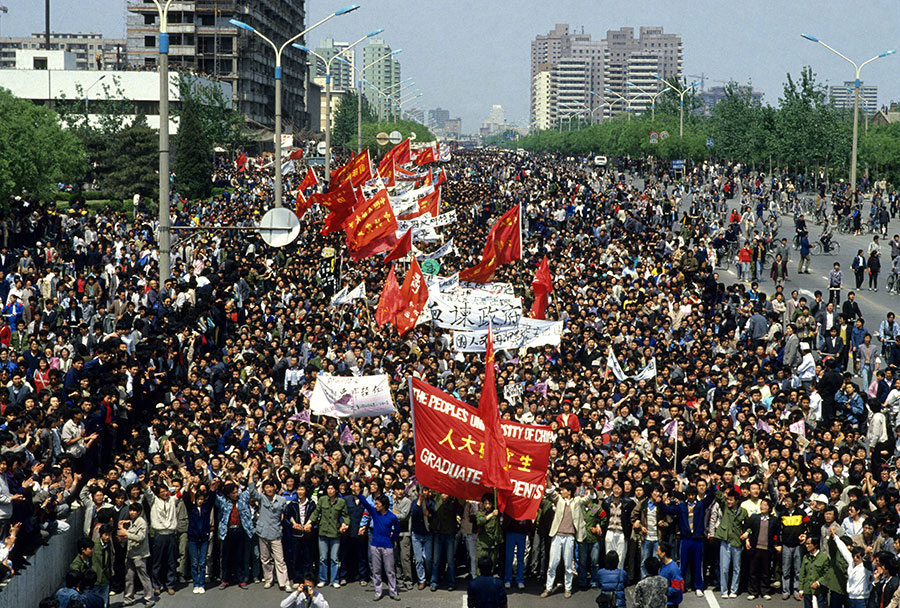
A long shot from head on if it’s a parade or procession. Forrest photographed this political demonstration in Beijing, China, from an overpass.
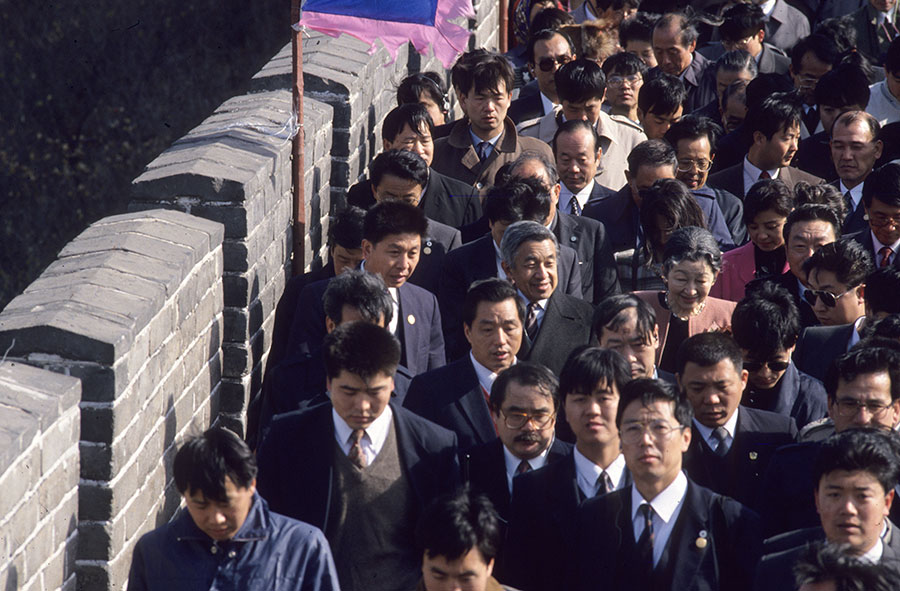
A long shot from above sometimes works well when you are photographing dignitaries in a crowd who you otherwise couldn't get a clear view of. Below, this photo shows the Japanese emperor and empress on the Great Wall in China.
A wide angle that shows the energy of the event and the crowd reaction. This scene shows a choir, orchestra and audience singing the Messiah in North Carolina.

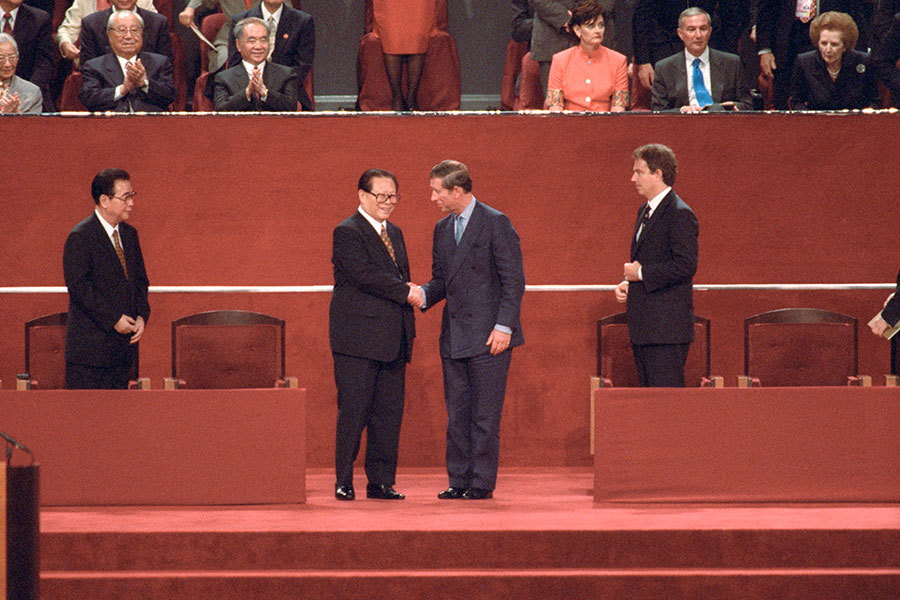
Close shots of the main characters or action at key moments such as handshakes over agreements or ceremonies. Forrest used a 600-mm lens to photograph Prince Charles and Chinese President Zhang Zemin shaking hands over the handover of Hong Kong to China. Margaret Thatcher looked on to the far right.
Asides – interesting scenes that are not necessarily the main event. This photo shows performers at a Confucious birthday celebration in Qufu, China.

Detail shots. This photo of a nativity scene at a Christmas festival captures the spirit of the event.

If you are shooting video, plan to get street interviews, interviews with key people, speeches and other key action as well as any meaningful backgrounds, juxtapositions or transitional movements.For video, capture good dialogue and extra sound effects and ambient noise for use in post-production.
To cover a big event, you need a range of lenses, from wide to a super telephoto. It also helps to carry a small ladder for use in a crowd. Decide whether you need a tripod, which is important for video. The main point is to bring the viewer into the experience, so you need lenses that will bridge the gap between you and the action. If you are too close, it disrupts the event or calls attention to you.
On the day of the event, shoot. Don’t celebrate, eat out, shop, etc. Just shoot if you want to get the best action.
Arrive early and stake out your spot. If there are multiple shots, consider paying someone else to hold a spot for you. Forrest got this shot of protesters in Beijing erecting the Goddess of Democracy statue because he showed up before dawn.

Go systematically from one part of the event to another, moving into position for the sequence of events.
Be prepared for serendipitous surprises. This is where being fluent in the use of your equipment is important so you don’t miss unexpected action.
Stay until the end. Some of the best photographs come after an event is over and other photographers have left. Sometimes dignitaries will come out after an event and you can get your best shots of them when it is over. After a meeting in Beijing, former U.S. President Richard Nixon went out on the streets in Beijing and greeted people passing by.

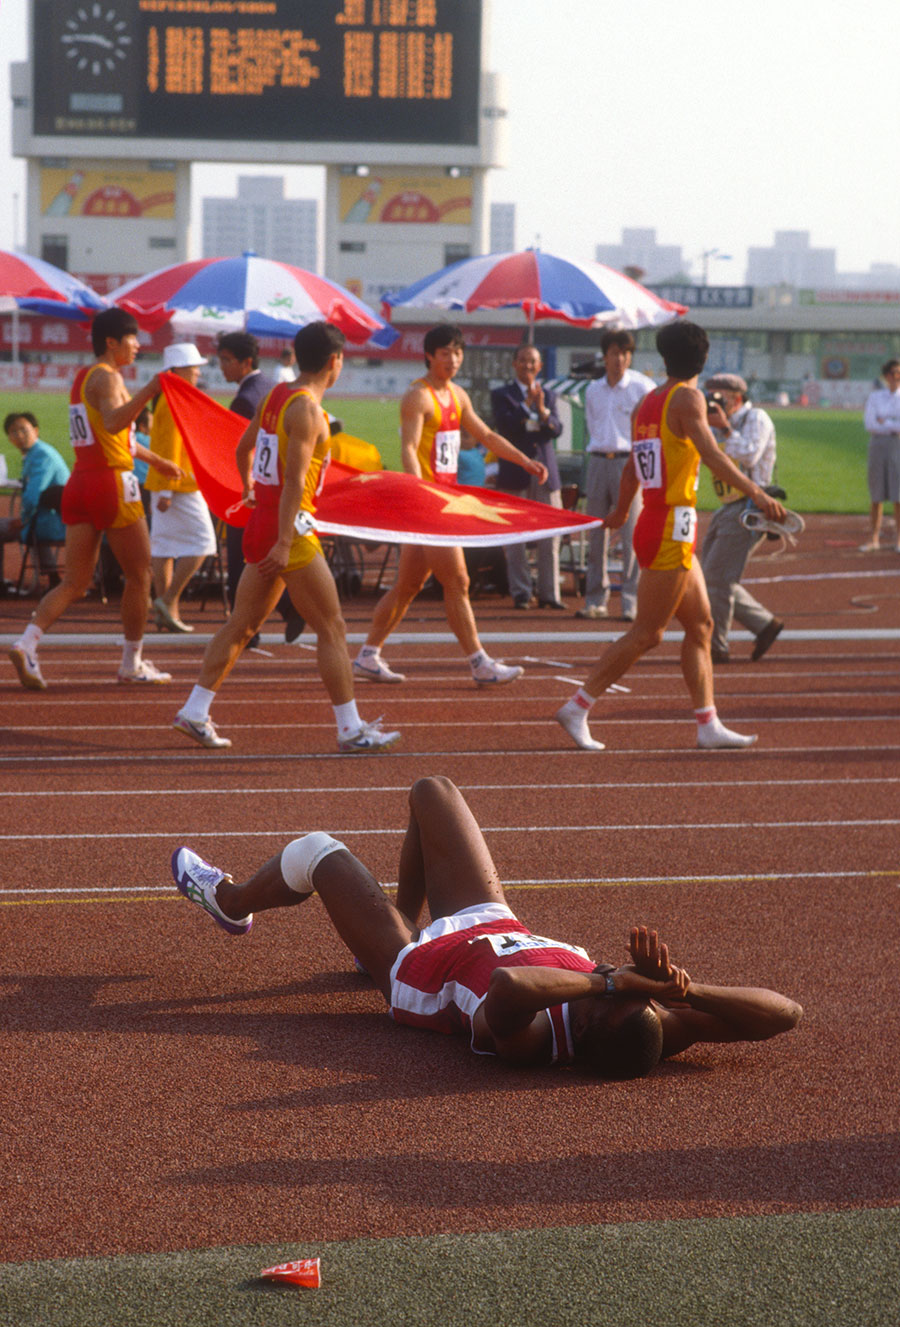
Forrest shot this picture of an injured runner laying on the track in agony as his victorious rivals took this victory lap at an international sports event.
The Thoughtful House Excavation
Rouviere Media did this video on the excavation of The Thoughtful House in Mapleton, Utah. See more about the house on hobblecreek.us.
Mobile Symphony
Rouviere Media did the main development for this responsive content management site for the Mobile Symphony of Mobile, Alabama, using designs by Optera Creative. We did the Illustrator to HTML5/CSS conversion and built the site using Bootstrap and WordPress. The site has an event calendar, an interactive infographic that shows how the musicians are grouped on the stage and allows sorting of the musicians by instrument and seating. Colleague Chris Muro assisted with the filtering and sorting of the events and musicians.
Design and Build a Website Part 1
Once we have defined the requirements for building a website, the next step is to start the designing and building process.
Designer/Developer Session
We start with a designer/developer session where we step back and look at the big picture of the website, including all of the information we have gathered for the project and stakeholder feedback on the requirements.
We consider any past and similar projects to predict the website's structure and movement.
We outline the project as a narrative story that includes all of its relevant elements, strung together in order of importance, so that we include all of the important aspects. We make sure that the thread of the website’s main idea runs through it so that the project is logical, coherent and succinct throughout. We include other important ideas, all of the relevant facts that make up the project and what they mean underneath all of the labels we will put on them.
We consider the website’s future as a result of the decisions we are making now.
We determine the attention getter, what will initially attract the user.
We specify all essential pages and functionality and how the website should behave, trying to visualize the ideal website to tell the narrative and create the appropriate conversation with the user.
We ask these questions:
- Will this product or service provide satisfaction over time?
- What will make people buy the product or service?
- What will make them loyal customers?
- What message and style will be appealing to them?
Based on the stakeholder feedback we received about the website requirements, we make sure we understand the client whose product or services will be showcased on the website.
Design Workshop with the Client
The next step is to hold a design workshop with the client to shape the project in depth, develop the vision for it and a plan to make its story a reality.
General decisions
We determine five main things we can impact with the website and then decide what is the one good thing that will make the story and the project.
We determine how to interpret these main points visually.
We define the features of the website that add functionality and utility. These include client requests, features we found in our research, and items that we know need to be there. This includes everything that may drive the site's design.
We determine how the site moves and functions and what the navigation is like.
We identify all of the different types and attributes of the content we expect to have on the website, then identify page templates that will allow for automated production of most of the pages, with more customized layouts for special features. We are designing for two users – the end-user personas and the person who will be inputing the information. We need templates that are flexible enough to meet the needs of both.
Various formats
We then consider how these general decisions will need to be adapted to meet the needs of various devices – mobile, tablet and desktop and how to make the site responsive.
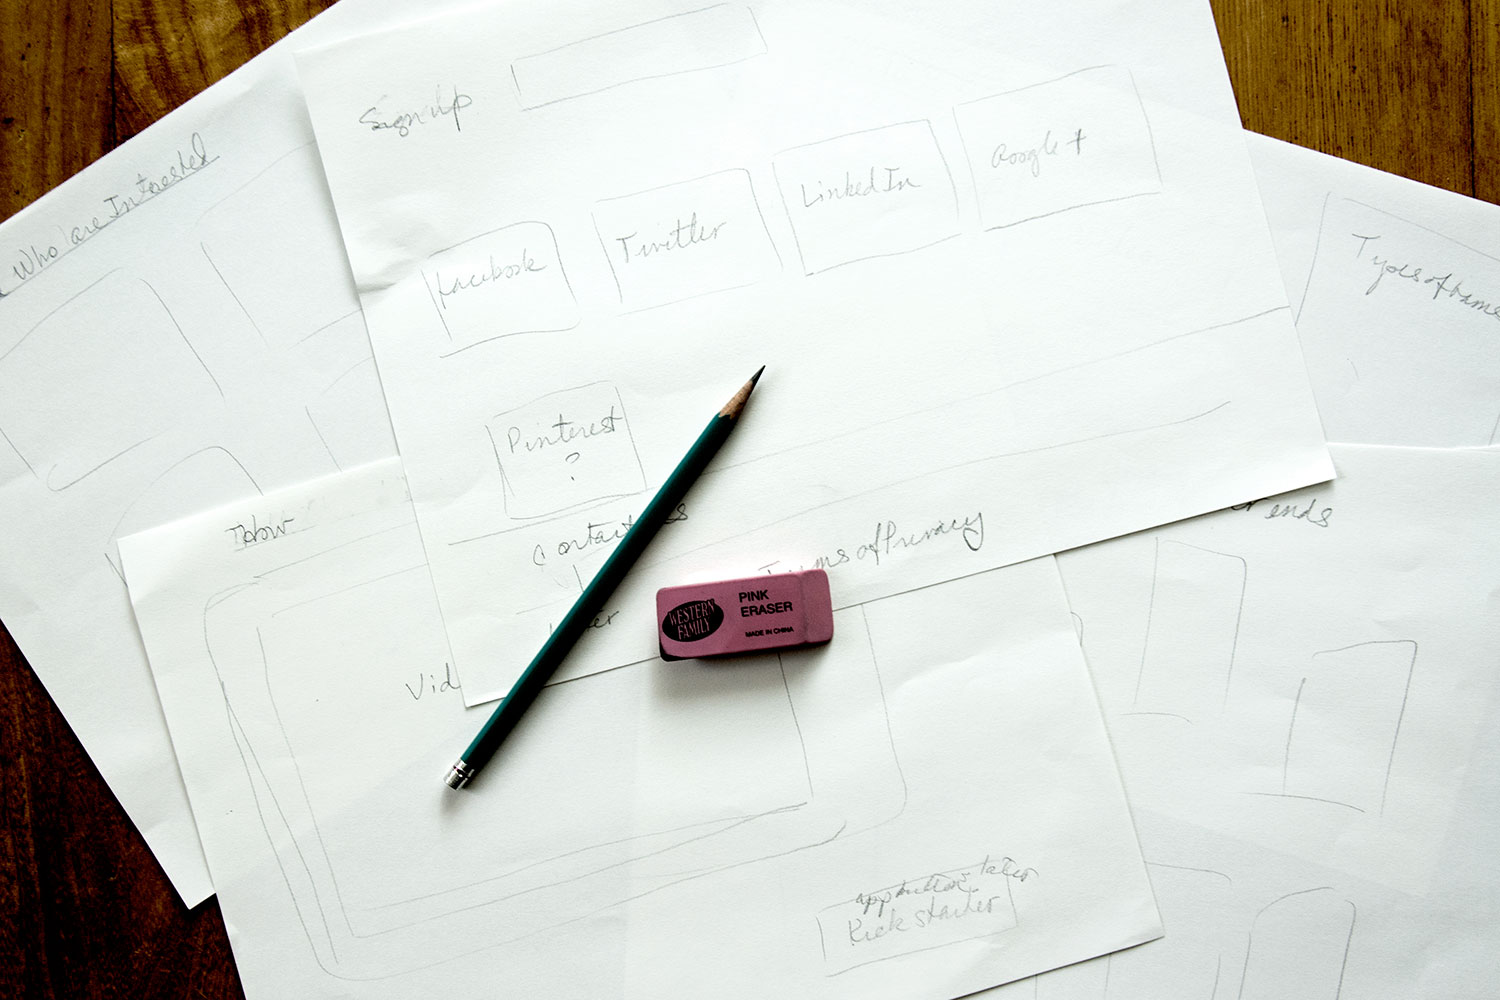
We storyboard the various views on the fly as we consider them – on paper or a white board so those present in the meeting can view them and provide input. We photograph each view on the white board before erasing it so we can use it for reference later on.
This process includes consideration of the following:
- Small logos on some pages
- Different kinds of navigation for different devices and/or parts of the website.
- Different layouts, such as the need to have content in a single column on mobile devices.
- Click functions and how active links will be identified for the user.
- The use of video and how it will be hosted.
Different devices - phone, tablet, desktop
We place ourselves in the user’s shoes with each device to determine how it will be used.
We ask who will use our website on each of the various devices and nail down the scenarios and context in which they will be doing so. We ask why the personas are accessing the site? What are they doing when they get there - the most likely task they need to complete. We make completing these tasks very obvious and easy.
We make choices about what to give them on the mobile version – the top 1-3 features. Mobile sites should be primarily for quick searching and two or three individual tasks.
We try to make sure these tasks are prominent without the need to scroll and can be instantly understood. We determine what desktop features will not be available on the mobile site or on other device views.
We ask where the user will access the site, the lighting conditions and circumstances and the time of day and whether they also will be busy with a task not necessarily related to the site.
We ask whether we can enhance the site to use information that the user entered previously or to influence the data the user requests.
We ask how we can collect data automatically that will help the user – the time of day, the date, the user’s location or phone numbers. We try to leverage mobile site features such as time of day, location, ambient light, a compass, a camera, a microphone, messaging and calendar.
Can we display suggested options that the user is likely to choose next?
We consider the limitations created on mobile devices by the keyboard and small screen. We make all buttons 40-80 pixels and type 16 point minimum.
We optimize the site for vertical scrolling so there is a minimal need for clicking or panning left or right.
We choose 2-3 fonts that look good together.
We decide how to do transitions and animations to help the user experience, minimizing unnecessary animation and graphics while assisting the user in navigating the site.
We decide how to use branding.
We group common elements and separate the groups with white space.
We put important controls such as search at the top.
We go over mobile forms and determine the fields that will be needed. We try to minimize required input and provide sensible default values. We minimize the number of screens the form has to pass through.
We consider disability needs.
Everything is sketched to determine how it will look.
Technical decisions
We then consider with the client and the developer the technical requirements and limitations.
Business decisions
We consider the phases of buildout and their financial ramifications.
Business factors.
Marketing.
Sales. Figure out how to make the site:
- Attract interested targeted visitors.
- Focus on the needs of the visitors.
- Keep the visitors on site and encourage repeat visits.
- Get the desired response - traffic and sales.
We define clearly what the client gets for the price and stick with it. We agree on funding arrangements for the website.
Summing up
We make sure we have specific measurable goals that include defining the purpose of the site, its benefits and features, agreeing on the target market and agreeing on market trends in that market.
We identify keywords and create a list of keywords that the client believes his target market would use to find his business.
We agree on start and tentative end dates, outcomes and how they will be measured.
We agree on a clear way to track the results.
Content
Content is the glue that brings together the credibility, usability, visibility, sellability and scalability of the website. Content that educates and empowers web users is paramount.
Content includes material on:
- The website
- in e-mails
- in press releases
- on blogs
- in videos
- on social media
- in articles
- in photos
We ask how we can customize all of these to serve the target market.
Content must provide value to the reader. It must have to have a human, conversational voice appropriate to the user.
We consider the potential reuse of the materials, including deciding on formatting options.
We follow up the design workshop with a written summary and send it to the client as well as incorporating it into the project plan.
Future blogs will outline Part 2 of the Design and Build process.
Infographic: The Mongol Empire
Mrs. Claus and Creativity
I had a grandmother who was next door to Mrs. Santa Claus. Not only did she look just like Santa's wife, she acted like her – always ready for a laugh, funny story, scrumptious goodies and a cozy, happy evening in her warm kitchen.
She died when I was 13, and I’ve since spent a great deal of time pondering about why she was such a happy, creative person. Here’s my list of some of the reasons:
- She was surrounded by those she loved. She lived in a valley with relatives and close friends who loved and respected her as her neighbors.
- She had secure employment as the postmaster for her community in addition to helping to run her family’s ranch.
- She had a reasonably amenable marriage with a lot of time to spend with her husband and other family members.
- She was surrounded by a beautiful and healthy natural environment.
- She lived debt-free in most of her later years.
- She had no commute time, rat race or need to dress up to go to the office.
- She enjoyed good food, animals, grew house plants and had a small garden.
- She was generous with her modest means and her time, serving as an election judge, writing for her local newspaper and performing other acts of service.
- She had time to pursue her talents, which included exquisite handiwork, cooking, writing to friends and relatives and entertaining.
- Although she was overweight (what do you expect from Mrs. Claus?), she was otherwise healthy into her advanced years.
- She lived in a community that had almost no crime and a low rate of serious social problems.
So what are the ingredients for a happy creative professional’s life?
- Association with family and friends.
- Steady, interesting creative work that provides a moderate income.
- The time and opportunity to develop both professional and domestic talents.
- A minimum of commute time and rat race.
- Contact with the beauties of nature.
- A minimum of destabilizing social problems.
- Good food.
- Animals.
- Plants and/or nature.
- Regular service.
- Little or no debt.
- The means to be generous.
- Enjoyment of beauty.
- An honest, respected reputation.
- Robust health.
Most creatives want to serve the world, but we need to remember to extend these charitable feelings to ourselves by providing ours with this kind of healthy environment, which becomes a fertile ground for our talents to flourish.
The kind of environment I have described was common when my grandmother was alive, but has become less so. Having this kind of life requires charting a clear direction and setting aside blocks of time to bring your life into this kind of order. A desire to have this kind of orderly environment leads naturally to simplicity, civility and an increased sense of balance, beauty and good design. It is the beginning of solving 90 percent of your problems.
To end up in the right place, you need to choose a destination. You can’t go everywhere. Then you need to choose the way you want to get there. Only if you choose both carefully will you have a joyful life and result. You can’t go to a chalet in the Swiss alps without a stunning mountain ride. You can’t go to Santa Cruz without enjoying the Central Coast of California along the way. The destination is intimately connected with the journey.

Everyone needs a life with healthy food, interesting work, family and friends, clean safe housing, a reasonable income, spiritual and emotional growth, development and use of their talents to better their lives and the lives of others, and something worthwhile to commit to.
Start with these needs and build a world that pulls them all together and you’ll find it will be big and wide and free and satisfying.
Hobble Creek
Rouviere Media is happy to announce the launch of our blog called Hobble Creek, an on-line magazine of sorts about topics we love: Adventures, Good Food, Thoughtful House Design and Construction, Good Design, Affordable Fashion and Good Photos and Video.
The blog is designed to present information about topics such as energy efficiency, drought-tolerant and efficient gardening, meaningful places to visit, and other serious topics in a fun, interesting and entertaining way. We invite you to join us. If you have any topics you'd like to see on Hobble Creek, please use the contact form below to drop us a line.
Pint-size storage with a pint-size cost

Western Digital backup drives are about the best hard drives money can buy in terms of size, dependability and cost per gigabyte. We have eight of them, use them daily and take them with us all the time as backup for our media assets.
The main ones we use are Western Digital My Passport Ultras, which stores two terabytes of data and currently cost $89-$99 on Amazon, depending on the color.
They are USB 3, so they are fast.
They are portable so we can take them on the road and they don’t require external power. They are powered through the USB connection. Since we need portable equipment that we can take on a plane, on a long car trip or just with us when no one is in the office, we love the fact that all of our backup drives can fit in a small carrying case. One of these little drives is 3.25 inches by 4 .25 inches by .75 inches.
We have been using them for several years, and have had only one drive that failed. Western Digital replaced it without cost. The drives have a three-year limited warranty.
Western Digital ranks high in the most crucial features for an external hard drive – reliability, speed, storage capacity, customer support, size, portability, warranty and physical quality.
Show the building as you experience it
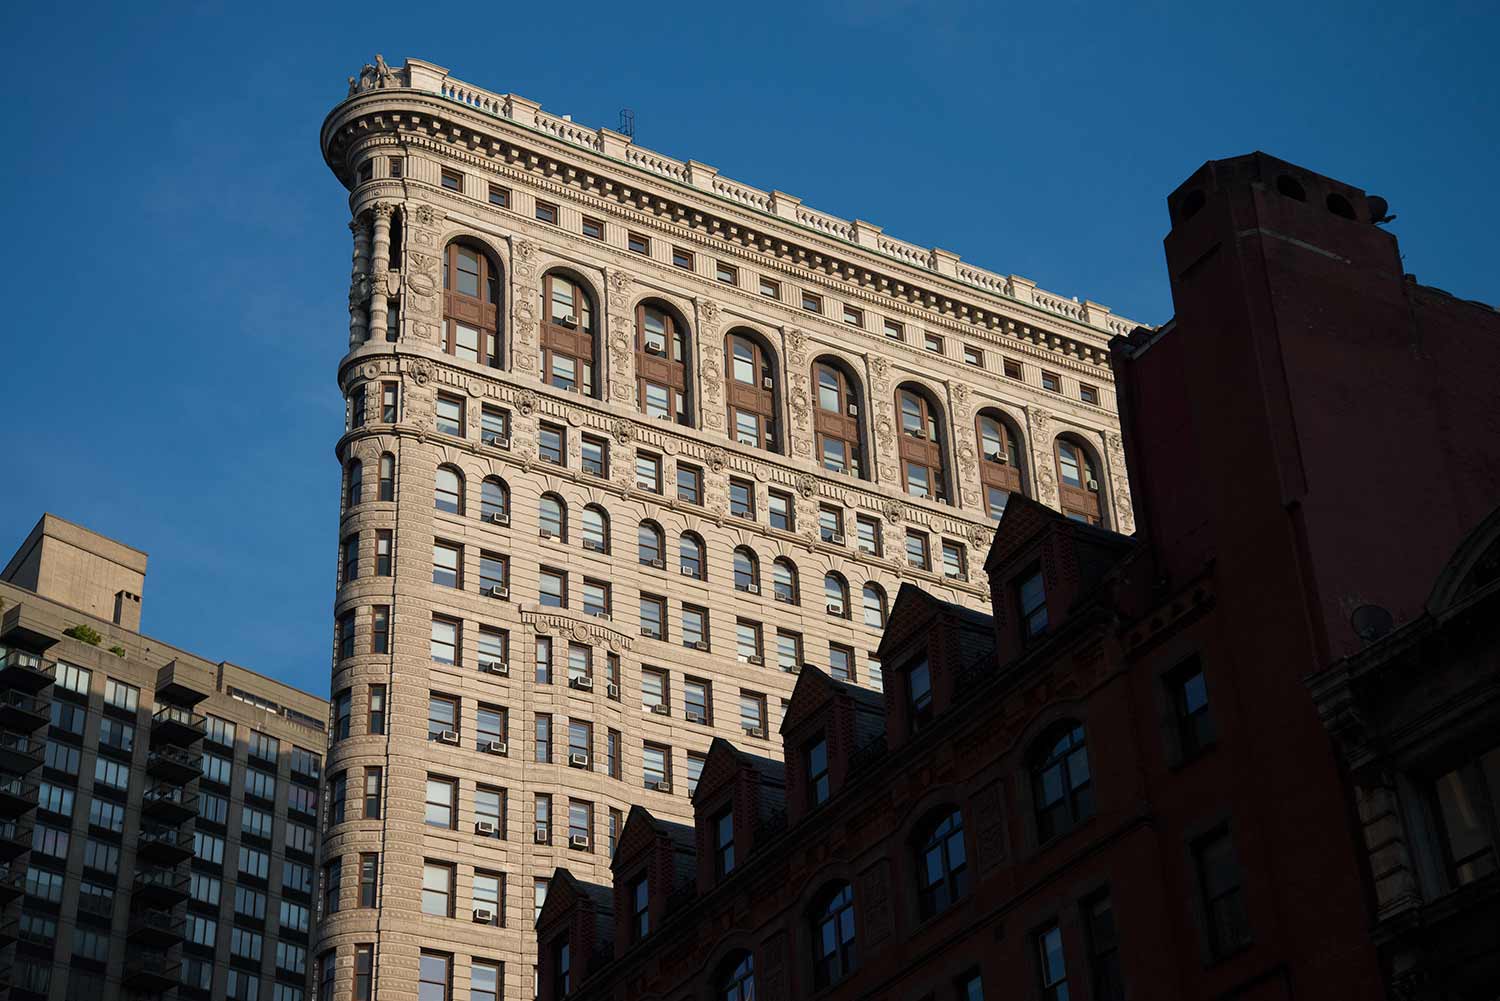
Photos by Forrest Anderson
The point of architecture photography is to show the building as it should look and to allow the viewer to feel what you felt as you saw the building, to experience it.
Good architectural photography begins with planning. If possible, research structures you plan to photograph, by walking through them in advance or googling pictures of them so that you can plan for the best vantage points, times of day and lighting and can figure out how to eliminate unwanted obstructions from your photographs.
You want to shoot four things – the interior, the exterior, the exterior with its garden space and the exterior in its general environment.
Architectural photography includes wide angle, medium and detail shots.
Ideally, equipment for architectural photography includes the following:
- A high resolution DSLR camera.
- A very wide-angle lens, which you need to use carefully to avoid distortion.
- If you're rich, a 24 mm f/4 perspective correction lens or wider.
- A 50 mm lens.
- A sturdy tripod with a ball head that you can level. It should have a pan and tilt head with a fluid drag.
- Have a quick-release plate that you attach to the underside of your camera to allow you to dismount the camera and shoot handheld when you want to.
- Possibly a step ladder so you can get up high enough to maintain non-tilt positioning.
- If you have time and lots of space to shoot, mount your laptop on another tripod and tether it to the camera with Lightroom. Then you can see what you are shooting as you go to see what is working and what isn't.
Be careful if you are shooting video, as shooting 25 fps under 60 Hz American current will cause your footage to have a slow pulsing illumination effect. Shooting 24 fps under 50 Hz lighting in Europe will do the same. Test it with different settings to avoid this problem if you can.
If possible, have filters that you can place on the lens as needed. Useful ones include:
Neutral density, graduate neutral density for cooling a hot sky and a polarizing filter to reduce surface glare on water or metal surfaces.
If you don’t have all of this equipment, don’t let that stop you from shooting architecture. Shoot what you can and do the best you can anyway. This list of gear just makes it easier to get good architectural pictures.
On-site, start with taking a survey of the building’s exterior, interior and landscaping as well as distant vantage points from which you may be able to see it.
Identify the following shots:
- The best angle for the overall shot.
- A shot of the structure in its environment, especially if the structure is stunning.
- Various views through the building.
- Paths and gardens.
- Create a “chair” for the viewer to put themselves in to look around the building, inside or out.
- Identify the important details or views that define the structure and tell its story - ornamentation, doorknobs, art, furniture.
- Look for places that can be separated with lighting.
- Identify lighting challenges.
Look for the sun’s angle and choose the optimum time to shoot. If possible, work when the sun is out, as you will get better definition. Set up your tripod and camera, shoot if the sun isn’t out and then wait for it to come out. If it doesn’t, shoot the building at dusk from the outside with the windows lit. From the inside, do the same and get the interior with blue windows outside. If it’s raining, shoot the interior with tungsten lights and let the windows go blue.
Making this kind of a shot list can totally change the quality of the photography you shoot. Here are examples of two architectural structures that we shot from a variety of different angles and in different lighting to get totally different results. The first is the Opera House in Sydney Harbor, Australia....

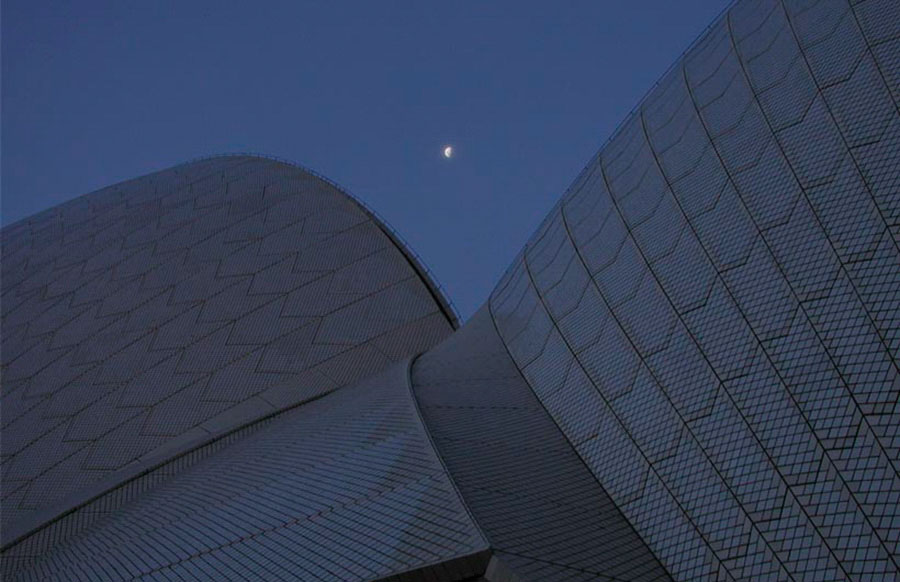
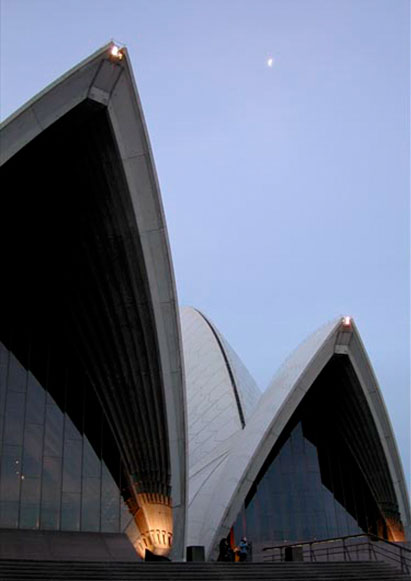
... and the second is the Forbidden City in Beijing, China.
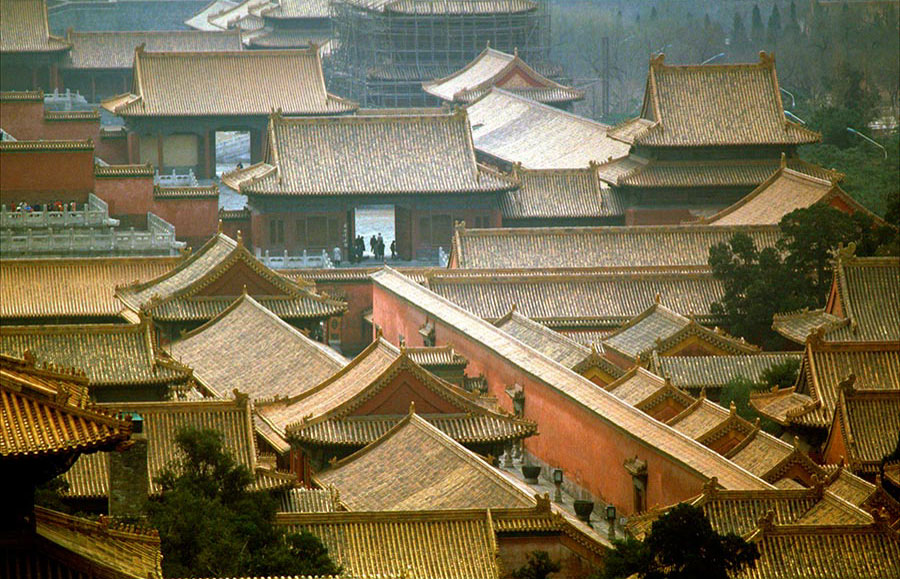
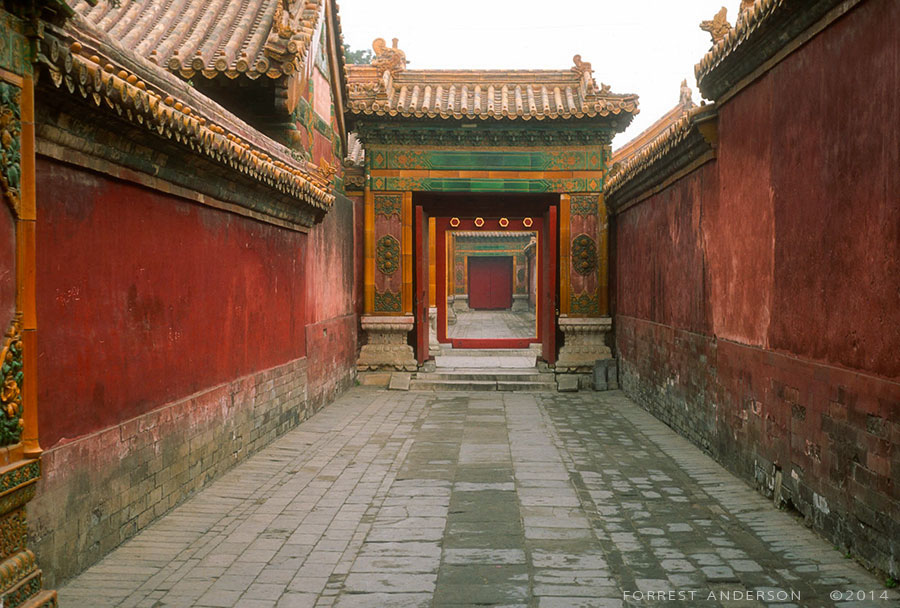
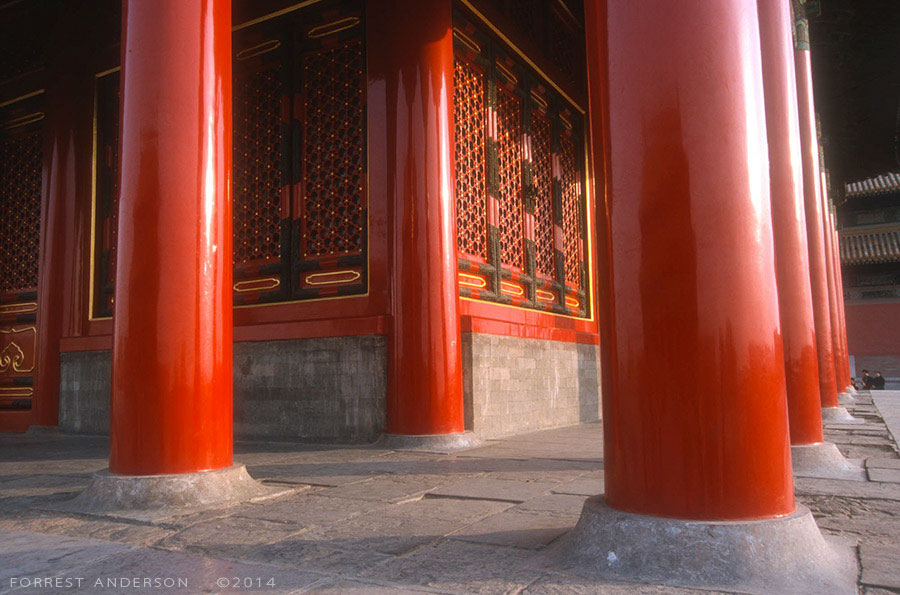

As much as you can, declutter the scene. Avoid vehicles parked outside. Take pictures both with and without people. You don’t have to show everything in a scene. Concentrate on what will give it a personality.
Use a color checker to have a known color reference in the space and as white balance. Look for an average because you can't remember when you leave the space what the colors look like.
In cramped rooms, tape light stands in place using black photo paper tape. Then crop or retouch them out later.
To solve the problem of tilting in pictures:
- In post-processing, do perspective correction after you've done everything you can to eliminate the problem in the camera.
- Photograph tall buildings from other buildings or from across a river when possible. Shoot tall buildings vertically unless you are doing video.
- Move further away and shoot with a short zoom lens.
- Get up to a high viewpoint on a ladder or scaffold.
- Point the center of the lens at the center of the building. Photograph it from the middle point from across the street, from the floor of a building that is halfway up the building you are shooting. Sometimes you have to move some distance away to be able to photograph it.
- Use a grid to keep things level.
Break up things that line up - they flatten an image.
When you see moire on a photo, look at it at 200 percent zoom on your monitor. It may not be on the file, but just on the screen. If so, it will disappear at 100 percent zoom.
Juxtapose light objects in front of dark ones.
Above all, focus on what interests you. Each photo should have one main focus.
Website Requirements
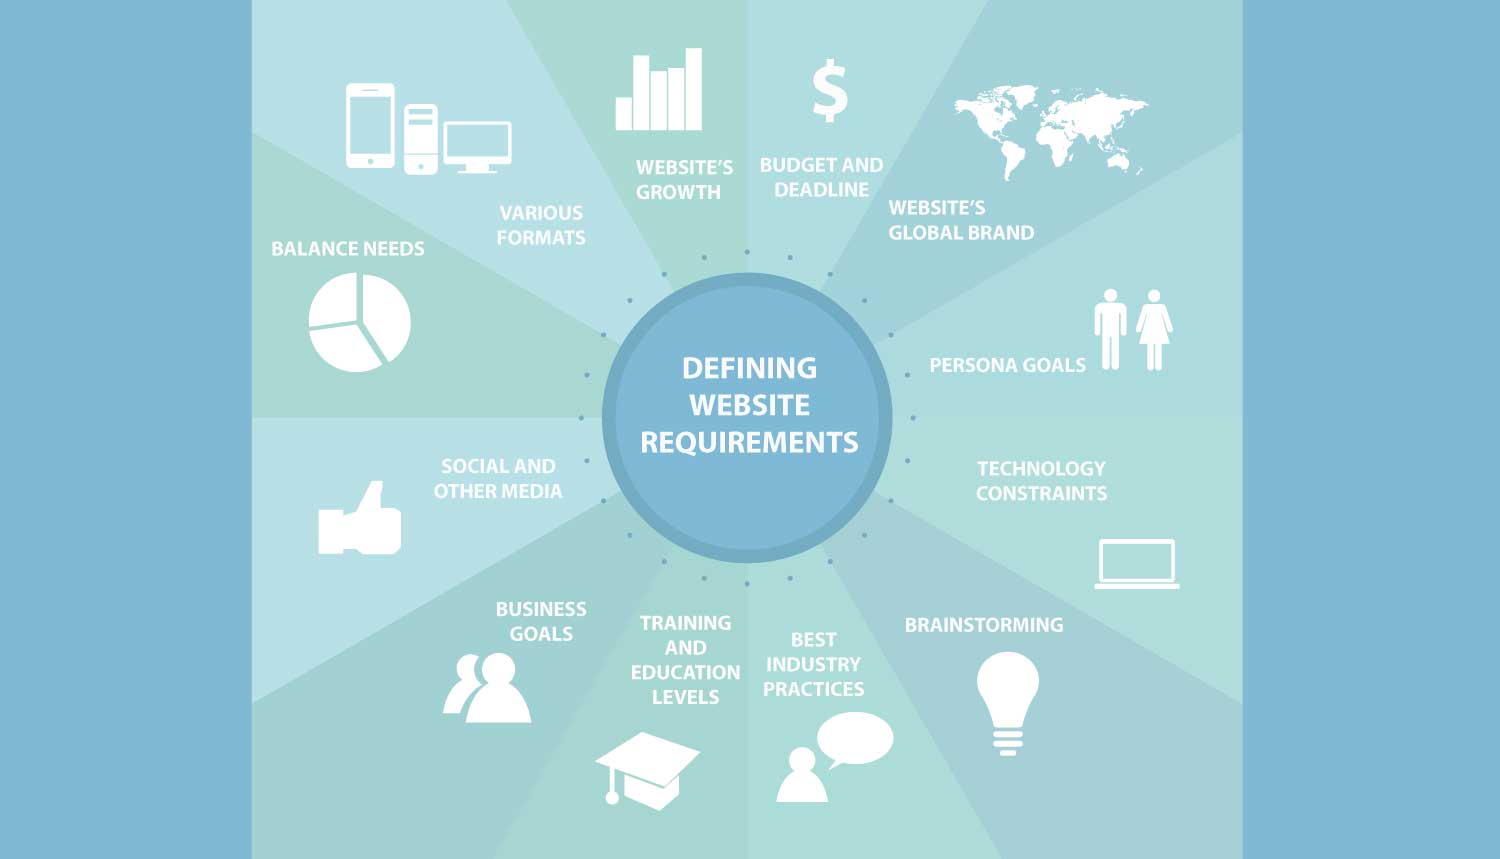
After you have researched a website, the next step in designing and building it is to define its requirements. Requirements are what the website must do to succeed. They enables you to define the product and bridge the gap between your research and design.
Keep in mind the following general points as you define the requirements:
- Determine the strategy behind the website first, then the website itself.
- Consider the first impression the website must make. After that, think about how it will work, calls to action on it and how it will interact with social media.
- Consider what means you'll use to sell and tell the website’s story – videos, testimonials, tag lines, photos.
- Think about how the website will scale up well as it grows and plan for future phases.
Be careful about the following issues that can occur in defining requirements:
- Many are based on executive opinion, technology preferences or customers' stated desires, which can pull them off their central task. Make sure that you depend on your research and personas instead to help define, filter and prioritize the requriements.
- Don’t jump to obvious solutions too early or you will eliminate opportunities. Instead, define the needs, then work on seeing the opportunities to come up with innovative solutions. Stick to high-level needs early on to help your stakeholders make appropriate business decisions. Keep the requirements succinct and to the point. They are not long, boring specifications documents. They can be confined to a few pages or presentation slides. Then develop additional requirements iteratively throughout the design process.
- Balance competing factors – those that will help make the initial sale, ensure long-term loyalty and be within the project’s budget. Get consensus on these key points.
To generate effective requirements, use these sources:
- Personas and scenarios derived from them
- The website’s business objectives
- Customers’ goals
- External factors such as regulatory agencies and competitors
- Good design principles and best web practices
- Other solutions that you brainstorm
Types of requirements you need to define:
- What kinds of data the website must handle – text, photos, video, e-mail messages and other forms. Identify the entire list early on. These are nouns.
- What users must be able to do with the data. These are verbs that describe what people need to do with the types of data. Describe them in terms of what kind of result people need to get, not the technology solution. Get as thorough a list as you can and add to it during the design process.
- Qualities the website’s product or service must possess
- Attributes related to brand, persona skills, environments, speed with which the system must process a file. The look, tone, behavior and terminology of the website should reinforce the client company’s overall brand values in terms of function, quality, ease of use, emotional values and trustworthiness. Emphasize those qualities at customer points of contact on the website. The website should be sharply focused on the brand’s personality.
- Constraints on the solution – deadlines, cost and regulations or policies.
Scenarios
Write scenarios – descriptions of a persona’s interaction with the website and its products or services. Begin with a specific situation or triggering event and then describe how the persona interacts with the system from the start of a task to its completion. Explain their motivation and the actions they take and what they achieve. Describe the ideal situation. Describe the persona’s point of view and emotions about the different tasks on the website. Answer the questions of who, what, where, when and how the website will be used. You can include other people who are involved in helping the persona complete a task. Define what data is exchanged, the setting where the website will be used, how long the activity lasts and how frequently it is done and the setting in which the product or service will be used. Define the reason and motivation for doing the task.
Diagram the narrative or use storyboards if necessary to illustrate how it will work.
Consider people’s need to feel confident and professional and to accomplish a variety of tasks.
Business and other requirements
- Consider the ease of deploying and maintaining the website.
- Training time for your client and their employees to master uploading content on the site.
- The website's reliability.
- Its compatibility with other systems.
- The support level the client will provide.
- The ability to customize parts of the website.
- Consider requirements for different audiences using various device formats.
- Consider what the product or service should accomplish for the business.
- Consider much time and money the client is willing to spend.
- Regulations that users must read and accept before installing software, ordering a product or using it on the site.
- Feature parity – this is requirements that are included to achieve pariety with competitors.
- Accessibility features for people with disabilities.
- The sustainability of the website – can an existing website be upgraded rather than starting over? How can we build in an ability to upgrade over time? How can we minimize printing and use the website to keep people off the road?
When you have made a list of each of these requirements, you will need to present them to the stakeholders and get their approval. When presenting the requirements to stakeholders, your point is to bring the audience through your thought process to make the case for your requirements list.
Put the requirements in pdf format so that they can be used as a presentation, printed or used throughout the design process.
Include:
- An introduction that includes the project’s parameters.
- A description of your research methods and why you chose them, as well as all credible sources you used.
- A summary of your findings that describes general issues and patterns. A description of what personas are, how they are derived from the patterns that your research uncovered, and why they’re useful.
- An overview of your personas.
- The roles of the primary, secondary and other personas. Make the point that you are optimizing for the primary persona but are not excluding the others.
- Describe the scenarios you created, providing rough storyboards. Explain that these are idealized descriptions of typical interactions with the website. Engage the audience's imagination with storytelling.
- Include a list of the requirements implied by the scenarios and your other research.
- Discuss what you will do next to move the website forward.
- Include what you need – stakeholder decisions, answers to questions. State the assumptions you will make on unresolved issues.
Presentation
Present the requirements to your stakeholders in an hour or less. Provide an agenda upfront and show an agenda slide at the start of every section to indicate where you are.
Keep the text on the slides minimal with phrases and bullet lists.
Answer all questions by referring to your research.
Try to get approval from stakeholders to proceed to the design stage.
Future blogs will consider the design process.
It wasn’t raining when ...

In the ancient story of the Great Flood, Noah built an ark into which he loaded supplies and two of each animal, male and female. As it began to rain, he finished the ark, took his family into it and within a few days, the ark began to float on the waters.
Noah, his family and the animals safely floated around in this large boat until the rains had stopped and the ground dried up. The ark came to rest and they safely disembarked, the only remaining inhabitants of the earth.
Noah’s ark has become a symbol of advance preparation for catastrophes. While the earth is unlikely to experience a major flood, other kinds of floods can hit everyone, including creative professionals. Nothing saps creative energy more quickly than employment, health and family relationship problems.
Wise creative professionals make long-term plans and set up functioning systems for:
- Their creative career, including keeping their training, skills and equipment current and their office and files well organized and backed up. These practices open the way for moving into new areas of creativity and revenue generation.
- Their finances and resource management. Good money and resource management can save thousands of dollars annually and make the difference in a creative professional being able to pursue the work they want to.
- Maintaining their health on an on-going basis.
- Handling emergencies.
- Building healthy on-going relationships with family and friends.
- Maintaining a peaceful spiritual and emotional life.
Wise creative professionals integrate all of these into a moderate lifestyle that:
- Reflects their true situation.
- Reflects their desires and interests.
- Includes flexibility to adjust for unforeseen changes, large and small.
When you plan for a lifetime, much of what you do will change, but your planning will get you to the right place any way. Planning can help you live and work moderately and avoid catastrophes that can rob you of your creative and life goals.
Don’t waste time on distractions and other people’s general platitudes. Instead, make your own creative goals and then chart a simple, direct course to achieve them. Deal with your life primarily in the specific and you will come closer to the truth.
Concentrate on high-value actions that have multiple good effects. Your actions have consequences that ripple out into your future. What you do has great influence on your present and future and that of everyone you are involved with. Concentrate on that which is of greatest worth and let other things go.
Your health should be a top priority before anything else, so plan your food, exercise and sleep wisely and stick with your plan. This is crucial to a happy, secure future, so do it first. Good health will ripple out to every area of your life, your budget and your work. Taking care of yourself first will make an exponential difference in your life and creativity.
Work on your career in a single minded way during work hours. Disciplined creative work helps you financially and psychologically and teaches you and those around you cooperation and the discipline of persistence.
Plan your life so that you will enjoy it long term. Enjoy is derived from the root word joy. To have joy in your life, you have to enjoy it.
Small camera, big views
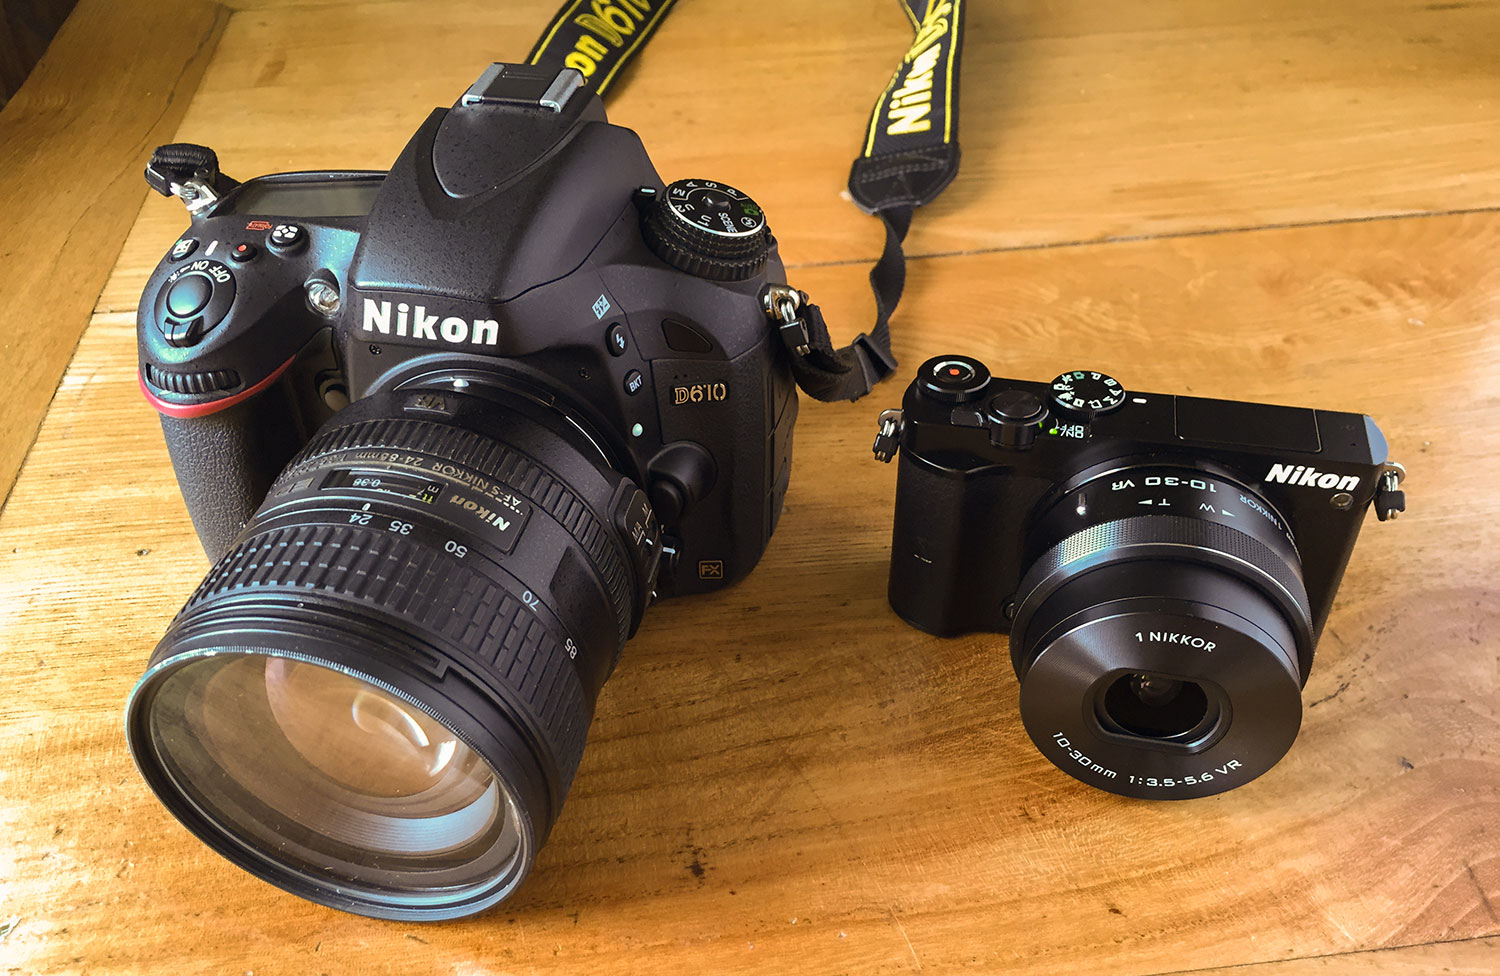
Why would a professional photographer who uses full-frame DSLRs want a tiny camera with a 1” sensor? The Nikon 1 J5 answers that question.
Nikon introduced the Nikon 1 series cameras in 2011. The J5 is the fifth camera in that series. It is a small form factor camera with a 1" sensor and interchangeable lenses.
Previous models of the camera had a very simple body style that was functional but not compelling visually. With the J5, Nikon has introduced touches of retro design that hark back to the styles reminiscent of the NIkkormat of the mid 1970s. This also adds some nice ergonomics as the camera is somewhat smaller than its predecessors. Despite the smaller size, the controls have been enlarged, making them more prominent and easer to access and control the camera.
The camera comes in black, silver and white with a 10-30mm (27-81mm equivalent) f3.5-5.6 VR lens and sells for just under $500.
So why would a professional photographer buy such a small camera? In a word, portability. The camera measures 3.9 in. by 2.4 in. by 1.3 in. and weighs just 8.2 oz. DSLRs are powerful, quality tools, but with all that functionality comes size, weight and cost. I learned a long time ago that some of the best photo opportunities come unbidden. In fact, you can almost guarantee that if you don’t have a camera with you, something will happen that is photo-worthy. Carrying a large DSLR is not always practical or appropriate. A small, unobtrusive camera that takes fine quality pictures provides a solution to that problems.
The other reason to consider the Nikon 1 J5 for professional work is for use as a second camera for both stills and video. It enables you to shoot video from angles and with lens lengths other than the one on your main DSLR. The Nikon 1 J5 gives you the capability to shoot video from other angles. The video capabilities of the J5 are pretty impressive. It shoots 1080P at 30p and 60p and also has minimal 4K at 2160/15p.
The Nikon 1 J5 is a good video alternative to the popular GoPro, which also is known for its portability and is often used for action shots. The GoPro has some limitations - no screen and a very limited fixed focus lens. Its sensor is just 1/2.3”, considerably smaller than the 1” CX sensor.
The Nikon 1 J5 also has much greater lens options, ranging from ranging from 18mm to 810mm on the full-frame scale.
My biggest concern about the Nikon 1 J5 was its image quality, so I spent the last month running it through its paces. I take it everywhere and have used it under a wide variety of circumstances. The image quality is good, the kit lens is very sharp and at 20.1 MBP - 5568 x 3712 pixels, the images are large enough for most needs. Here are some samples:


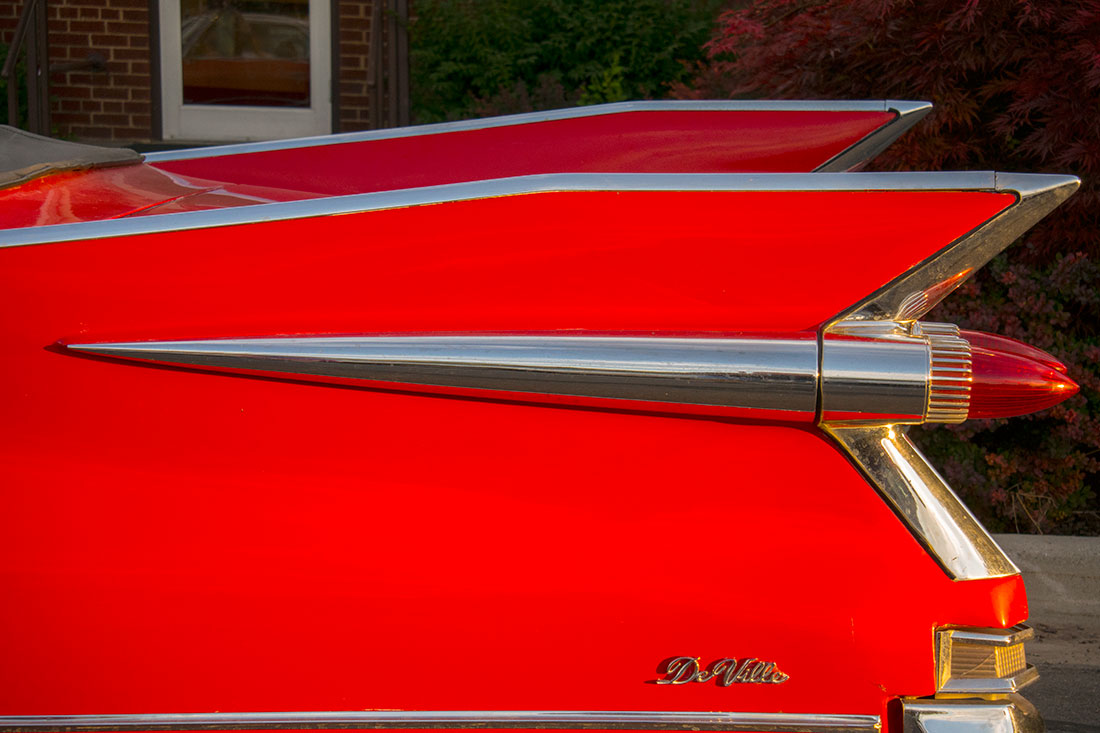
The biggest challenge has been the lack of a viewfinder, which Nikon addresses with their V series camera. Adjusting to a flip screen on the back of the camera has taken some getting used to. I often find myself raising the camera to my eye at first. However, the flip screen works well in most situations, especially for odd angled shots. I don’t have to lay in the dirt to get a low angle shot of the sun coming through long grass. In direct sunlight, it can be hard to see the image on the flip screen using the default display brightness settings. By increasing the brightness this problem is resolved.
The video quality is also quite good. The focus and exposure are both very responsive and allow for quick changes in covering subjects.
The small size of the system makes it possible to have a camera and three lenses that cover everything from 18mm to 300mm and take up less camera bag space than a single DSLR.
Cost is another plus: the Nikon 1 J5 with the following lenses - 6.7-13mm (18-35mm), 10-30mm (27-81mm) and 30-110mm (81-297mm) - costs only $1200.
The single biggest weakness of the camera is its performance in low light. While Nikon has worked some real magic in extracting such good image quality out of such a small sensor, noise becomes visible at around 800 ISO at above 50% magnification of the image. While the images are certainly usable at that setting, full-frame sensor images still win hands down in comparison. As a result, I like to keep the ISO setting on the Nikon1 J5 to A800, which means it auto-adjusts the ISO between ISO 160 and 800 depending on the available light. While it is better to have a grainy (or noisy) image than no image at all, ISO 1600, 3200 and 6400 on the camera need to be reserved for extreme cases. The photo below shows an unacceptable level of grain at ISO 6400. It’s much better to use a DSLR in low-light situations.
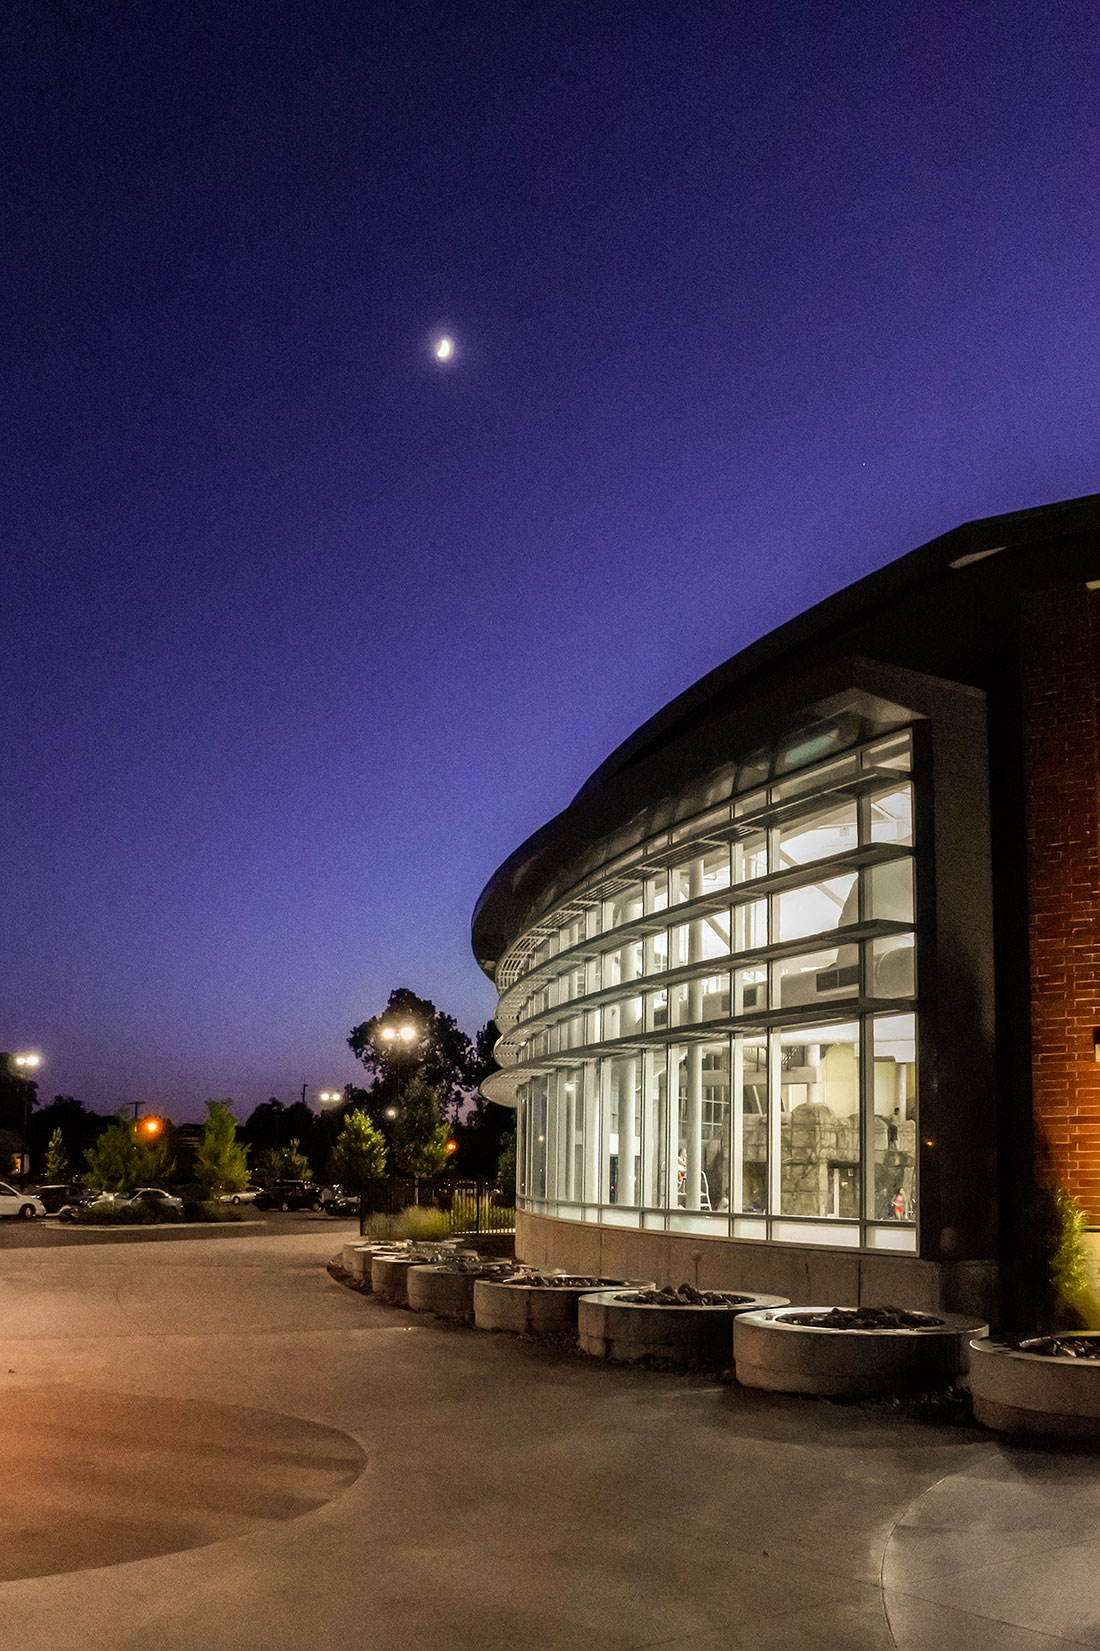
The Nikon 1 J5’s other weakness is that it overheats occasionally when shooting video. It displays a warning that it is too hot and shuts down. At first I thought this was a weather issue associated with outside temperatures, however, I had the same experience when shooting an interview in an airconditioned room. After about 30 minutes the warning comes up and the camera shuts down.
The Nikon1 J5 is convenient to use and unobtrusive, allowing me to feel a small measure of invisibility, whereas a full-sized DSLR is much more obvious. It is light, the images are high quality and I will definitely continue to use it in conjunction with my full-frame DSLR.
Aerial photos - who needs a plane?

Photos by Forrest Anderson
Wikipedia defines aerial photography as the taking of photographs of the ground from an elevated position. Usually, it opines, the camera is not supported by a ground-based structure. Why not, we ask.
Traditionally, it was assumed that aerial photography was taken from an aircraft, balloon, rocket, kite, parachute or other similar air-borne platform. Cameras could be triggered directly by a photographer who was along for the ride or remotely from the ground. Too many photographers have thought that because they couldn’t afford to hire a plane, they couldn’t take aerial photos. We’ve never let that stop us from taking aerial shots. We rarely shoot from a plane, but never miss an opportunity to get good aerial shots from elevated places.
From our point of view, the point of view – looking down on a scene from above - is the main point in aerial photography. Who cares whether the camera is in an aircraft, on a tripod at a lookout point above a scene, handheld by a photographer on a mountain peak above a scene or in a high rise building? There are lots of good elevated spots from which aerial photos can be taken. And when all else fails, a quadcopter has been a game changer in making aerial shots affordable.
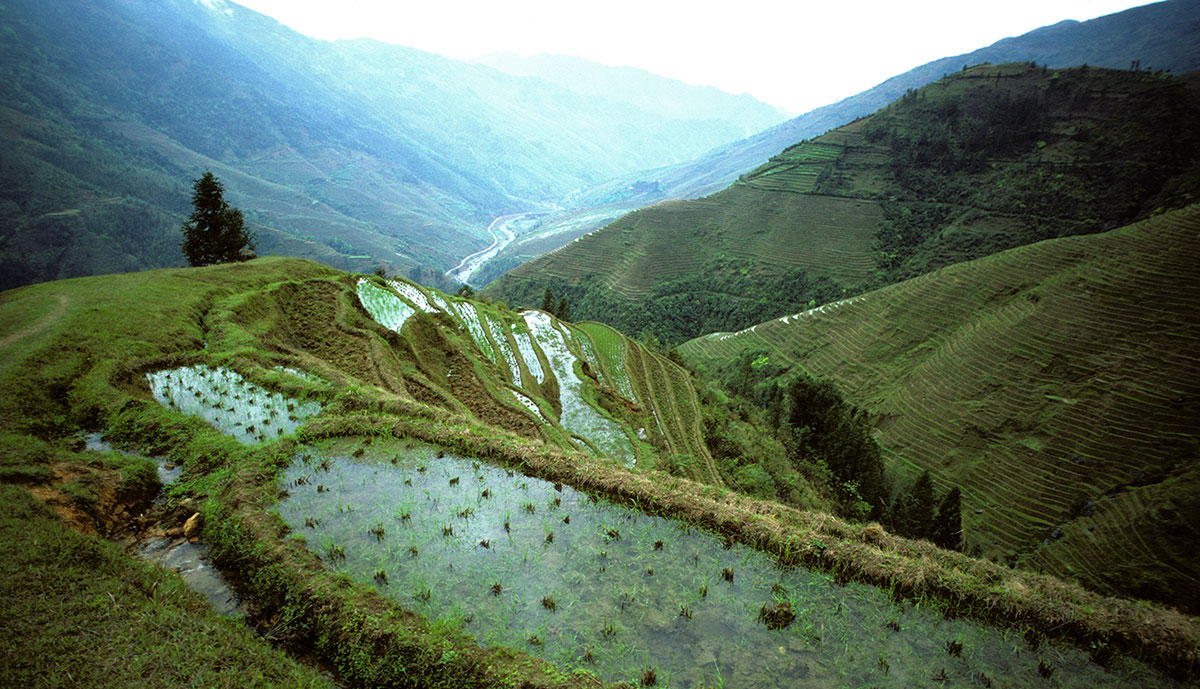
This photo of terraced fields in a mountainous area of southern China was taken from a spot above the fields. The top photo of the Colorado River was taken from a lookout point on Dead Horse Point in Utah.
Here are some tips for getting good aerial photographs, whether you have access to an aircraft or are stuck with climbing up to a high spot:
For aerial photography, bright sunlight and clear skies work better than overcast ones, as they lend the scene higher contrast and enable you to work at higher shutter speeds. The most reliably attractive light is a low sun early in the morning or late in the afternoon, so try to photograph before 11 a.m. or after 2 p.m. on a clear day with blue skies. Shadows are longer and textures are well defined at this time of day.
To overcome haze, fly or aim fairly low and use a wide angle lens with a UV filter. A polarizing filter works even better, but it slows the shutter speed.
If you have access to an airplane, the most useful one is a single engine, high-winged one, like a Cessna. Helicopters are better than airplanes, but they cost more and you have to be careful to avoid including the rotor blades in your photos.
Try to see if you can shoot a clear view with an open or removed window.
Whether you are shooting from a plane or from a building or mountain, plan the photos in advance with a map and mark the locations you want to shoot. Decide whether you need a vertical or horizontal view. For video, you always want to shoot horizontal. If you are working with a pilot, show them your plans in advance and ask their opinion about the best subjects and angles. On the plane, sit directly behind the pilot and talk to them during the flight using the aircraft’s communications system.
Check weather reports and the angle of the sun in advance.
Use medium telephoto to medium wide angle lenses. Take measures to stabilize the camera, especially for video.
Stay below 1000 feet above your subject to avoid haze if you can.
Try to keep the sun beside or behind your shooting position to eliminate haze from backlighting.
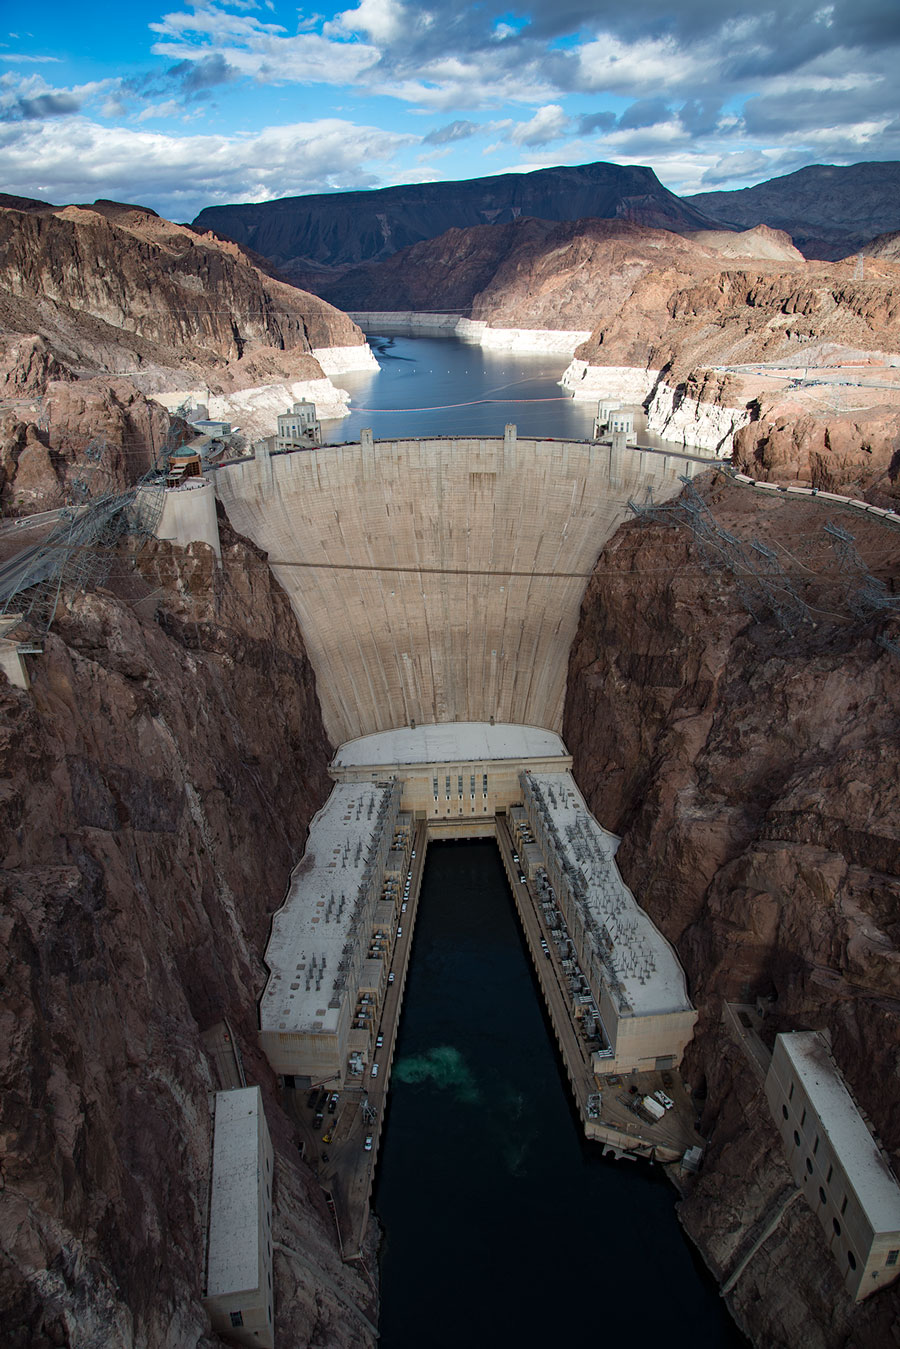
Hoover Dam in Nevada from a bridge.
Shoot at an angle, not straight down.
Use at least 1/500th of a second and go higher if you can.
After shooting daylight photos or video, shoot an hour or so before sunset to get some more moody photos. At twilight, shoot photos with city lights.
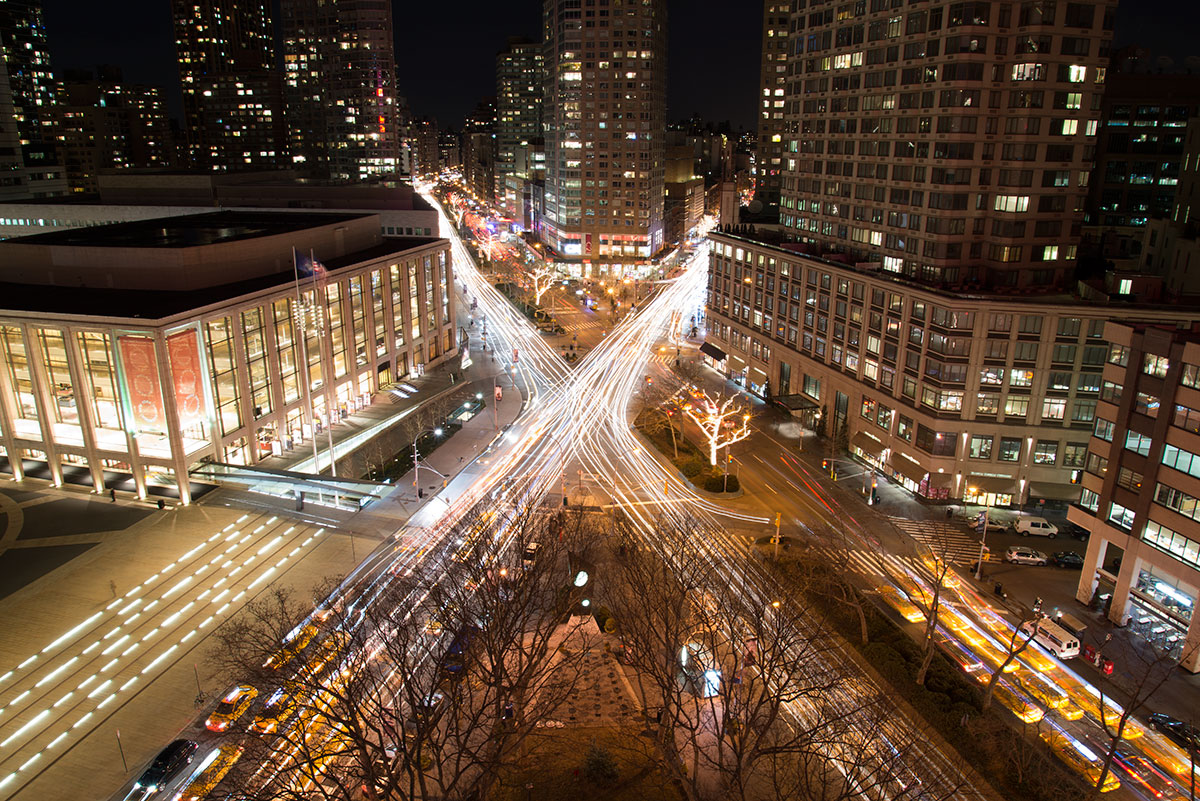
The Lincoln Center in New York City from a nearby highrise.
In post processing, use Camera Raw's new de-haze effect to crisp up your photos.
Encore Azalea
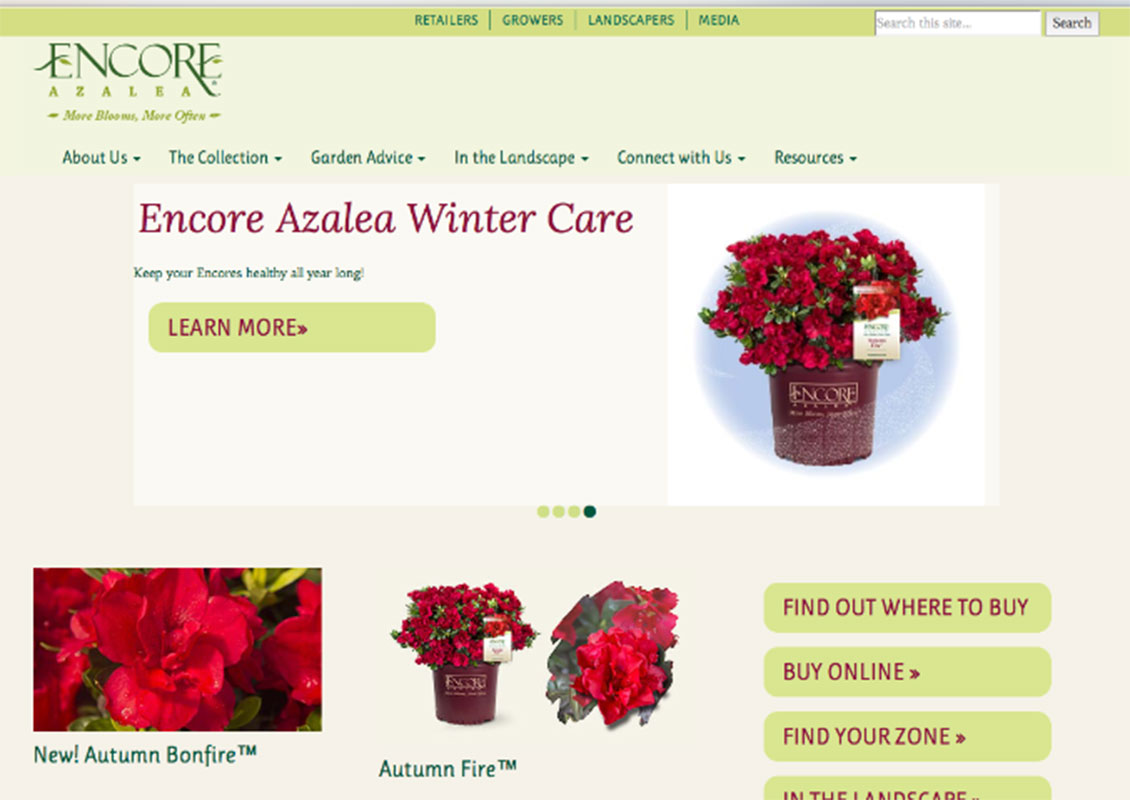
Rouviere Media did the web development for a redesign and streamlining of this engaging website on assignment from Optera Creative, which designed the site. If you love azaleas and want to grow them, this is the site for you.
The new version of this Expression Engine content management site is a responsive site for all platforms from desktops to tablets and iPhones. It showcases the Encore Azalea, a hardy reblooming variety of azalea with a premier reputation in the plant industry. Encore Azaleas come in 29 different varieties - hence the need for an entire site about them.
The site was developed using Bootstrap.
The site’s efficient navigation allows users to quickly find information about how to buy, plant and cultivate Encore Azaleas. Its color finder helps users to choose azaleas in the colors of their choice. Two geolocator infographics show users where to buy Encore Azaleas in their area and help them find recommended Encore Azaleas for their zone.
Savannah 1OO Foundation
Forrest Anderson of Rouviere Media did the web development for this responsive Expression Engine website for the Savannah 100 Foundation, a non-profit organized to help improve the quality of life for children in Savannah, Georgia. The site was designed by eMarketSouth.
Website Research
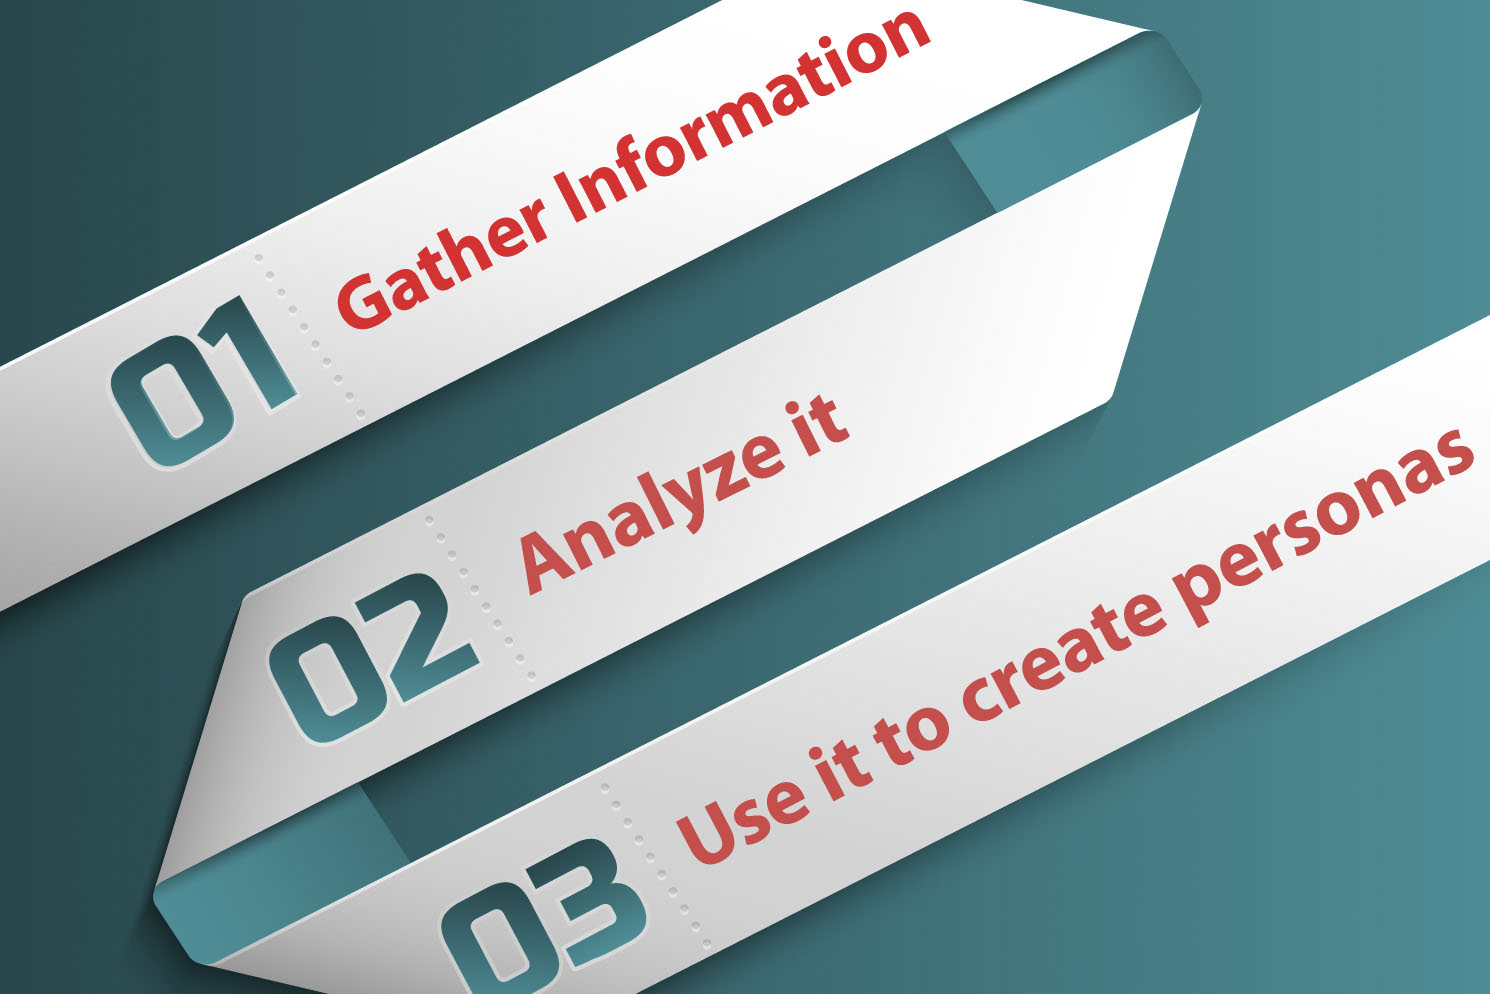
Before starting to design a website, we gather all the information we need to understand and define the problem the client is trying to solve by creating the website.
We research the general landscape for the site and the industry in which it will reside.
We consider technology constraints and opportunities that go along with the site.
We look at similar sites to see what the client’s competitors are doing. We check out the features and content of those sites, focusing mainly on those sites’ users and customers. We identify through both our clients and web research who the clients consider to be their competitors and find out what products and services they consider to be competing ones. A competitor is any other solution a customer could use instead of our client’s solution. We look at the design language that the competitors use and consider how it could uncover an opportunity to differentiate our client from the field and take a different approach that still would meet the needs of the client's industry.
We look carefully at the client’s existing site if they already have one, outlining it and considering what can be used from it and how it can be made more effective.
We collect any existing content – text, photographs and graphics and study them.
We look at best practices inside and outside of the industry – websites the client likes as well as websites we think demonstrate best practices both in general and for the specific industry.
We consider past strategies that have worked well in similar situations and include past or similar ideas from our library.
Having collected all of this information, we organize it into categories. We look at the site’s goals and priorities, its frustrations, the demographics of the audience and user characteristics.
This opens the way for us to look at the risks and opportunities that the research brings to light in the form of unexpected customer and user needs.
It is quite normal for our research to reveal some significant business problems that need to be overcome. Sometimes the client is not clear who the potential users are, overestimates the demand for a particular product of service, or wants technology that will limit the future development of the site. We share our major concerns with the client, recognizing that they may have information we don’t that could alter our conclusions. We discuss anything that we think might be a major problem and its implications, and let the client draw their own conclusions about these issues.
At this point, we usually take a little time to ponder about the project and its implications to make sure we are moving forward in a way that is good for our client and their customers, ethical and truthful and will be upgradable in the long run.
Using our research, we create personas – composite individual profiles who represent typical users of the website. Personas can include anyone who uses a website – customers, employees who input information into a website, and others who are affected by the website.
If possible, we try to meet with some of the clients’ actual or potential customers and employees who will be involved with the website to interview them about their use of the website, what they would like about it and what they don’t as well as how, when, where and on what devices they would use the website. We ask these people to explain what key tasks they would perform on the website, how frequently they would perform these key tasks and to identify and explain potential use patterns.
Our goal is to connect with the people who really matter, the real target audience for the website.
In cases where the client’s budget will not allow this type of interviews, we get detailed descriptions of the client’s customers from the client. This is a distant second, however, to having the opportunity to actually talk to the people who will use the website.
From our interviews, we clarify distinctions between the people who will use the website arising from their purpose for using it, how they use it, the devices they access it from and perhaps other demographics.
We group the interviews into categories based on these characteristics and prioritize them by primary persona, secondary persona and so on. We usually try to keep the set down to five different personas.
We then develop a composite personality for each of the persona categories, with a narrative that describes how a typical person in that category would use the website a particular way. We define three or four of their goals in using the website so we can prioritize the features they want to use and emphasize those in the website’s design. We include how the person should feel while using the website and its associated product or service. We give the person a representative name that is easy to pronounce and remember and include a stock photo of someone who looks like we think they would look so that we can identify with them while we design the website.
We prioritize the personas and choose the primary one that is the best target to design the website for. Then we consider how well designing for this persona also will satisfy other personas’ goals and how we can meet their needs without interfering with the primary personas’ goals. We use market share, revenue and budget constraints to make these decisions.
We write a one or two page narrative for each persona that includes the representative photo, any workflow or other diagrams that would be important, quotes or illustrations about the persona’s environment and activities or other helpful illustrations.
We use this to create a presentation and written report for the client.
In the presentation, we walk through our research findings first and then introduce the personas to the client to help them understand how we developed the persona set and how it makes sense. We answer any questions and get their feedback.
We focus on these things that will have the greatest impact on the client’s product definition or accompanying business strategy, as well as anything that will have a major implication for the design.
Where our findings differ from the client’s assumptions, we bring up our evidence for them and talk them through with the client so that we are on the same page.
Once we have reached agreement with the client on the research findings, we can go on to define the website’s requirements. This is a topic for a future blog.
Research a Photo/Video Shoot
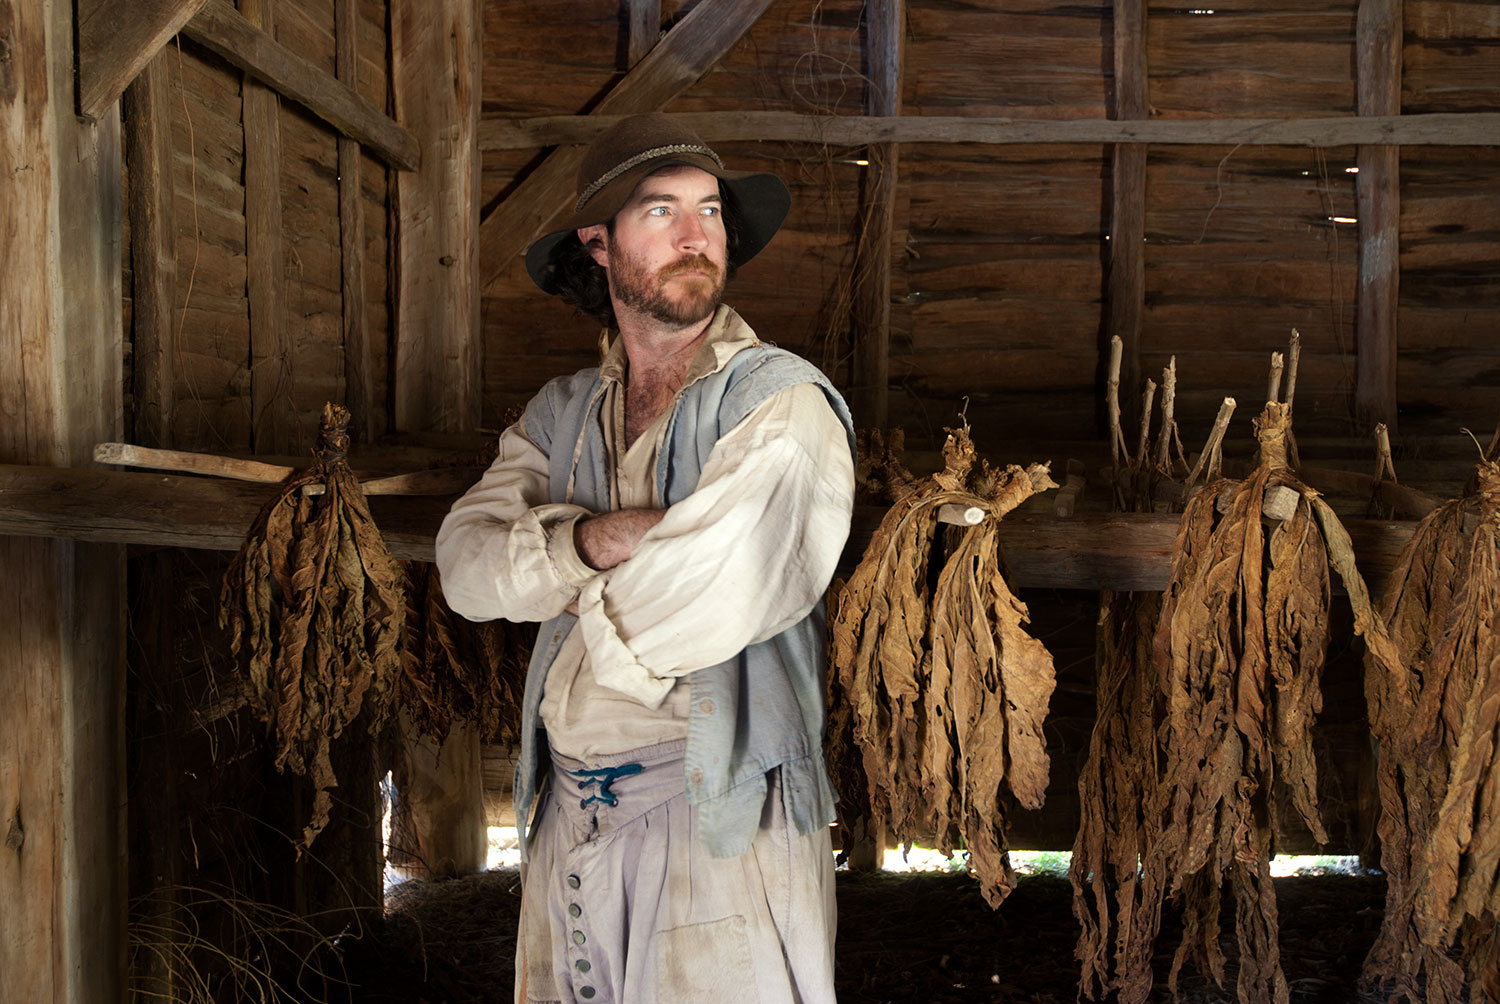
Planning a photo or video shoot can be done fairly efficiently if you have a good workflow. Here is the planning section of our workflow.
1. Research the subject.
- Immerse yourself in it so you can decide who and what you might film. Reach preliminary conclusions so you know what to focus on.
- Decide on the restrictions that will narrow and deepen what you shoot. Know what aspects of the subject you are not interested in, don't want to shoot and then decide what you want to concentrate on and the strategies you'll use to do them justice.
- The subject and type of project determine the kind of research you should do.
- Start a list of contact names for the area and subjects you want to cover. Get good knowledgeable local help if possible to get past the obvious shots.
- Identify the experts, ask them questions to make sure you've have got it right, revise your research and insert them into your contacts list.
- Study relevant maps.
2. Make a working hypothesis
- Decide tentatively what you believe on the subject.
- Decide how your film or photos will show that in action by exploring particular situations.
- Who or what are the central characters and what are their characteristics.
- What each wants to get, do or accomplish.
- The main conflict and who or what it is between.
- Decide what will determine the video's structure.
- Decide what you want your audience to feel and realize.
3. Create a shooting plan, budget and schedule.
- Designate a purpose for each scene in the video or photo shoot's likely narrative.
- Analyze each situation for its significance and ability to show what you want to show.
- List the basic information each scene must convey so your audience can attain your level of understanding.
4. If possible, observe the activity you want to film to:
- Plan a shoot that is characteristic, telling and brief.
- Figure out when significant or potentially dramatic things start happening.
- Get to know the participants and explain to them your motivation for the shoot or video. Try to get them to trust you.
- Understand the participants' roles. Decide who represents what and narrow your choices.
- Decide who will be the most communicative and visually effective.
- Imagine different possible outcomes once you start shooting and how you will deal with them.
- Rethink the possible meanings your photos or video could delver.
- Write a proposal that outlines the shoot's intended content, theme, style and outcomes.
5. Assemble all the resources you need to begin shooting.
- Make a list of sound and photo material you will need for each scene.
- Decide which people to use and who your central character is.
- Decide who or what is in conflict, what is at stake for your participants, those around them and society at large. This is the key to giving the shoot the definition and clarity it needs to be effective. Its purpose and identity changes as the shoot evolves, so keep watch on that. Figure out how to make any oppositional forces meet in confrontation.
- Determine the central point and counterpoint of the project's argument so that you collect all materials you need.
- Identify thematic goals for each part of the shoot or sequence of video and for the project as a whole.
- List the expository information that the audience need to understand each sequence.
- Determine what is typical and atypical in each part of the shoot to guide your shooting.
- Plan to collect images such as cityscapes, landscapes and workplaces that set the scene for your participants' location or condition.
6. Define the main point of view, whose it is, why it matters and how you'll make the audience empathize with it.
- Who must the audience specially understand and sympathize with? How will you take the audience inside these emotional viewpoints? What changes in thinking and feeling do you want the viewers to experience as they follow the story? What should they feel and think by the end?
- Define secondary points of view, as you might tell the story through secondary characters.
- Define your own angle or point of view, what you want to say and which what emphasis so you collect the materials to do it.
7. Define the shoot's style
- What style best serves each sequence and the stylistic characteristics of the shoot as a whole.
- How point of view might effect style in each sequence and in the whole shoot.
- Style issues to avoid.
- The project's genre.
8. Make a draft of the information you have created.
9. Obtain permissions.
- Place - Secure written permissions for owners or administrators of non-public locations. Many cities require you to get a permit from the authorities to film int he streets or on public transportation. Permissions to film in a location must be obtained in writing before you start shopping. All events on private property must be cleared by the relevant authority to avoid invasion of privacy. Anything unrestrictedly open to public entry such as streets, markets and public meetings may be filmed without asking anyone's permission. However, you need to get police permission and perhaps pay for a cop to control traffic or wave away troublesome bystanders in some situations. New York requires you to work through a specials division of the mayor's offices or state film commission as does Paris. You must cary proof that you have liability insurance in case your activities cause injury.
- People - Secure a committment for agreed dates and the amount of time and involvement from those you intend to film. Personal releases should be signed immediately after participants are filmed. For video, no signature is valid without a $1 minimum legal payment which you hand over as symbolic payment. Give a small sum to help people if they are in great need and you have filmed them.
- Copyright. If music or other copyrighted material is necessary, now is the time to secure it.
10. Scout locations if possible.
- Make a list of problems the locations pose.
- For an exterior, when is available light at its most useful? Carry a compass so you can estimate the angle of the sun at different times of day.
- What scenes look promising?
- Is there enough electricity for lighting interiors?
- Can power cables pass under doors when you close windows during shooting?
- Where can lighting stands go so you have freedom to shoot?
- How reflective are the walls and how high is the ceiling?
- Where might the camera go if it's a public event and you must shoot unobtrusively from a tripod using a long lens?
11. Sound at locations
- Clap your hands and listen. If the room is reverbant, sound will be thrown around the room. This is a major concern and may require using another venue. because sound reflectivity can make the sound unworkably bad.
- When in doubt, record representative dialogue in dubious sound locations and roughly edit the results together to see how serious the problems are.
- Consider whether drapes, carpet, soft furniture or irregular surfaces can be introduced to absorb unwanted movement of sound within the space.
- Determine whether the alignment of surfaces will cause sound bouncing between opposing surfaces and whether the room has intrusive resonances (common with concrete and tile).
- Determine whether people can walk around during the shoot without the floor squeaking.
- Consider ambient sound and noise from the outside - airport paths, highways and railroads, schools, construction sites as well as refrigeration, hvac and other sounds inside.
12. Secure any crew you need.
13. Make a shooting schedule, building in options to deal with inclement weather or unavailability of a major element or participants.
14. Do any necessary trial shooting
- Audition dubious participants or crew.
- Set standards for work you are going to do together.
- Test new or unfamiliar technology.
15. Schedule
- Break your material into intended sequences or scenes and allot time for each. Expect to cover perhaps two lengthy sequences in a day of work, provided you can get from one to the other without too long a journey. Setting up lights slows things down.
- Don't cover too much and have inhumanly long hours. Consider:
- Travel distance and the time it takes to tear down equipment in one location and set it up in a new one.
- Amount and complexity of lighting and sound setups.
- Amount of randomness inherent in the subject.
- Consider that a 20-minute interview can take 3 hours. Leave time to socialize..
16. Revisit your contact list and flesh it out with the mobile phone of everyone involved, a phone contact for each location if possible. Also list special equipment or people needed at each location and directions and a map to each location.
Further aspects of pre-production for a photo or video shoot will be outlined in later blogs.
Don’t take No Cutoffs

I grew up on the edge of the Tahoe National Forest, very close to the place where a group of American pioneers on their way to California to seek their fortunes became snowbound in the Sierra Nevadas.
This unfortunate group had been delayed in their journey when they unwisely followed a rugged route called the Hastings Cutoff. They lost many cattle and wagons on this leg of their journey and were trapped by an early snowfall near Donner Lake. When their food supplies ran low, some of them ate their dead to survive. By the time they were rescued in February 1847, only 48 of the original 87 were alive.
As a child, I was taught this story at school and taken to the museum that commemorates the group. The takeaway that has stuck with me ever since? Survivor Virginia Reed’s comment in a later letter: “Never take no cutoffs and hurry along as fast as you can.”
One of the worst forms of crazy making that will hold back a creative professional is reacting to other people.
Reactivity is simply not functional for a creative pro. You can’t get anything done if you are reacting to others. Creativity requires aggressive, proactive use of your time. You need to politely demand the space to do so from the world.
Planning and charting a course to move projects to completion and active marketing are other essential behaviors.
Practically speaking, this requires time – regular, quiet, uninterrupted time daily in whatever space you consider your office or studio. Then you need to use that time wisely, dividing it between all the necessary parts of running a creative business or career.
You don’t have time for a lot of socializing during this work time. Your creative skills and business will develop in a much more positive direction if you just efficiently set up a system that works and don’t “take no cutoffs” instead of talking about how you want to. You don’t want to unless you do.
To avoid reactivity that pulls you away from your creative goals, you must have and follow a personal plan. Don’t be accommodating of interruptions. There’s nothing wrong with a Do Not Disturb or Off-line system. In fact, it’s essential to getting your creative projects done. You need a system and schedule that are inviolable and respected by yourself and others.
Balance is a totally different thing than accommodating everyone else’s agenda and schedule, which is the surest way to be thrown off balance.
That doesn’t mean you have to be rude. A good creative business is staffed with appropriate, professional, businesslike people who treat each other kindly and are rewarded for cheery behavior. It actually is more efficient and less reactive to treat everyone civily, kindly, and as people of worth, rather than just responding to the squeaky wheels. When you put squeaky wheels first, you lose all perspective on what is important because they squeak about all problems, important and trivial.
Extract yourself from these people’s clutches by doing what works. It is no good lecturing yourself about not getting off track. You will be ensnared by time wasting agendas unless you set up for yourself a strong alternative agenda.
Don’t be afraid to take the time to do and be the best you can possibly be. Your niche is in being your very best, not like everyone else, and producing something that will stand out from the crowd.
We all are floundering in an environment in which there are so many choices that make demands on our time and energy. The response of many people is to throw short-term solutions at things rather than to fix the problems long-term once and for all. Short-term planning is the hallmark of low-level thinking. Long-term thinking is the “pay as you go, invest in the future” approach.
People who think long term take the time to graph their future out for years ahead, considering how they are going to achieve their goals, and they don’t allow themselves to get distracted by short-term distractions and "get there quick" cutoffs from planning and executing their lives well. This is wise stewardship of your own talents.
The present is a point with lines fanning out, like a tunnel that you are looking down as it gradually widens until it fills your whole view. Take actions now at the pivot point that swing the tunnel in the direction you want to end up, because your current decisions will grow to fill your whole world. Insisting on this uninterrupted time is difficult because the majority of people aren’t doing it, but it’s essential to a creative professional life.
Photo-Video Workflow
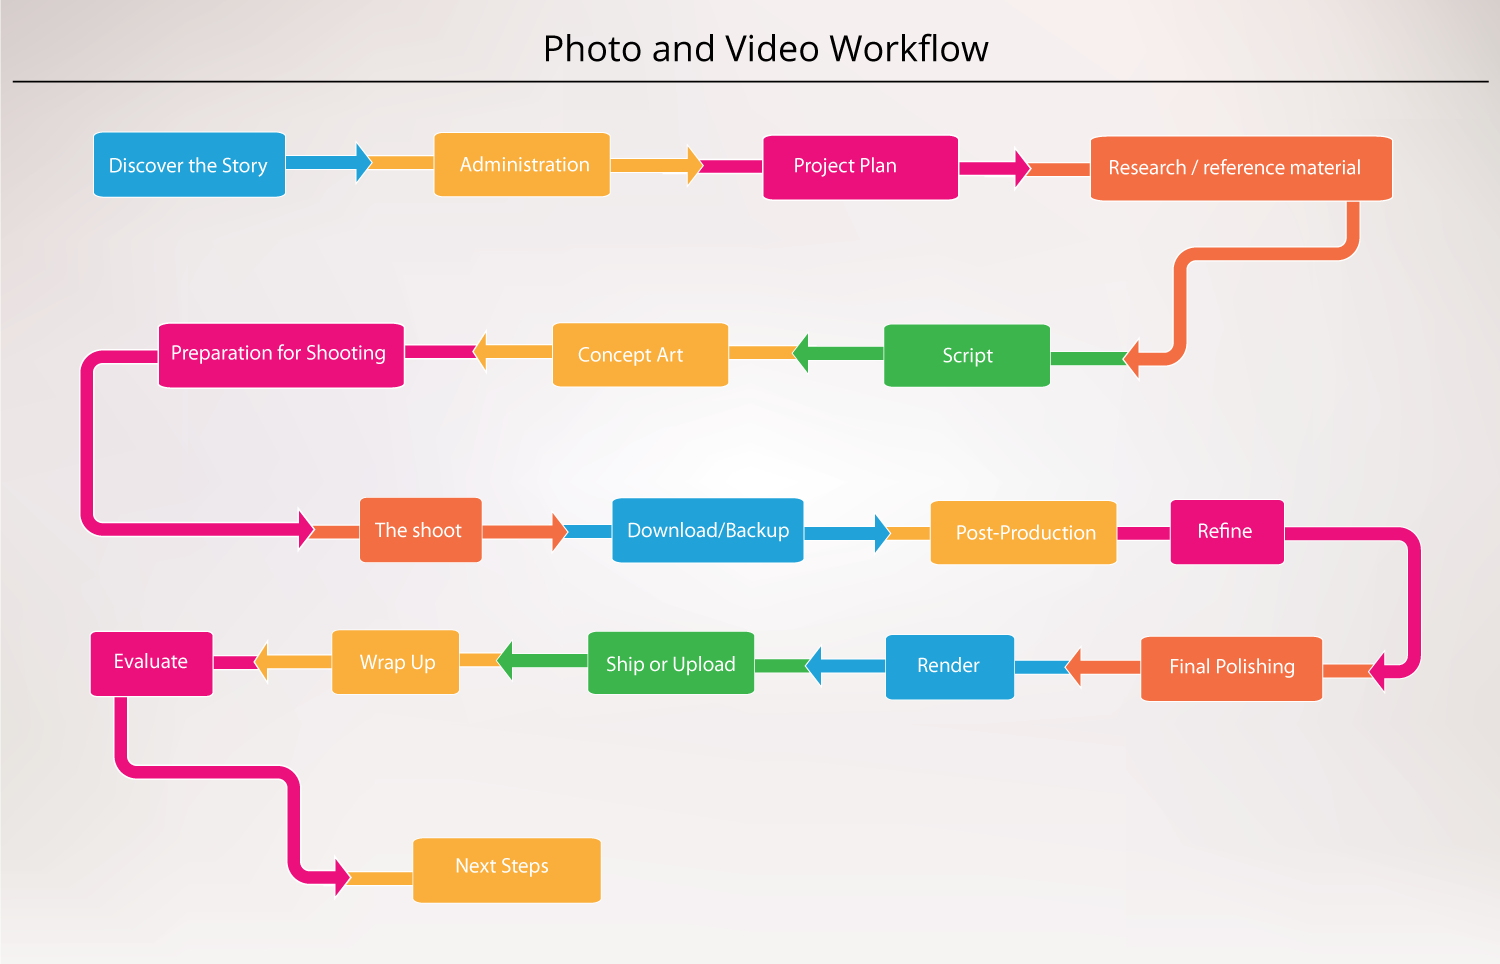
Both photo and video shoots require an efficient workflow. This blog details the broad outlines of our workflow for photo assignments and short videos. Future blogs will tackle in detail specific areas within the workflow. Although the complexity of this workflow varies greatly depending on the complexity of a shoot, most projects fall into this basic structure.
- Discovering the basic story we need to depict in the photos or video - We start each project with a discover process aimed at nailing down the story to be depicted in the photos or video. Our clients fill out a questionnaire about their project’s requirements and what they want to achieve. We discuss it in depth with them, look over any visual or other materials they have and write a creative brief outlining the requirements to bring the story to life. Sometimes this can double as a proposal. The client’s approval of the creative brief constitutes their hiring us to carry out the shoot or part of it.
- Administration - We set up files for the project. See our earlier blog, Documents for a Photo Shoot, for more details.
- Project Plan – We create a project plan for the shoot that includes mapping out the steps we need to go through to make it happen, scheduling parts of the shoot, allocating resources and people. From this plan, we create a task list.
- Research and gathering reference material – This process can be lengthy or brief depending on the complexity of the shoot. We immerse ourselves in the topic and find out what has been done visually on it in the past as well as figuring out the logistics of carrying out the shoot, researching locations and gathering samples of photos and video on the topic or aspects of it. From this, we select the best to learn from. We also dip into our past projects for insights as to how to shoot this assignment well.
- Script - Using the creative brief as a beginning point, we flesh it out into a more comprehensive script for the shoot that includes the most important aspects of what we have learned in our research.
- Concept art - We create boards with concept art for each aspect of the shoot, especially when doing video, so that it is clear what type of look and lighting we want to achieve. This can range from actually creating digital concept art for each scene to simply creating simple boards with examples of the type of photos or video we would like to capture. These boards can contain instructions about props, clothing, sets and lighting.
- Preparation for shooting – The concept boards and creative brief go to each person involved in the shoot to use as a guide in planning for the shoot. For a simple still photo shoot, this could be limited to the photographer and photo retoucher. A video could require coordination between those who are in charge of directing the video, designing the set, the people in charge of prop and costume design and dressing, the sound engineer and designer, the lighting designer/cinematographer, the person in charge of technical support and backup, the post-production editor/colorist and of course the subjects of the video if necessary. Each person involved in the shoot uses these materials as their guide in preparing for the shoot and post production, working with each other as needed to nail down all aspects of preparation and scheduling. On most of our projects, one person may fill several of these roles.
- Shooting the photos or video footage
- Download and backup of the photos of footage – This varies in complexity depending on the complexity of the shoot.
- Post production - This includes sorting, rating, metatagging and organizing the photos or audio and video; assembling a package of photos or, in the case of video, creating a rough cut assembly of all of the parts of a video to provide an overall idea of how it will look; refining the project with retouching and caption writing for photos and timing, transitions, color grading, special effects and sound mixing for video; and final polishing.
- Render – The rendering process puts photos or video into the final formats needed by the client and creates master and backup files for our own archive.
- Sending out or uploading the photos
- Wrapping up the shoot - Archive all materials and repurpose materials as needed, invoice, evaluate the project and make any changes to our workflow.
- Determine next steps - Many photo and video shoots are part of a series or lead to other projects and opportunities.
Creative Pro Hardware and Software
In a previous blog, we covered the basic equipment we use in our multimedia business when we are on the road. This week’s blog, which runs through the hardware and software that we use, overlaps somewhat with that earlier blog, but concentrates on an affordable core suite of software and hardware for small media operations. This is what we use and how we use it:
Hardware - We run our business on the Apple train and have done so for about 20 years. Apple machinery keeps things simple so we can concentrate on creative work. We use 13-inch Macbook Pros which we swap out every three years, 27-inch Apple monitors, an iPad to test web and app products on and iPhones.
Adobe’s Creative Cloud software package is by far the best for creative professionals. The package entitles the user to use any of Adobe’s main software products for $53 per month. We can download or update new Adobe software and access Adobe support any time from any location. Adobe’s products are highly integrated with each other and with other third-party software that we use. Our business is so dependent on Adobe that we try to avoid third-party software in favor of Adobe products as much as we can. When we do have to use third-party software, a major factor in our choice is whether it is integrated with the Adobe stable.
On a daily basis, we use the following Adobe products:
- Photoshop – Adobe is the industry standard for editing photographs (i.e. raster graphics). We use it extensively for photo editing, but also for matte painting, preparing graphics for video purposes, copying and enhancing historical documents, preparing photos for web and print purposes, restoring damaged documents and images, batch processing hundreds of photographs and processing and enhancing reference materials for 3D animation.
- Illustrator – Illustrator is Adobe’s vector graphic program and one of our main workhorses. We use it for web and print graphics - mockups and wireframes for websites, ads and images for videos, icon and logo creation and map and infographic creation.
- Bridge – I use this digital asset management app so constantly that I keep it open almost all of the time. I organize assets for books and apps, metatag, rate and archive photos and other graphics, make contact sheets to send to clients and search for photos in Bridge. I also use Bridge to navigate through my huge library of graphic assets, reference materials, patterns and textures used in 3D animation and other projects. I even use it every morning to sort and clean out documents on my desktop.
On a less frequent (several times a week) basis, I use Adobe’s video software as well as Cinema 4D:
- Premiere Pro is Adobe’s video editing software. I use it alone for straight video editing as well as with other Adobe and third-party products. It is integrated with Photoshop, so I can bring still images and graphics from Photoshop into Premiere Pro to add to video projects. I then can return to Photoshop to edit images and graphics as needed during the course of assembling and refining a video.
- I also use Adobe Speedgrade, a tool for color correction and developing the look of video clips. It also is integrated with Premiere so I can switch back and forth between the two as needed.
- Adobe Media Encoder is a related Adobe tool that outputs Premiere Pro video projects for various purposes such as YouTube, broadcast, film, etc.
- Adobe After Effects is a visual effects, motion graphics and compositing application that is integrated with both Premiere Pro and Photoshop, but it also represents an entire community of third-party providers of effects that make it even more versatile. It also integrates with Cinema 4D, the non-Adobe 3D animation software we use. The powerful combination of all of this software enables us to combine video, motion graphics, animation and special effects within a single laptop and upload the result to a website or Youtube.
- Cinema 4D is probably the most affordable full-fledged 3D animation program for a small shop. As well as using it for animation, I use it to make still 3D graphics for infographics that can then be finished out in Photoshop and Illustrator and made interactive in Edge Animate.
On a much less frequent basis, we use several software products that are invaluable when we need them for specialty purposes:
- Adobe Story is video script writing software.
- ScreenFlow enables us to make training and other screencasts.
- Adobe Edge Animate is a web animation program that enables a non-programmer (that would be me) to create animated and interactive slideshows, infographics and other similar projects without knowing a lot of code. It uses HTML, CSS and Javascript on the back end, so that Edge products can be uploaded to the web and used in apps. We use it for interactive infographics, web animation and website slideshows that contain animation.
- InDesign is Adobe’s page layout program, but it goes way beyond laying out books. We have used it for interactive PDFs and for an Adobe Digital Suite interactive app.
- We use Adobe Lightroom, a photo organizing and editing program, to organize and upload stock photos to the web.
- Adobe Acrobat Pro, the pdf creation program, is a frequent workhorse in our stable. We use it to send a variety of mockups to clients, from ads and website wireframes and page designs to logo designs and photo contact sheets.
- We use a Wacom tablet and software for precise creative graphic design and digital painting.
- I manage my collection of more than 1,000 fonts, web and print, in Font Book.
- As mentioned in the earlier blog on travel, we run the project management part of our website on Omni’s suite of organizational apps. We plan our schedules and keep track of projects in OmniFocus. We use OmniOutliner for our various project workflows. We do site maps and organizational charts in OmniGraffle and project plans in OmniPlan.
We use Microsoft Word to write and collect research materials.
We use three main browsers – Safari, Google Chrome and Firefox - to test our products and navigate the web and also check other browsers as needed when testing projects.
Superduper! keeps our backups current, and we use Skype to communicate remotely with colleagues and clients on projects.
We store our passwords in 1Password.
This list doesn’t include the coding software that our technical director, Forrest Anderson, uses or our financial software. That is for another blog.
Creating a Website Project Plan
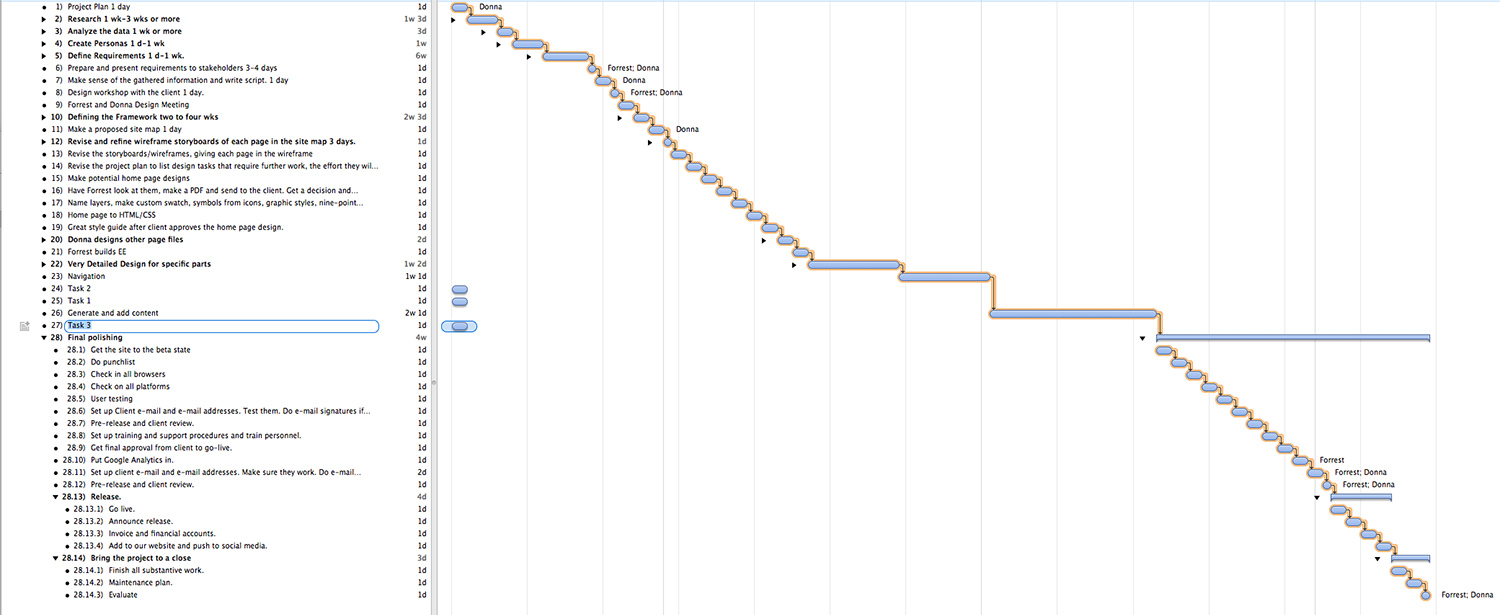
Once a website client has approved your statement of work and gives you the go ahead to create a web project for them, the next step is to make a project plan.
We begin by making files for the project. These include a computer file, a hard copy file if we have notes on paper about the project, an email file and a project in Omnifocus. Each of these are labeled with the same name and color so we can easily find them. For hard copy files, we use colored file folders. If the project is huge, with many hard copy files, we use a bin and label it with the same name and color as the other files. We also add the client contacts to our phone contacts.
In the computer file, we set up sub files as needed, including at a minimum a file for mockups, administrative content and raw content.
We set up a simple communications plan so that we can provide regular and milestone reports to clients. We decide what contacts will receive these brief reports.
This plan includes the following procedures:
- We provide clients with regular and milestone reports on the progress of a project.
- We try to confirm in writing all important information from informal discussions with clients.
- We address any surprises or major information with clients immediately rather in our regular reports.
- As it will be necessary to communicate with clients throughout the project in phone or in-person meetings, we try to do the following in those meetings: Clarify the purpose of a meeting and who needs to attend it, give plenty of advance notice of the meeting and its agenda, keep the meetings to less than an hour, start on time and take notes of the discussion, decisions made and assignments. We make a list of action items from each meeting and assign responsibility for them in Omnifocus. Then we monitor the progress of all action items on a daily basis. When meeting with busy managers, we pick out a few key messages to emphasize in short presentations. We gear the messages to the interests of the audience and explain how the project is addressing those interests. We allow time for questions. We present information about risks involved with a project and how they are being addressed. After the meeting, we send out emails highlighting the issues raised and the actions agreed upon.
After setting up this preliminary structure for managing a web project, we create a preliminary project plan, using Omniplan as a project management tool. This includes:
- Do a work breakdown structure, identifying all major assignments, tasks under them and sub tasks in Omniplan.
- Make assumptions about uncertain activities and plan to change them as we proceed, recognizing that most web projects change during development. Identify all unknowns that we need to make contingency plans for.
- Identify any preexisting templates we can incorporate into the project. Put copies of them in the computer file.
- Identify the basic products and results and when they will be produced during the course of the project.
- Identify roles and responsibilities and how we will work with each other on each of the project's activities.
- Identify the required resources – funds, technology such as modules, software licenses, content, information, outside technical experts. If the project requires us to travel or take photographs, we make a sub plan that includes these tasks.
- Identify the order in which things must be done – what tasks are dependent on preceding tasks and what tasks must be done before succeeding tasks can be completed. Mark the activities that are dependent on each other with designated paths.
- Mark the critical path.
- Include tentative start and end dates for each task, recognizing that many will change but they give us an idea of the overall time the project will take.
- Consider ways to shorten the critical path or other paths.
- Consider any legal requirements that certain things be done before others, client company policies that require certain activities to be done before others, deadlines for having certain tasks completed, relationships between various activities, and any arbitrary decisions by the client to work on certain activities before others.
- Make a tentative schedule based on the project plan.
- Make task lists for each person who will be involved. Look at them with each person and see what has to be adjusted. Revise them until we get their approval.
- Adjust the plan to accommodate other projects we are working, holidays and other work activities to avoid overcommitting ourselves.
- Make a detailed budget estimate with labor costs for each activity and the cost of any materials, technology, travel, outside services or products or other resources.
- Set up a way to keep track of our labor and materials costs as well as any information we will need for taxes.
- Add 10 percent to the time the project will take as well as the budget to make sure we get it done in plenty of time and within budget.
Consider the risks of the project and make a plan to eliminate or manage them.
Make sure the project as outlined will solve the client’s problem and that it is not too large.
Make sure you have the required skills.
Consider the risk of budget overruns and be upfront with the client about that possibility.
Consider the risk of untested technology.
Make sure the strategy for the site is clear.
Make sure that the client’s deadlines are realistic and are not made by backing into an arbitrary end date with no historical information of how long it has taken to perform similar activities in the past.
Divide the project into realistic phases.
Consider the likelihood of the risks and their impact on the total project.
The most common risks involve working with clients.
Web design and development are highly specialized skills that many new clients don’t understand well. If they haven’t worked extensively on a web project before, it is common for them to underestimate the complexity of their project and the time and effort on both their part and ours that it will take to complete it. They often make suggestions that violate standard web conventions and don’t understand the importance of sticking with those commonly understood practices. Other issues they often don’t understand well are the importance of adjusting websites for various devices, having a clear, consistent graphic style and that making websites simple and user friendly can require compensating complexity in the coding.
Some clients start a web project and then get busy and don’t provide needed content or feedback in a timely manner.
Many if not most clients don’t have the skills to provide content in the format that is needed on the web.
The vast majority of these clients are intelligent people who are skilled in their own field, but recognize that they need our expertise to translate their vision and needs to the web. We assume that they are approaching us as an outside consultant and it is our job to help guide them through the process of creating their website. Our work approach with them is to be polite but direct and specific about the entire process and what we can provide as well as about the capabilities and limits of technology and their budget. This approach works well with most clients.
Infrequently, we acquire a new client who wants to simply order us around and ignores the advice we give them regarding best website practices. This problem can vary in scope with clients. If they are generally good to work with but have a blind spot in a specific area, we look at whether their desire is possible technologically. If so, we inform the client of the drawbacks of their approach and how it will reduce the effectiveness of the website and then do as they instruct us even if it is less effective. If it isn’t possible, we simply tell them so and why.
In the very rare case in which a client’s general top-down approach and desires would make a site unworkable, we notify them upfront that their approach will not work. If they won’t modify it, we tell them that we can’t proceed and they’ll have to find another solution.
Some clients believe that purchasing a web project is like purchasing a pair of shoes – a one-time deal. We try to avoid this misconception by helping them to understand that websites are like pets – they are a changing and developing media from the beginning and have to be kept up to date with new content and upgraded technology as well as marketed if they are to be successful. We tell them that we try to set up a system from the beginning that can evolve over time with a minimum of their time and resources. We help them to see their responsibilities by sending them a task list of those things that they need to provide for the website.
We sometimes wind up developing the contents of their website for them. This is fine if that is what we contracted to do. If it isn't, we let them know there is a problem with content and reach a solution.When clients provide poor quality photos, we put them on line in a development environment for them to see and then ask for confirmation in an e-mail that they are satisfied. Often they provide new ones or ask us to do so at an additional charge. If a client provides text that is unsuitable for the web, we make minor changes to make it suitable and notify the client. Sometimes we provide sample text that clients can use as a place to start and they can then edit what we have written.
Another common risk is scope creep. The statement of work should define the scope of the work clearly, but most clients will ask for more once you begin a project. If the requests are significant, we inform them that they will impact the overall cost and schedule.
As we hit each milestone at which a client needs to approve parts of the project, we make sure the client understands that after they approve that phase, further changes will require additional labor and cost. Outline the impact and give a time and cost estimate if the cost difference of a request is significant. Give the client the option to proceed or cancel the request.
Most clients have both good and bad ideas about what they want on their website. Support the good ideas and eliminate the bad ones, tactfully. Just explain your concerns and why you have them so that you show that you have the client’s best interests at heart. If the client doesn't accept your point of view, consider providing references to information that will support your point of view. If your client still wants the idea incorporated into the site, put it in if it’s technologically possible.
Thriving as a Creative Pro

1. Give yourself permission to thrive – real life “I like you and what you produce and how you live” permission, not just laissez faire neglect coupled with silent disloyalty and criticism. No individual and no business can thrive in a critical environment. Give yourself and others a break from criticism and unkindness for a solid month or two and see if it doesn’t have a huge positive impact on your productivity. This will do more to establish a firm foundation for your business than anything else you can do. Nothing’s lost and all’s gained from this exercise.
2. It’s one thing to hate a bad person or company for messing you up and another to wisely analyze why they did so. When you are exposed to inappropriate behavior, look at why people behave the way they do. They may be functioning with an agenda that is not in your interest even if they believe it is. If so, just give it a miss.
3. Market yourself truthfully and ethically and be very clear about who you are and what you are marketing, as well as what you are not. Market the truth and market to people who like what you produce. They will buy and the others will stay away.
4. Spend time and money on things that produce abundantly with less work and avoid choosing that which produces sparsely no matter what you do. This can save you a lot of trouble. We once had a neighbor who spent much more time on his yard than we did, with much worse results. The problem was his choice of plants. We deliberately chose drought tolerant, low maintenance plants and a Japanese garden design that suited the climate and tolerated some neglect, while he planted a high-maintenance lawn that burned up in the summer sun. Invest in that which produces the lifestyle you want with less effort on your part. This gives you more time for your creative work.
5. There are essentially two paths. One leads to progress and satisfaction, the other to destruction and misery. Some people go only part way down whichever one they choose. Others go back and forth on both paths and get no where. Some go along the path toward destruction while telling themselves they are going the other way. Productive creatives always try to stay on the path to progress and satisfaction for themselves and others.
6. Craft a practical environment in which to be creative and design it to facilitate your work. It should be a place where you can withdraw from the rest of the world and be uplifted, a place of refinement and learning and progress. It should support you, not you it. Design it specifically so it does so.
7. Set up your workflows and environment to work for you as much as possible. I call this the vending machine principle – set up the machine, load it with goodies and let it make money for you while you do something else.
8. Get over prejudices about both private entrepreneurship and working for someone else. Both are neutral – they can move you ahead in your creative pursuits or hold you back, depending on how they are structured. Private entrepreneurs have to pay their own benefits and taxes, etc. and those who work for other companies sometimes find their talents hamstrung by visionless or incompetent bosses and practices and by time wasters such as commuting, meetings, off site activities and other unproductive events that are in fact a tax on their ability to do their jobs. So the playing field is pretty even.
9. Preparation meets opportunity. Lack of preparation meets lack of opportunity. So organize and prepare yourself and opportunities will come. You don’t have time to deal with no-win situations that arise from disorder. Don’t put yourself or allow yourself to stay in no-win situations.
Holiday Inn Express for Creatives

We travel a fair amount for our work, so looking for hotels with reliable services used to consume a fair amount of time before a trip. Then we discovered Holiday Inn Express, which is now our first choice for consistent, efficient service for creative professionals. Since then, we have mostly skipped both cheaper hotels and luxury but less inconvenient ones. When we’re working on the road, we don’t have time for inefficient services.

Here’s why we stay at Holiday Inn Express almost exclusively when we’re on the road:
Holiday Inn Expresses tend to be located conveniently close to main highways and near reasonably priced and efficient restaurants.
The rooms are clean and comfortable.
The beds are comfortable. We work long hard hours when we’re on the road, and we can’t afford to miss a good night’s sleep after an exhausting 15-hour day of shooting photos, interviewing people, research, website development or travel. They offer a choice of firm and soft pillows and clean, comfortable bedding.
The design of the rooms is made for business travelers, with a desk and exercise facilities. Many Holiday Inn Expresses have small refrigerators and microwaves. The rooms have lots of space to lay out and organize photo and video gear and place luggage.
Holiday Inn Express’s Internet service is free, simple to access and reliable, unlike some of the more luxury hotels we have stayed in that charge for Internet service that turns out to be unreliable and irritating connect to.
Holiday Inn Expresses have convenient parking to rooms, a boon when we arrive (inevitably) at a hotel at 11:30 p.m., so beat that we can hardly muster the strength to lug our gear into the lobby.
Holiday Inn Express has a free breakfast buffet. It’s not gourmet, but it’s decent quality, quick and convenient, which is what we care about when all we really want to do is to get on the road and working as fast as we can.
Holiday Inn Express rooms tend to be consistently laid out with the same amenities from place to place. We love going to different places, but when we are working, the last thing we want is to figure out a different system at each hotel we stop at. Holiday Inn Express becomes our home away from home, where we put our luggage in the same spot in every room, set up our desk the same way, hang up our clothes in the same place and get the same level of service. This enables us to avoid the disorientation of a different style of hotel in every location. It means we can turn our attention to capturing photos, video and information about the unique wonderful characteristics of every location we work in.
Holiday Inn Express’s reservation and check-in service are reasonably streamlined. The reservations are centralized and available on the website, a mobile app and by telephone. If one Holiday Inn Express in an area is full, often there will be another one near by. Instead of having to look up a list of hotels and go from one to another getting a different reservation system for each one, we can just call one number in our contact list.
We also appreciate that Holiday Inn Express has never charged us hidden charges – a good rate for the room and then adding other charges as some other hotels have.
Holiday Inn Express has a rewards program that once in a while earns us a free room for a night for a bargain price – a great bonus when we are pursuing self-initiated projects.
On most occasions when we have forgotten an item such as toothpaste, the staff has provided a replacement.
Our second choice: We’ve had good luck, albeit limited experience, with Spring Hill Suites. Ones we have stayed in have beautiful suite-style rooms that are laid out for business travelers and they have most of the amenities that Holiday Inn Expresses have.
Note: This is an editorial review, not an ad for Holiday Inn Express. We have no connection with Holiday Inn Express except as regular business customers who pay our way.
TOP PHOTO BY FORREST ANDERSON, HOLIDAY INN EXPRESS IN QUEENSTOWN, MARYLAND
SECOND PHOTO: HOLIDAY INN EXPRESS PASO ROBLES FLICKR, available through fotor.com under through a creative commons share alike license.
Documents for a Photo Shoot

Nothing can kill a photo assignment faster than not having the documents you need to get access to what you want to shoot. For this reason, preparing documents is the first thing we do to get ready for an assignment.
We start by making assignment files. We have a file on our computer desktops called Active Projects. As soon as we get the go ahead for an assignment from a client, we create a subfile for the project inside this Active Projects file. We also use Omnifocus, which syncs on our computer and iPhone, to keep track of all of our projects and photo work, so we also make a file for the assignment in it. We also create a file in our e-mail program for the project. For projects that have paper files, we create a hard copy file as well. If a shoot is a complex, involved one with a lot of research material, we create a project bin. We give the project a one-two word name and label all of the files with that name and a color that is consistent across all of them. This makes it easy for the file to stand out among our other project files. From this point on until the assignment is completed and archived, we place every record associated with it into one of these files. When we start shooting and organizing photos or video or creating graphics associated with the assignment, we metatag those assets with the same name as the administrative files. We don’t necessarily keep all of the photos or video we shoot on the assignment in the administrative files, but we do make sure the labeling is consistent between them so that we can do a quick search and find all of the assets or information on the assignment that we need.
We include notes on phone or other conversations in these files, including the label name and date at the top. This information is important when we invoice a client, complete tax forms, settle problems regarding the project and write captions and descriptions for the assignment.
In Omnifocus, we insert:
- Our daily trip schedule
- Links to important emails about the assignment, email travel itineraries or other relevant email documents and urls.
We create a contact list for the assignment in our phone and a text copy in our hard copy file in case we run into phone problems. The contacts include primary contacts for the assignment and alternative ones in case the primary ones aren’t available when we need to reach them. We also make sure we have addresses of family, friends, medical resources and other essential contacts in our phone and computer. We include airline and hotel contacts, U.S. embassy or consulate addresses and phone numbers in areas where we are traveling if we are going abroad and any needed banking or other financial contact information.
We create a map in our phone with shoot locations, hotels, restaurants, ATMs and other important locations. If we are going to an area where phone service may be disrupted, we include a hard copy map in our hard copy file.
We keep a camera and computer equipment list with serial numbers in Omnifocus and in our wallet.
We download apps to our phone that have basic and emergency words in the local languages in the areas we will be traveling to.
We include copies of travel documents, credit cards, insurance papers, medical prescriptions and guidebook information in our file.
We include the following travel documents in a wallet or carrying case:
- Passports that will be valid for the next 90 days with any required visas
- Extra passport photos
- Airline tickets and boarding passes if we don’t have them on the phone
- Information about car rental reservations
- Equipment U.S. customs registration if necessary
- Health certificates with current immunizations
- Driver’s license. We check to make sure that our auto insurance will cover us if we rent a car. If not, we'll have to buy the rental company’s insurance.
- Any press passes, accreditation or cards that are required
- A list of rates for excess baggage and weight on the airlines we are traveling on
- Cash
- A guidebook for the locations we are traveling to
- Any notes or letters of introduction to people we are photographing
- A small portfolio
- An envelope to keep receipts
- Model and location release forms that are legal in the areas to which we are traveling
- Any written permissions that give us access to areas where we need to shoot
- Bank and credit cards
- Information on copyright and privacy laws for the specific locations and countries where we are shooting
- Liability insurance
It is also important to check to make sure that you will be able to use your smartphone in the area where you are traveling. You may have pay extra for service in some locations.
Patterns for Creative Professionals

Here are 25 tips for building a wonderful creative professional life:
1. Choose specific patterns for your creative life. For us, these recurring themes are:
Training, technology, techniques and methods.
Keep your materials orderly.
Keep our procedures simple.
Keep your legal and financial matters organized.
2. Pick a niche wisely and serve it. Because we wanted to keep our business relatively small and family centered, we mostly work for small and medium-sized businesses. Picking a niche and setting up shop in it is the key to not getting overwhelmed. Live comfortably and wisely in your niche, enjoying it and progressing in the things that you love. Your talents, resources and finances are all things that build your niche, so build them daily. Work within your personality and talents and find work that does so. There’s lots of room for you in this world, and it isn’t as a recluse – far from it.
3. Combine the patterns that work in your niche into a system that works for a variety of circumstances with some adjustments. Organize your databases, filing system and storage systems so they are up to date and easy to keep current. Use templates and style sheets to simplify projects. Create and follow standardized workflows for every type of creative work you do. We have a website workflow, photo and video workflows, an app workflow, a book workflow and a small graphics projects workflow. They keep us moving in the right direction when we are down in the weeds with a complex project. For projects that cross the lines between various types of media, such as an app with an accompanying website and printed materials, develop a method for seamlessly integrating projects for efficiency so you can multi-purpose their basic content.
4. Displace consumerism with producing and planning. Pare down your consumption while you are trying to produce more until you are meeting your needs.
5. Plan every day. You either plan or fail – there are no other options. Terrible messes ensue when people fail to plan. Planning enables you to predict and shape your future to a much greater extent than you could otherwise do.
6. Be careful about the expectations you borrow. The right expectations are those that enable you to be healthy, happy and progressing, with a cheery, simple life. Dress functionally, comfortably, simply, attractively, appropriately and moderately within your budget and follow the same goals with the housing and car you have. Try to get these items as close as possible to being exactly designed for the lifestyle you want to lead. Then spend the rest of your efforts on your important relationships and talents so you can serve mankind to the fullest.
7. Arrange your finances well to eliminate debt, have emergency resources, and pay for your expenses and education throughout your life. Concentrate on what is needed and reject what you don’t need.
8. Don’t do one thing and say you are something else. Reality is very honest. You are a professional author if you write and publish your writings. You are a professional photographer if you take pictures and publish them. So do what you say you are now. You will find a deep personal sense of satisfaction coming into your life as you move forward in this way. Be a model of who you really are and can be every day. Don’t fragment yourself by trying to do what you aren’t.
9. Life becomes complex when people have terrible role models. Don’t try to hang onto these role models or you will miss the chance to make yourself into a model of what you should be. Take a new direction that exemplifies order, simplicity, wisdom and professional organization. Positive means positive – a happy, productive, healthy life - and you can’t give that to anyone when you aren’t giving it to yourself. Work hard, exercise, take care of your health, educate yourself, develop your talents, build your spirituality. Refuse to live in a crazy, insane world. Live sane and happy and productive by doing all happy, productive, healthy things. Avoid those who would waste your life and theirs with craziness. Take responsibility to shape your world and chart your future all of the time.
10. Give yourself both lots of space and lots of structure of the right kind by bringing order to your life.
11. Realize your limitations and work within them. Don’t have unrealistic fairy tale expectations of yourself and others.
12. Make progress.
13. Take joy in personal independence and accomplishment and reward yourself for it.
14. Take responsibility for the way you treat others.
15. Never think you have to put up with any kind of abuse. Abuse has no use. Many systems have the idea that abuse of their employees is a necessity. In fact, many people would get along just fine without criticism and abuse, much better than they do with it. People can have non-abusive work that they love and nothing bad will happen. They can give up an obligation to be critical and judgmental and nothing bad will happen.
16. The only way to deal with disasters is to rebuild, not to keep dealing with them. Your major tasks are to build good steady skills and employment, and this is plenty to be going on with. This will ground your life in reality, and that is what it needs – the limitations of caring for yourself and your family provide the exact structure that you need.
17. Don’t live vicariously. Live wisely for yourself and let the chips fall where they may with others.
18. The real history of the world is one of sharing or contributions on the part of everyone who has lived on it. The aristocracy owned the lovely porcelains, paintings, furniture, buildings that others made, but the people who made them became them. They are the ones who developed the skill, talent and abilities. This is the meek inheriting the earth. The point of life is becoming, not doing, so in the end, the meek of the earth inherit it because they have experienced the personal growth of creating beautiful things, planting and tilling, cooking, carpentry – the experience of creating.
19. Certain behaviors and actions and attitudes are toxic to living organisms. Because they are widespread does not make them okay, any more than an oil spill is less toxic to living organisms because it is widespread. Likewise, the fact that many organisms may survive an oil spill and even help to clean it up in the short term doesn’t lessen the long-term toxic effect on them. They become coated with the oil, which destroys their insulation against the elements. In an effort to cleanse themselves, they ingest it, becoming poisoned and break down inside. Avoid toxic influences because some cleanups are impossible in their entirety. Avoid them so that you can stay free and clean.
20. Learn to be really, really good, organized and fast at what you do. This means work, work, work, practice, practice, practice, and train, train, train until you can do virtually anything in your niche.
21. Go for results. If you feel like things are a waste of time, they are. Give them a miss. Be honest about projects you don’t support and don’t do.
22. Don’t define yourself by your income, high or low. People can waste their entire lives and have either high or low incomes. Just because someone pays someone a high income doesn’t mean they are wealthy. Look at what they spend their time and money on. Spend your life making a good solid substantial difference.
23. Anger is manageable, but it is a skill and knowledge that must be learned. Anger is a meaningless, generic term. Feelings are not just general, ever. They are very specific. We know what we are struggling with or can identify it with a little trouble, and if we learn to do that and bring it out directly and honestly and work on it, we have no need for anger. Otherwise, unsolved problems build up until they are overwhelming. Whatever is against doing your mission needs to be gone around, avoided or removed. Anger management is an important part of this because all work, right or wrong, is going to meet obstacles and if you zone out into something else, get discouraged, allow yourself to be bashed, blow up, break things, etc., you will never achieve anything worthwhile.
Where did people get the idea that just because something is the right course, it doesn’t take constant work, planning, tweaking, overcoming obstacles? Waiting for a magic solution holds you back. It absolves you of the responsibility to make the right thing work, but it doesn’t get you anywhere or out of any problems. If you want to get out of negativity, you have to take responsibility to do so with constant hard work. Anger and fear are the biggest impediments to progress, so you need to learn to manage them. Start out petrified and angry, and then work through the problems gradually and the fear lifts.
Long-term perspectives and plans are extremely useful in solving anger and anxiety issues. They provide a perspective outside of the issue of the moment that enables you to judge that issue in the context of your life as a whole. They chart a direction that if followed day by day, takes you inexorably closer to what you want and away from that which you don’t want. You for example are highly unlikely to pick up someone in a bar if you have charted a course that takes you far away from bars and picking up people. Chart a course that takes you as far away as possible from that which you don’t want and as close as possible to that which you do want.
24. Co-dependencies are a way to rob people of responsibility and freedom of choice. They are built on reinforcing and recognizing weaknesses, not strengths, to make people more dependent on each other. Get out of situations that reinforce weaknesses and block talent development. A debt chain is a codependency pattern. Generational divorce is another, as is any addiction, which passes in a chain from one person to another. So discard co-dependencies and build up strengths in yourself and in others.
25. Don’t fear to live sensibly and do good, for it is in the good you do that you will build a sure foundation for the future.
Cameron Clinic
Rouviere Media did the design and development for this website for the Cameron Clinic of Oriental Medicine in Wilmington, North Carolina. The website is a responsive Bootstrap design with versions for computer, tablet and smart phones. It is an Expression Engine content management system that enables non-technical staff to update its content. It has a health assessment form that potential patients that can use to submit information for an initial evaluation.
Website Proposals

People come to web designers and developers because they want us to solve their website problems and articulate the direction that their website project needs to go in.
They need a website, but they often also need us to help them determine the path that they need to travel on to meet their media needs and more general company goals. They are usually clear about what their website problems are, but they look to us and our expertise to help them come up with the solution, vision and direction they need to go in on the Internet.
A website has many parts that need integrated – technology, design, the website’s interaction with other media and the world in general, its interaction with products that may be showcased or sold on the site or by the client’s company, legal and financial constraints and more. All of these need to come together to create an engaging and effective interactive vision that is communicated as naturally as possible with the website’s users.
A website proposal is our chance to show a client that we can provide that clear, organized, integrated solution to the problem they have brought to us – that we can add value and vision to what they are trying to achieve.
Website proposals are an important administrative tool for doing this. Some clients require them. For others, it’s a good idea to provide one, especially if they are not professionals in the web world and you don’t work with them on an on-going basis. A website proposal demonstrates that you understand the client’s needs and explains how you intend to go about meeting them.
It also gives you a chance to show you are competent and reasonably priced.
One of the risks of providing website proposals is that many companies ask several competing website companies to provide proposals as a free way to do their thinking for them about what their website needs are. This is unavoidable – in order to get clients, you often first need to be willing to give prospective clients some guidance and direction. To protect yourself from spending too much time on a proposal that a client then uses as a free research document, here are some guidelines to follow:
- Never design during the proposal stage.
- Try to structure the proposal so that the client’s acceptance of it will become their agreement to have you do the site.
- Have a template on which you can efficiently put together a proposal so that if you aren’t chosen to do a website, you won’t have lost a great deal of time.
- Do enough research to put together an intelligent proposal, but save indepth research for later. Don’t be afraid to tell clients in your proposal about unknowns that will have to be clarified.
A website proposal should include:
Your name, the client’s name and the names of your companies, as well as your address, phone number, url and email
A Statement of Work
- State the goal of the website
- List the pages that the site will include, such as home, about, etc.
- List the site’s capabilities - examples are responsive design, a content management system, search capability, social media links, emails sent from the web url, e-commerce, secure download capability, slideshows or other animated content, various forms, video, a registration/log-in system, a calendar and a large or animated background.
Define the design
Describe it in two or three adjectives and in terms of what it must accomplished. Include colors if those have been decided on, whether the logo is already designed, the style to be used for the website, what the design must accomplish and what other media it must be compatible with.
Define the website’s content and who will provide it – text, photography, graphics, video and audio
Include a note that if the client provides the content and it is not in a format that you deem is suitable for the web for space, quality or other design reasons, you will discuss the problems with the client and present possible options to adapt the content. If the client opts to have you provide more content than was included in the original proposal, you will work together to reach a solution and you will charge for any content you produce at your hourly rate.
Make recommendations for building the site
This section should include an overview of the site and various options for building it, phases for buildout and how much they will cost and any unknowns. Include any of your outstanding questions and concerns.
Note that times for buildout can vary depending on how quickly the client provides feedback and content.
Design and development schedule
This includes the major tasks to be completed during the project. Be careful about including time frames. We generally don’t, because we find that the completion of a project can be delayed when clients don’t provide content or feedback in a timely manner.
We generally include the following tasks in this section of the proposal:
- Preliminary Project Plan
- Research on the industry, technology constraints, competitors, the current site if there is one, and relevant best practices that we can incorporate. We ask for any market research or other information on the company, the industry and the company’s customers that would be useful.
- Defining the requirements for the site. We tell the client that this step usually requires a meeting to present a summary of the research findings and get feedback.
- Designing and building the site - This usually requires an initial design workshop with the client to shape the project, wireframe mockups to show the basic structure, navigation and functionality of the site, a site map, home page designs for the client to look at and provide feedback on, the home page after it is on the web, then detailed designs of all website sections.
- Polishing the site, testing in browsers and on various viewing devices.
- Pre-release for the client to review.
- Training the client's employees to use the site.
- The site goes live.
- Discussion on future phases and maintenance requirements
Cost estimate
This includes a list of the services and features we will provide and conditions and constraints. Include the design and development fees, software licenses, domain and hosting fees if we are handling them, e-commerce licensing fees and any specialist fees if we are hiring another guru to do special tasks on the site. Also include costs for content if you are providing it.
Let your client know that this is an estimate and you will charge less if the site costs less. We often give clients a range and we try to keep website costs within the estimate. If we didn’t use all of the budget in the estimate, we give the client a discount when the site is finished.
Legal Considerations
The client must have copyrights or have acquired the legal right to use the content that will be posted on the site.
If the client is collecting information on the site, they must provide us with a Terms of Privacy statement to post.
This section includes a statement that we will not post any information on a website that violates laws or poses a danger to the privacy and safety of the public.
We also state that any changes to the scope of this proposal will require the client and Rouviere Media to discuss how to carry out those changes and the impact they will make on the budget.
We handle payments on a three-part basis – 1/3 on acceptance of the proposal, 1/3 after the design is approved and the home place is in place and approved, 1/3 when the site is built out and goes live.
We also include a statement that we are happy to provide technical advice not directly related to the website’s buildout and maintenance, but we charge an additional hourly $40 consulting fee to address those questions.
We ask the client to review the proposal and let us know in an email that they are in agreement with it or let us know their concerns so that we can address them.
We end by saying we are enthusiastic about working on the project and look forward to meeting with them.
The proposal should be visually appealing with your branding on it, easy to read with headers dividing the sections, free of typos and grammar errors and courteous.
Before sending it out, we double check to make sure it addresses all of the client's requirements and answers all of his or her questions.
We send the proposal as an attachment with an e-mail introducing it and highlighting our team’s relevant skills. We thank the client courteously for considering us.
After we send the proposal, we usually call the client to tell him or her that the proposal is on its way. We offer to go over it so that any questions can be cleared up. If we don't get a call in a day or so, we follow up with another phone call or email to verify that the proposal was received and answer any questions.
Mobile Office
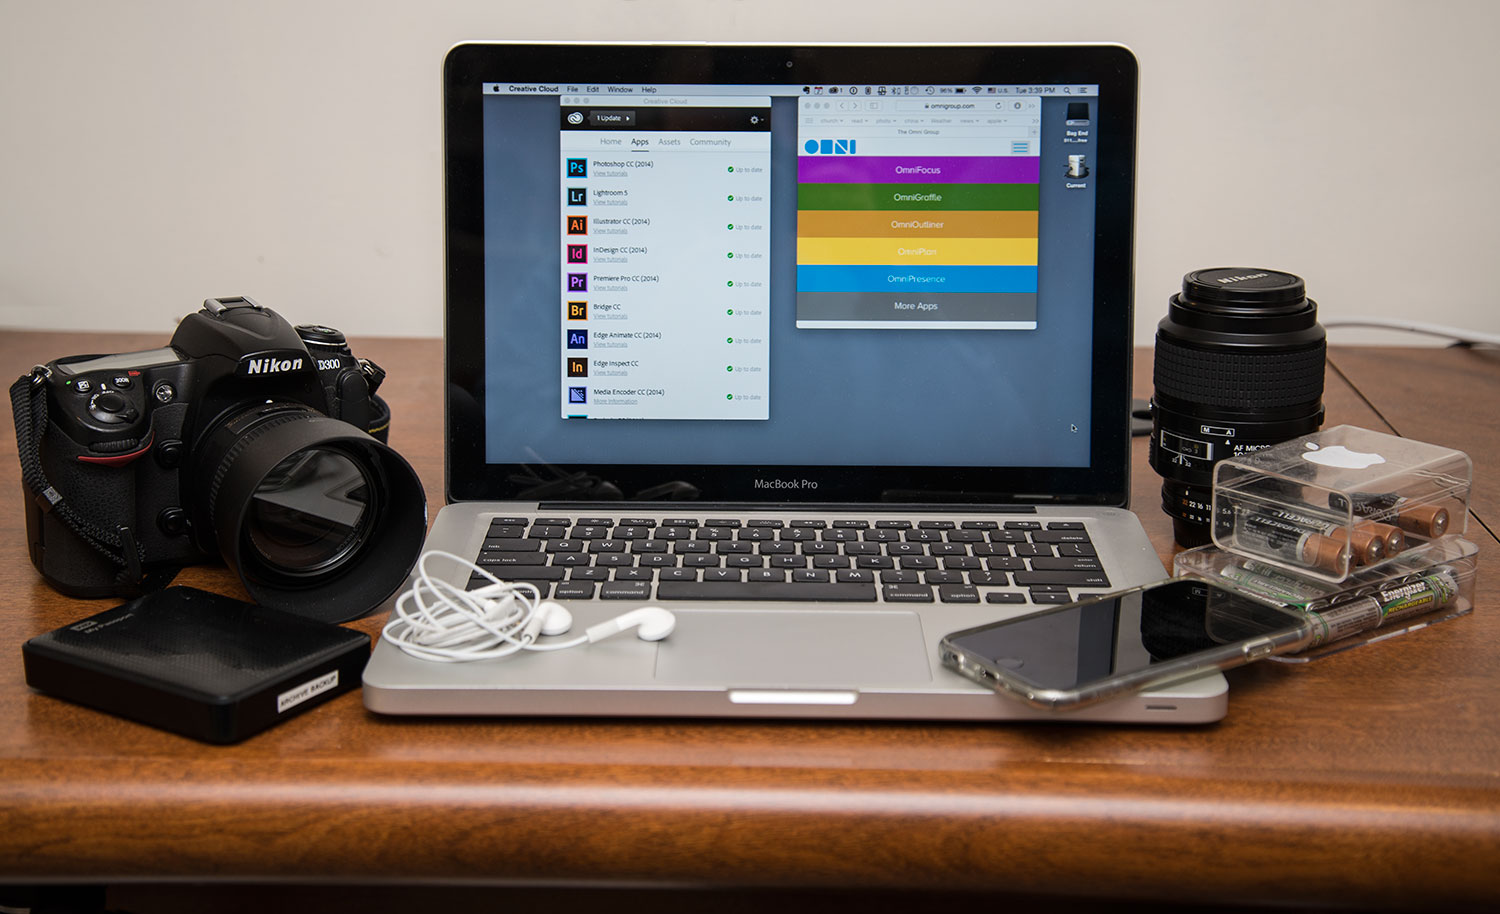
We work on the road quite a bit, so we need to take our office with us. Working efficiently wherever we are requires that we take a few key items with us on the road. Here are the physical and digital items we keep in our travel kit:
- 13-inch Apple MacBook Pros for each of us, at least one iPad and at least one Apple iPhone 6. We have been running on Apple’s train since about 1995. Buying our first Apple was probably the most important thing we could have done to simplify creative work.
- An Adobe Creative Cloud subscription. This software package, which entitles the user to use any of the main Adobe products for $53 per year, is the best deal in the business for creative professionals. We can download or update new Adobe software any time from any location, access Adobe support, and Adobe’s products are compatible with each other and other software we use. We consistently use Adobe Photoshop, Illustrator, Indesign, Edge Animate, Lightroom, Adobe Web Fonts and Premiere Pro in our work, and could never run a multimedia company without them. They are the main workhorses of our stable. We also use Cinema 4D animation software, which is not an Adobe product but is compatible with Adobe After Effects.
- Omnigroup software – specifically Omnifocus, OmniOutliner, Omniplan and OmniGraffle. We organize our work in Omnifocus, which acts as a dashboard where all of our projects are kept. Omnifocus links with our project plans, e-mail and urls so that we can bring all of those into our task lists. It syncs on phones and tablets. We run our entire lives in it. We keep our workflow templates for websites, photo shoots, video shoots and print projects in OmniOutliner. We do project planning in Omniplan, generating task lists there that we can import into Omnifocus and we do web site mapping in Omni Graffle.
- Lynda.com subscription – We always have a subscription to this premier training library and train daily using Lynda.com tutorials. Because we can access it on the Internet from any hotel and on the phone in most areas, we can train in the car, in an airport, in a hotel room or almost anywhere else.
- Western Digital My Passport backup drives – These small drives are smaller than a stack of 3 x 5 cards and hold 2 terabytes of data each. We carry a backup of all of our digital files, about a terabyte, with us everywhere we go, and these drives are perfect for it. They are USB 3, so they are fast, and they are durable. We carry them in a small padded Think Tank bag.
- Nikon camera gear – We carry a minimum of two camera bodies and a 24 to 85 mm lens, an 80 to 200 mm lens, and a 105 macro lens with us. When needed, we add lighting gear, and for video, sound gear.
- Five Sandisk memory cards for the camera.
- A Manfrotto light carbon fiber tripod.
- Battery chargers for our laptops, cameras and cables for the iPhone and iPad, including wall and car charger cables.
Apps we keep on our iPhone:
- Pocket Expense financial software on the iPhone. We keep track of our finances in real time with it.
- MileBug app for tracking our mileage.
- Weather Underground for tracking the weather, which is particularly important for photo shoots.
- Yahoo weather app – shows the sunrise and sunset time and the phases of the moon, which can be crucial for photography.
- Road Trip for tracking auto expenses.
- Lighttracker app, which shows the angle of the sun for any given location, date and time.
To pack all of this gear, we use wheeled mobile office bags and also take backpacks. CaseLogic backpacks are the best we have found for hauling laptops and notebooks. For camera gear, we use Think Tank bags, which are the most versatile and useful we have found.
We always carry snacks, bottled water, a flashlight, small tools for fixing loose screws on camera and other gear and a Photographic Solutions camera sensor cleaning kit.
Other items:
- Headphones.
- Lots of batteries, including rechargeable ones for the camera.
- A flash drive.
- An extra car key.
- A pocket knife.
- Duct tape and black photo tape.
- A notebook, a sketch notebook, pencils and pens, an iPad and a Wacom pen for it.
- Small folding umbrellas.
All of this gear fits easily into carry-on luggage, with the exception of the tripod and pocket knife, which go in check-in luggage for plane trips.
For road trips, we load all of this plus clothes into our Toyota Echo, which gets 46 miles to the gallon on the road. Alas, Toyota stopped making this fantastic little car, but we’re lucky enough to have one that runs like a top on very little fuel. Plus, our gear fits perfectly in the trunk.
Moving Ahead on a Photo Assignment

Once a client has answered all of your relevant questions about an assignment shoot, it’s time for you to evaluate whether you want to do it and if so, how best you can do it. While it’s tempting to accept every assignment that comes your way, grab your gear and run out and shoot it, there are compelling reasons to have a heart to heart with yourself before you notify the client that you will do an assignment and discuss how best to do it. It is well worth answering these questions as you consider any photo assignment:
- What are the benefits plus the costs associated with doing the project? When you ask yourself this question, it becomes easy to eliminate bottom feeder clients who don’t pay well enough to make it worth your time, have assignments that make you want to drag your feet as you head for them, don’t pay on time or represent other significant drawbacks. From there, you can concentrate on doing a shoot that will meet and exceed your good clients' expectations and needs.
- Does the project as defined really meet the client's needs? Most clients aren’t photographers and they often have misguided or unrealistic expectations about photography. It’s a good idea to do a reality check and perhaps go back to the client if you think the project carries major risks of not meeting their needs or if you have some better ideas to make it do so. In working in Beijing for Time Magazine and other publications for a decade, we were very proactive in doing this, making suggestions that could improve the final product. Most editors we worked with were very open minded and about half of the time, such discussions opened the way for a much better shoot than had originally been envisioned.
- Are other projects under way that have or address similar needs, create photos that the current project will need, or use the same resources as this assignment? Often, consulting with the client about this question or considering how you could later reuse the photos or stay another day in the same location at your own expense and shoot for another client or for your own projects can double or triple the value of an assignment shoot. While you should never double shoot an assignment for more than one client at a time or shoot for two competing clients during the same trip, you can often stay extra days and shoot for other noncompeting projects, We made a point of looking at our photos as communicating broad social themes, so that if a client asked if we could tackle the issue of employment, for example, and suggested we go to a job fair to take pictures, we could also suggest other photos that more deeply illustrated the problem of unemployment in China. The photo above and the one below are examples of ways in which we tackled illustrating the perennial problem of employing billions of people.
This photo of a carpenter with his tools, his cat balanced on them, humanizes the whole issue of work.
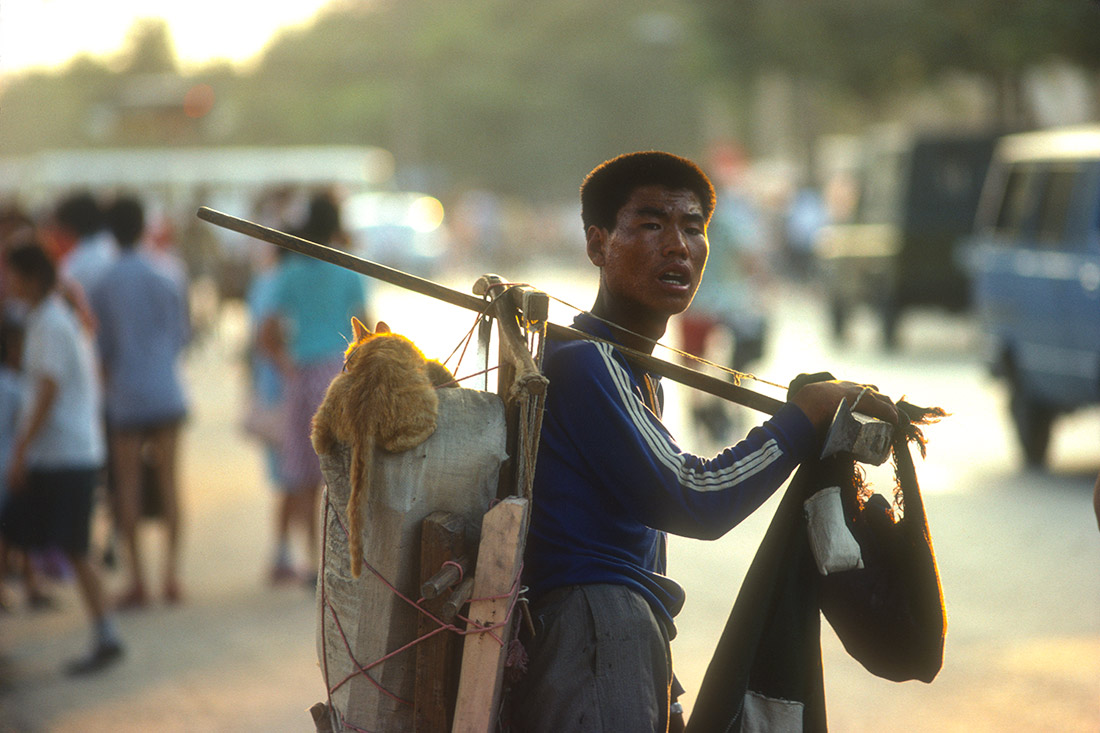
This photograph of a steel worker at a factory that was polluting the air brings to light other factors that affect the employment picture, such as trying to employ people while at the same time avoiding factory pollution.

This photograph of a farmer who found his income to be much lower than fellow villagers who had left the land for construction and factory jobs in urban areas illustrates the dislocation that the search for employment can cause.
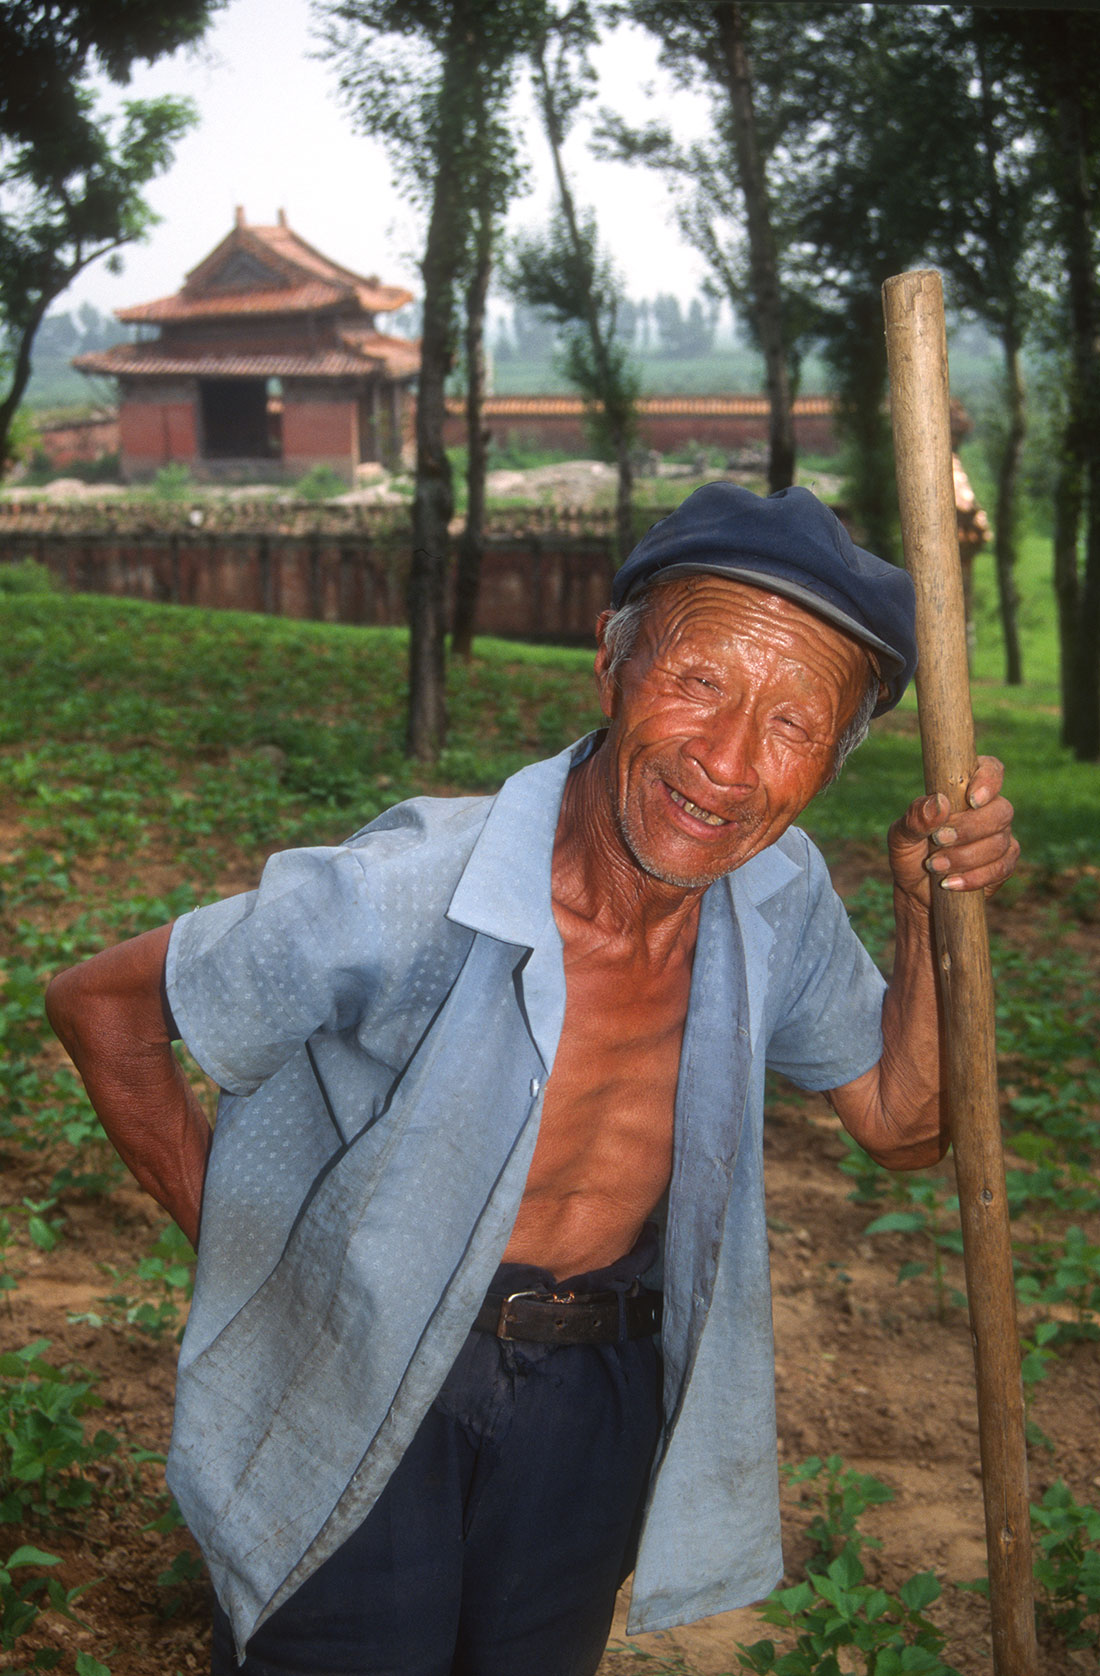
This photograph of an unemployed man with a paper stating his skills encapsulates the despair and idleness that unemployment creates in individuals' lives. Taking the time to think more deeply about the meaning behind photo assignments creates much more meaningful pictures to illustrate abstract ideas.

- How does this shoot relate to our and our client’s top priorities - long range and short range? Revise it to make it relate more closely if necessary. If an assignment is not helping you accomplish your and your clients’ top priorities, often it can be revised to meet the client’s needs better while aligning with other goals you have. If you are asked to shoot some pictures at a well-known venue, you may also be able to take pictures that fit within your long-term priorities of doing professional architectural photography. On the other hand, if the assignment is way outside of the direction you want your career to go, you may be better served by turning it down. We decided early on that we did not want to do wedding photography. There’s nothing wrong with the wedding photography genre, of course, but we decided that dealing with the down side of the wedding industry – brides and grooms who run short of cash to pay promptly, mothers-in-law with double chins who want us to make them magically disappear, divorced families whose tensions run high during a wedding shoot and tend to take their differences out on the photographer, soused guests and working every weekend wasn’t the direction we wanted to take our career. For us, it was a great decision because it freed us up to do the kind of work we do enjoy and thus could become really skilled at.
- Sometimes, there’s nothing wrong with a shoot but you have a better opportunity somewhere else. Generally, when we have gone with our gut and taken the better opportunity, the other one has fizzled out and we were glad we did. When we’ve gone against our gut feelings, we’ve regretted that we didn’t go with the better opportunity.
- Consider past strategies that have worked. Insert past or similar ideas to predict the structure and movement of the shoot. This is particularly important when shooting fast moving events such as sports or political events, but developing clear repeatable patterns for successfully photographing everything from factories to landmark buildings takes a great deal of the stress, bumbling and failure factor out of a shoot. More on this topic on this blog later.
- Ponder for a few minutes about the basic truths involved in this shoot. What will it say when it is published? Is that message honest and consistent with your value system? For example, we don’t smoke, so accepting an advertising photography assignment from a tobacco company wouldn’t be in line with our value system no matter how we sliced it. On the other hand, an editorial assignment about the health problems related to smoking would be in line with our values. If you have doubts about an assignment for any reason, can you craft it so it will work for you? If not, now is the time to back out. If so, move ahead and make a preliminary decision to do the shoot.
Now quickly define the basic steps needed to make the shoot happen and make sure you can do them.
Define any restrictions others will place on the results.
Identify unknowns and decide what assumptions you will need to make regarding the assignment.
Once you have gone through this process, you are ready to contact the client and either tell them you will pass on the shoot or have an intelligent and proactive discussion about any concerns or questions you have before shooting it.
Southern Living Plants Redo
Our technical director, Forrest Anderson, did the development for this redesign of the Southern Living Plant Collection website. The site was designed by Optera Creative. This website is an Expression Engine content management system with a responsive Bootstrap framework that automatically adjusts in size and function depending on whether it is viewed on a computer, tablet or phone. The site has a retail locator for various plants and a locator for plant growing zones.
No More Purple Elephants

Security, safety and happiness grow from a life that is balanced spiritually, healthwise, workwise and financially. As people build this type of security daily, a step at a time, they gradually become strong, capable, secure and more creative.
While we as creative professionals seek to tell coherent stories to our audiences, we need to create this type of secure and coherent story in our own lives. We need to beware of chaotic work and personal situations with many unanswered questions and incoherent situations that are not user friendly, that have many incompatible parts or that overlap with unrelated areas in ways that don’t make sense. These types of situations make it unclear what our role is in a creative process and make it impossible for us to achieve coherence in the stories we are trying to tell.
We need to beware of personal and work situations that have no coherent story, no journey, no progress – that are a time-wasting, chaotic hodgepodge of ill-conceived experiments launched on a manager’s or family member's whim with no clear direction or theme. This is the basic definition of hell – no progress from one level to a higher one.
The photo below by Forrest Anderson is of a storyteller in a teahouse in Chongqing, China. Traditionally, such storytellers tell stories from the past that focus on and illuminate great life themes such as loyalty, love and courage. Our role as creative professionals is to, like these storytellers, use great stories to explain and illuminate the great themes of our time. If our own lives are filled with chaos and our own life's themes are unclear, we are handicapped in using stories to illuminate universal themes even though we have sophisticated technology at our disposal to aid us.
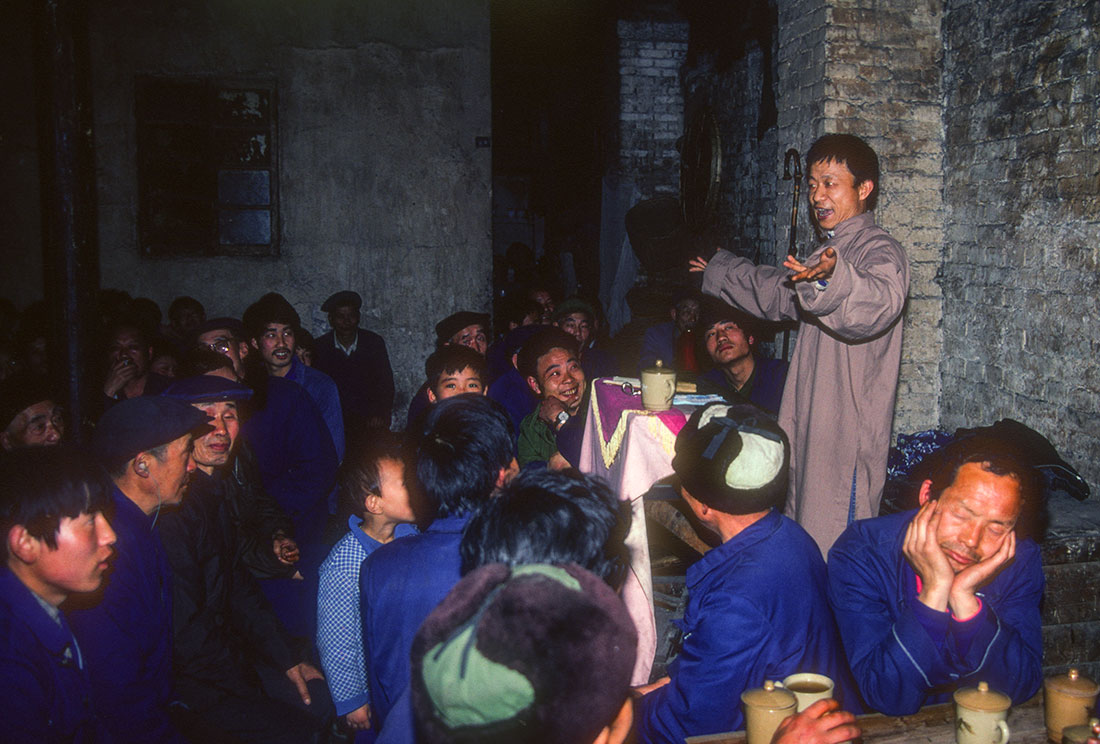
Behind chaotic work or home hells are too often the presence of destructive purple elephants that can’t be talked about openly but that take up time, space and commitment in our lives or limit our creative opportunities. Few of us would adopt a real elephant and keep it in our house or office because it would take over and trample our work and lifestyle. Likewise, these unspoken purple elephants can do a great deal of damage to our creative efforts. The main reason that people can’t get purple elephants out of their minds is that they take over mental and emotional space. We need to face and eliminate these unspoken emotional companions because they create chaos that tramples on our life’s story and blocks its progress.
Among the most damaging of these purple elephants to a creative person is abuse and oppositionality. Many people who would never acknowledge the presence of these purple elephants are in fact oppositional. They can trample on a creative person’s every effort if their influence is not checked.
Oppositionality is primarily an abuse of power issue. A child who is treated in such a way that he is inspired to be oppositional in words and behavior can retain that type of behavior as an adult. He becomes an oppositional abuser, even when he knows he is acting against his own best interests and those of others. He learns to be oppositional to what he knows to be true and right for him and other people. Oppositionality is a way of life in many work and home situations, to the detriment of creativity. It becomes the purple elephant in the conference room that tramples or tries to crowd out all attempts to move a creative project forward.
Elephants have voracious appetites and this particular one is fed by an unbalanced life. A closer look at most oppositional people often reveals an unbalanced and thus unhappy life at the core. If they are in management positions, these people can throw the lives of all those who work for them off balance. Nothing creates work or home hell faster.
In contrast to this hell, heaven seeks cooperation, balance and mutual good to create win-win situations for as many people as possible.
As creatives, we should never trust unduly in any system that is oppressive, unkind, destructive or irrationally judgmental but should seek instead to find, create and nurture encouraging, inclusive and uplifting creative environments that encourage each person to be their personal best by developing what they are and can become.
Keen Shoes Fit for Creative Work

While living in China, I occasionally did some reporting for Time magazine’s then-Beijing bureau chief, Sandra Burton. Sandra had a number of cardinal rules about dressing for work as a creative professional.
When working on a dangerous story involving combat or civil unrest, she always wore non-military looking clothing and often a dress, so that if she encountered a soldier, police or other anyone else who was armed, they would see that she was a harmless noncombatant who was not a threat.
In such circumstances and whenever boarding a plane or train, she wore shoes in which she could run or walk quickly. Sandra had covered the Philippines during the fall of Philippines President Ferdinand Marcos. She was on a plane flying into Manila with Filipino opposition leader Benigno Aquino in 1983 when he disembarked ahead of her and was shot and killed. Since I happened to be working with Sandra during a period of political unrest in China, I took her advice to heart and thereafter always wore shoes that I could run in when working on a story that could have dangerous implications.
Sandra’s sound fashion advice made eminent sense to me as a creative professional and I thereafter launched an on-going search for shoes that were comfortable enough to run or hike in if I had to, attractive, would not be destroyed in wet weather, and would last through the vicissitudes of covering accidents, political events and enduring, often on my feet, through 13-14 hour workdays.
Finding such shoes was difficult until about 15 years ago in a Santa Cruz, California, shoe store, I discovered my first pair of Keen’s shoes. I now own eight pairs of Keen’s and probably have owned a total of 12-15 pairs. I wear them almost exclusively. If I could fit them into my budget, I would buy many more. Why? Because they are the ideal shoes for my work as a creative professional.
Keen’s shoes are beautifully crafted and come in a variety of styles and colors, as well as being as comfortable as tennis shoes. I’ve hiked into remote areas in them; worn them to church, meetings with clients and professional events; stood through long hours of photo shoots and worn Keen’s boots in snowstorms. I’ve gotten them wet, muddy and spilled food on them, only to have them clean up beautifully.
At between $85 and $110+ per pair, Keen’s shoes aren’t cheap. However, I’m still wearing my first pair of Keen’s shoes, which look fine and are still comfortable. I find that in my size, 61/2, Keen’s shoes are also often on sale. My favorite pair cost only $27.
Another perk is that Keen’s sizing seems to be consistent, so I usually can just order them from Zappos or Amazon without worrying about trying them on first.
The only Keen’s I have had that haven’t lasted through the 15 years have been several pairs of Keen’s hiking and running shoes, which I used heavily for several years. I found that while I like Keen’s hiking and running boots, I prefer Nikes for pure daily exercise as the soles lasted longer. However, Keen’s exercise shoes are exquisitely made and comfortable.
One of my favorite parts of buying Keen’s shoes are the hours of shoe shopping that I have saved since I found them.
Mamie’s Wafers
Our technical director, Forrest Anderson, developed this content managemenet website using designs by Optera Creative.
This custom WordPress content management site has e-commerce capabilities. It is a responsive site developed in the Bootstrap framework and automatically resizes for laptops and desktops, tablets and smartphones.
Ask before you shoot
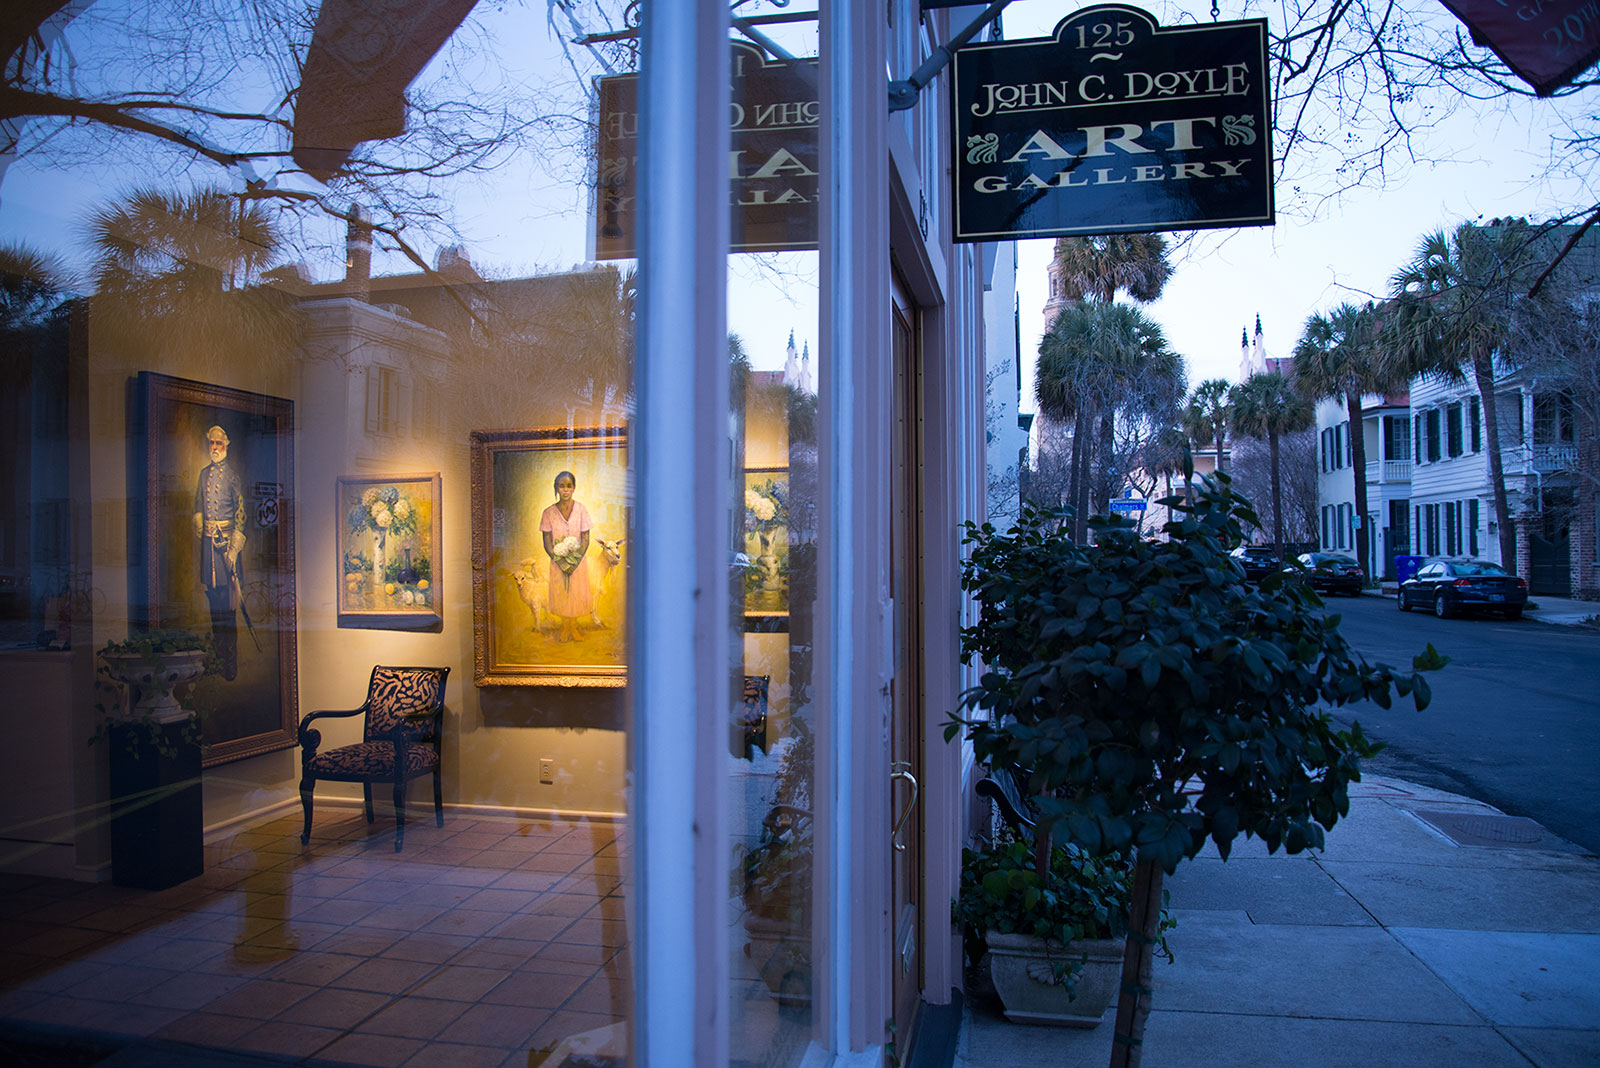
In our early days of working in news photography, we once received a photo assignment to travel to a city in eastern China to photograph a building there. We received the basic contact information, made travel arrangements and went to the city, only to discover that the building had not yet been constructed. There was nothing to photograph except an empty lot.
Another time, we received an assignment to photograph happy workers busily working at an elevator factory in China, scheduled the visit and arrived to find that almost all of the factory workers had the day off. The person who we scheduled the visit with hadn’t realized that we needed workers in the photos, not just pictures of the facility. Not only that, but the few workers who were hanging around, including the man who guided us through the factory, were so disgruntled about the working conditions that there was very little happy we could photograph to fill the assignment. We managed to get a few pictures, but they definitely weren't of the quality that would land them in our portfolio.
We quickly learned to ask more questions, do more research, plan photos more carefully and make it clear in advance to those who we would be dealing with directly exactly what and who we needed to get good pictures. This is crucial, because often the person we deal with at the scene of a photo assignment is not the same as the person or department that scheduled the assignment and will eventually use our photos. Often, the two sides have not communicated clearly with each other.
The above photo and the two below are from a recent shoot in Charleston, South Carolina. In this case, we did the opposite of the two above fiascos, taking time to research the area thoroughly and ask a lot of questions before going there. The results were much more meaningful than they would have been otherwise.
The photo above is of an art gallery in Charleston in which hang portraits of Confederate general Robert E. Lee and an African American girl. Both are symbolic of the city's tragic past as America's main slavery enterpot and the location where the first shot of the Civil War was fired.
The photo below is of Rainbow Row, a street of colorful iconic historic houses in Charleston. Because we did prior research and asked questions, we were aware of the best time to go to Rainbow Row to take advantage of good light.

We happened to come across this pirate reenactor on a street in Charleston. Because we had thoroughly researched the city's colonial past, including piracy, we were able to get a photograph that was representative of the city's history.
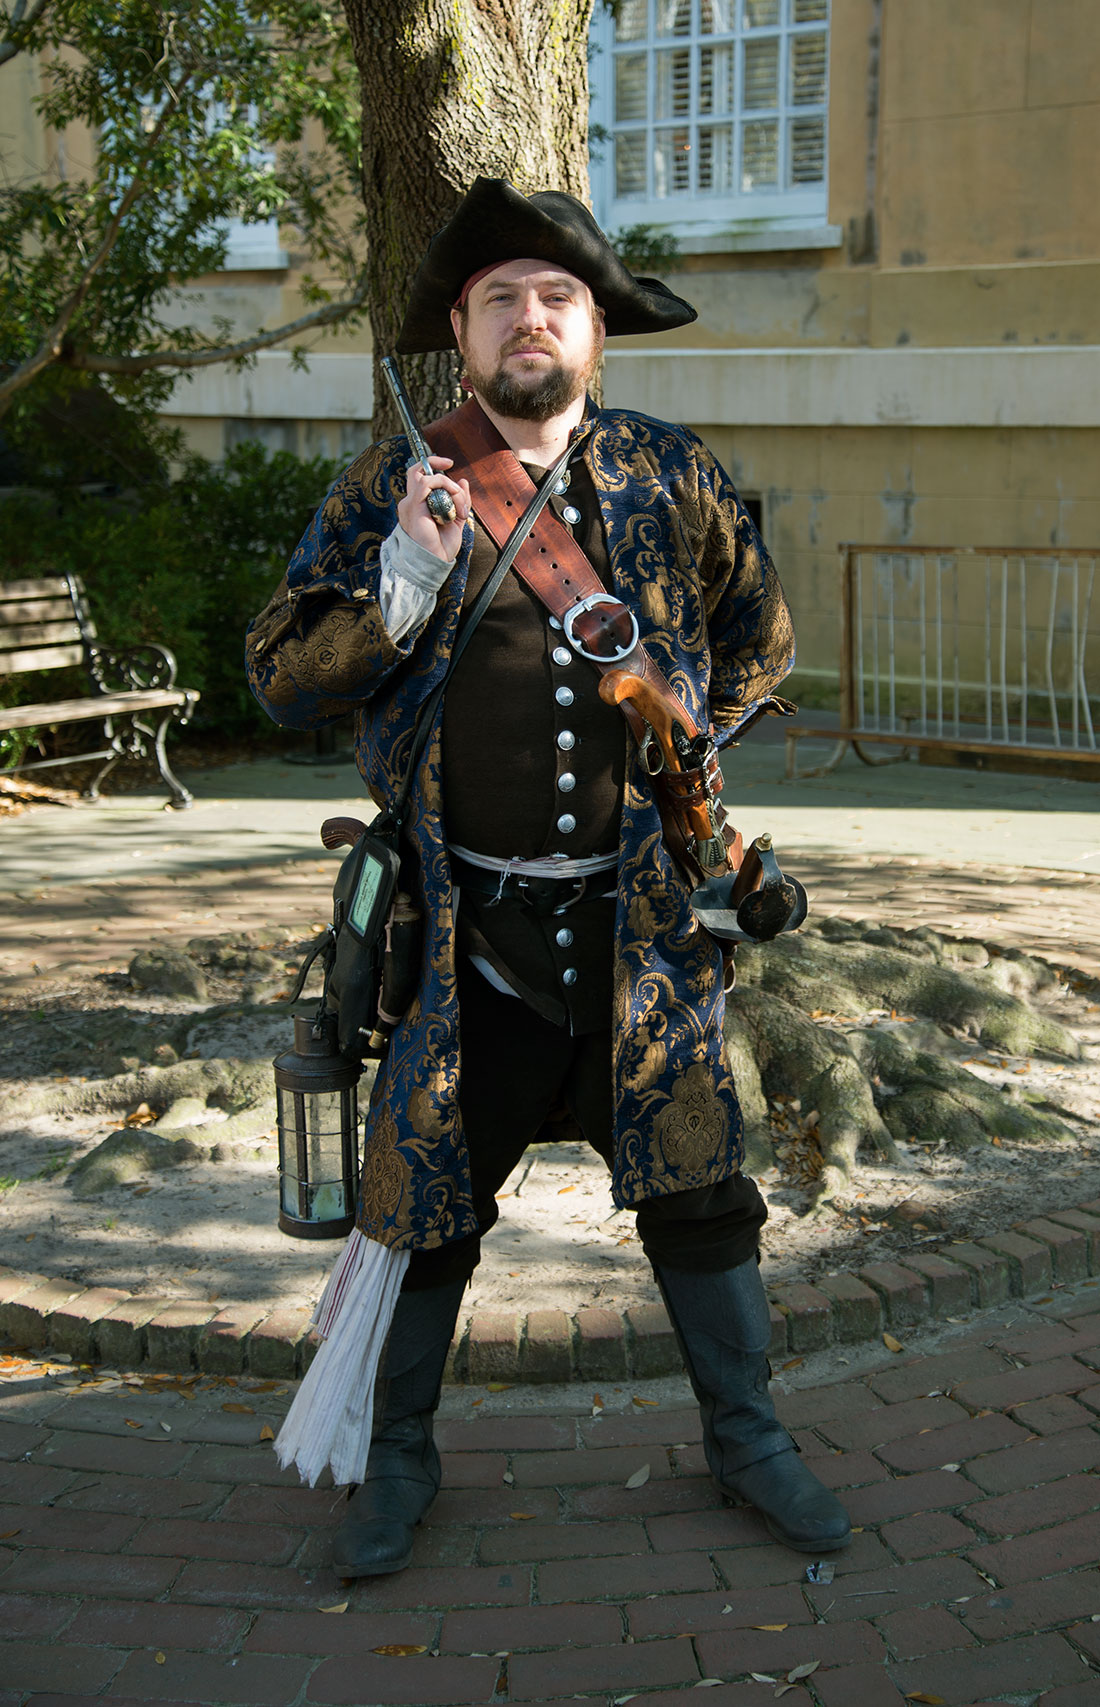
We now use the following photo assignment questionnaire, either sending it to a client in advance of an assignment, walking through the questions with the client on the phone or asking and answering the questions ourselves on a self-initiated photo shoot. Even when we are photographing for clients with whom we have worked repeatedly, we ask as many of these questions as are necessary to satisfy us that we understand the assignment clearly up front.
Please fill out as much of this form as is needed to help us understand your photo needs.
1. Name:
2. Organization:
3. Email:
4. Phone:
5. What do you need photographed?
6. Where?
7. When?
8. What is the purpose of the photos? How will they be used and what message are they intended to communicate?
9. Do you want a collection of photos with a theme or individual shots? Please describe.
10. Please list everything you need photographed.
11. Is this part of a broader package - website, brochure, ad, book or other end product? Will the photos be used in multiple formats? Reused over time? How?
12. Who will approve the photos and/or any unanticipated changes in the shoot? Please provide their contact information if different from the above.
13. How do you want the photos delivered and when?
14. What specific usage rights do you want to purchase?
15. Is the pay basis a guarantee of a certain number of days or a flat rate? Do you have a set rate or do we need to discuss the fee?
16. Is travel time included?
17. Will a contact at the site work with the photographer? If so, who? Please provide name, e-mail, and phone number if different from the above contact information.
18. Are models required? If so, do you have them arranged or do we need to do so? If so, please describe the type of models needed.
19. Are model releases and location permits required?
20. Is retouching required?
21. Will you provide liability insurance for the shoot?
Thank you for filling out our form. We will contact you within 24 hours to confirm our availability for the shoot and proceed.
Armed with this information, we then move on to the next stages of research, planning, arranging the shoot, shooting, editing and delivering the photos, which I will go over in future blogs.
We have found that when we take the time to do this planning, the results are far more meaningful even if what we encounter on the ground is different than some of our plans. We also have avoided mistakes like our elevator factory one by clarifying in depth the conditions we will need at the site to be successful.
Discover Process in Website Design Part 2
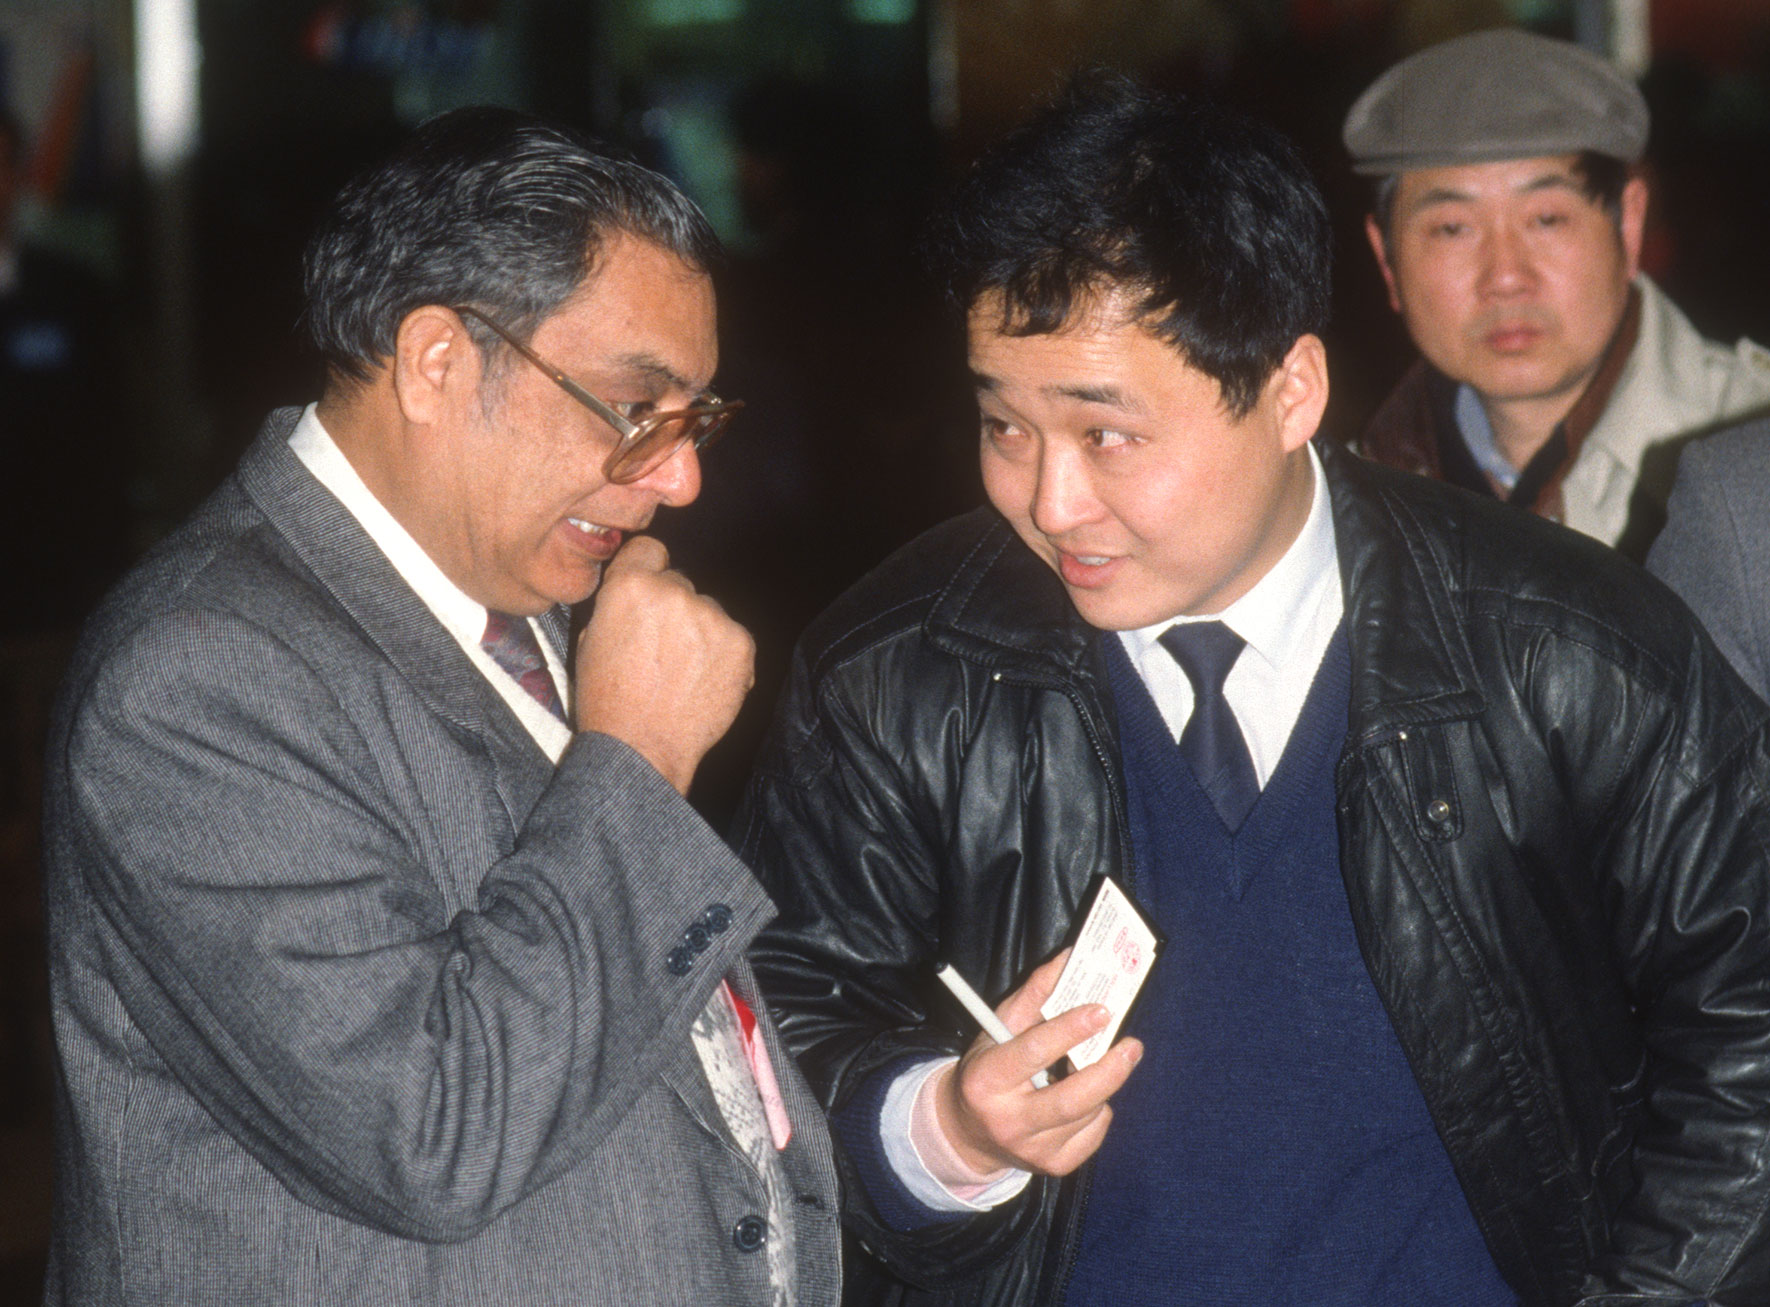
I'm not a Catholic, but I'm with the pope on the above quote. If you want to have a successful web design and development career, don't just do any web project that a client approaches you about. Once you have determined what your client wants (see the previous blog), thank the client and tell them you will get back to them as soon as possible to let them know whether you can take on the project. Then sit down with your staff, including designers and developers, and have a candid chat about whether all of you want to take on the project and why.
Here are the issues you need to discuss and decide:
Is the project worthwhile doing, considering all of our other current projects and its monetary value?
Do we want to do it? Is it exciting and inspiring to us? Will we enjoy doing it?
Will it contribute to the general creative direction we want to go in? Does it work toward at least one of our company’s goals?
Does it meet our company's financial needs?
What is its scope? Are we willing to pay the price to do it well?
What will it take to achieve it? Discuss this in specific, measurable terms.
Does the project depend on us or on others outside of our company for success?
Can we handle it? Are we and the client together qualified to do this project well?
Will the project trap us into committing to any goals that we can’t achieve or control? Are we clear and specific about what we can deliver. We can’t have absolute control over search engine ranking, the size of the market, the popularity of the client’s product or service or the overall success of the client’s project and we shouldn’t promise that we can.
Does the site have too many goals? We can have more than one, but if the site has too many, it won’t accomplish any of them well.
Discuss and consider the risks involved with the project one by one. The following are common risks that can occur in almost any web project. Assess them in the context of the project and consider what ones are significant and what measures you could take to mitigate them.
- Insufficient time
- Insufficient skills
- Insufficient resources/funding.
- No cost/benefit analysis.
- No feasibility study.
- Key information not written down or clarified.
- Moving to a new phase without completing one or more of the earlier ones.
- Erratic client.
- The project even if successful wouldn’t meet the needs.
If one of your people who will be involved heavily in the project is strongly opposed to doing it, consider that a risk as well.
Is the project in line with our core values. Is it ethical? Do we care about it?
Given all of the above, do we feel at peace about getting involved in it?
Should we do this project?
If not, file information on the project away and notify the client immediately so that they can find someone else and you won’t waste any more time on it.
If yes, notify the client and get any necessary instructions to proceed with a proposal or the next appropriate step.
Next week’s blog: We’ll take a break from website workflow for two or three weeks and look at the discovery process in a professional photography workflow.
Discovery in Web Design Part 1

Any creative process begins with discovery, and web design is no exception. Long before a web designer starts pushing pixels and sizing typography, she goes through a rigorous discovery process aimed at bringing out the best of her client's vision and ideas about their web project and matching it with the best of her and the web developer's talents. The discovery stage of web design is when the web designer and developer find out what the client wants and whether the designer and developer are a good fit to create it.
We have found that it saves an enormous amount of time and money for a client as well as producing a better product if we start this stage by sending them a questionnaire that helps them to think through their project before meeting with us. Since most of our clients are startups and medium-sized businesses, they are budget-conscious and appreciate the opportunity to think through the project in its initial stages without the clock ticking away billable hours. The questionnaire also helps them to clarify and articulate their thinking about what they are trying to achieve with the project.
Depending on the project, we look over our questionnaire before we send it and sometimes adapt it to the client to avoid wasting their time answering questions that are not relevant to their project or that they have already answered in a phone conversation or email. Here is our basic questionnaire, which we have developed as a result of our own experiences with clients, their feedback and ideas that from web design and development training courses that we have taken over the years.
After the client returns the filled out questionnaire, we schedule a meeting with them. Before the meeting, we carefully review the questionnaire, and look at their current website, those of others in the same industry and those that they mentioned on their website they like or dislike.
WEBSITE QUESTIONNAIRE
In order to design a website that meets your needs and the needs of your site’s users, we need to know more about you and your business. This questionnaire is designed to help you give us that information. Please feel free to add any other information that you think would be helpful.
1. What is the purpose of your site? What do you want it to do for your organization?
2. How does this purpose fit into the larger mission of your business, organization or project? In other words, how will the site interface with the other parts of your business or organization?
3. Do you have examples of similar sites that you like or don't like? What do you or don’t you like about them?
4. What do you like or dislike about your current site?
5. What colors would you like to use (please choose 3-5 colors)?
6. What colors do you want to avoid?
7. If you already have a logo, do you want it to stay the same? If not, what changes do you want in it?
8. Is there a particular style of site or look that you like?
9. What are the approximate number of pages you want and their function? (About us, Clients, etc.) Please list the pages that you need.
10. Do you have the content for the site in hand or would we need to create it? Do you hold the copyright for the content?
11. What is your time frame or deadline?
12. What is your budget? This may seem like a nosy question, but knowing your budget constraints is essential for us to ensure that we accomplish what you want to do with your website while staying within those constraints. We need to know your budget so that we can make a long-term plan that will enable us to build your website in phases if necessary and properly prioritize the order we put features in place if your current budget does not allow for every feature you might want at this point. This will save you money in the long run because we can craft this plan to use your web resources as wisely as possible so you don’t have to do workarounds and expensive redos down the road. It is one of the most important factors in ensuring that your web project will be a success.
12. Which of the following features do you want? Please describe them.
A content management system that a non-technical person could add content to as required
E-commerce capabilities
Slide shows or other animated content
Forms (contact, work orders, etc.)
Google stats to track the traffic to the site
Blogs
Social media links
Twitter and Facebook feeds
Videos and podcasts
Photo Gallery/Portfolio
Advanced search capability – filtering, maps
Member only access to content
Member groups and management (controlling access by group membership)
Google maps
Favorites/wish list capability
13. Once the site is up, do you have on-going expansion plans? If so, what are they?
14. What are your on-going maintenance requirements?
15. Will this site need to be compatible in look and function with other non-web media – business cards, brochures, posters, T-shirts, tickets, name tags? If so, what will those include? Do you want us to design those? If not, can you provide them so that we can use them as a guide in creating the website?
16. Does the site need to be compatible with a larger corporate identity? If so, do you have any guidelines or a style guide that we can use as a resource?
17. Do you have any guidelines for specific features we need to be sure to avoid in the design or function of this site?
After the client returns the filled out questionnaire, we schedule a meeting with them. Before the meeting, we carefully review the questionnaire and look at their current website, those of others in the same industry and those that they mentioned on their questionnaire that they like or dislike.
The meeting is an informal, friendly but direct conversation with the client, with both the designer and web developer present.
We ask the following questions:
1. What does your company do? Who is the client?
2. What is your role in the company?
3. What story are we telling with this web project? What conversation are we having? What experience are we designing? What is the site’s goal and purpose?
4. Is the goal realistic and specific? If not, we help move it on that direction during the meeting.
5. What is your company's mission statement? Does it need to be revised for this project?
6. Brand - A website is where your company’s brand exists and is defined. We need to determine:
- The brand’s image in the mind of your audience.
- The website’s appearances, offerings, behaviors and messages that determine how your brand will be perceived.
- Your brand’s personality.
- Your brand’s positioning in the market.
- Your brand’s values.
Is the brand global or specific? Pragmatic? Simple or ornate? Optimistic or darker? Respectful of the user?
7. Any purely cosmetic goals for the site?
8. What information do you wish to provide online and in what formats - text, photos, video?
9. Who are the site’s users? Their age, gender, physical location, interests.
10. What is the industry or landscape in which your company operates? Who are your competitors and how are they positioned in the market?
11. Discuss websites they like and what they like about them.
12. Sometimes clients have their own logo and sometimes they want us to create one for you. If so, we ask the following questions:
- What is the one thing that is most important for the logo to convey?
- The specific secondary feelings the logo should convey.
We usually defer a detailed discussion about the logo design until a later design meeting. These questions are merely to start us and the client thinking about the logo design.
13. Website colors – define what they are, in swatches if possible, and what they are not.
14. Typography
15. What experience are we trying to create visually? What style or look? What world are we bringing the user into?
16. What will be the approximate number of pages and their function, as well as generally how the content will be organized? This is a question that clients generally have to be guided through and it will be expected to evolve later as the site develops. Our goal at this point is to get a clear enough idea to price the project and write a project proposal.
17. What does the navigation provide access to? (task, information?) The order of options, arrangement on the page, font type and size, color. Work through this in a general way with the client. It too will evolve as the project evolves.
18. Technology - What technology is needed or useful in this situation? How can the technology amplify the message? Define the technology requirements and constraints.
We go over with the client our standard package, which includes:
- Mobile device compatibility/responsive design.
- A content management system that a non-technical person could add content to as required.
- Google stats
- Search engine
- Social Media links (Basic social media links are included in the proposed price. More sophisticated integration with social media will be an extra expense and will depend on what is needed.)
- E-mails that are sent from the website’s web address.
We then discuss other features to determine whether they will be needed and find out the client's ideas about them:
- E-commerce capabilities
- Secure download capability
- Slideshows or other animated content
- Forms
- Contact Form
- Forms that non-registered users can fill out
- Slide-down forms (sections or the whole form)
- Blogs
- Navigation
Horizontal
Vertical
Drop-down Menu
Accordions that show/hide
Flyout menu
Clients often want navigation that will not work well on mobile devices. When this is the case, we point out the difficulties and try to give them choices that will provide a better result. - Video
- Audio
- Popup Windows/Fancy box
- Registration/log-in
- Users can access and manage their own content
- Member groups and management
- Calendar
- Google maps
- Callouts
- Wizards
- Advanced search capability, such as maps and filtering
- Favorites/wish list capability
- Large background
19. Budget constraints
What are they?
Is there a way we can do this in phases?
Do a rough order-of-magnitude budget estimate that is the amount that can't be exceeded if the project is to have an acceptable return.
If the client’s budget is too small to do what they want to, give them choices if possible.
20. The client's time constraints/deadline.
21. Our skills. Do we have the right skills to pull off this project? Will we need to outsource any work? Discuss the cost of this with the client.
22. Go over the risks of failure or difficulties. Can we and the client handle them? Potential risks:
- No experience on this kind of project.
- Insufficient time devoted to any of the stages. Backing into a deadline.
- Key information not written down or defined. Make a system to avoid this.
- No cost-benefit analysis or feasibility study.
- The project as conceived doesn't meet the needs.
- The client won't listen to what will work.
23. Does the project as defined really meet the needs? Are other projects under way that address similar needs, create products that our project will need or use the same resources as our project? Does the project provide low cost, high performance design, consistent quality, fast delivery, on-time delivery, development speed, customization and volume flexibility? How can we use design and technology to reduce the friction in the sales flow, create new efficiencies and facilitating learning?
24. Social media considerations
How are we going to create or participate in a social media community with this website as the go-to hub?
An on-line Community has:
- A deep sense of connection that members feel toward each other.
- Collective sense of difference from others not in the community.
- Shared rituals and traditions.
- Moral responsibility - sense of duty or obligation to the community as a whole.
- In addition, members can share proximity (geographic), purpose (a common task), passion (a common interest), practice (a common career or industry.
We need to provide members of the community with expertise, information, rewards and an ability to refer us to others.
What will people share – proximity, purpose, passion, practice (common career or industry), or connections with each other?
We need to avoid an ad approach on at least some social media.
We need to determine the type of language we will use to reach the users of the hub and social media outlets.
Are there popular tastemakers that we can create or make a part of the on-line community? How can we leverage opinion leaders?
How will we provide transparency?
How will we provide connectedness between members of the community?
How will we efficiently allow groups of people to contribute ideas, opinions, criticism, money?
How will we target people who already have the values of the website and then give them an opportunity to share them?
How can we reach the types of on-line users?
- Status seekers who enjoy accumulating tokens of influence such as number of friends, awards.
- Critics.
- Socializers who go online for information about friends, events, games, social news and to stay in the loop.
- Emcees who want to perform online.
- Lurkers who are self-effacing but can be influenced.
- Buddies - strong sense of friendship and likes to joke with friends online. and spend time with them online and in online activities.
- Creators - the online community is a creative medium. Actively creates, builds, makes, publishes.
- Pundits - a topic leaders or experts. Offer the latest news, opinions and observations.
- Rebels - disrupt on-line chats and discussions.
On-line attitude and tone of the community.
Regular features or rituals on social media.
Practices.
Stories.
Sacred objects.
25. Trends in the Industry – New trends have less to do with the people trying to propagate them and everything to do with whether they naturally come from the culture.
26. Define where the project starts and stop in a clear written statement. Confirm this with the client.
27. Define the restrictions on the results, resources, the way you can approach it.
28. Define the requirements that must be met to achieve project success.
29. Define what you will need in personnel and other resources.
30. Identify unknowns and decide what assumptions you must make regarding these issues.
31. Content
Copyright information.
Do they want us to develop or format content?
Clarify all other possible media uses for the content.
32. Interface - What is the environment for the information?
What is the flow, controlled by the user? How do we get from one place to another? How do we use motion to give the user choice on demand? How can we steer on demand to make a dynamic channel? Animation needs to be there in the beginning.
How can the interface add value to the client's product or service? Make using their product or service a better solution?
How can we create an experience the user will use and love?
Continuity across media and platforms, accessibility, usefulness. How can we have a seamless flow across media? TV to web to mobile technology? Print of all kinds?
Consider all the different ways that this is going to be used.
How can the richness of interaction become part of the brand we are trying to express?
33. Marketing – Do we have a great idea, at the right time? How can we make the design desirable, the implementation technically sound and cost effective, and the sales and marketing effective. How can we provide decent support for it?
34. What are on-going maintenance requirements once the site is up?
35. What future phases can we identify and plan for upfront?
36. If this is a redesign:
What are the site's visitors usually looking for when they come to your site?
What are the problems with the current design?
What does the client hope to achieve with a redesign?
Are there any elements of the current site that the client wants to keep?
How does the client think the visitors will react to a new site design?
At this point, we thank the client and tell them we will go over the information they have provided and let them know as quicikly as possible whether we can proceed with the project. If so, we will send them a proposal.
More on that that process in Discovery Process Part 2...
Coastal Moving
Our technical director, Forrest Anderson, built the Expression Engine content management system for this responsive website in collaboration with eMarketSouth, which did the design and web conversion of the site.
Mobile Yacht Club
Our technical director, Forrest Anderson, converted the designs for this site from Illustrator to HTML and CSS3 and used Bootstrap and Wordpress to create this fully customized responsive content management website. The project was a collaboration with Optera Creative, which did the design for the site.
Islands of Serenity

The mission statement of this blog is “Workflow, electronic flow, ink flow for the creative professional.” Our technical director, Forrest Anderson, and I have worked as media professionals since we were 18 years old and have decades of experience working for some of the world’s leading media companies as well as smaller clients. This blog is a venue for us to share what we have learned along the way and what we are still learning every day that could help other creative professionals.
This blog concentrates on workflow because professional creative work is an on-going journey, not a destination. It involves the continual progression of ideas from raw thoughts through the process of research, design, building and then publishing or releasing a product in some form, followed by iterations, upgrades and spinoff ideas that go through the same process of creation again. Creative professionals are never really done with a project, as it always spawns offspring that send them through the creative process again.
As a result of living our lives on this moving escalator, us creative professionals are prone to constant vertigo. We have a well-deserved reputation for having messy desks, studios and computers filled with the detritus of the various projects we have done or are currently working on.
Over the course of our careers, however, we have known and been mentored by many creative professionals that were the best in their fields. They have taught us that the very best don’t live like this. Instead, they craft their lives and environment as meticulously as their creative projects.
Those who are in it for the long haul keep their lives lightweight with an efficient workflow, simple work environment, balanced budgets that are the result of wise business choices and lives simplified around their life mission of pursuing their craft. They are not “have it all” types. Instead, they organize their lives around furthering their craft but also enjoying the companionship of friends, family, beautiful environments and serving the less fortunate.
They carve out personal islands of serenity amid the volatile ups and downs of professional media work.
Those personal islands include:
- Daily time to ponder and plan their lives and craft. Our workday begins with private time during which we review our work and write what author Julia Cameron has called morning pages – three handwritten pages in which we identify the challenges we are facing, our feelings about them, and solutions that come to us as we ponder and write. Finding Julia Cameron’s book The Artist’s Way more than a decade ago and beginning her practice of writing morning pages has transformed the entire direction of our work and life. The practice of articulating in the linear format of written lines on a page our challenges and their solutions jump starts the creative process every day. It throws us head first into creativity before we have time to worry, because writing is in itself creative. Once we have written our morning pages, our daily to do list naturally follows and we can jump into the day with clarity and confidence. We know the nature of the challenges we face and can break them down into pieces that we can digest in an organized way. Morning pages take the multi-tasking muddle and chaos that hits us in the morning and sorts it so we know what to tackle, what to give a miss entirely and what to schedule for in the future.
- Daily exercise that includes time to think. For us, that translates into an hour a day of walking, running and/or swimming. Literally thousands of creative challenges from sorting out code that won’t cooperate to figuring out how to handle a difficult client have been solved during exercise. Like morning pages, exercise works because it allows us to zoom out from our problems and look at them more broadly for a few moments while at the same time keeping us moving even when we are stumped. Solutions come as we walk on a nature trail or rack up running miles on a treadmill.
- Julia recommends a weekly Artist’s Date – a short period of getting out to a venue that replenishes the creative juices. This is a “filling the well” experience – a concert or play, hike in the mountains, hour of browsing through a bookstore or any other environment that enables you to be strengthened and inspired by creativity. Not only are we replenished by our weekly Artist’s Dates, but many of our best ideas and resources come to us through artist’s dates.
These three practices are key “islands of serenity” for us. No matter how busy we are, we carve them out of our schedule.

PHOTOS BY FORREST ANDERSON
Solar Forum
Rouviere Media produced this video for the North Carolina Sustainable Energy Association on the first forum in a series about local solar ordinances.
Plant Development Services
Rouviere Media did the web development for a redesign of this website for Plant Development Services, Inc., which introduces plants that solve landscape challenges and have a high impact on the plant marketplace. Working with the nation’s top growers and breeders, Plant Development Services brings plants to market that have highly marketable and recognizable trait improvements year after year.
The Expression Engine content management website includes a listing of available plants and an online ordering tool for wholesalers. These features enable the website to serve a comprehensive grower network. Non-technical employees can update the content on the site on the backend.
Mobile Arts Council
Rouviere Media did the web development for this website for the Mobile Arts Council of Mobile, Alabama, with design work from Optera Creative.
The website, designed to serve the artists' community of Mobile, Alabama, includes features for artists to register online and upload samples of their artwork for an artists directory.
They also can pay fees online. The site also has registration and online payment for sponsors and a full fledged calendar of events.
Holi Festival
Thousands of people participated in the annual Holi Festival of Colors in Spanish Fork, Utah, on March 29. 2014. The ancient Indian Hindu spring festival has become popular with non-Hindus in many communities. Participants toss colored powder in the air, musical groups perform and participants dance. The event has been held annually or several years in Spanish Fork. This video and photos by Rouviere Media show what it was like. Photos by Forrest Anderson and Tai Anderson. Video by Forrest Anderson and Donna Anderson.


Hand prints in chalk on the wall of the temple.

Cleaning up after the festival.
Sunset Western Garden
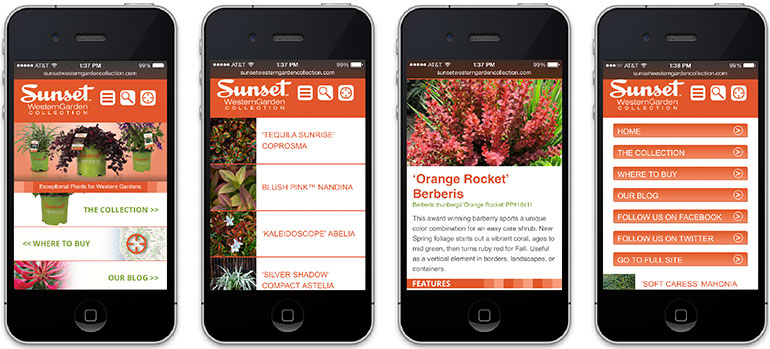
Rouviere Media did the website development for this mobile site for Sunset Western Garden Collection, an on-line plant database. The mobile site includes the plant database, a retail locator so users can buy plants, a blog and social media links in an Expression Engine content management system that non-technical users can update as needed.
Southeastern Wind Coalition
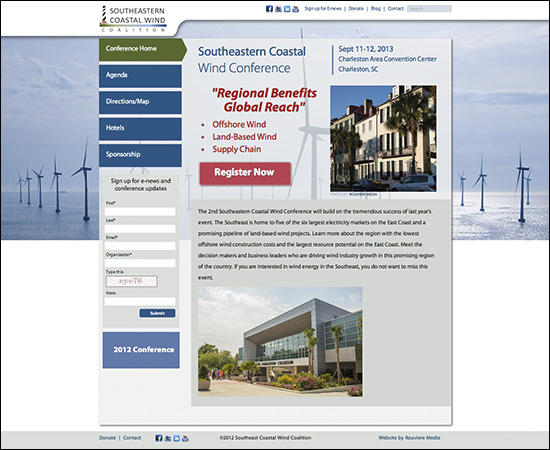
As a media provider for the clean energy industry, we are proud to have done the website for Southeastern Wind Coalition.
This Expression Engine content management site allows the coalition's officers to update the site's content as needed.
The site is designed to inform the wind energy industry, government decision makers and others about the economic opportunities of wind energy in the U.S. Southeast. A linked slideshow across the home page of the site spells out the benefits of wind energy and the suitability of the Southeast for development. The site showcases advisory groups and research initiatives spearheaded by the coalition.
A special section (right) for coalition events has information about the conference and registration links.
The site is fully integrated with social media.
Clean Energy Video
At Rouviere Media, we do a lot of media work for the clean energy industry. We produced this YouTube video for the North Carolina Clean Energy Association about an association reception for state legislators.This video includes comments by government officials and members of the North Carolina Sustainable Energy Association in support of continuing clean energy policies in the state that have brought clean energy companies into North Carolina and created thousands of jobs since 2007.
The video incorporates interviews, speeches, footage from the reception and still photographs of clean energy projects.
Sunset Western Garden Collection
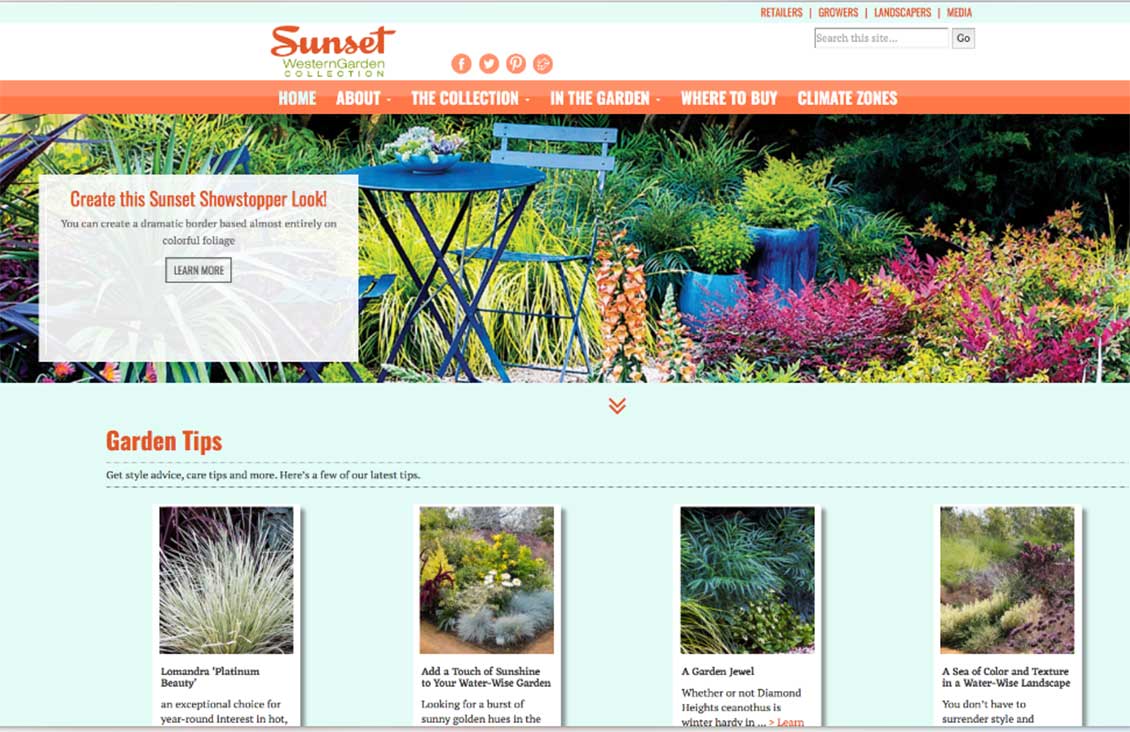
sunsetwesterngardencollection.com
The Sunset Western Garden Collection is a live plant collection that focuses on plants for western gardens. Rouviere Media worked on the development for this site on assignment from Optera Creative, which did the designs. The site's content management system allows non-technical staff to update the site’s content.
The principal features of this Expression Engine website include a climate zone infographic with maps, a retailer locator infographic and a plant collection catalog.
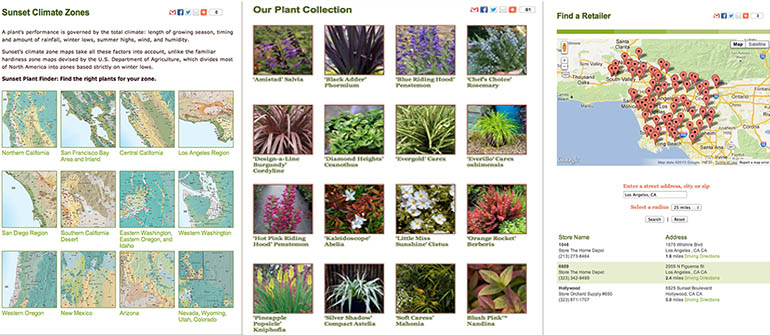
Oriental Health Solutions
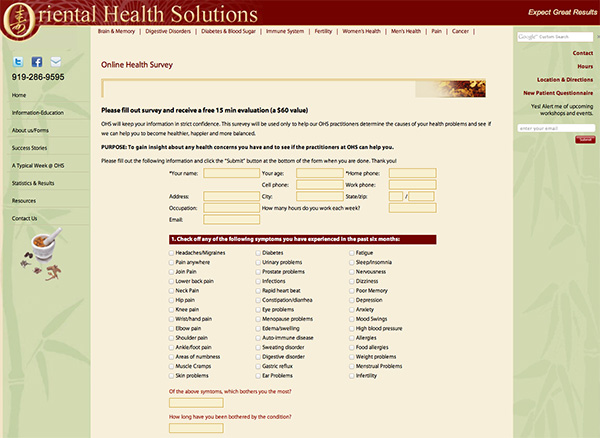 Oriental Health Solutions is a busy practice in Durham, North Carolina, that treats a variety of health problems. We created this innovative responsive design website to handle the practice’s large repository of health information.
Oriental Health Solutions has a large collection of health information that requires an extremely complex but user friendly navigation system with many home page links. Creating a navigation system that was simple and handled the large amount of information without confusing users was the biggest design and development challenge of this site. The navigation design took many hours of consultation, but the result is an attractive, streamlined site that is a treasure trove of data on a wide variety of health problems. Among the site’s features is a complex health assessment questionnaire (right).